It is important that you access this field trip on a laptop or desktop PC.
Click on any image to enlarge it - you will need to zoom in to see sufficient detail.
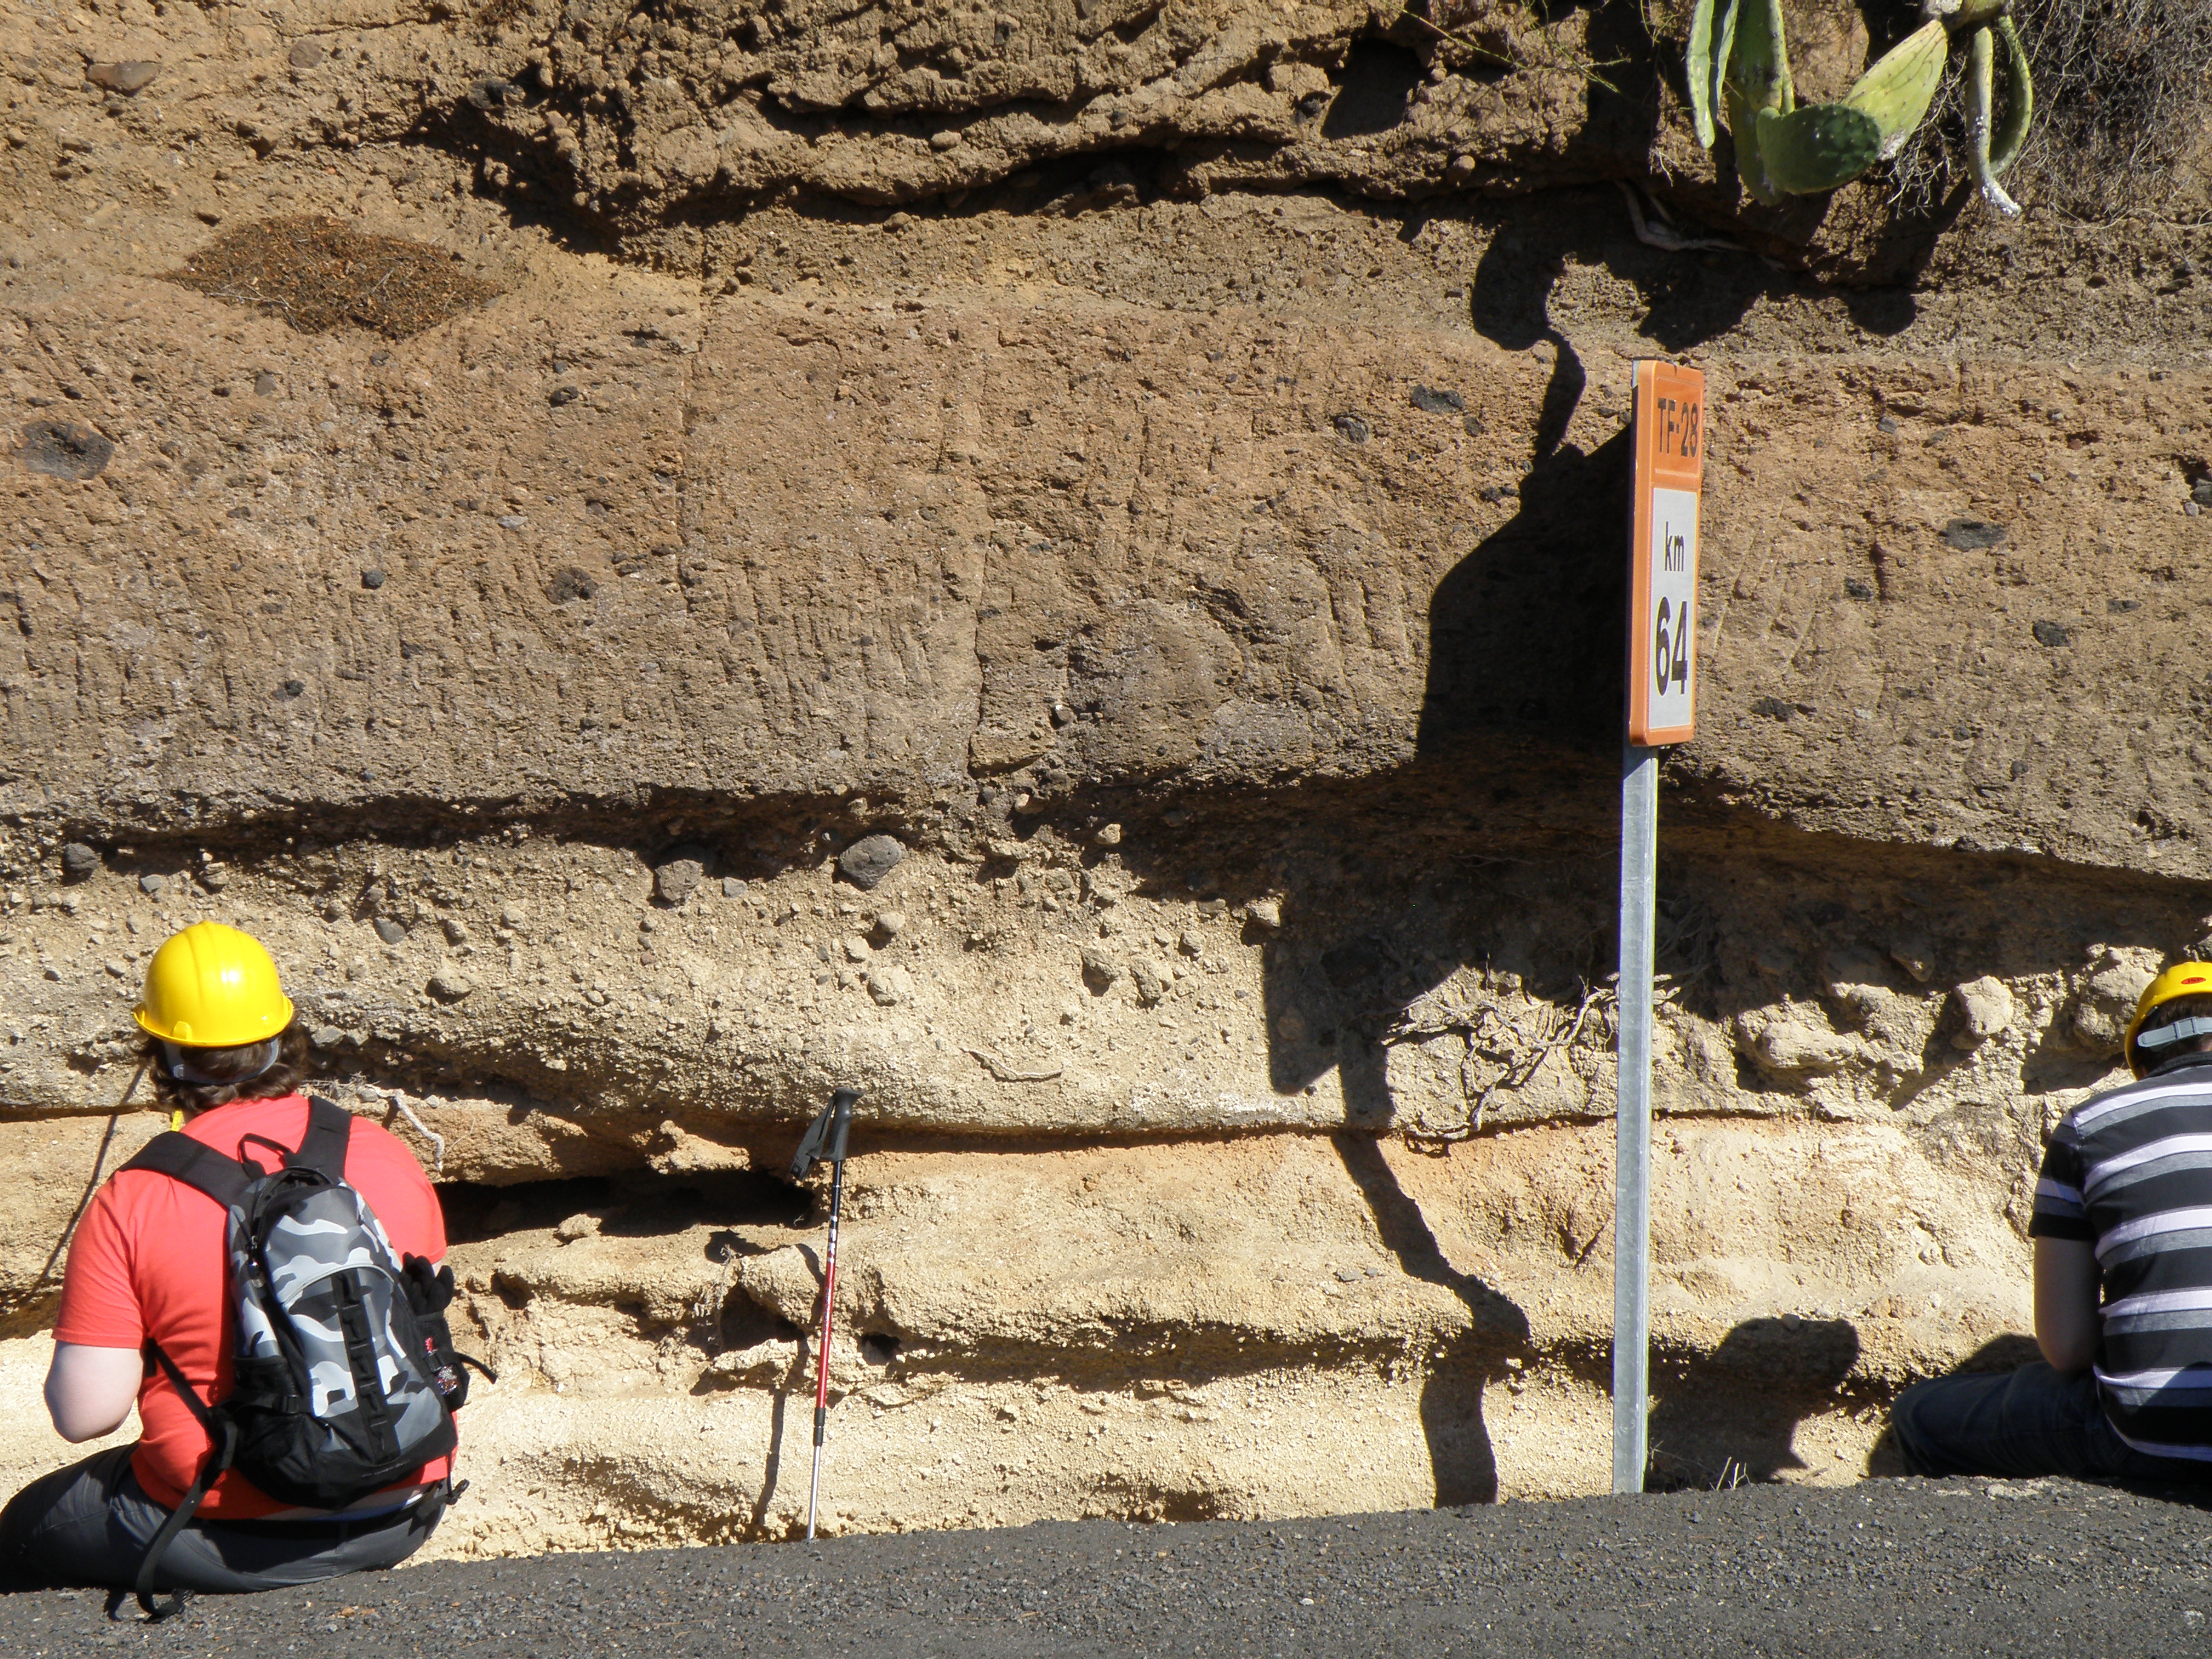
Where are we? We are going to log a road section across the Barranco del Azúcar, around km marker 64 on road TF-28. The section lies between the villages of El Rio to the SW and La Cisnera to the NE. Take a good look around the area in Google Maps. We can see a lot of outcrop detail in Streetview: our logged section starts just west of the bridge and hairpin bend here and ends about 300m to the SE, when we run out of outcrop around here. There's a lot to observe and record at this location, and we usually spend 2-3 hours here.
 |
 |
|
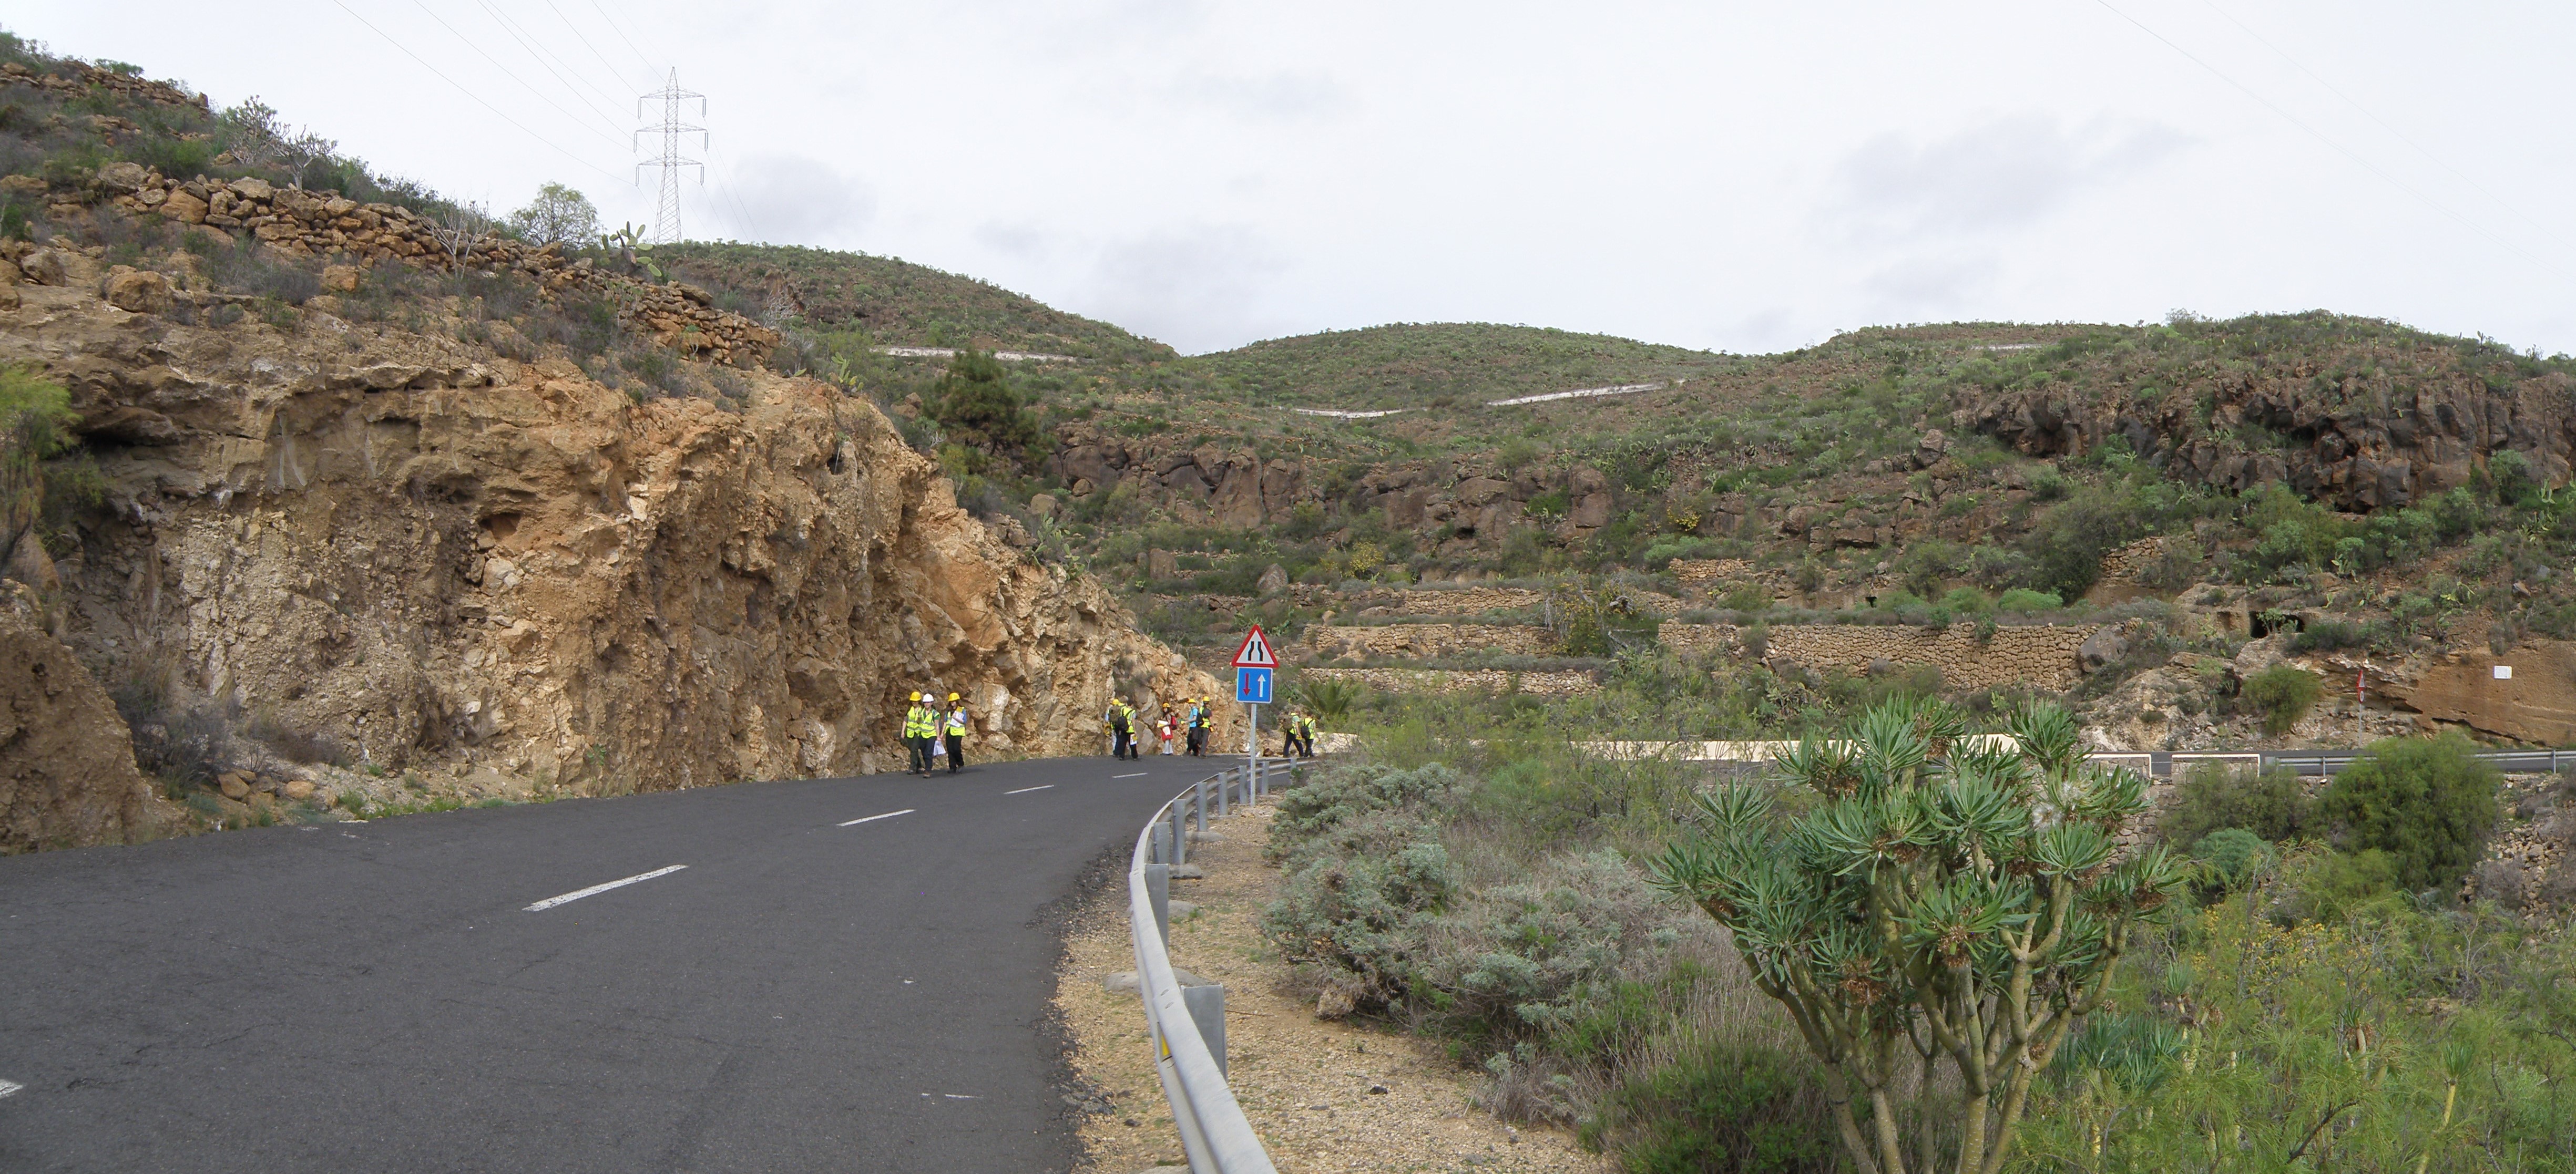
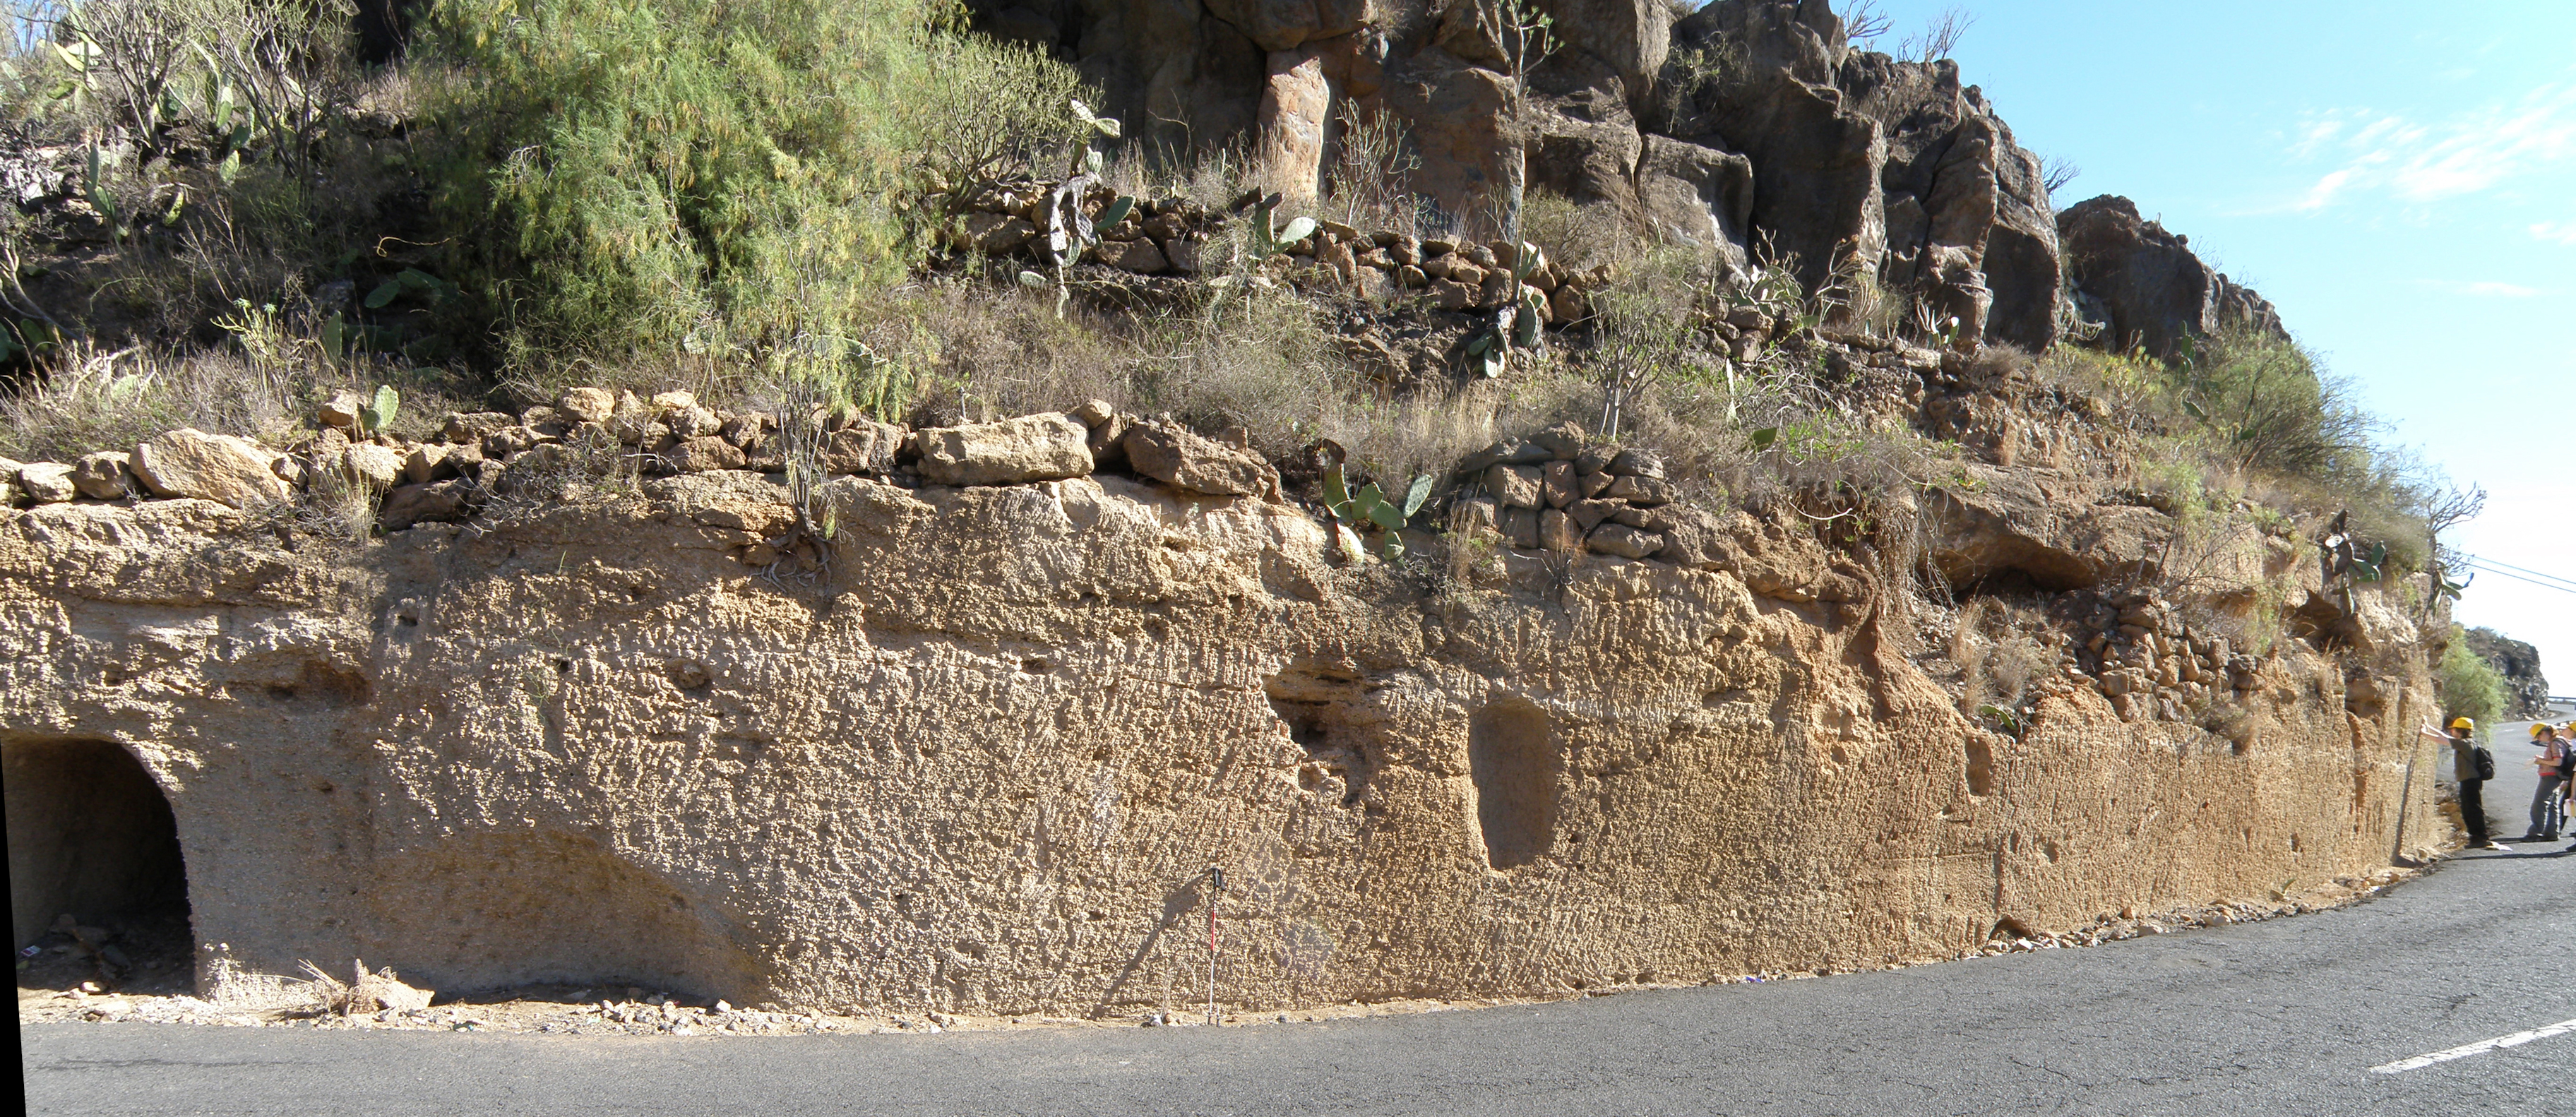
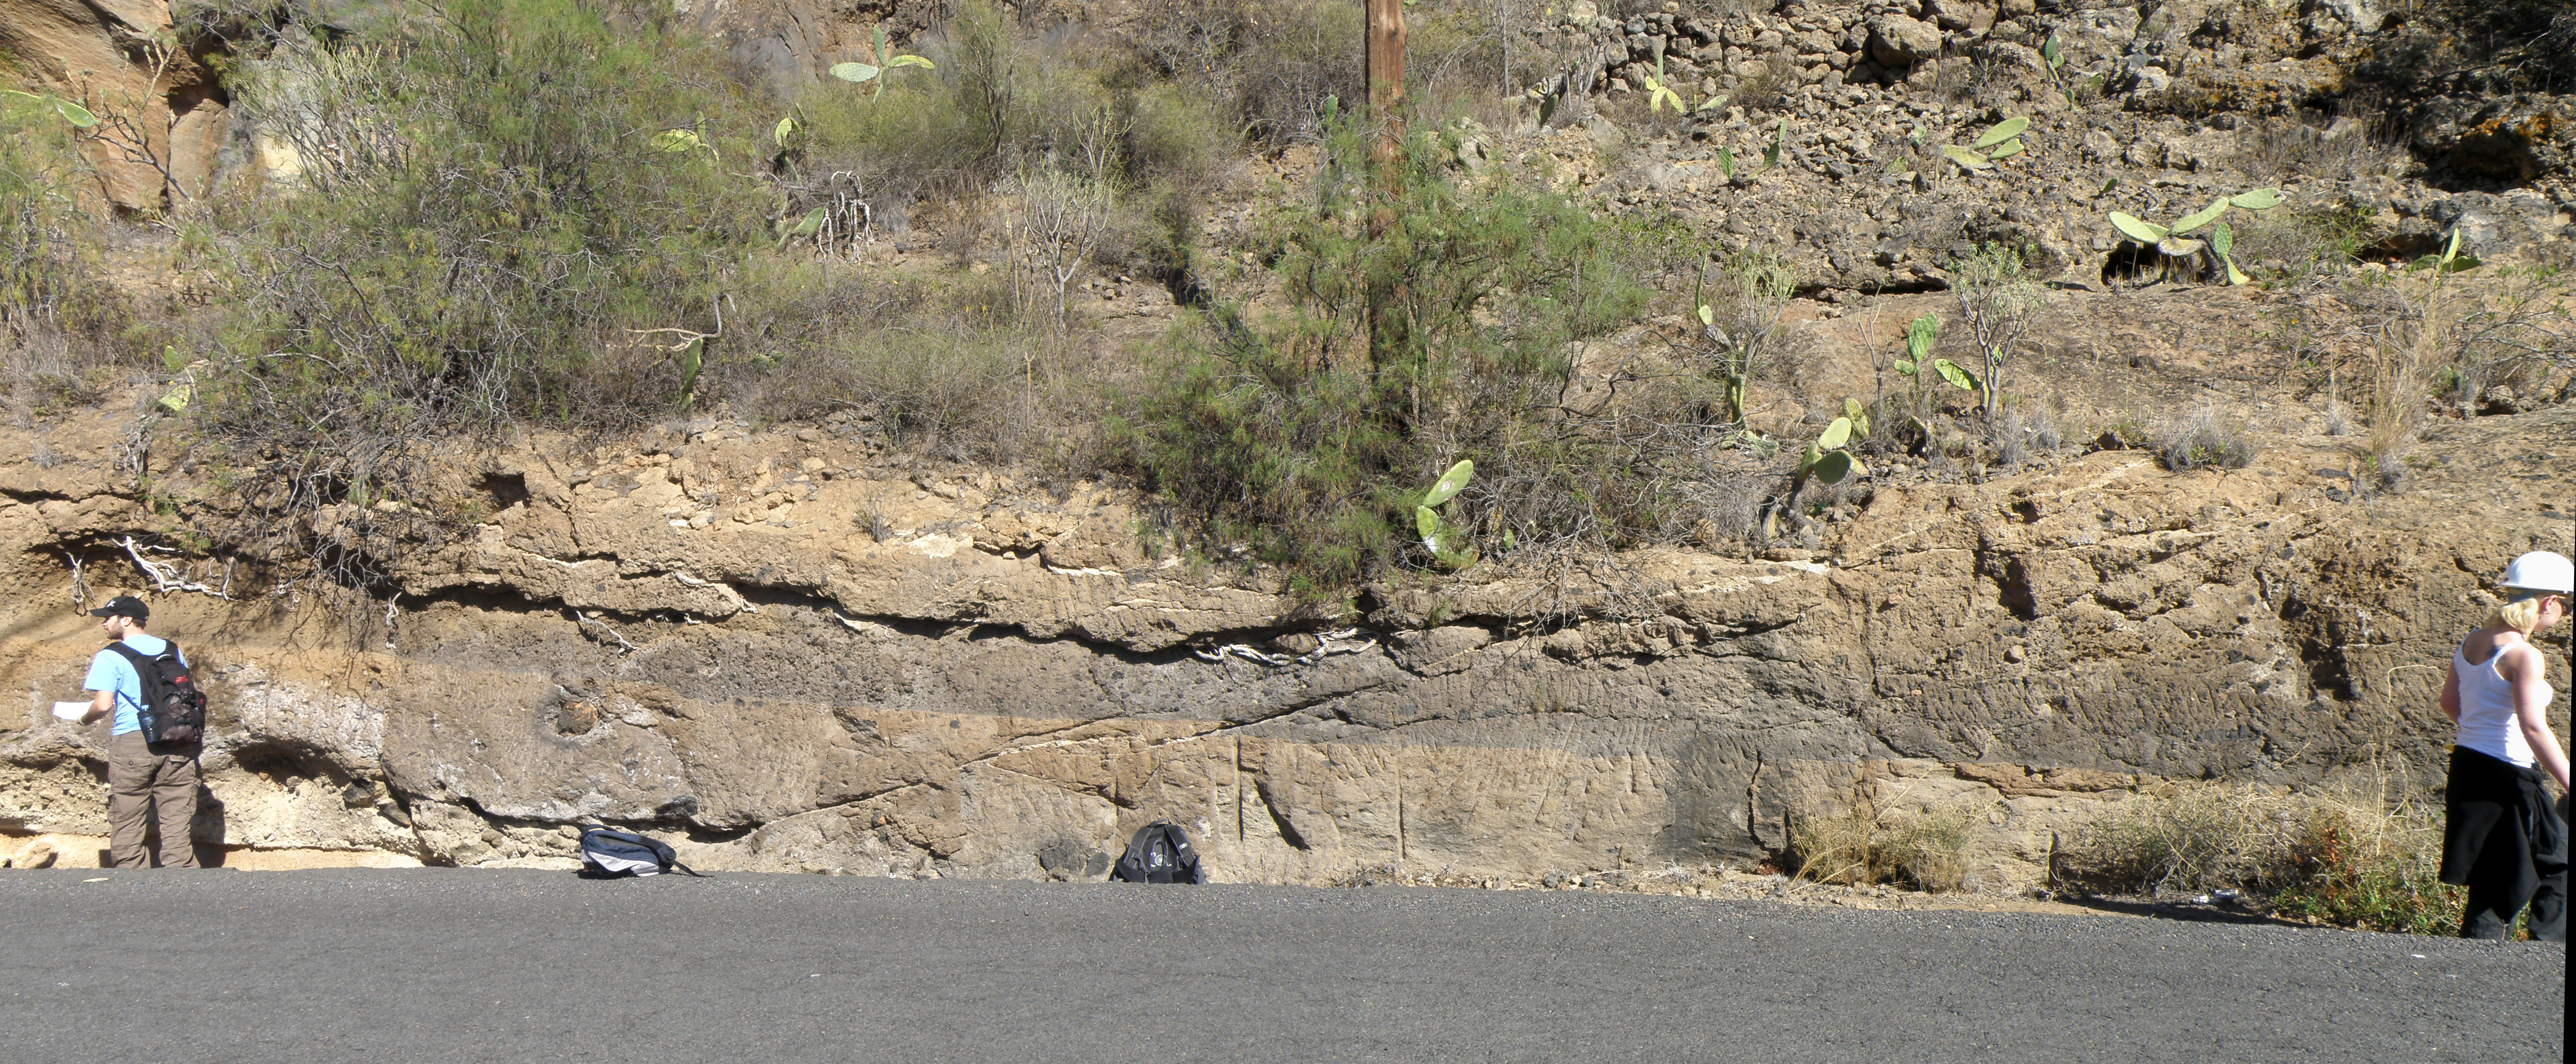
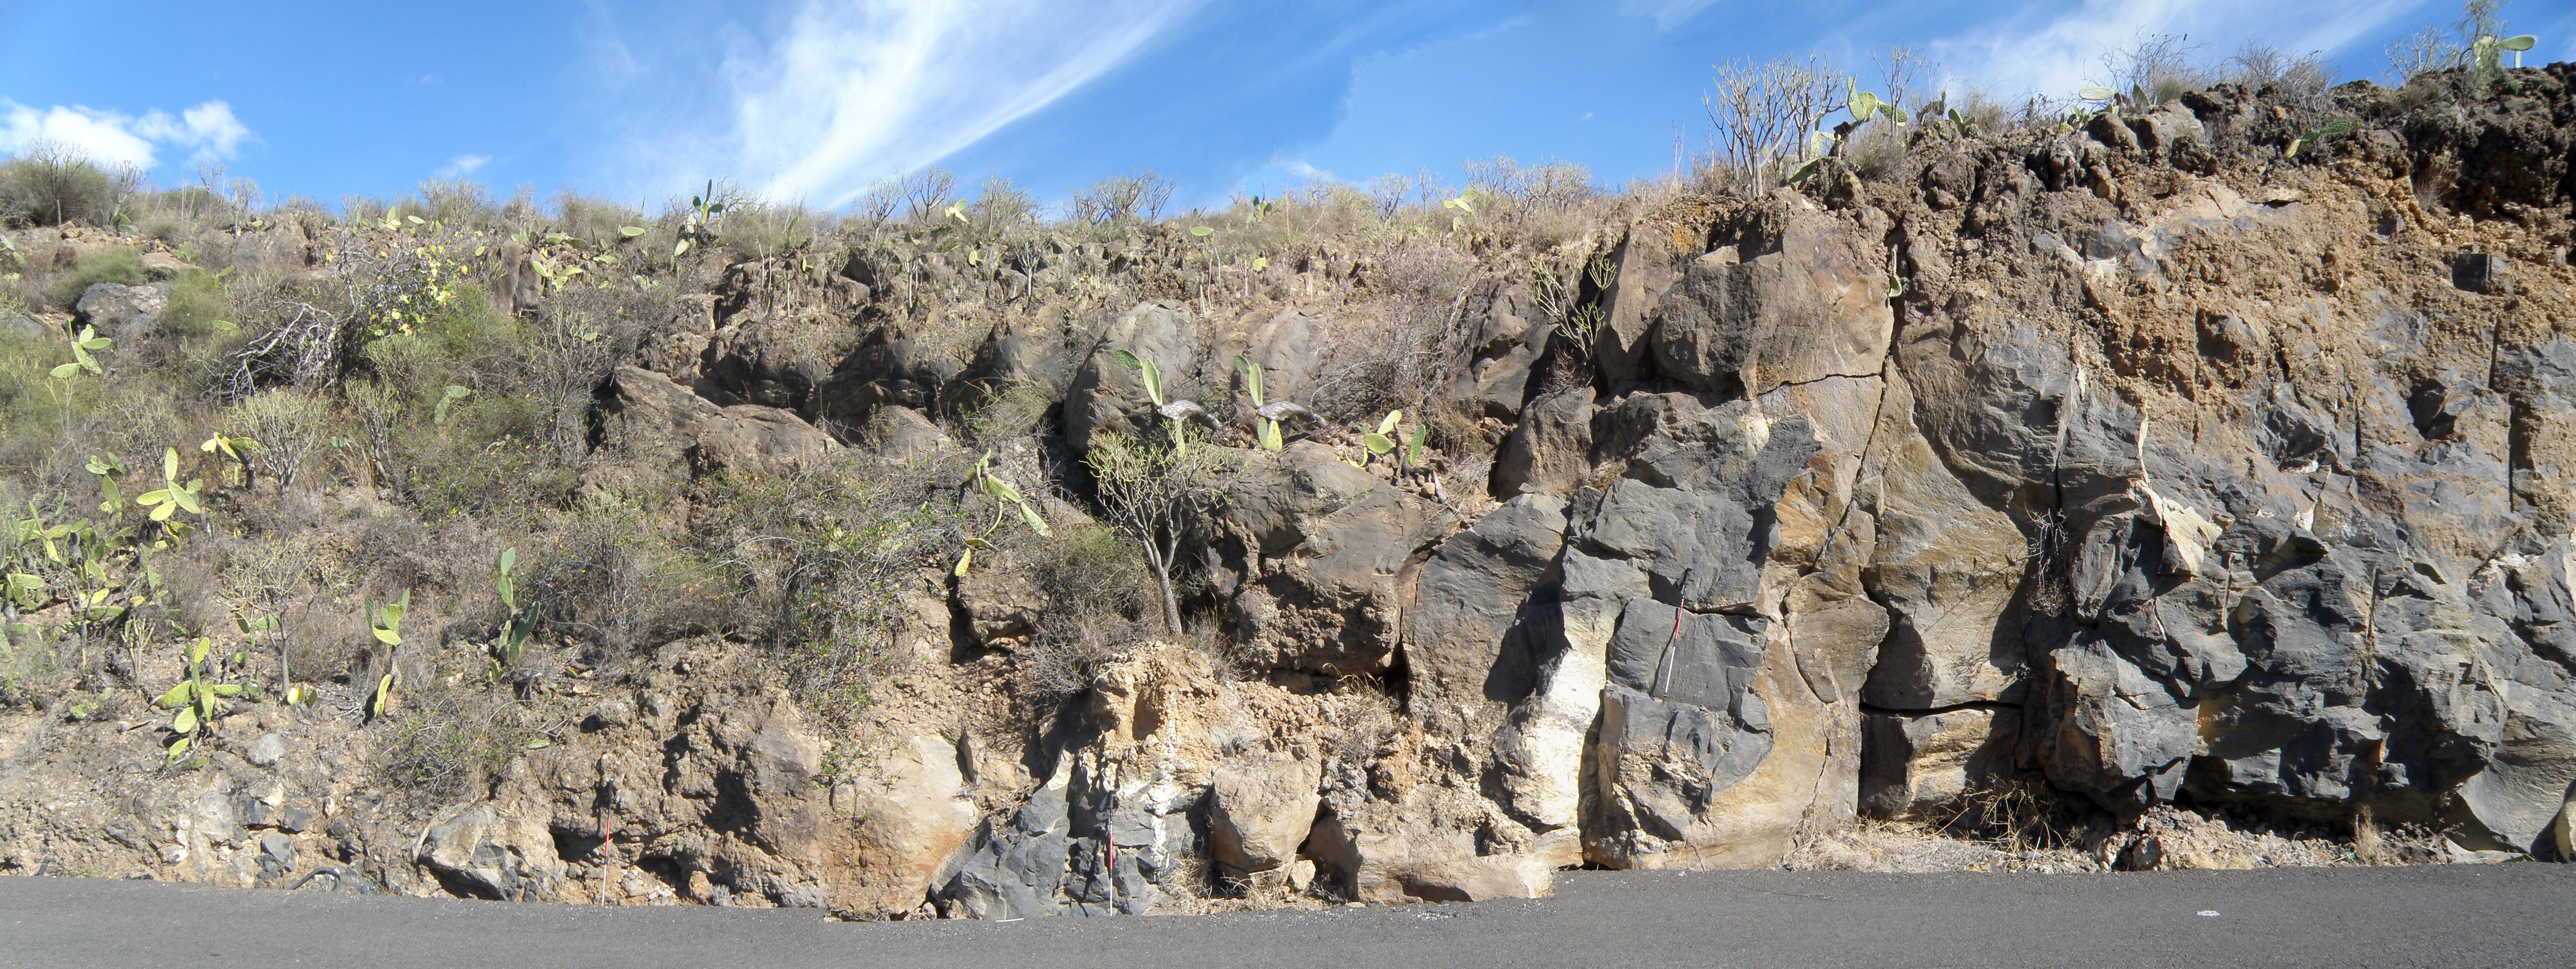
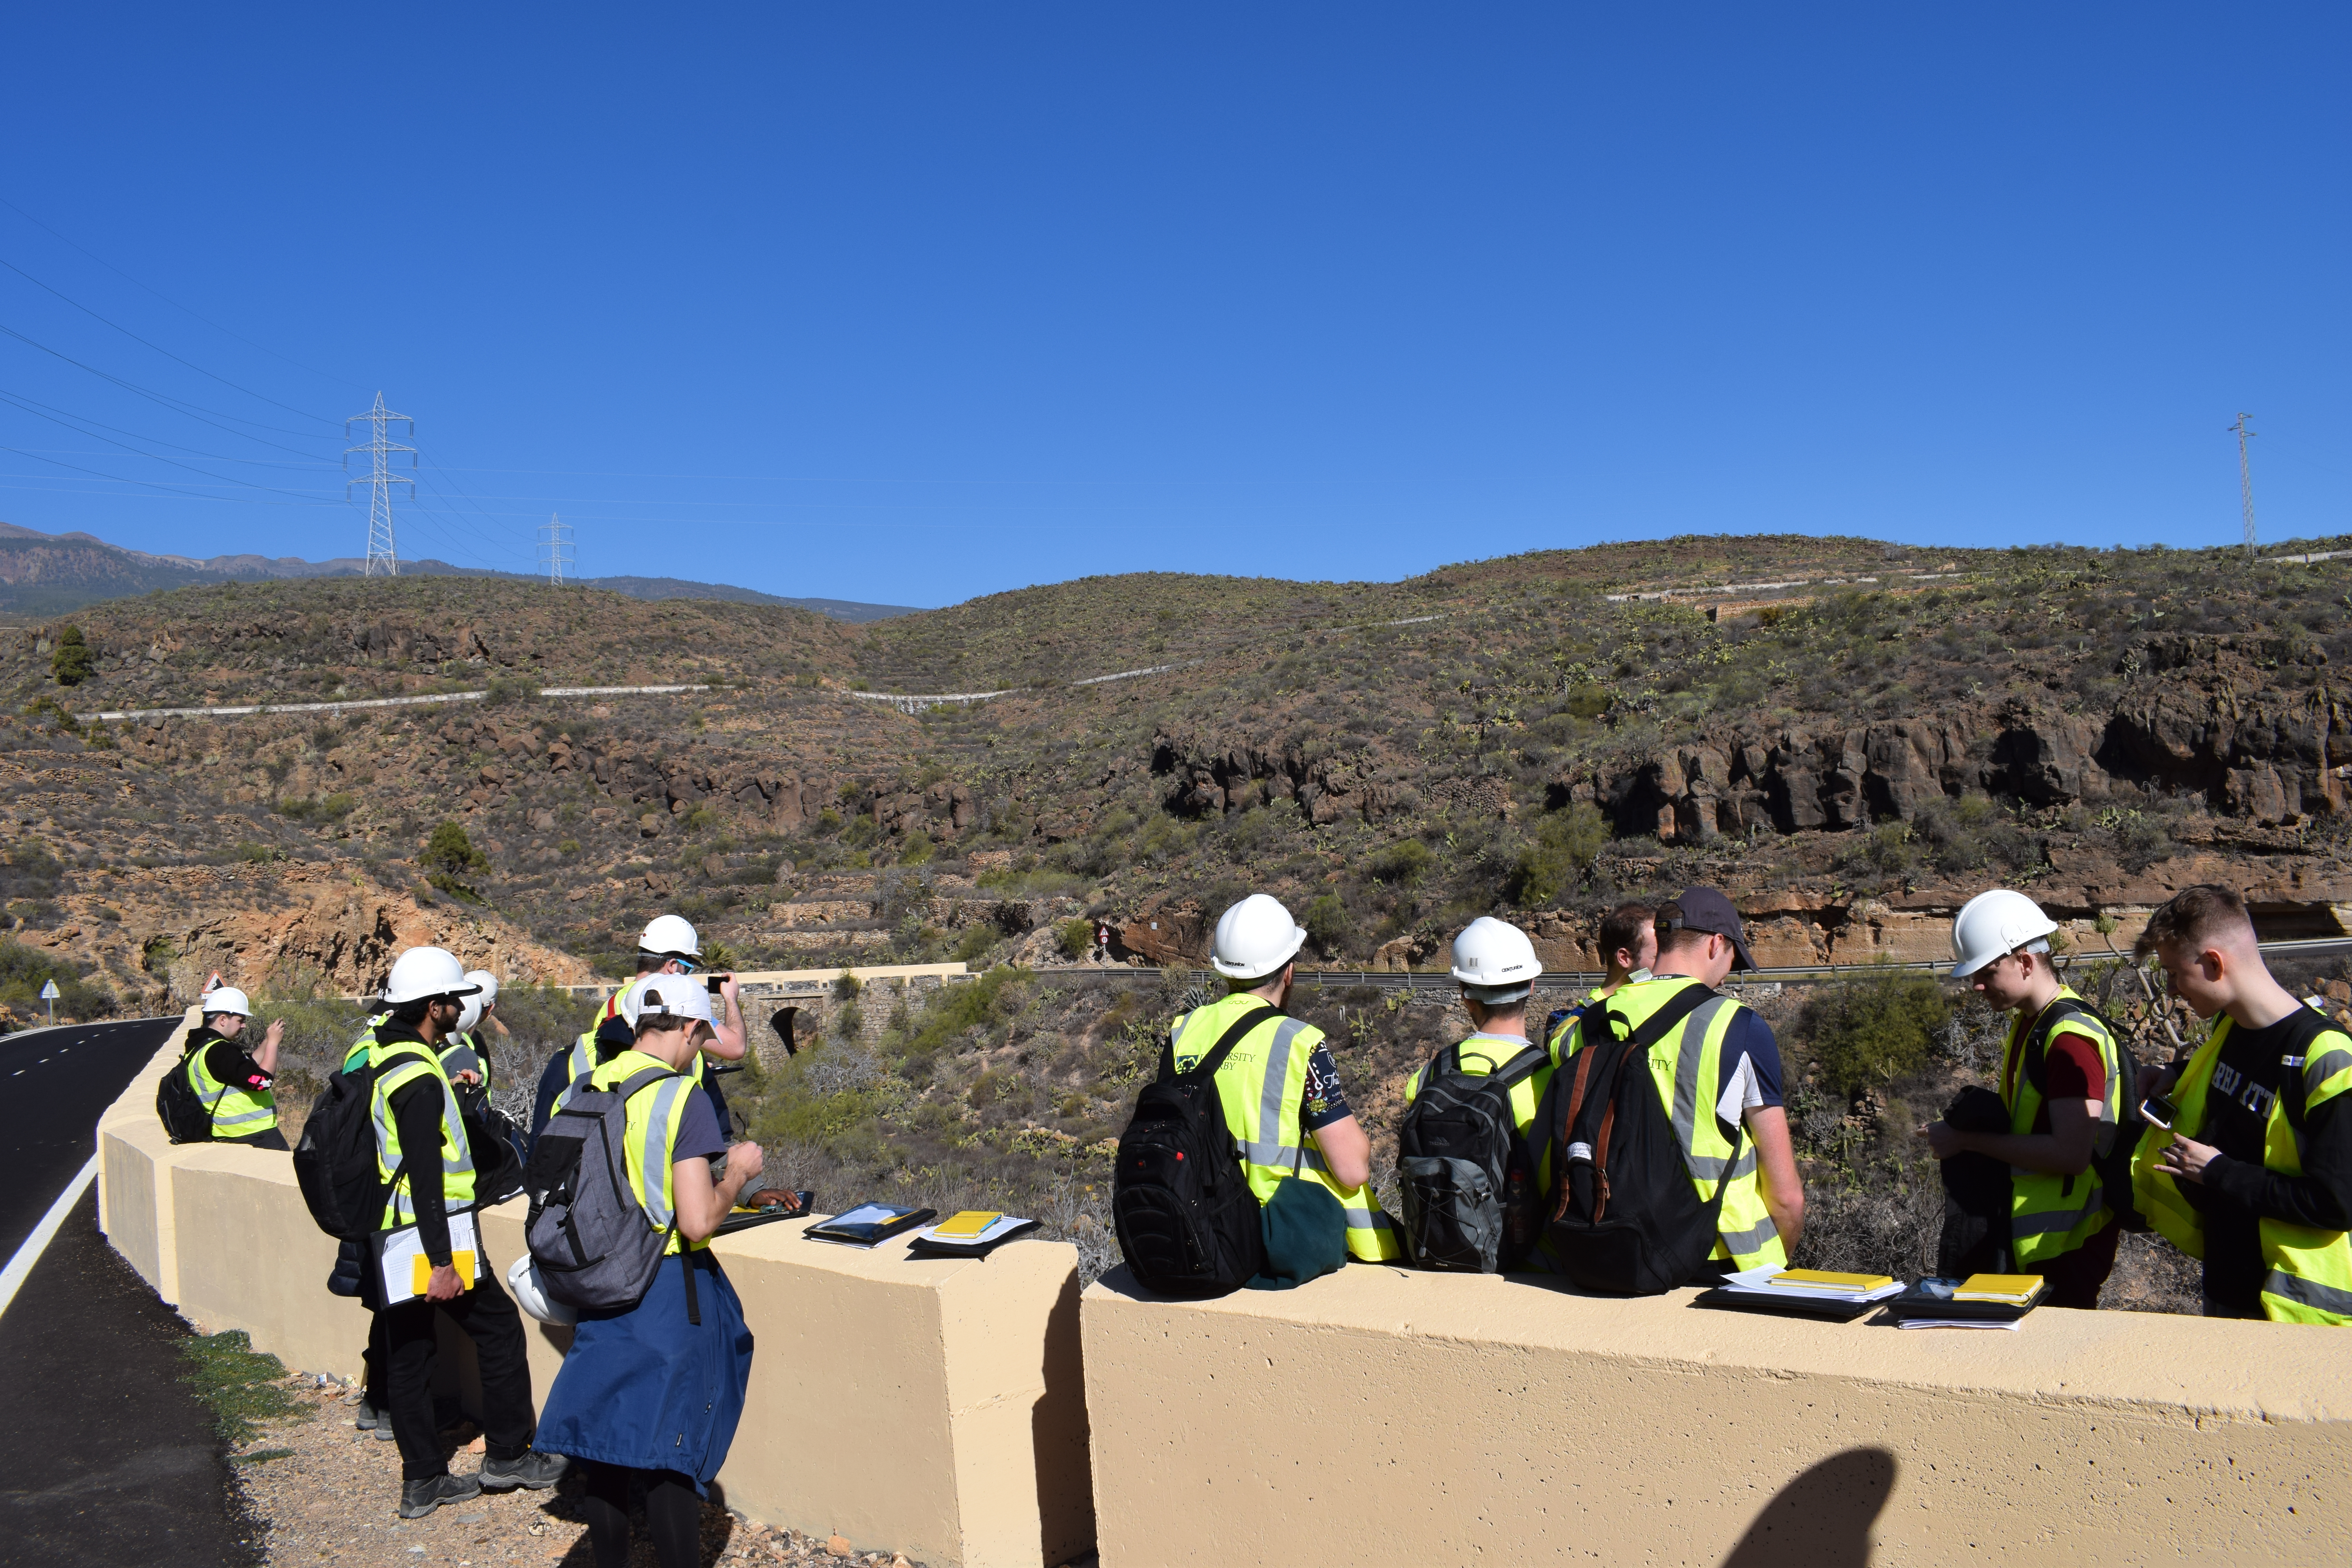
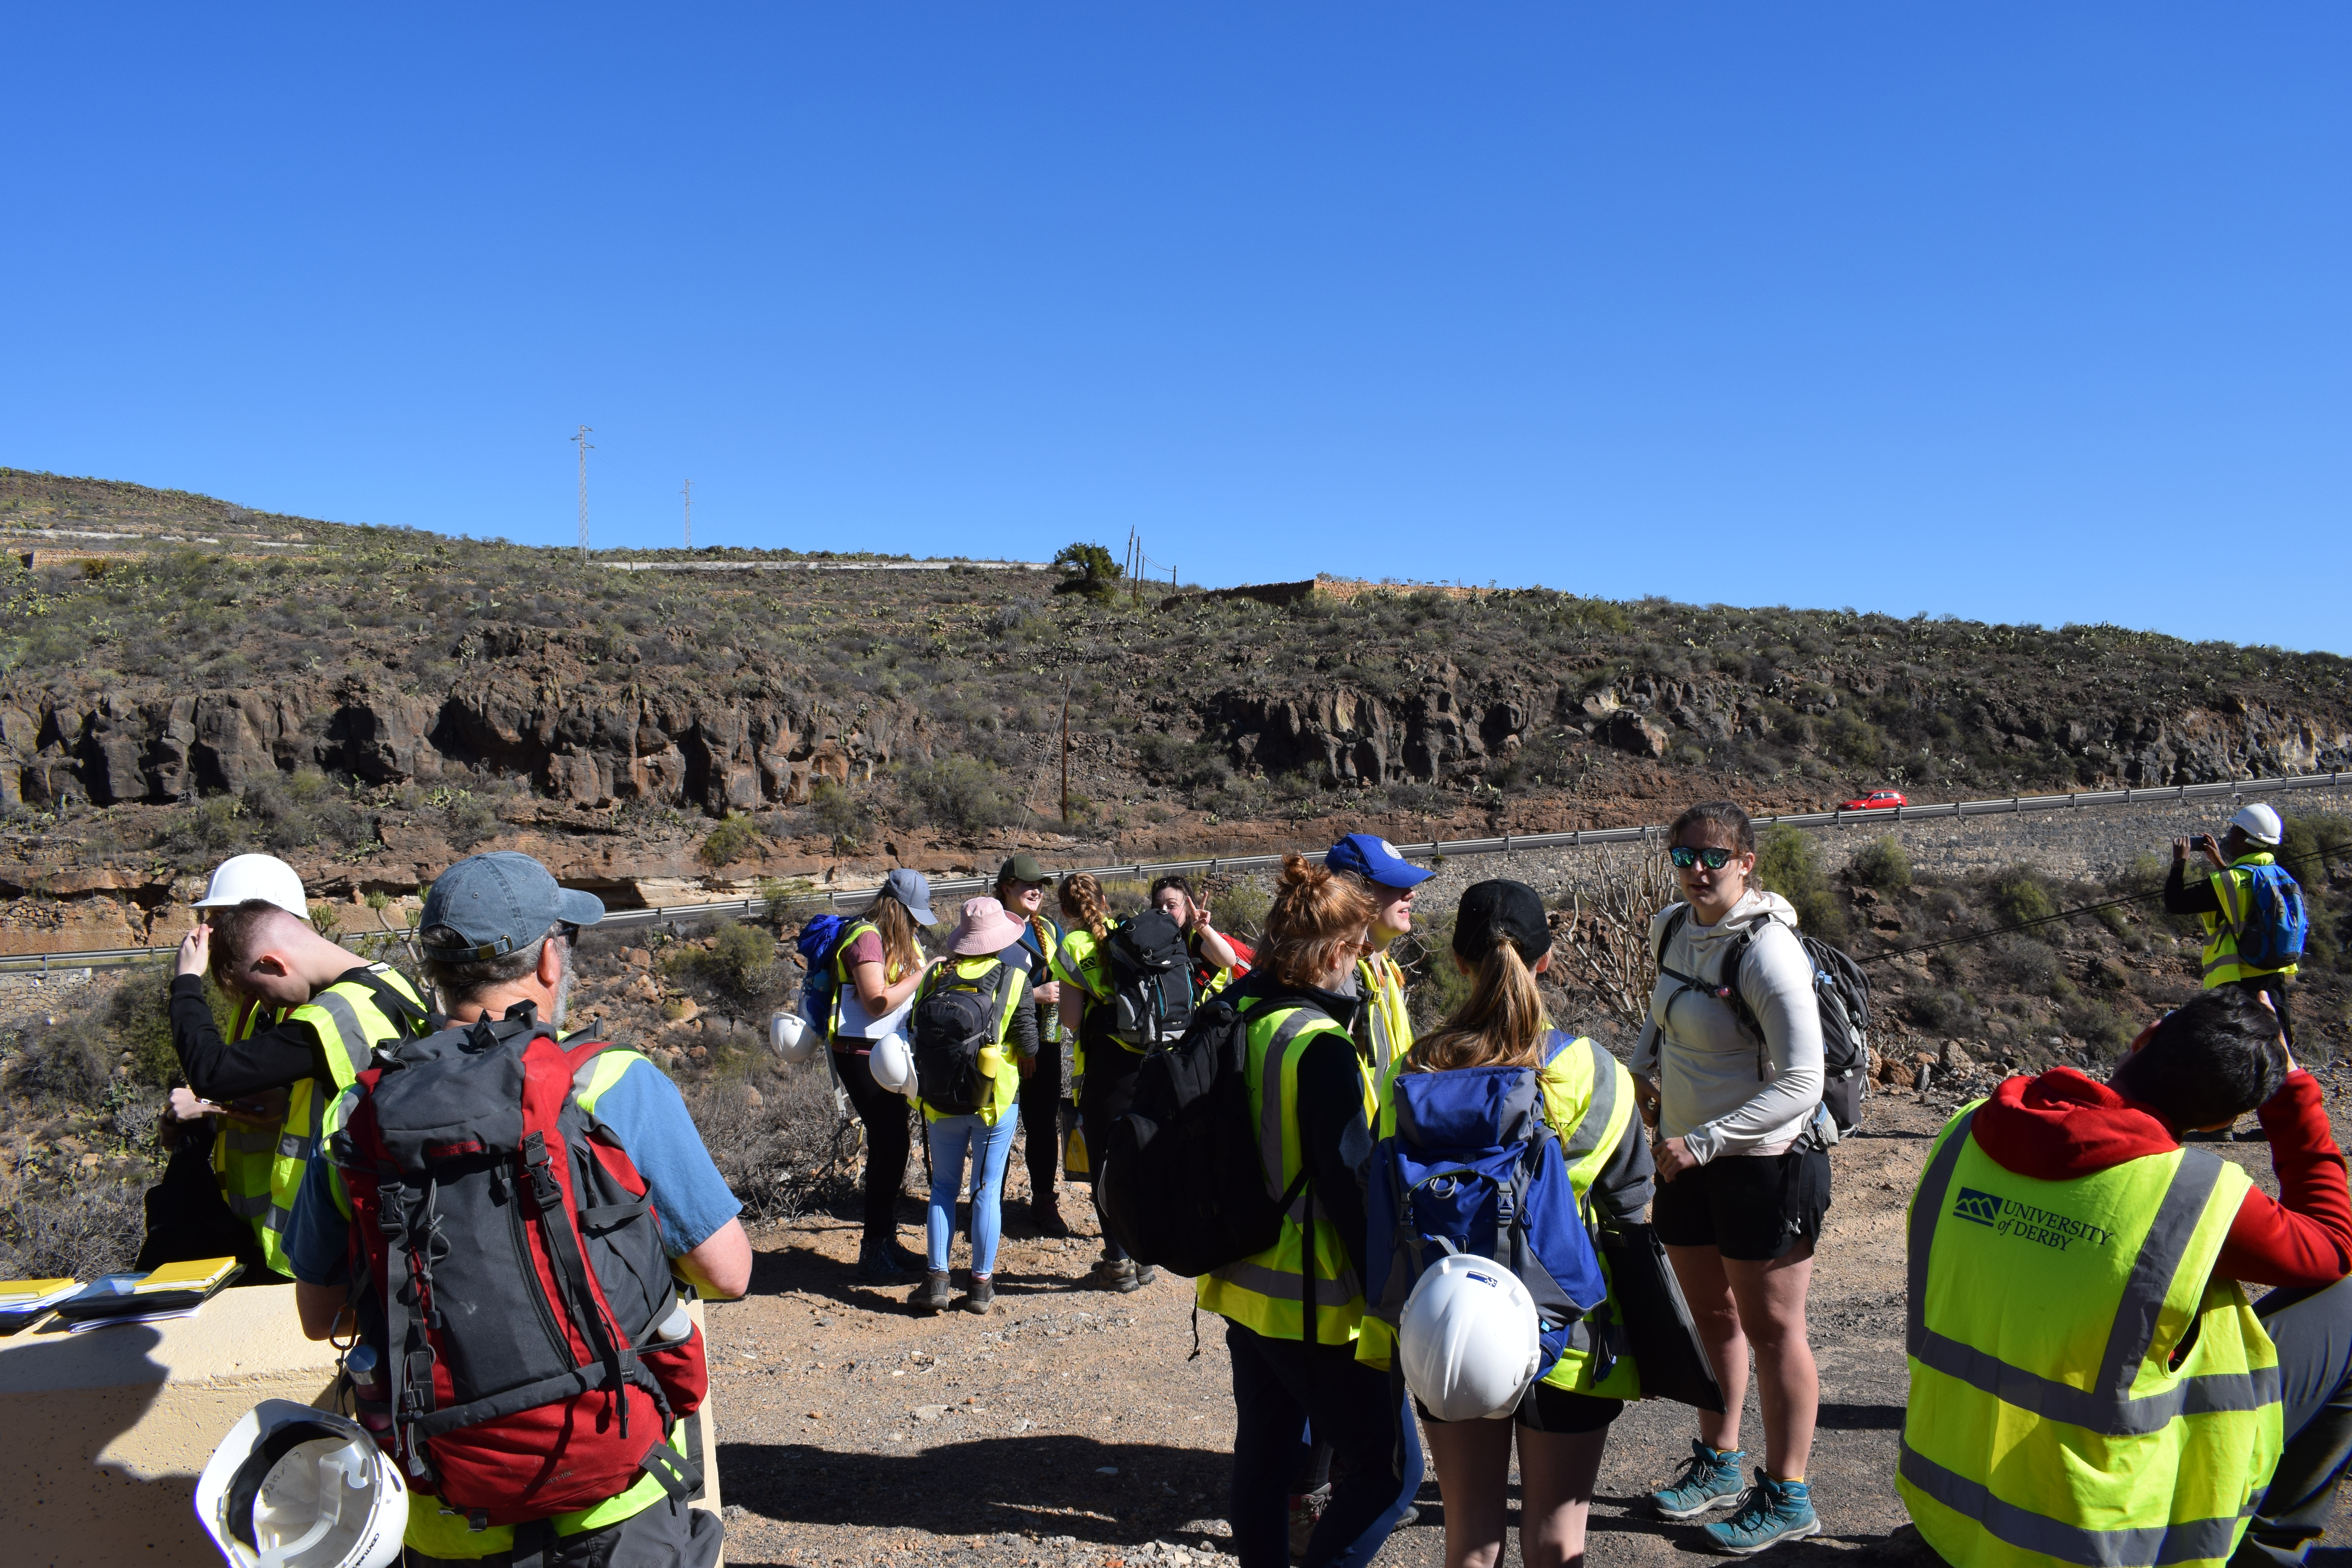
Figures 1 &
2. General views of the section, looking east from the west side of the
Barranco del Azúcar, with the 2019 University of Derby group. The
linear concrete structure high on the hillside is one of the major aqueducts
feeding groundwater from the galerias (water mines) to the crops
on the south side of the island.
|
|
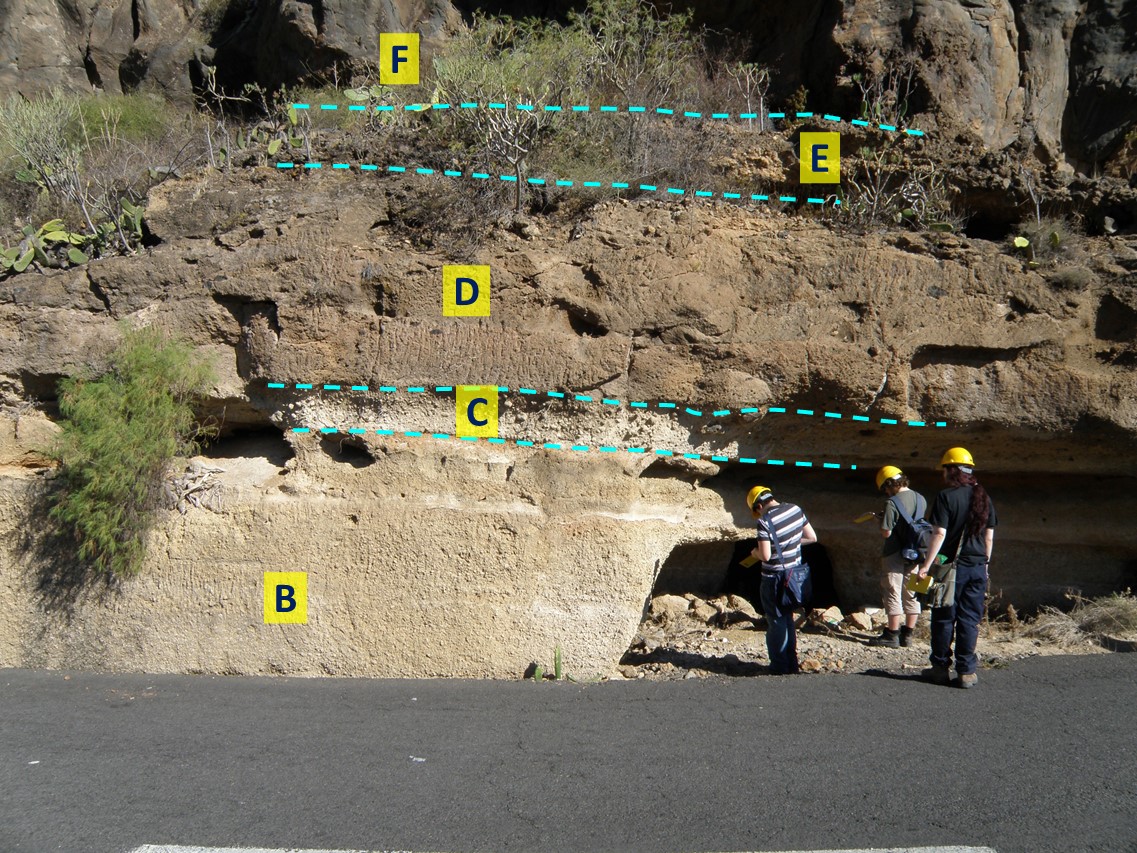
Stratigraphy: the section starts in the Helecho Formation - the top unit of the Lower Bandas del Sur Group - and continues up into the lower part of the Upper Bandas del Sur Group. The rocks are all Pleistocene in age, ranging from around 0.773 Ma to around 0.596 Ma.
Tasks: at this location, we will produce a graphic log of the section, and interpret each of the units to try to reconstruct the volcanic history of this part of the Las Cañadas stratovolcanoes. The rocks are gently dipping and the road ascends gradually through the section, so rather than measuring a vertical section straight up the cliff, we will take the easier and safer option of following contacts and units along the road to piece together our log. Aim to fit your log on a single sheet of log paper. It will be easiest to draw the log by hand.
The photos are your outcrops, and you'll need to spend time studying them in detail, and working out the relationships between them. Where you need additional information, because you can't actually get your hands or your hand lens on the rocks, this is given below.
Logging instructions. Log paper (pdf; PowerPoint; odp)
Photos are by Roger Suthren and Adrian Watson
![]()
General view of the section
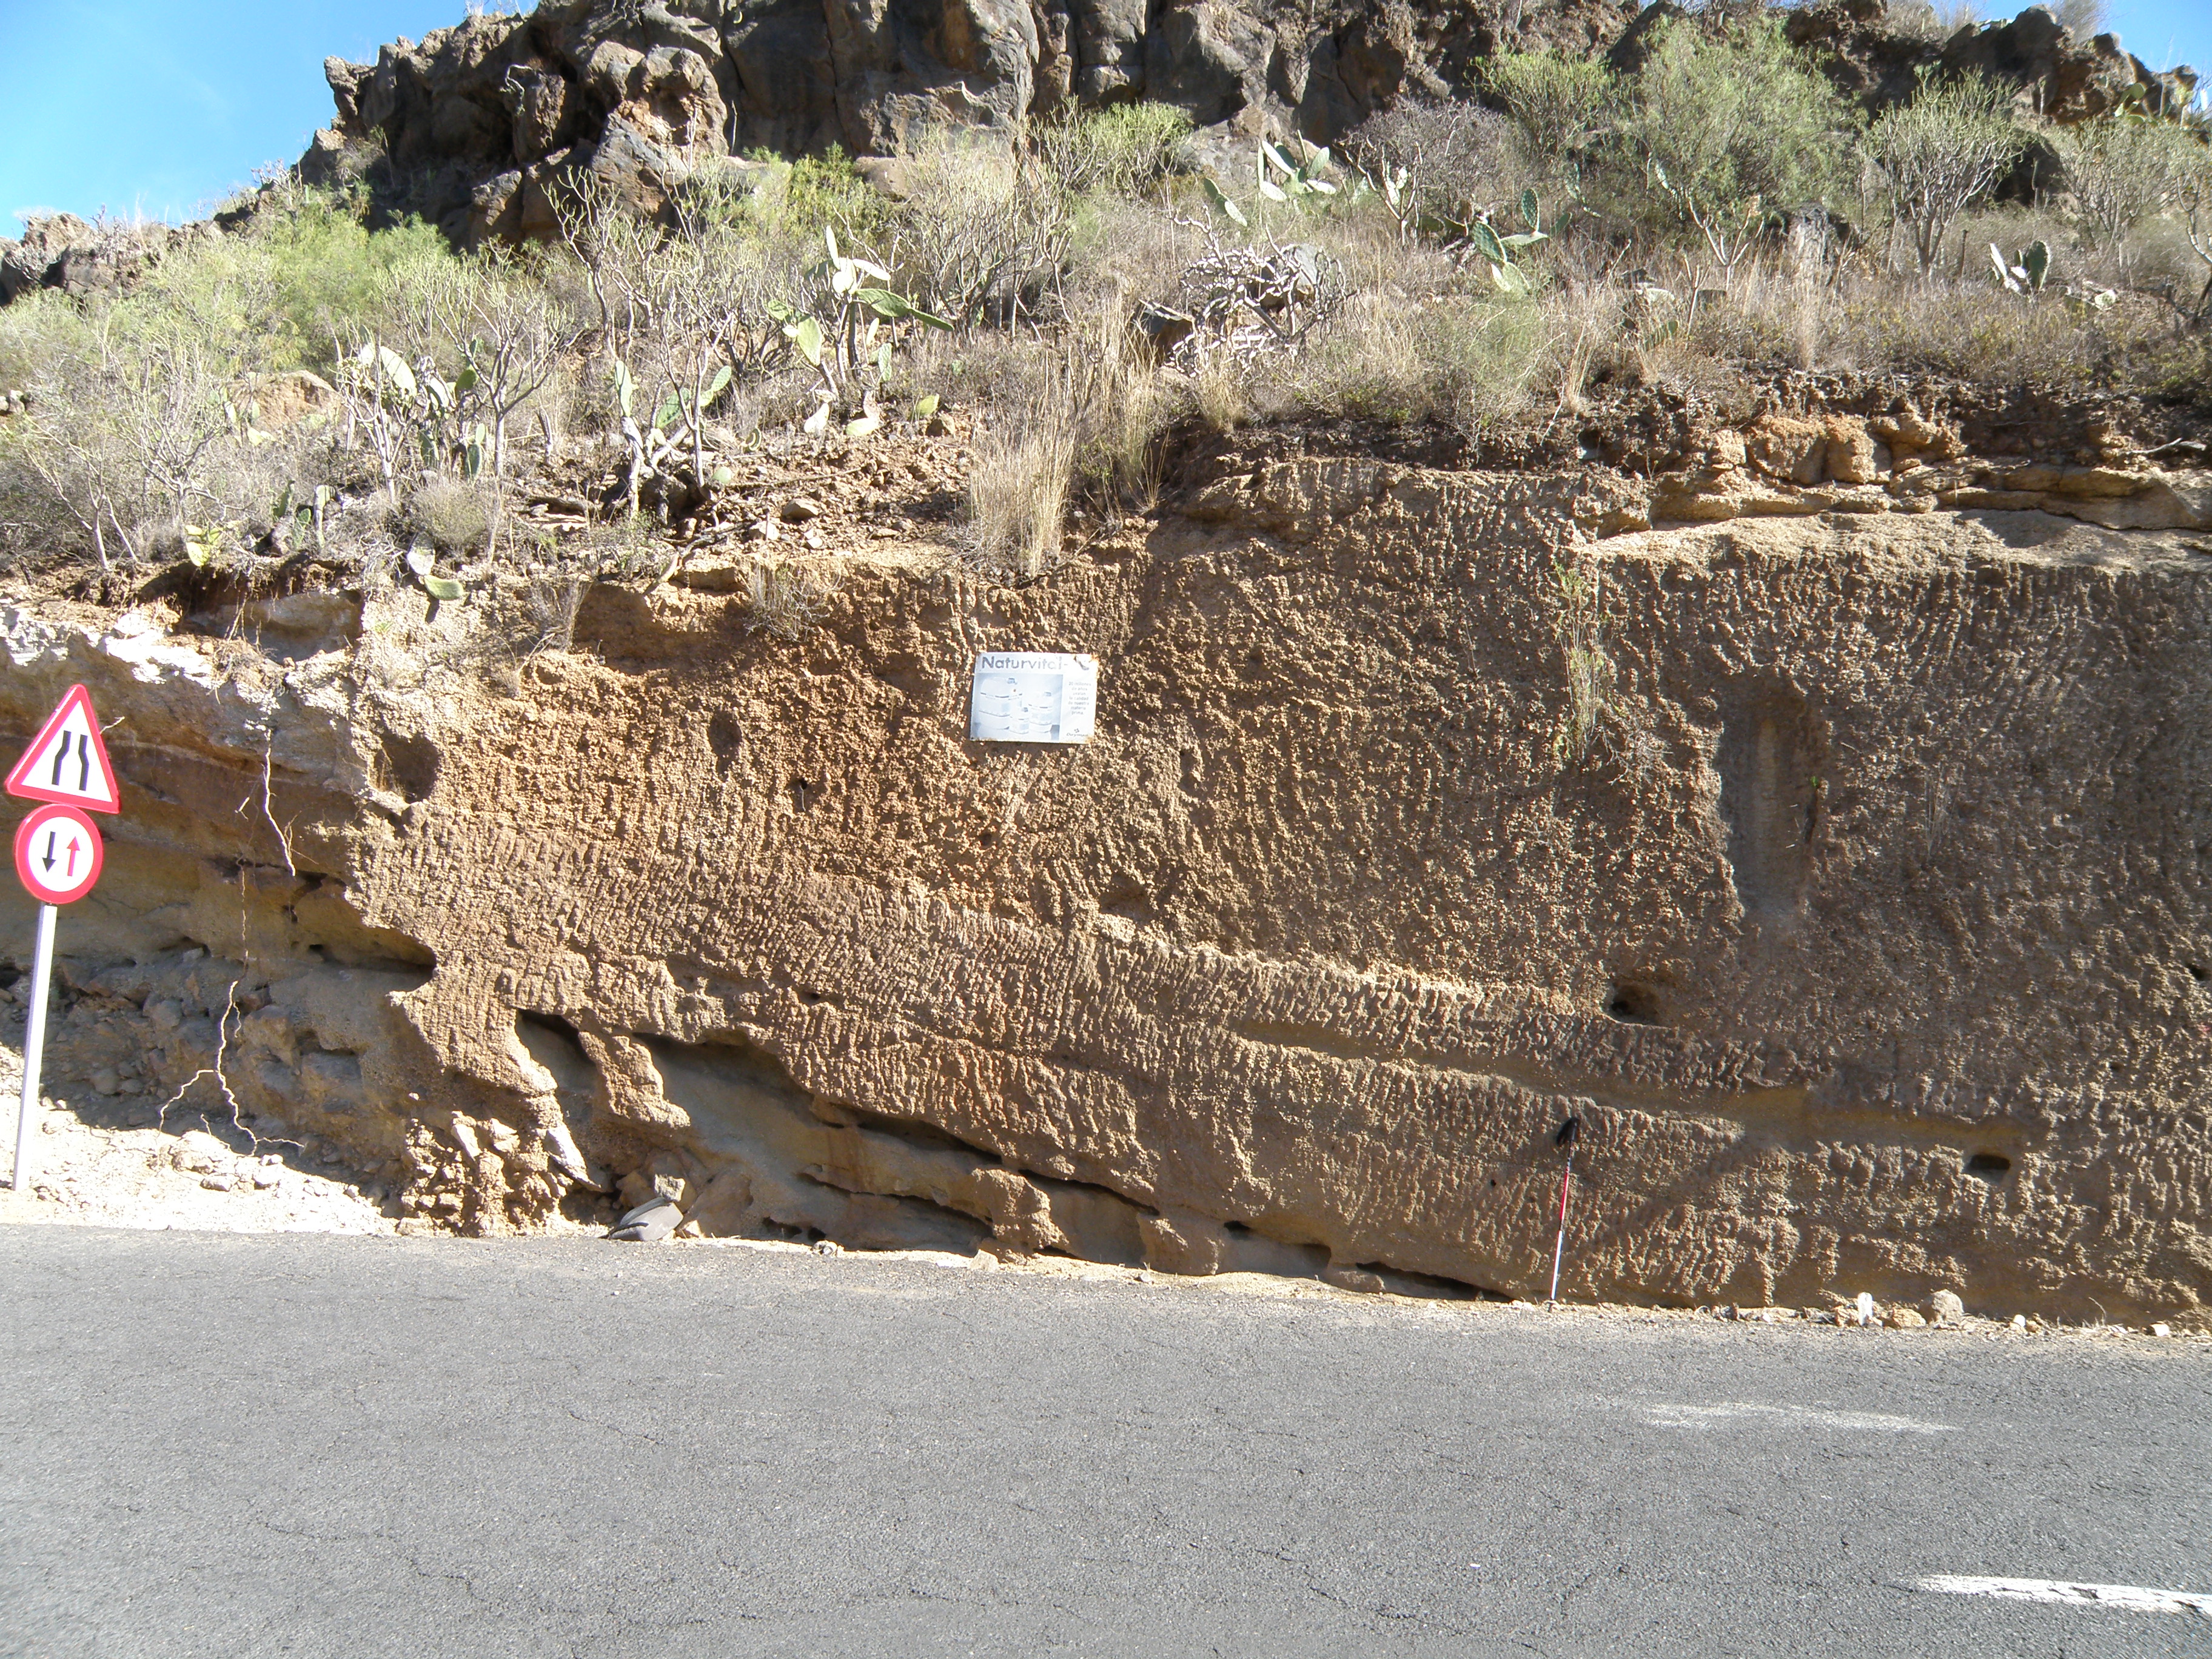
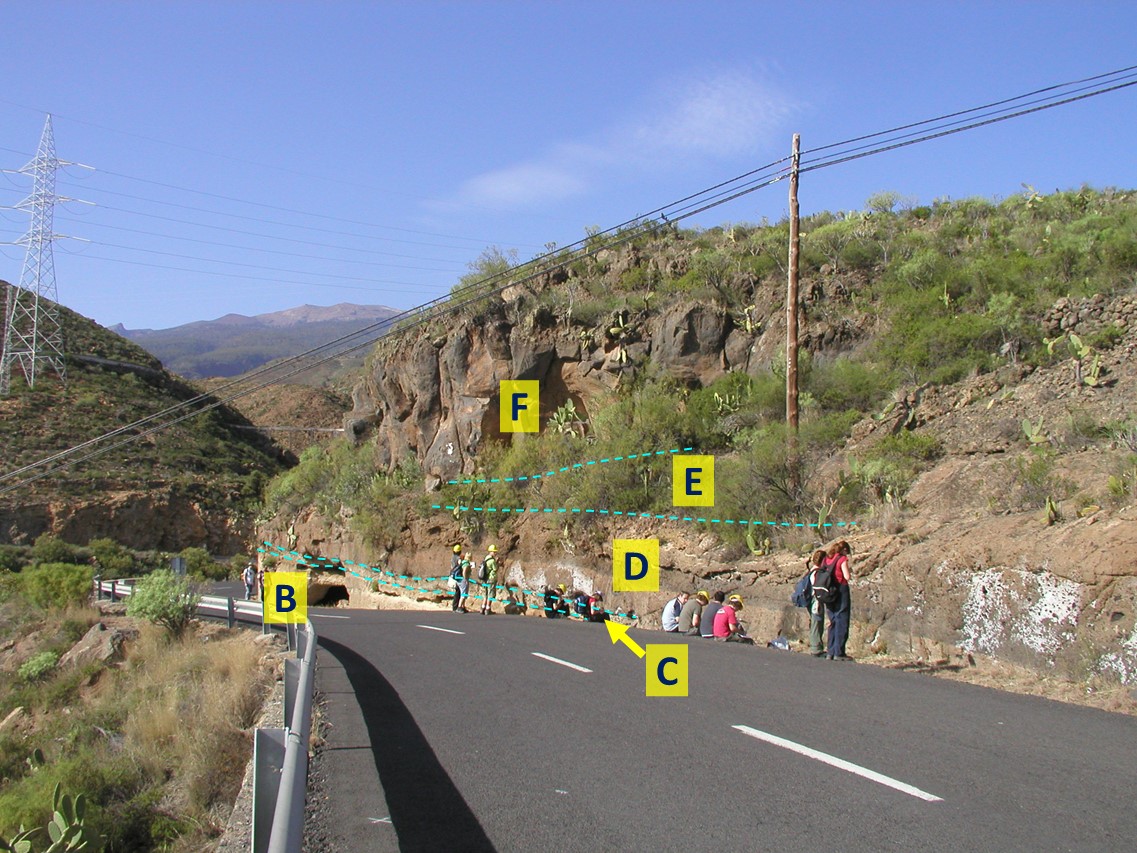
 Figure 3. Panorama of the whole road section, looking east from the west side of the barranco. From the left, the section starts at sub-location 2.4.1 just to the right of the van, and continues across the bridge and up the road section to where the road disappears over the skyline on the right beyond sub-location 2.4.7. Click on the image to see it at full size. |
![]()
Logging the section
For each unit, record:
 |
|
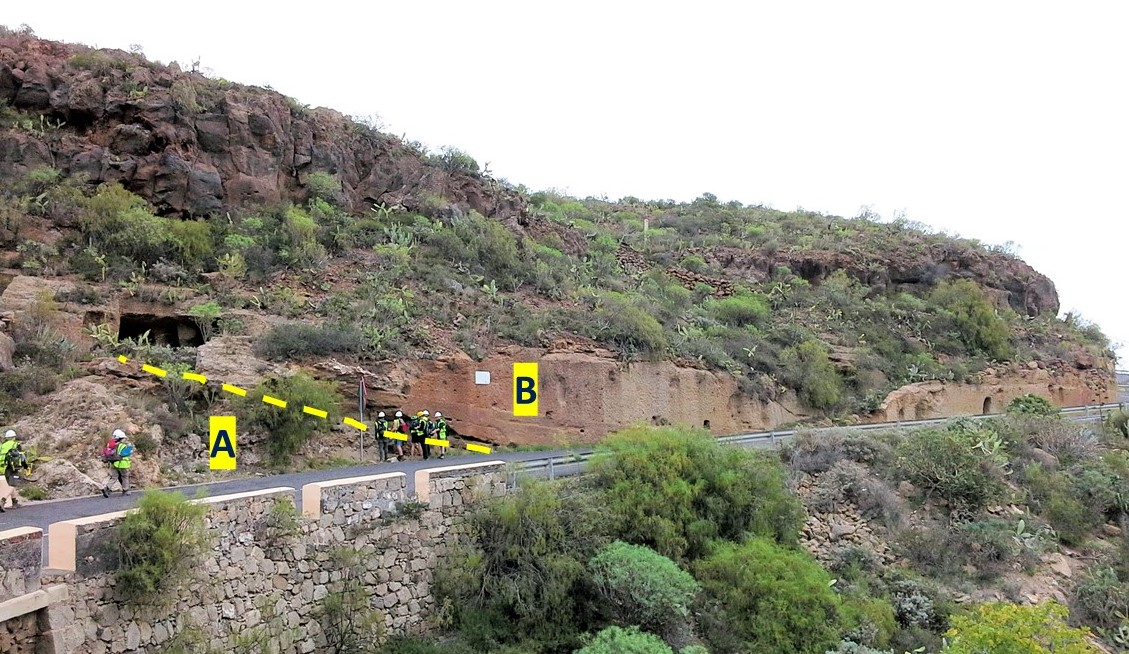
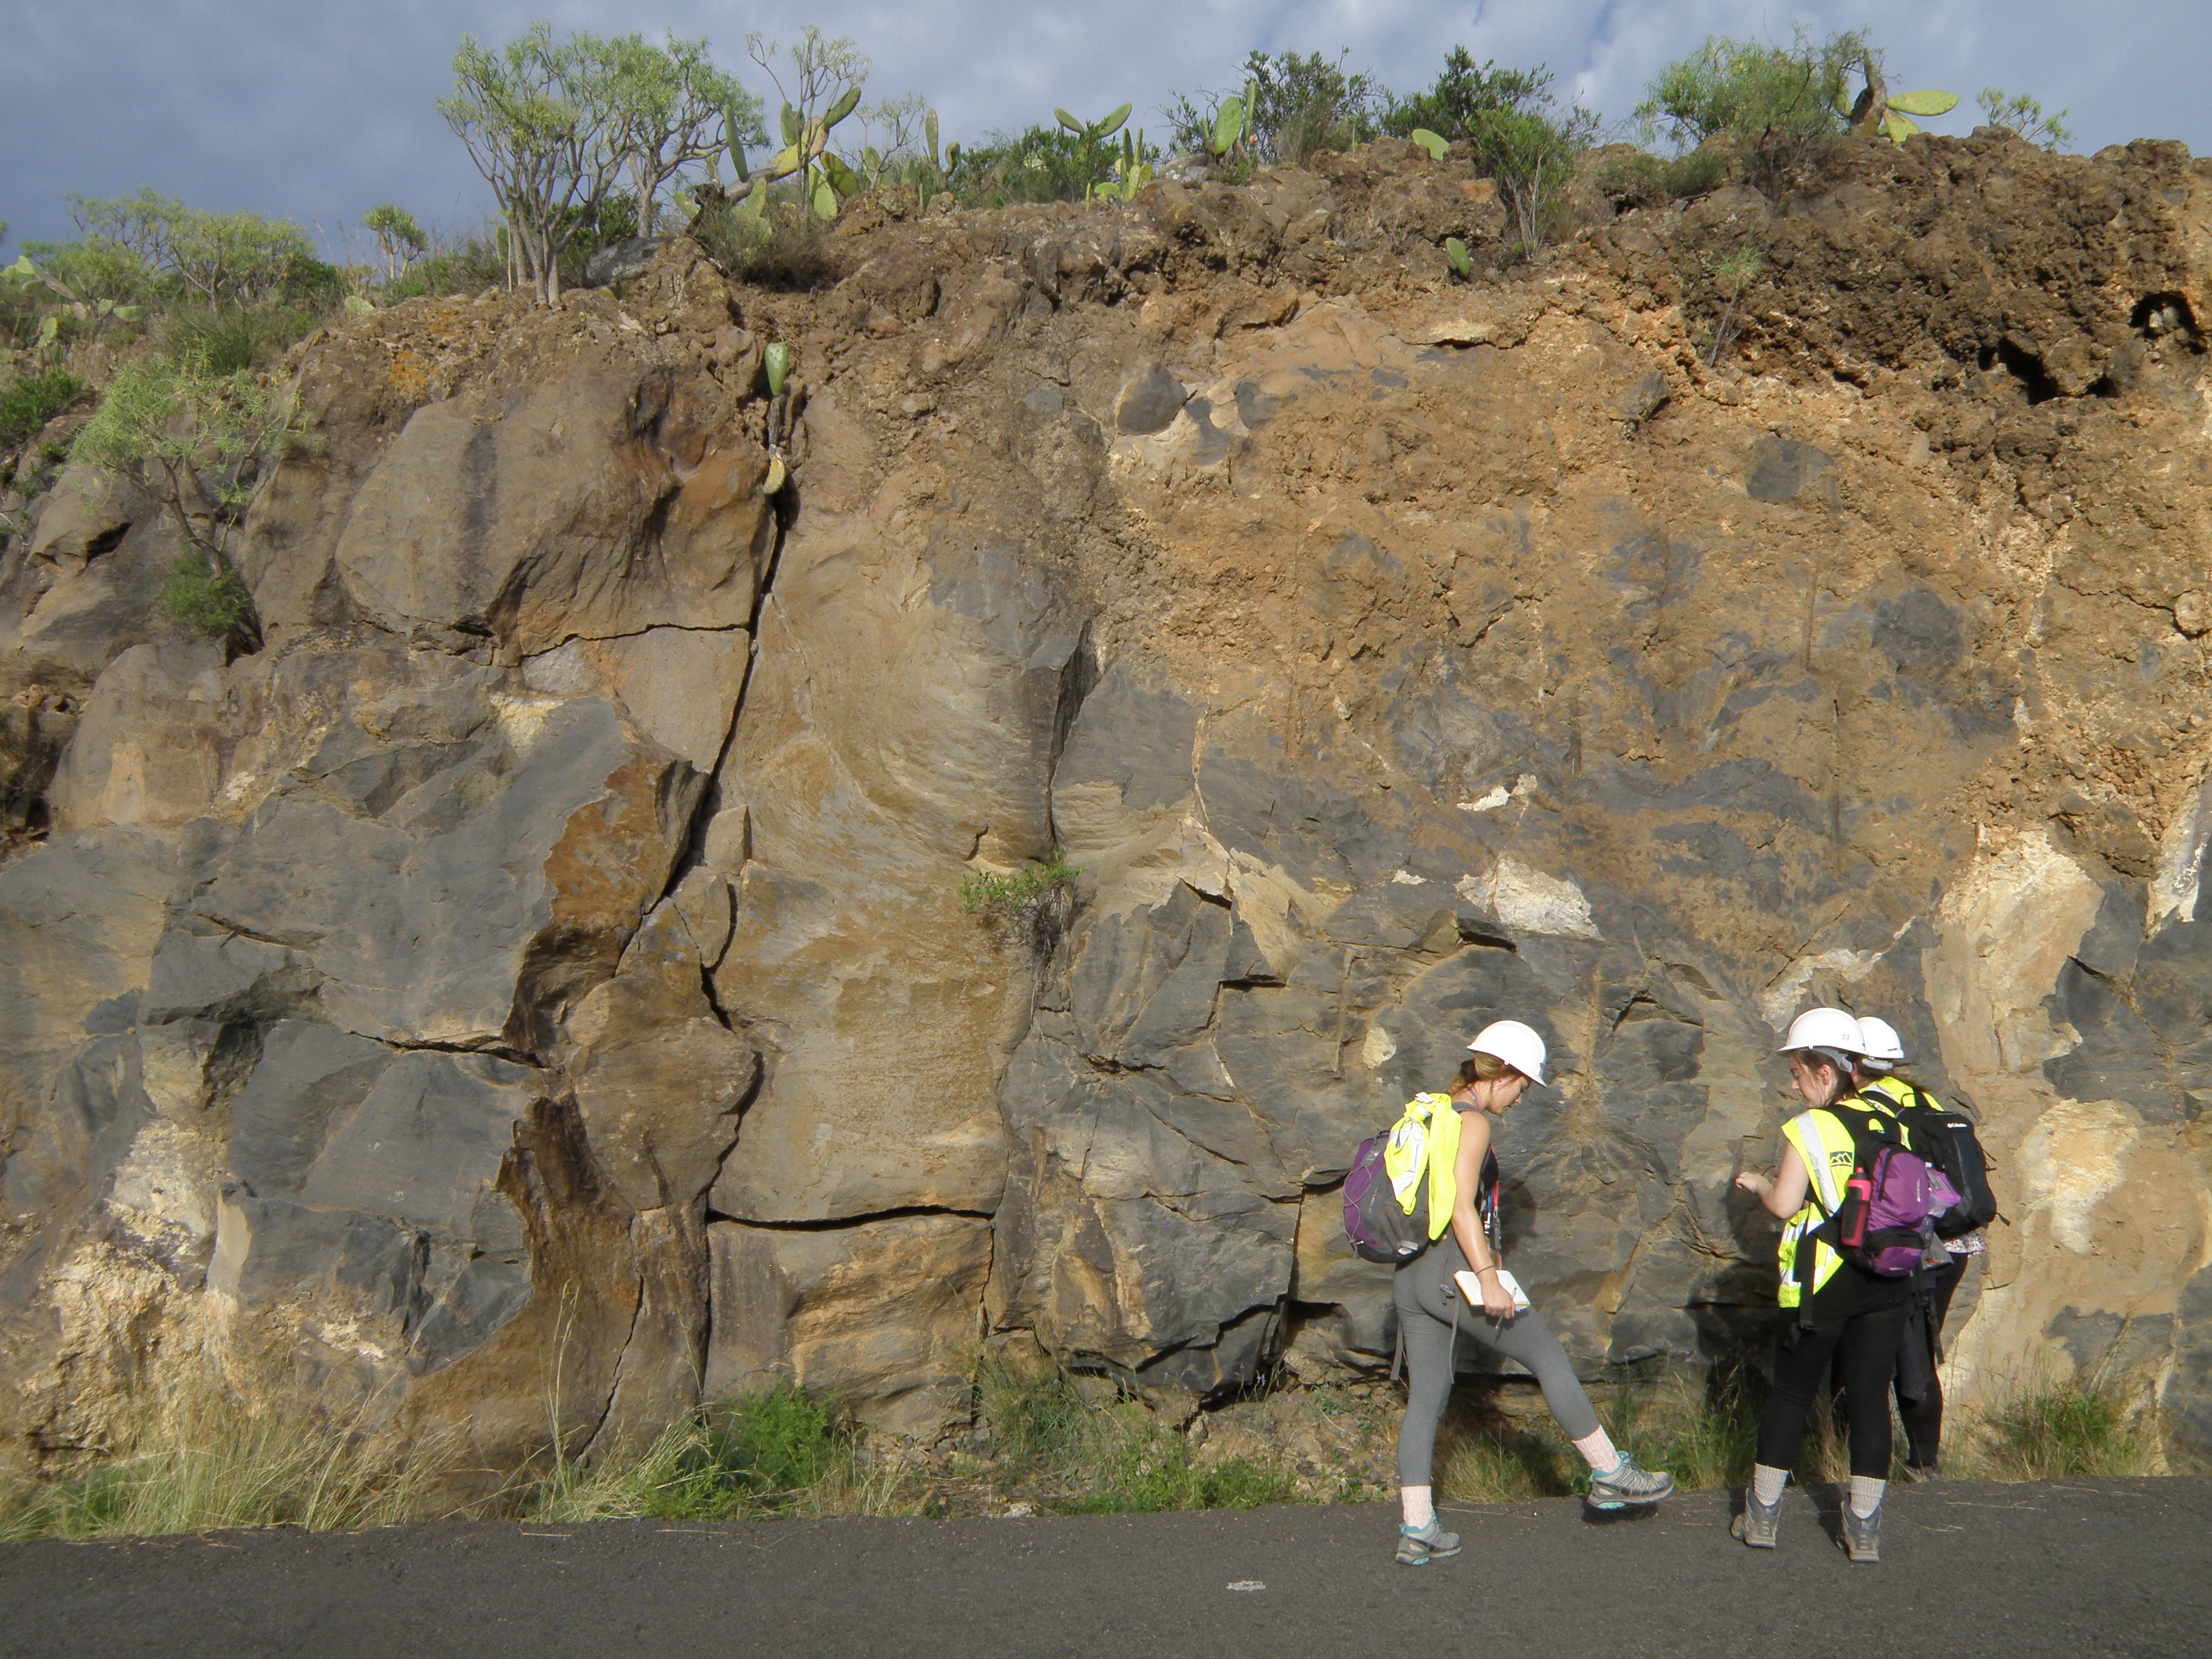
Figure 4. Click on the panorama to enlarge it. Click here for the full size, unlabelled image. In this panorama:
|
| General view of the section at loc 2.4.1 | Close-ups of the outcrops of interval A | |
|
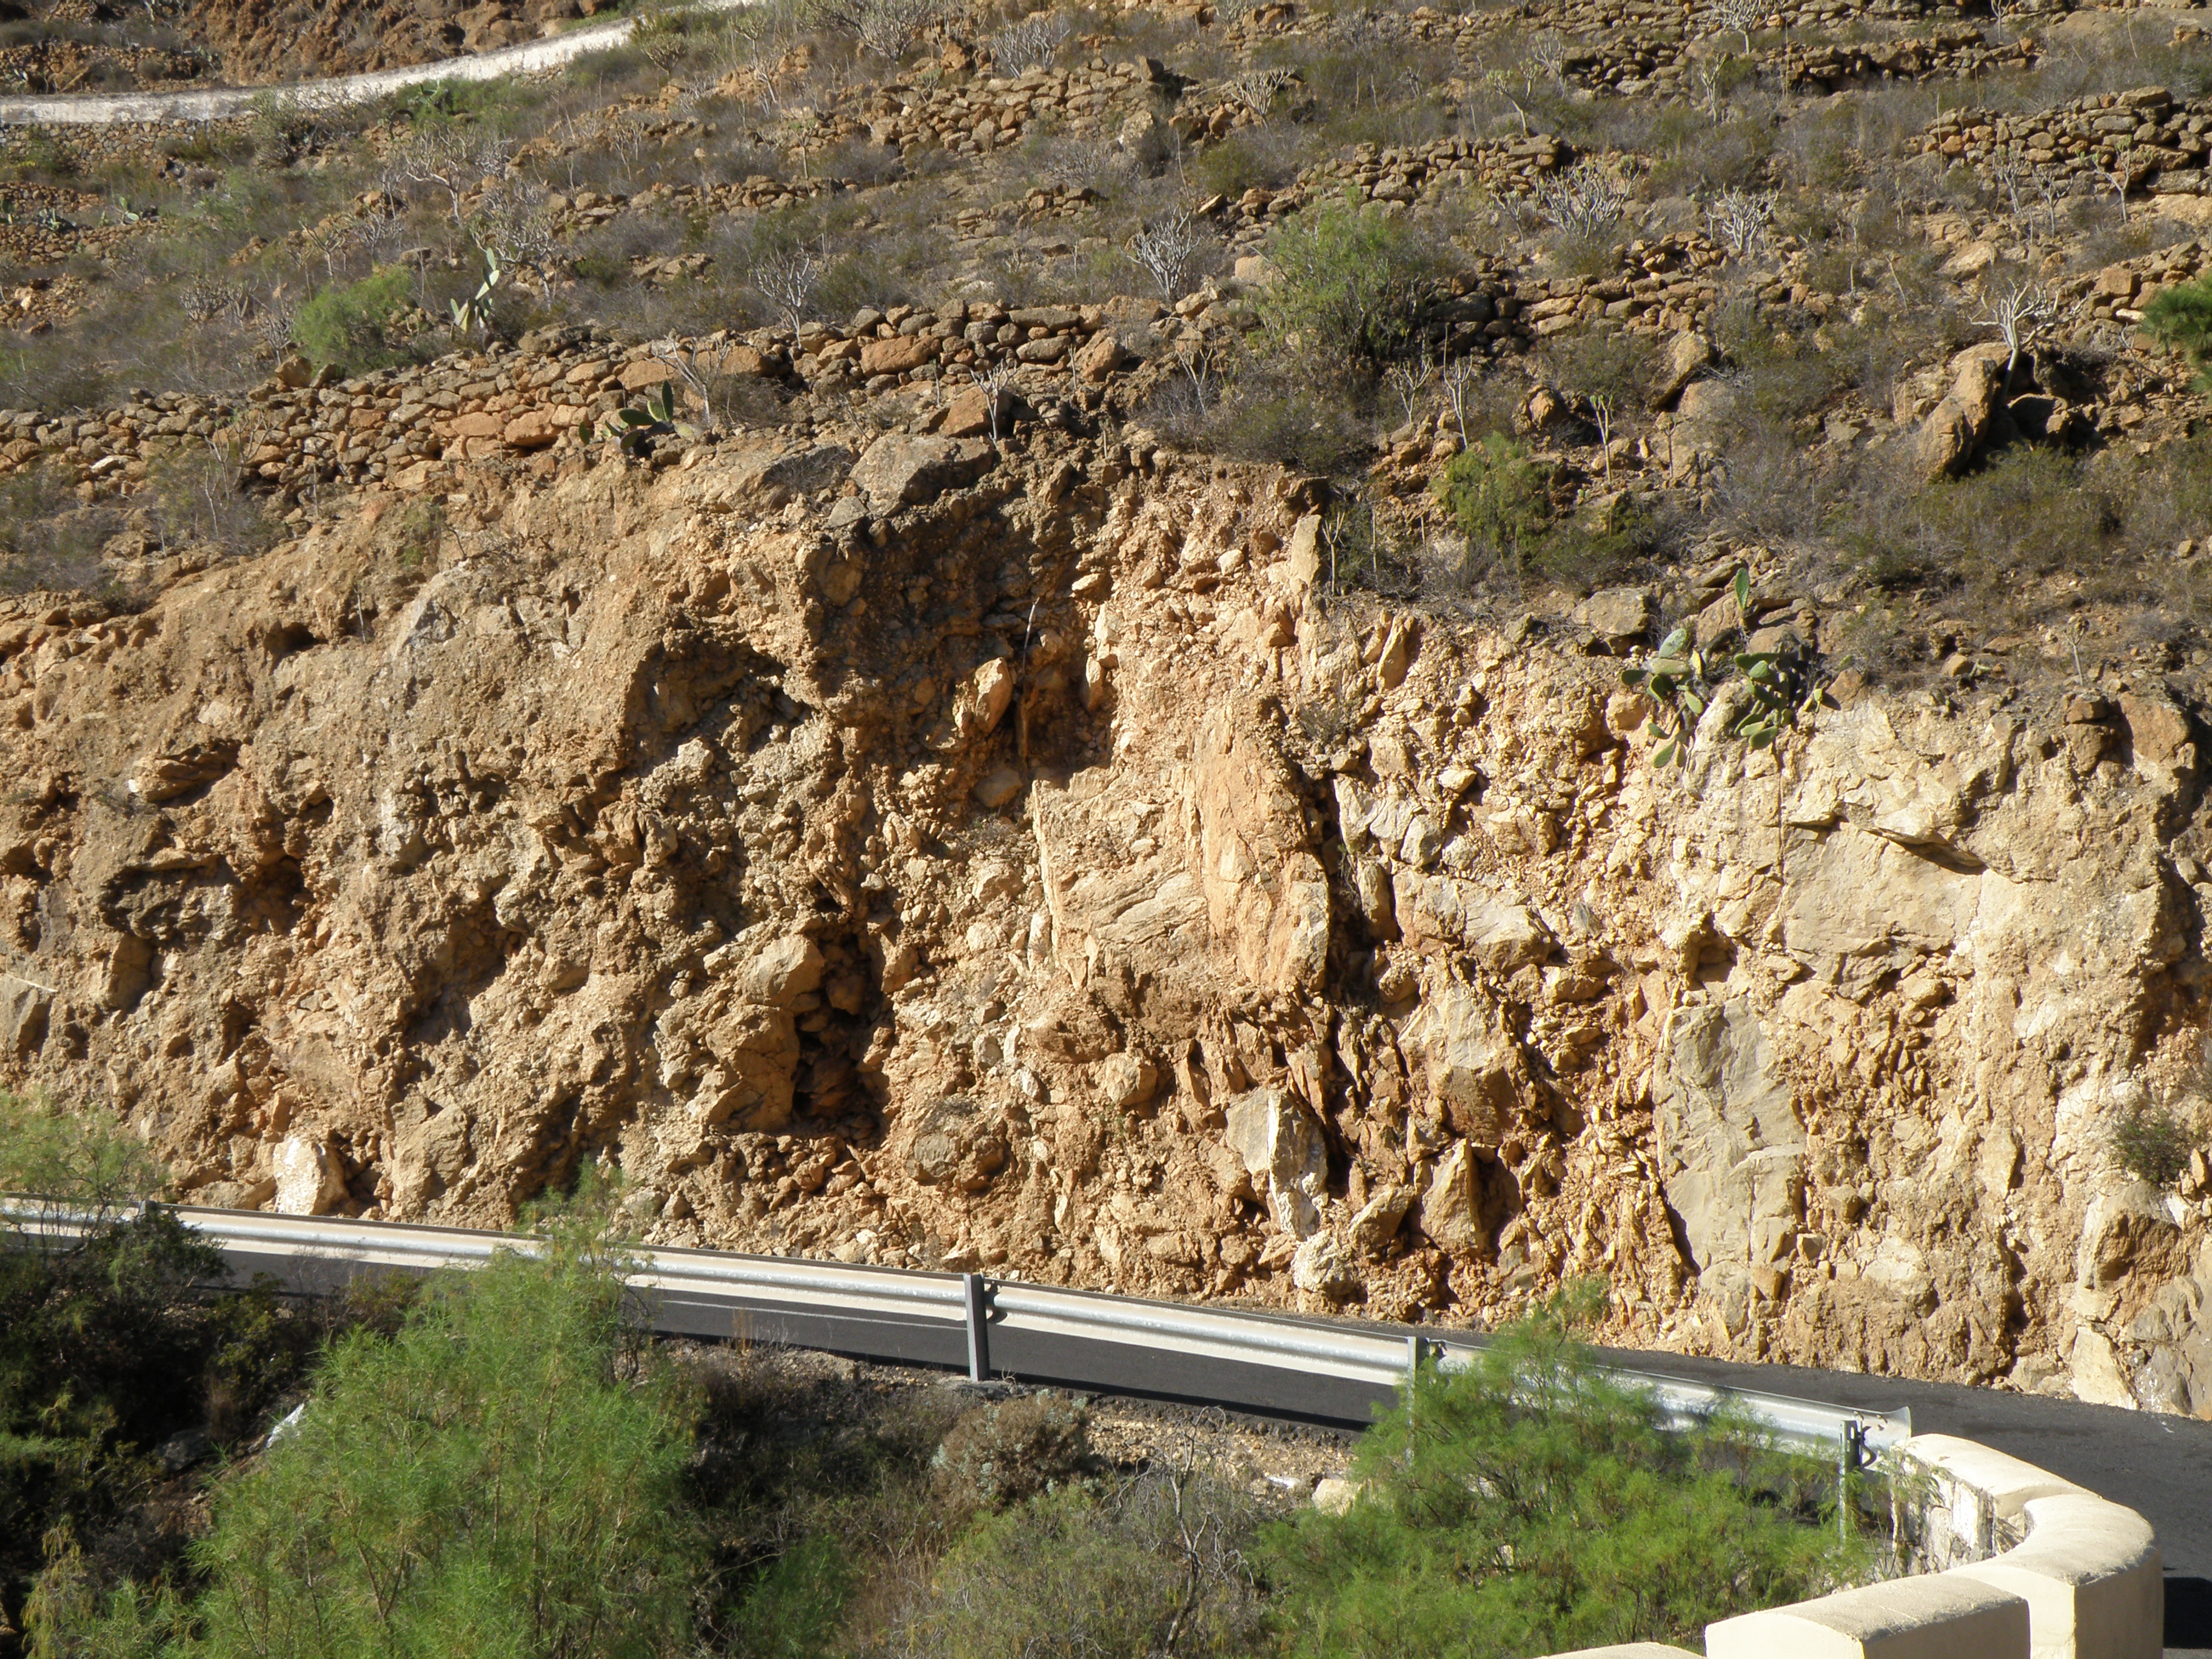
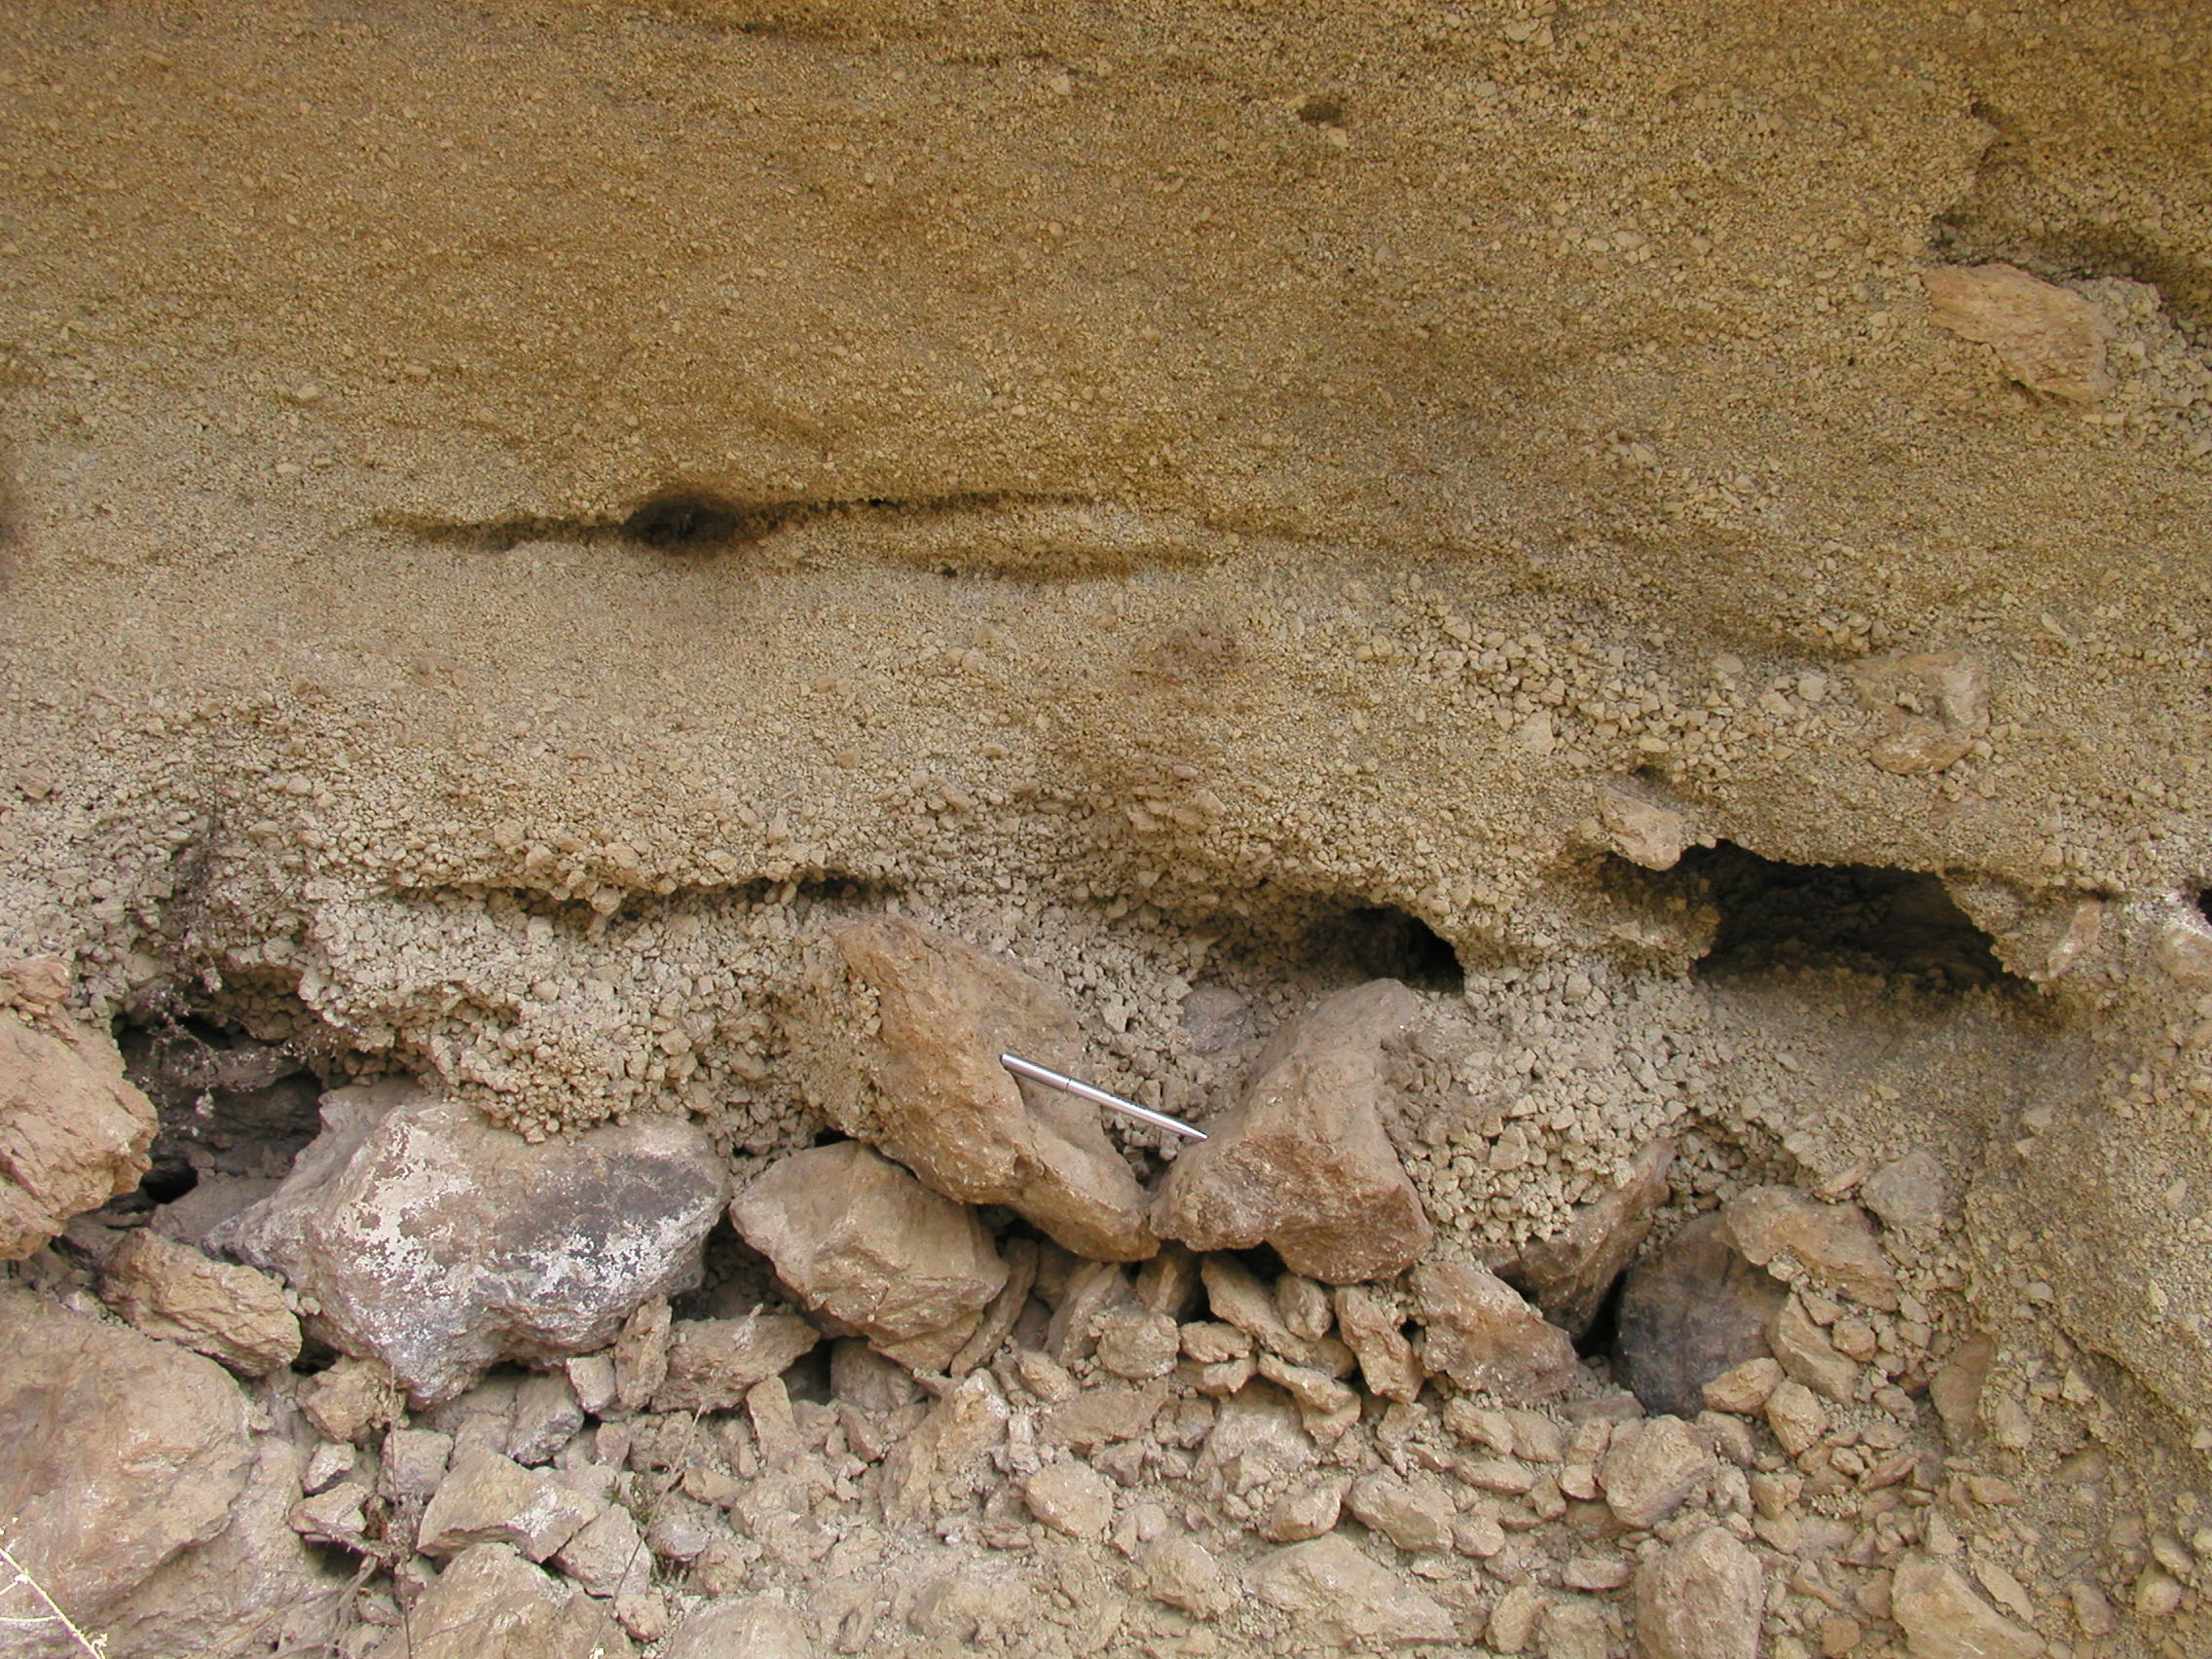
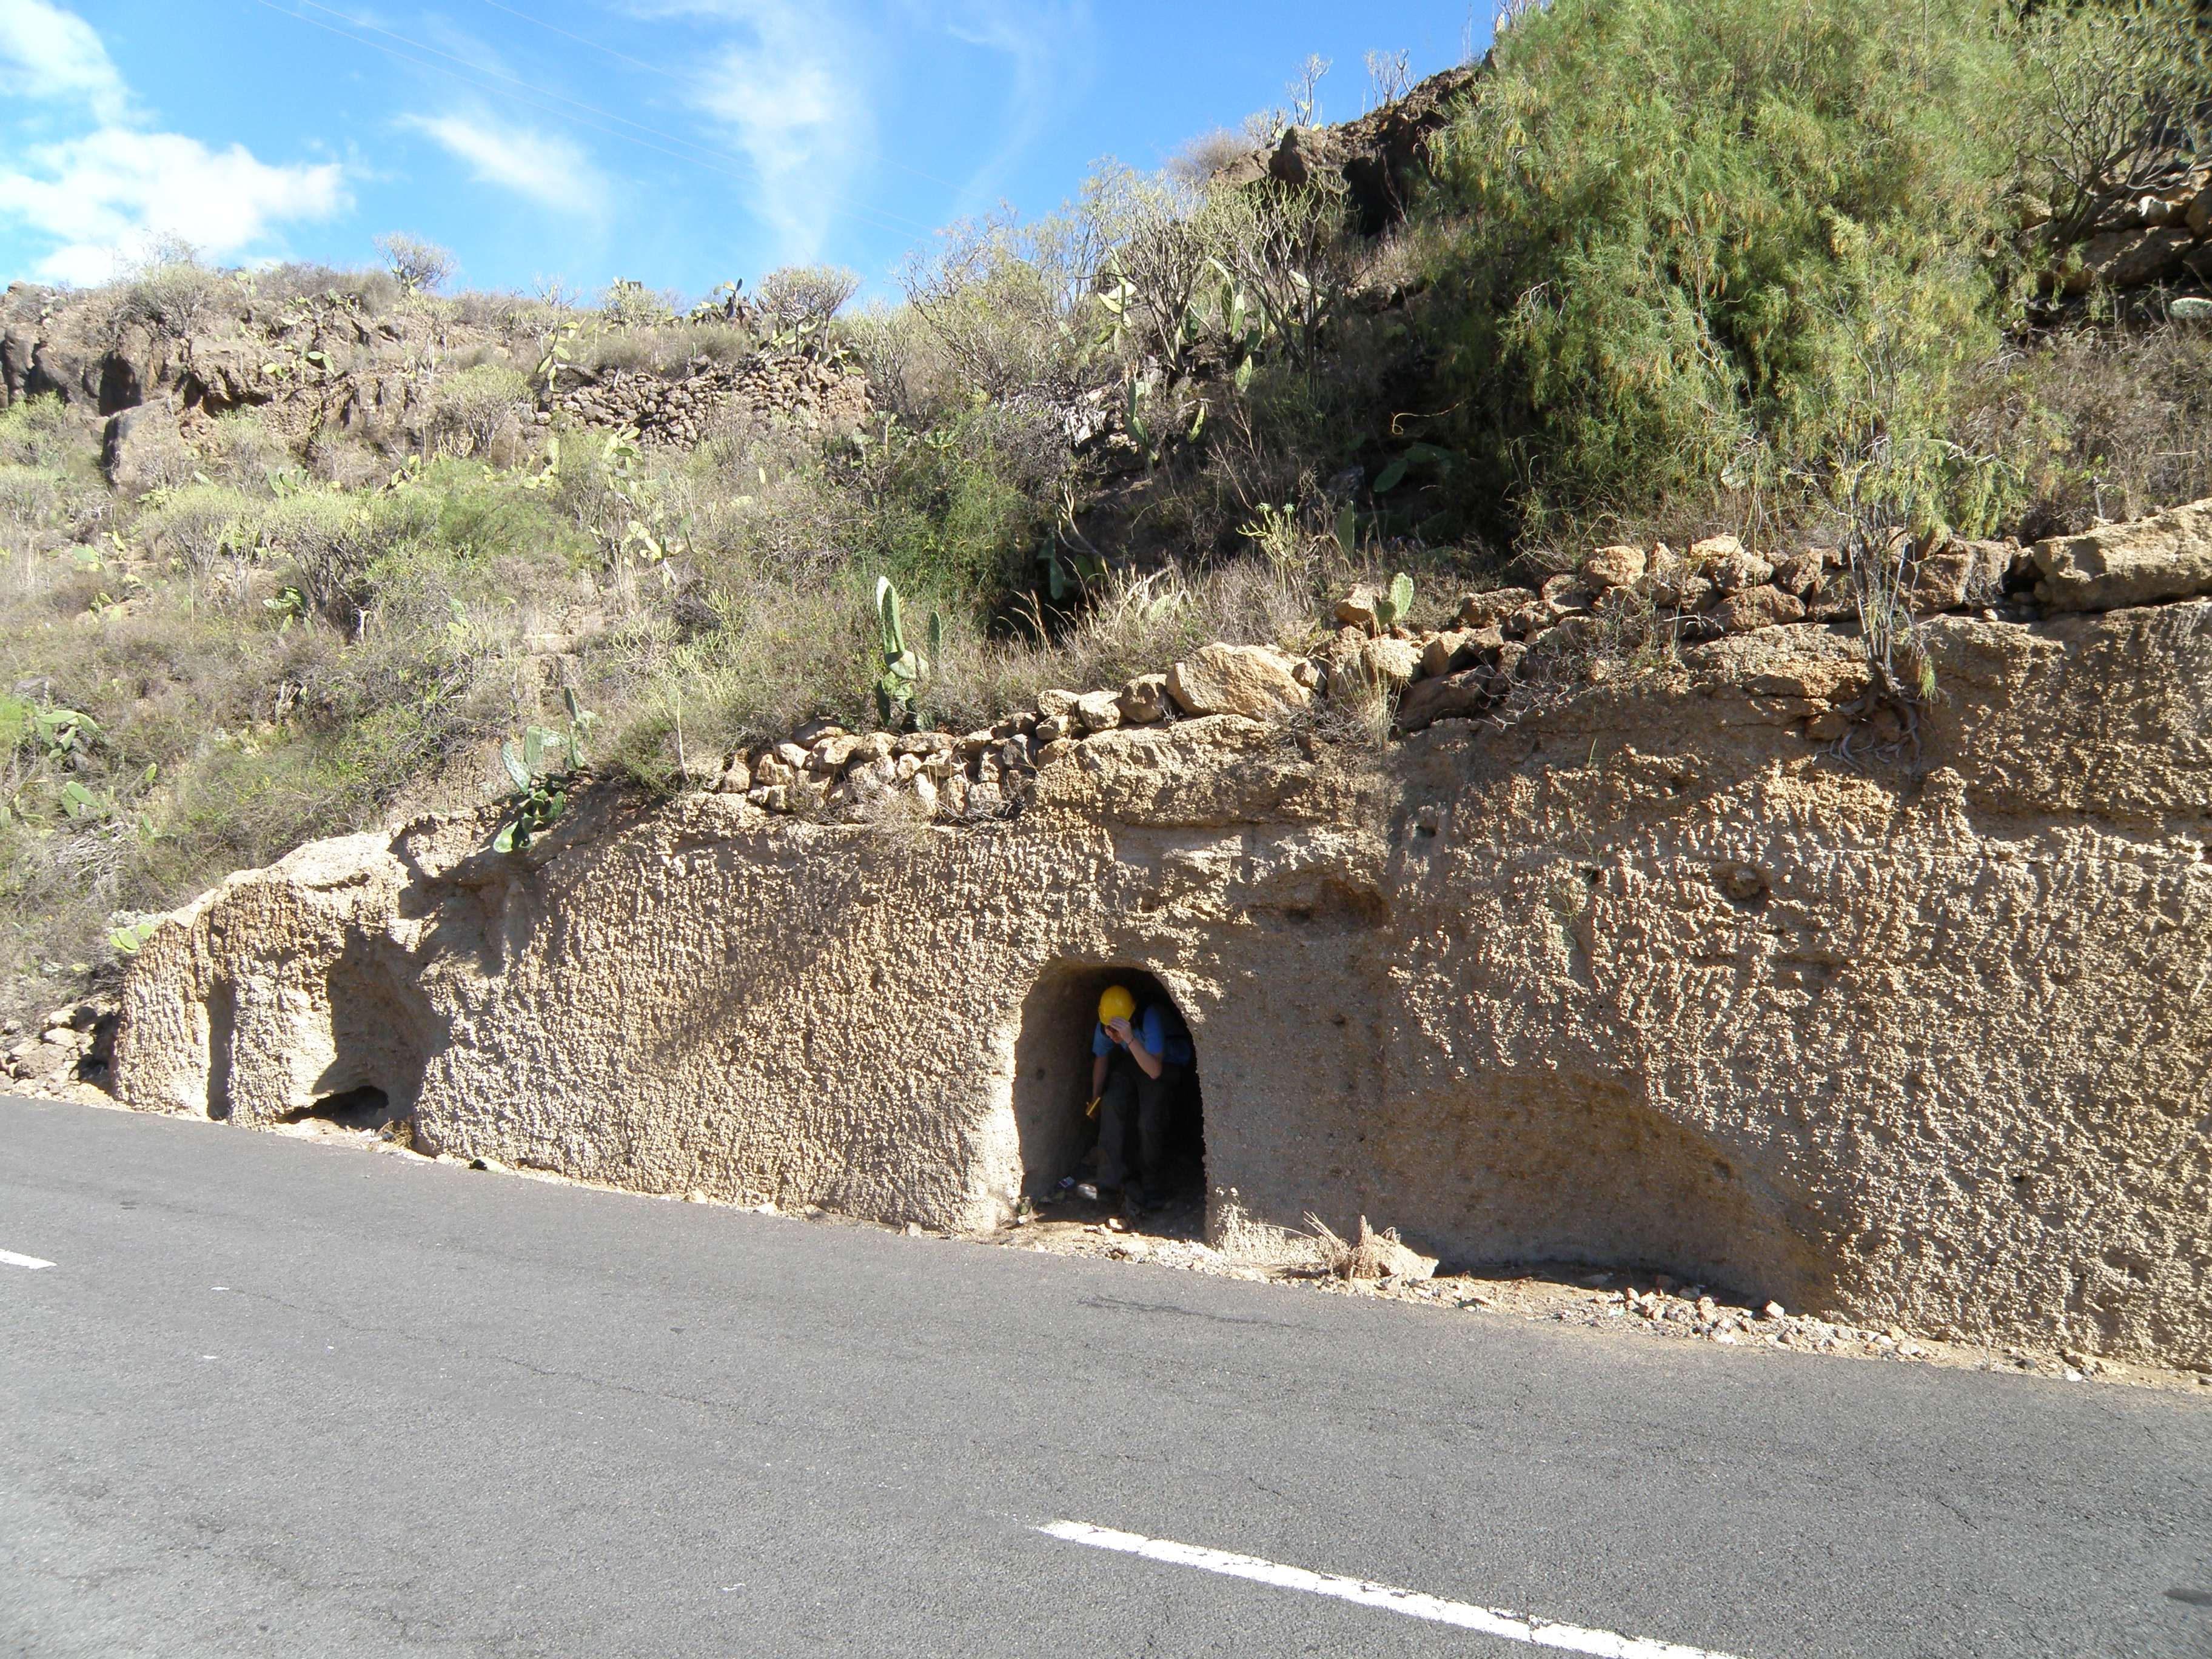
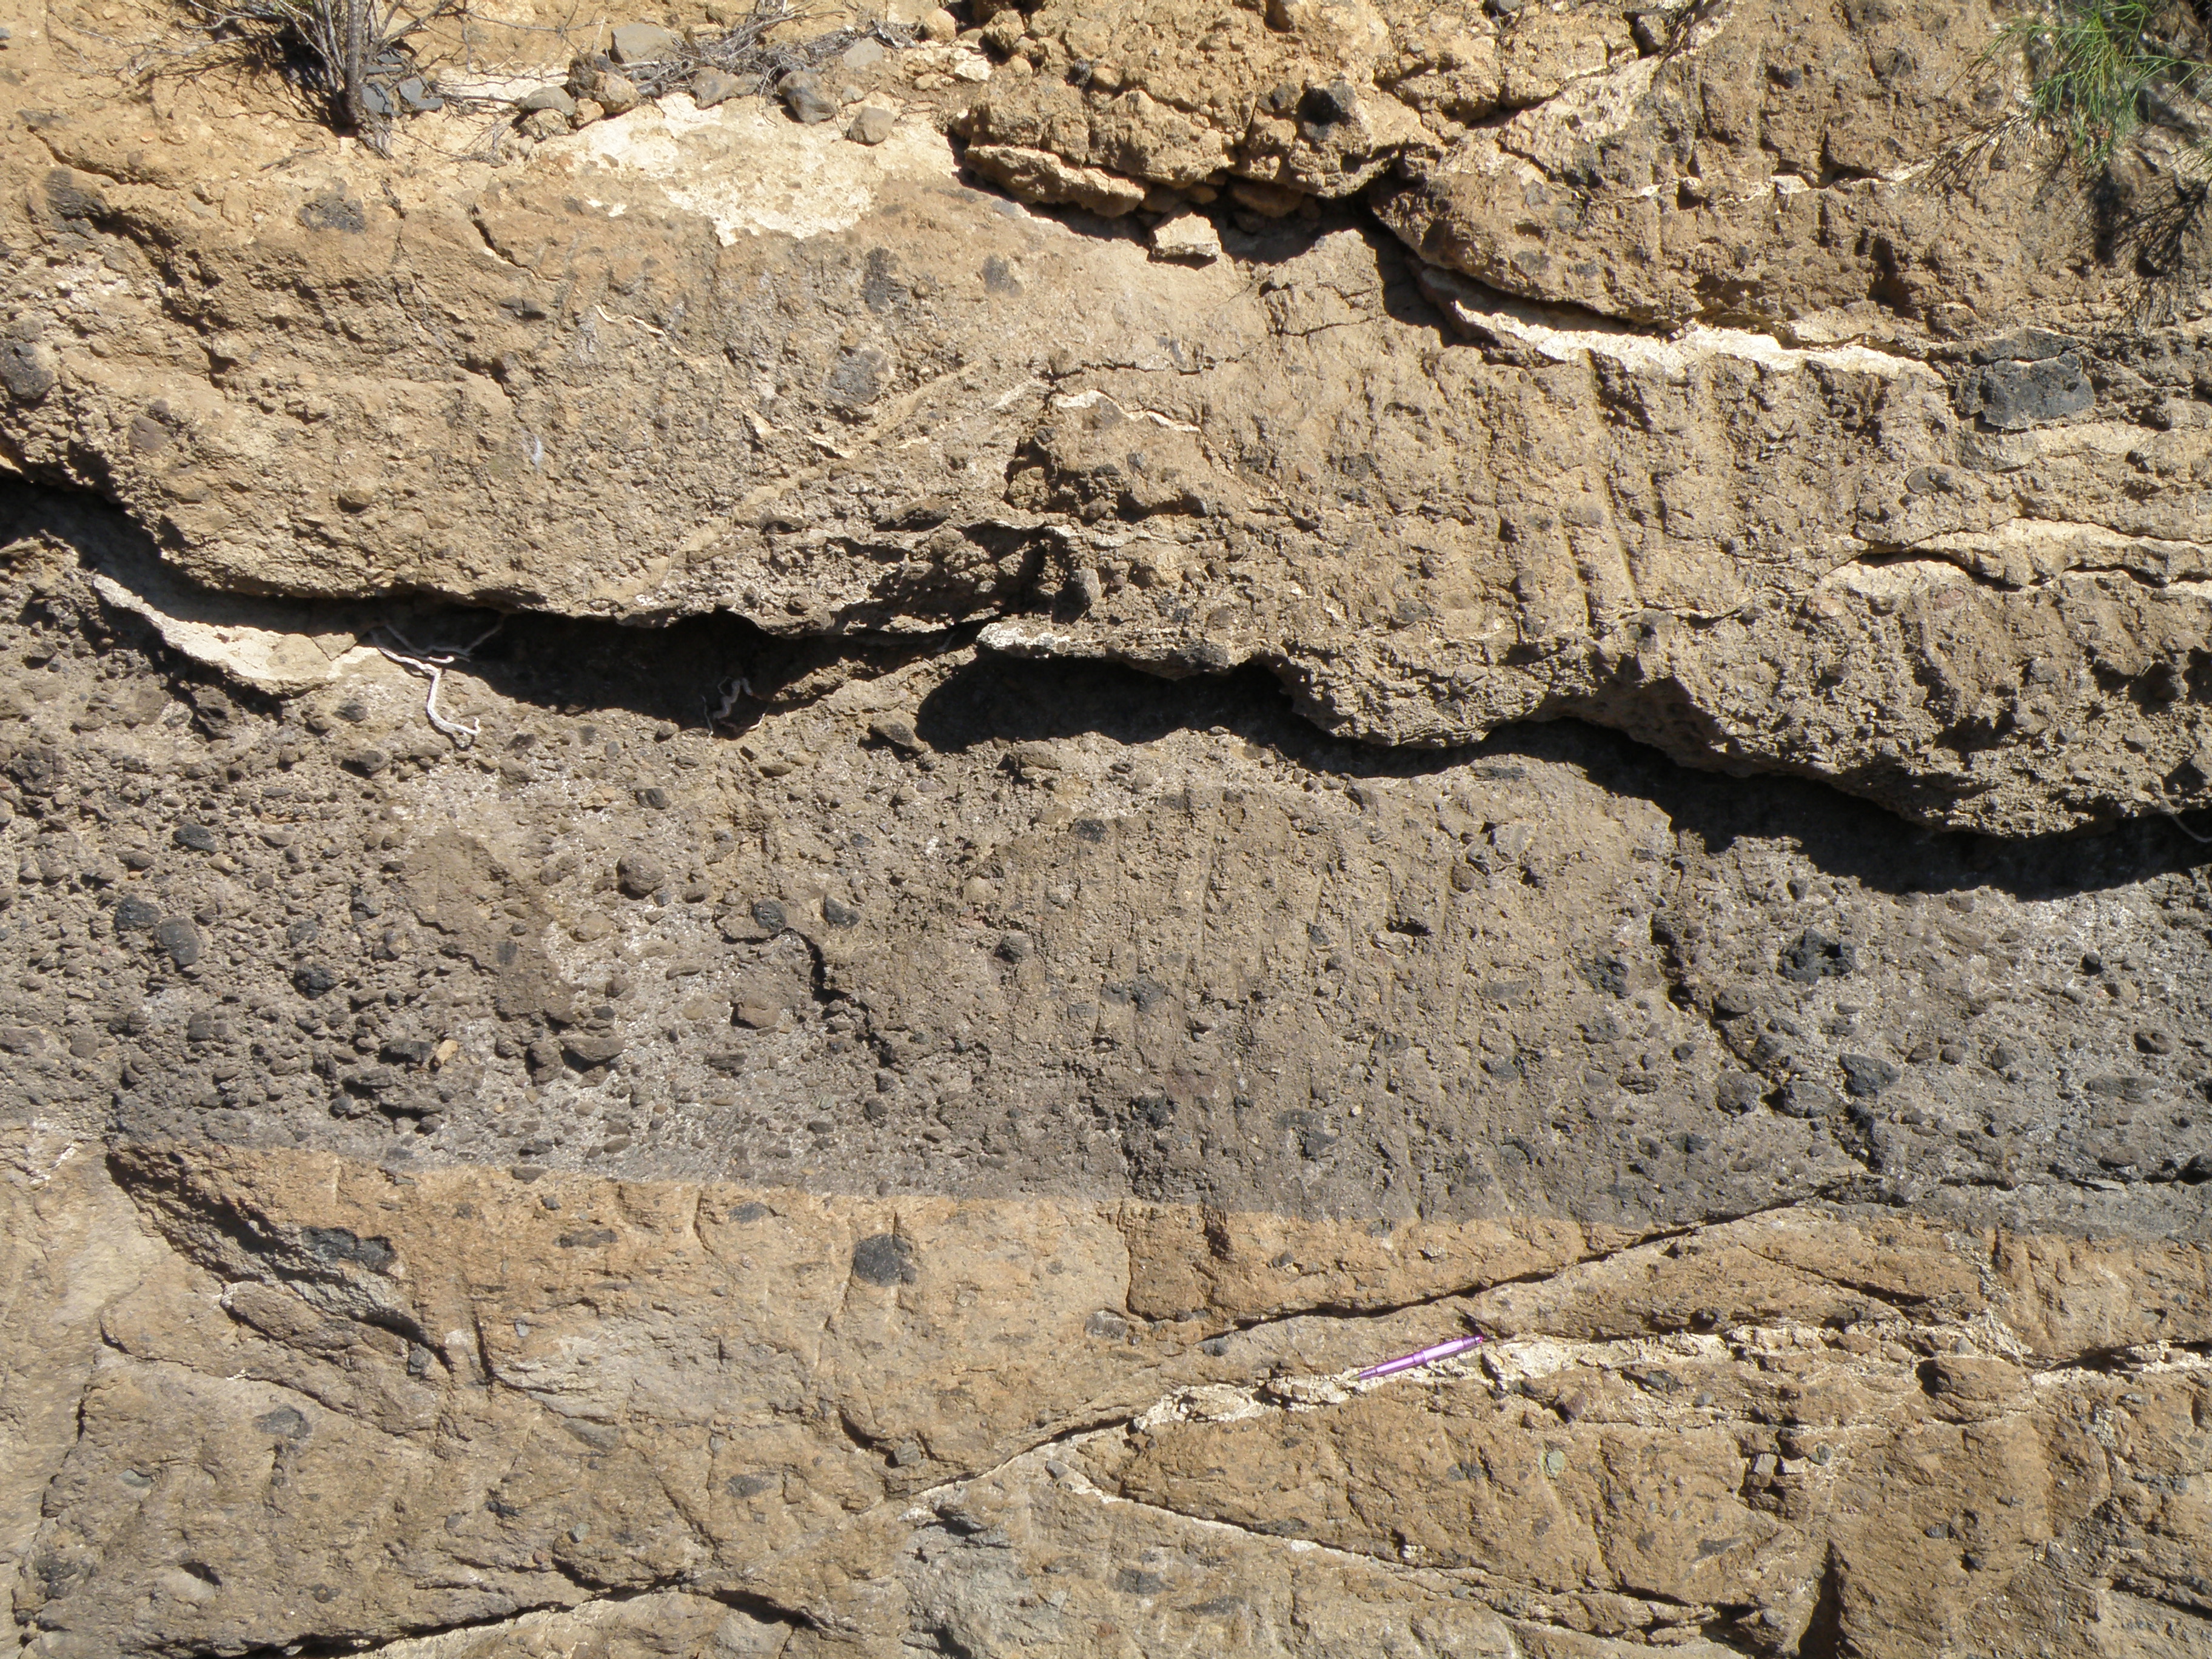
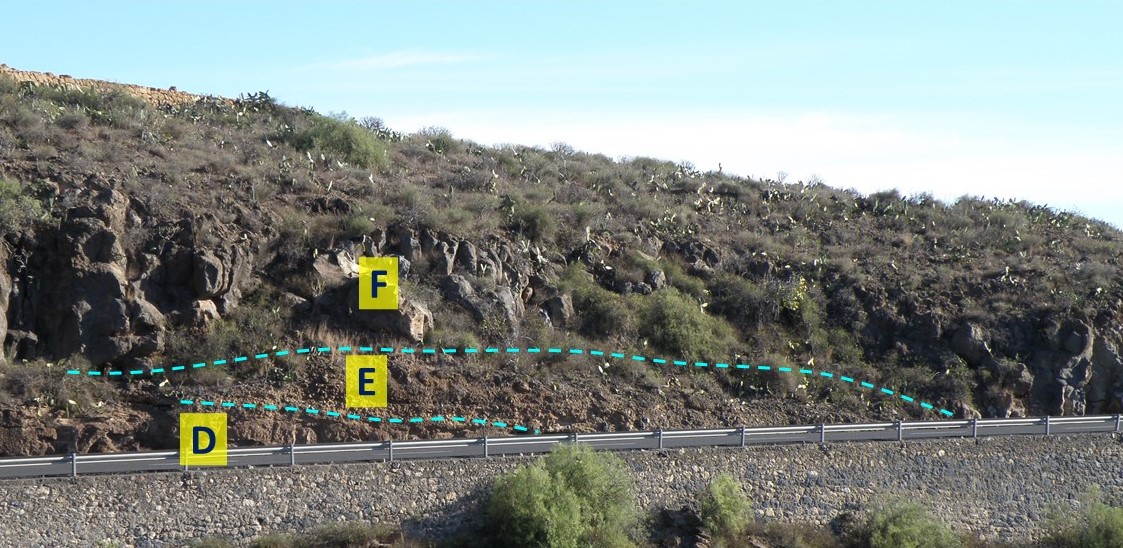
View of the lowest unit in the section, west of the bridge. These are breccias of the Helecho Formation (interval A), and their base is not exposed here - record this as base not seen on your log. On the right, the dashed line through the section east of the bridge marks the inclined base of interval B, which overlies the Helecho Formation. |
This deposit is very widespread on southern Tenerife. It has been described and interpreted by Davila Harris et al. (2011) This short article is well worth reading. |
|
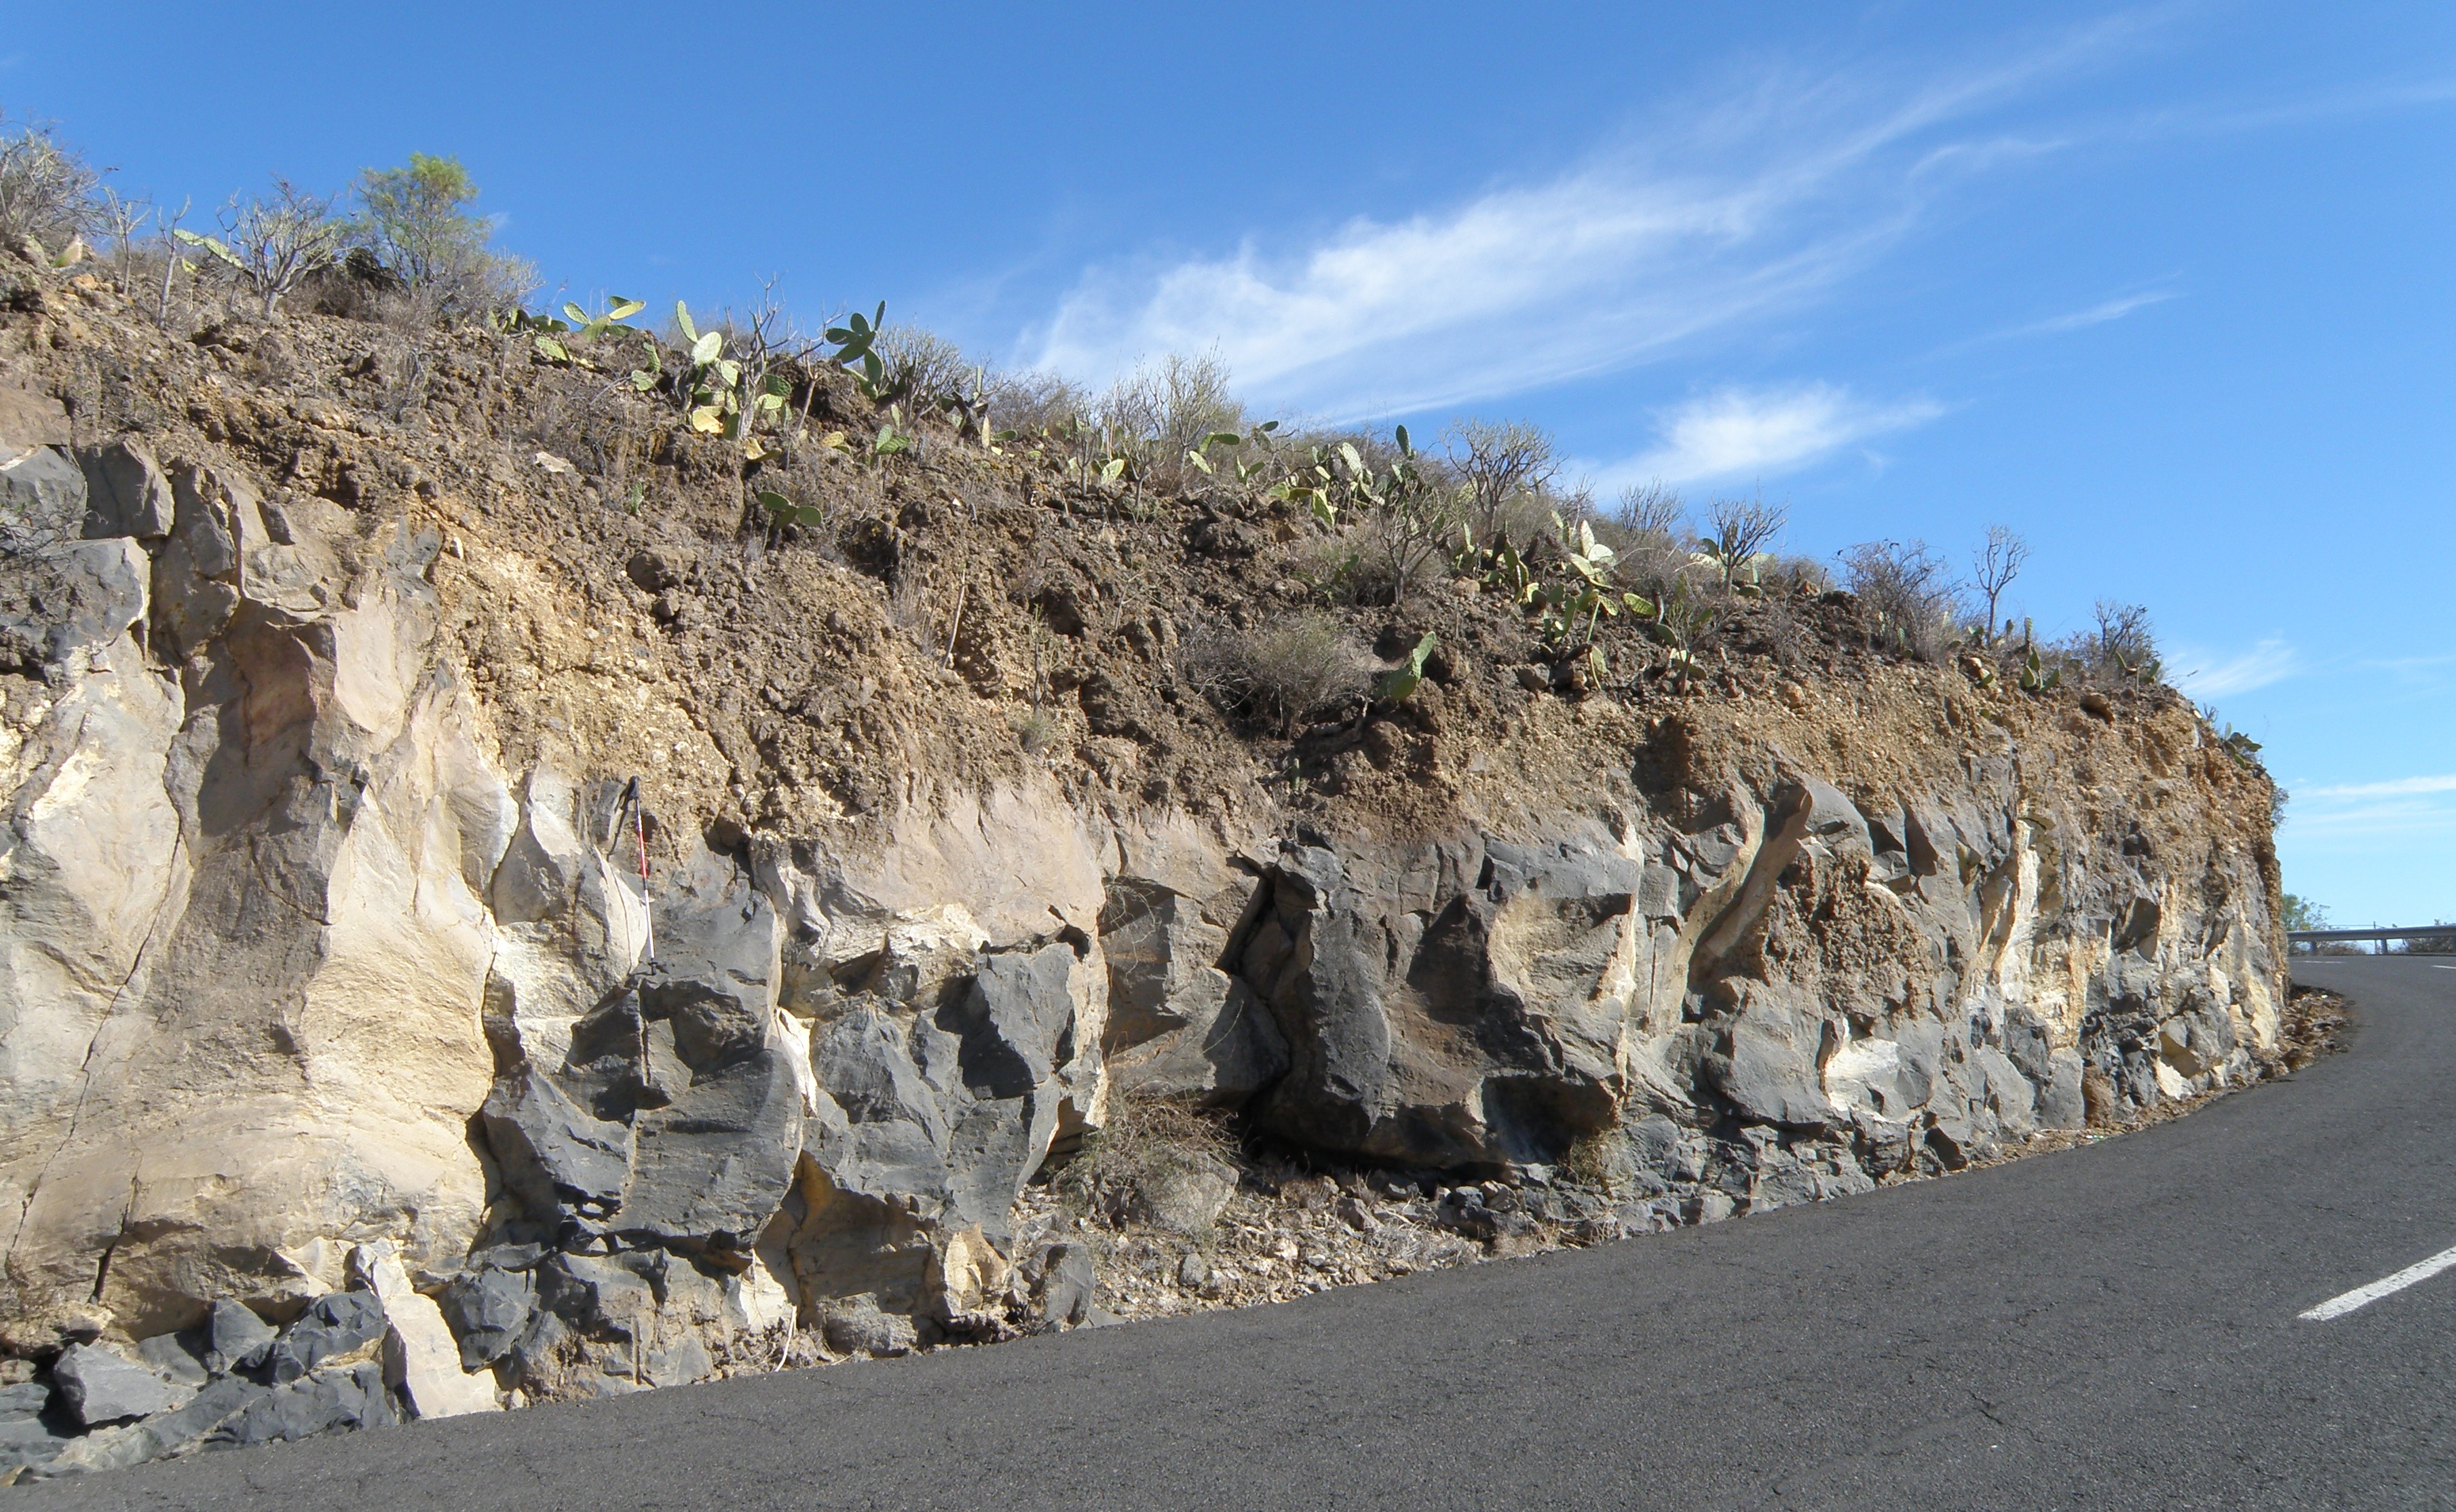
| General view of the section at loc 2.4.2 | Close-ups of the outcrops | |
|
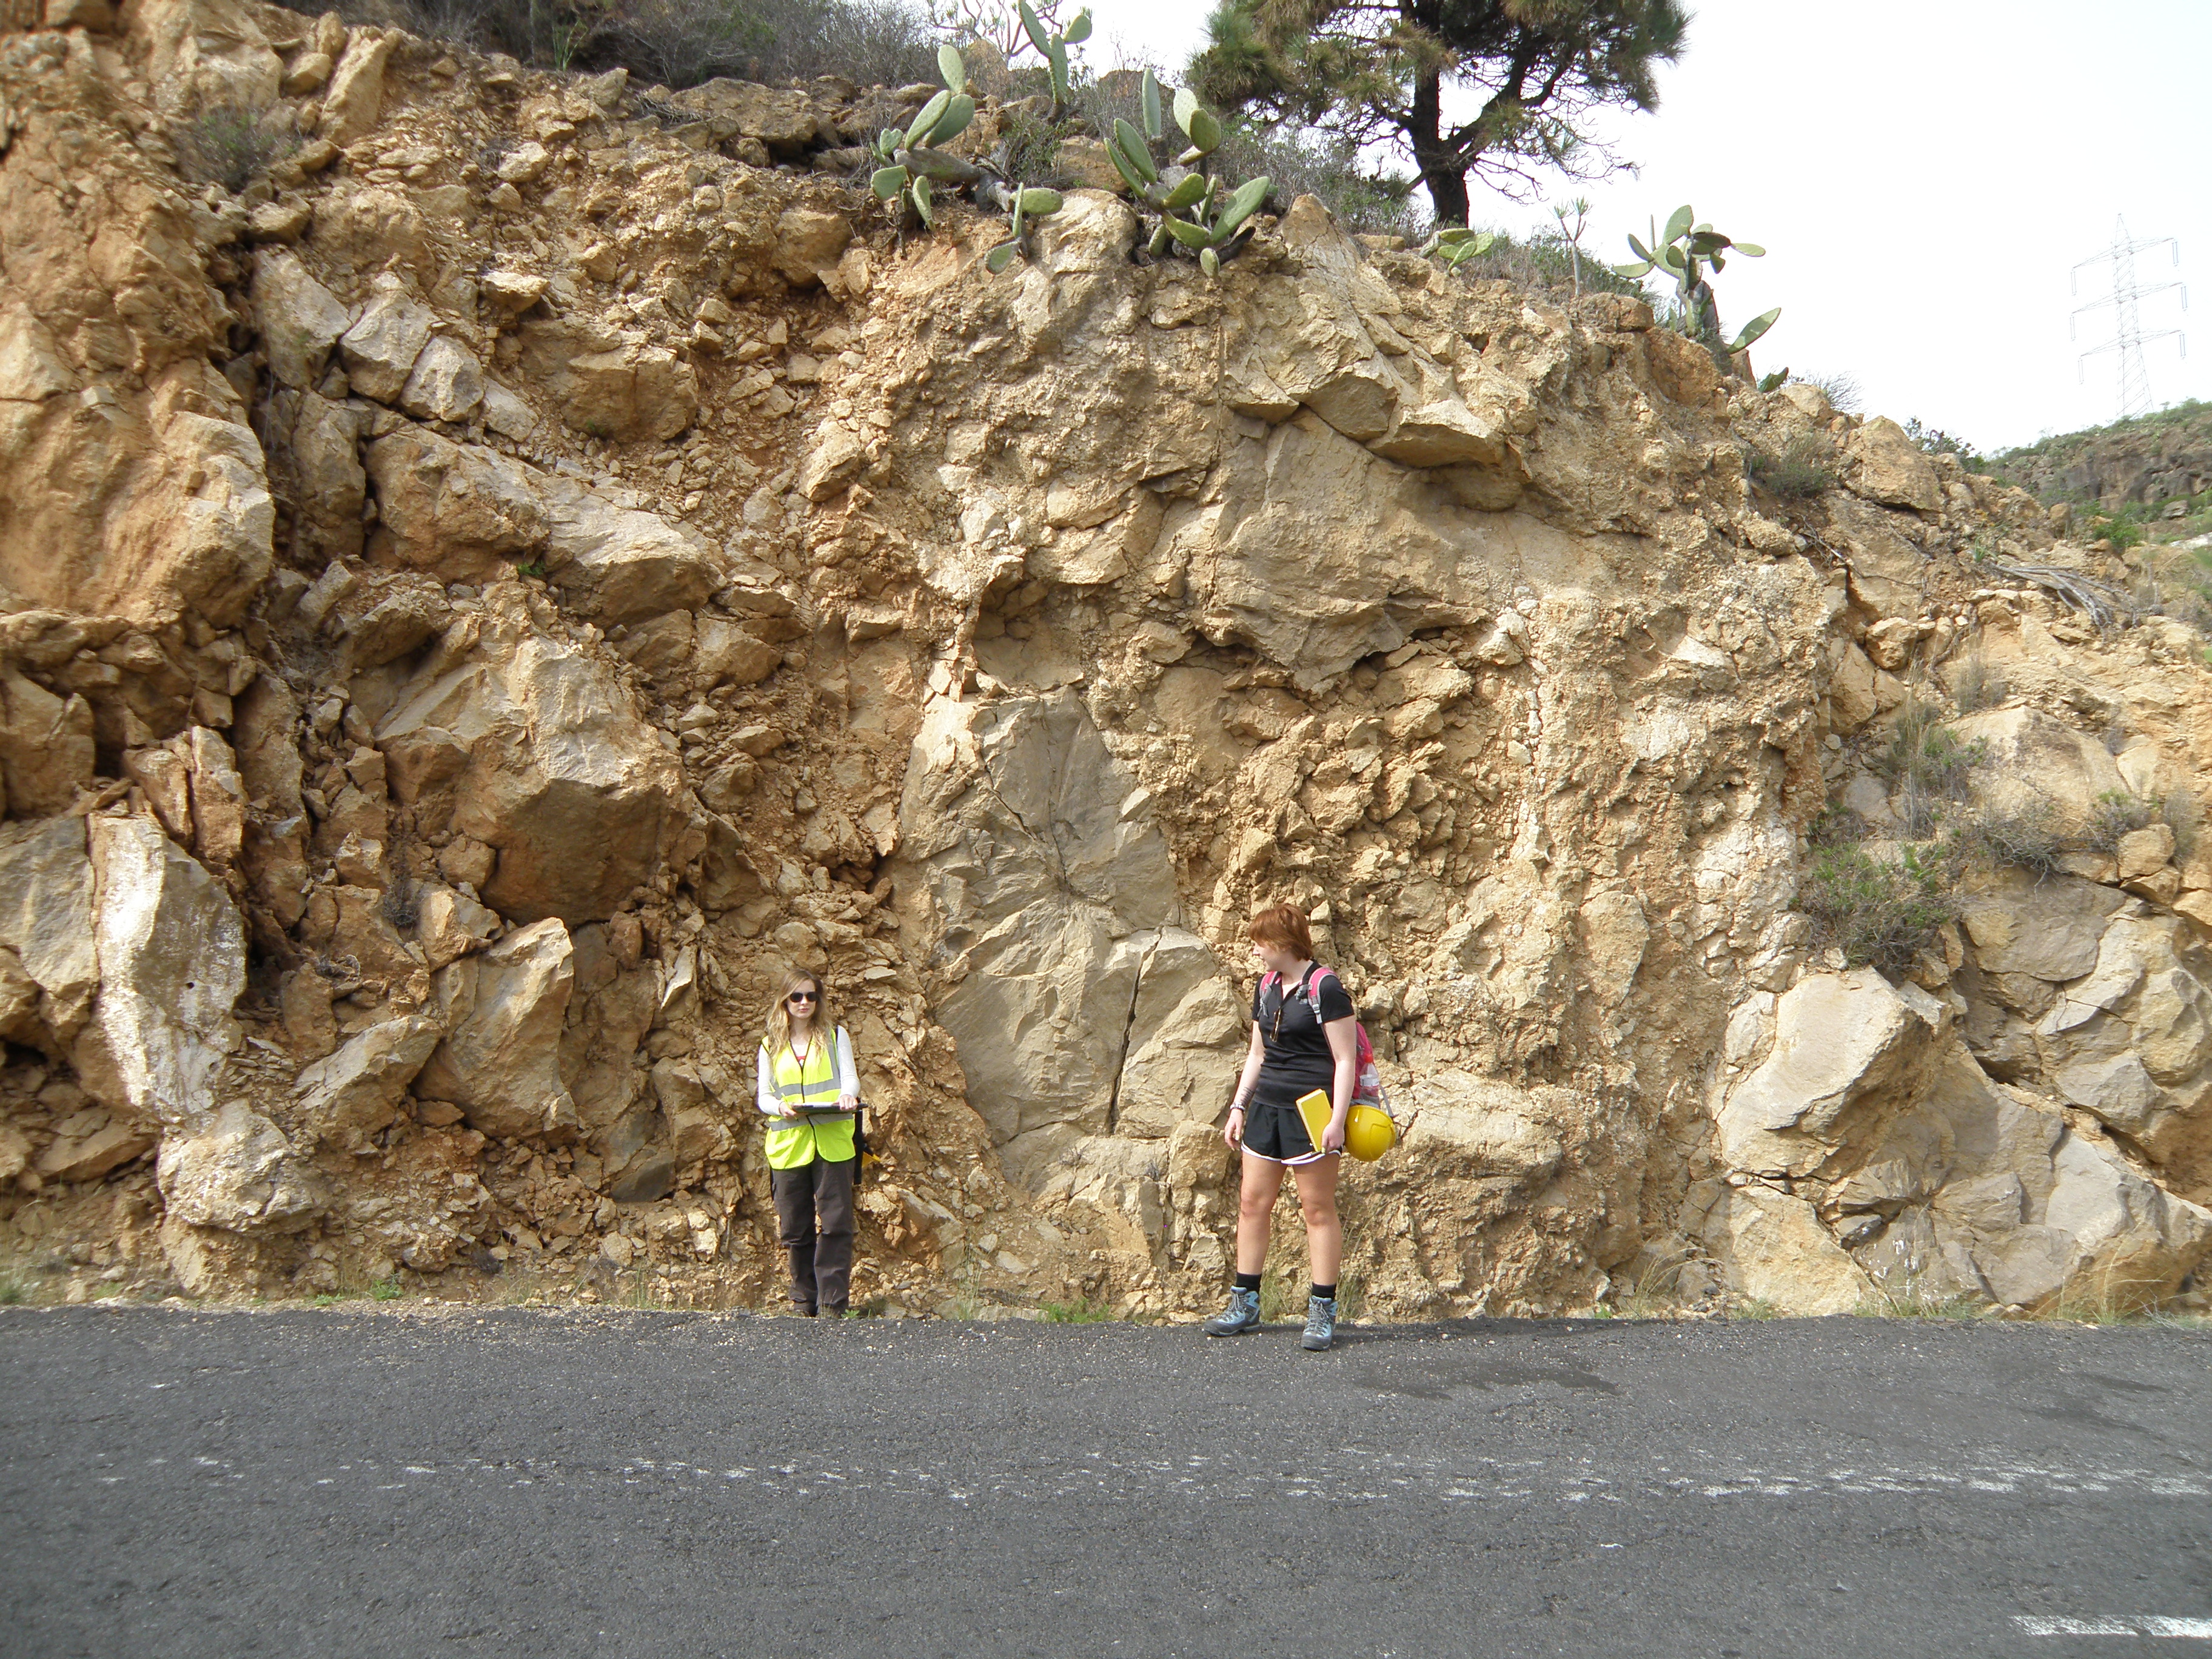
View of the contact between intervals A and B.
|
|
|
|
|
Your detailed description should enable you to interpret how this material was emplaced. |
|
| General view of the section at loc 2.4.3 | Close-ups of the outcrops | |
|
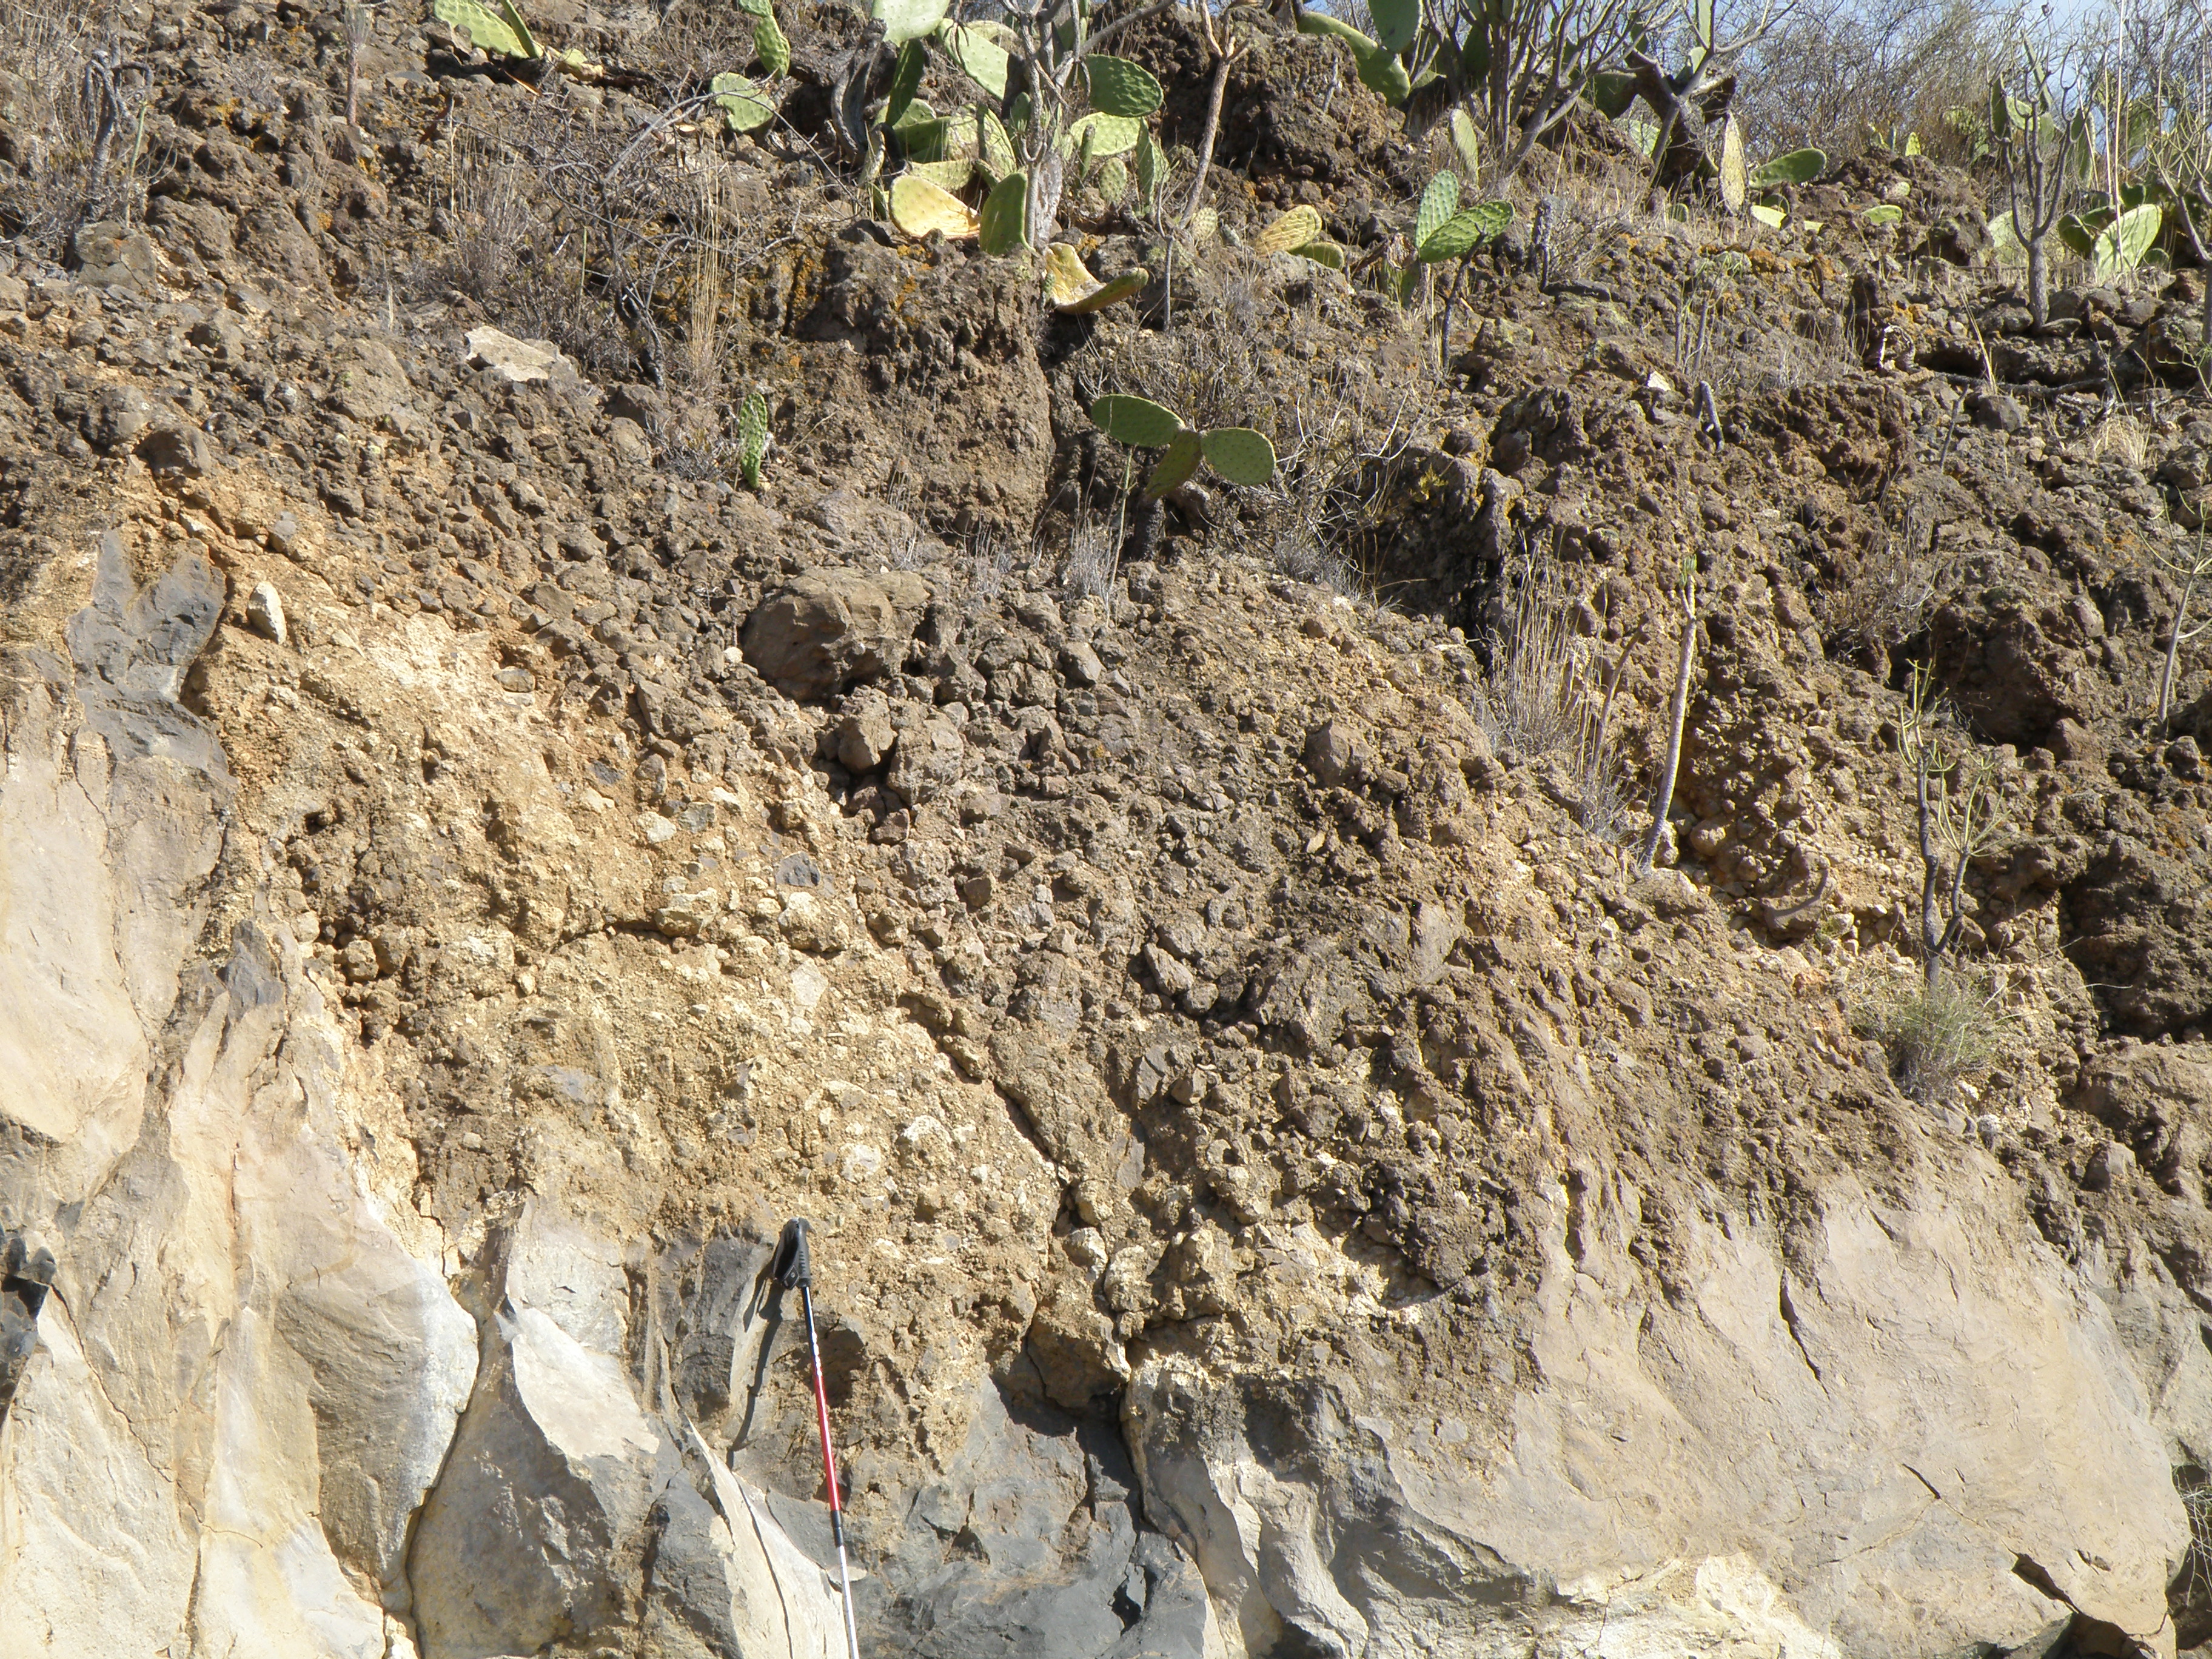
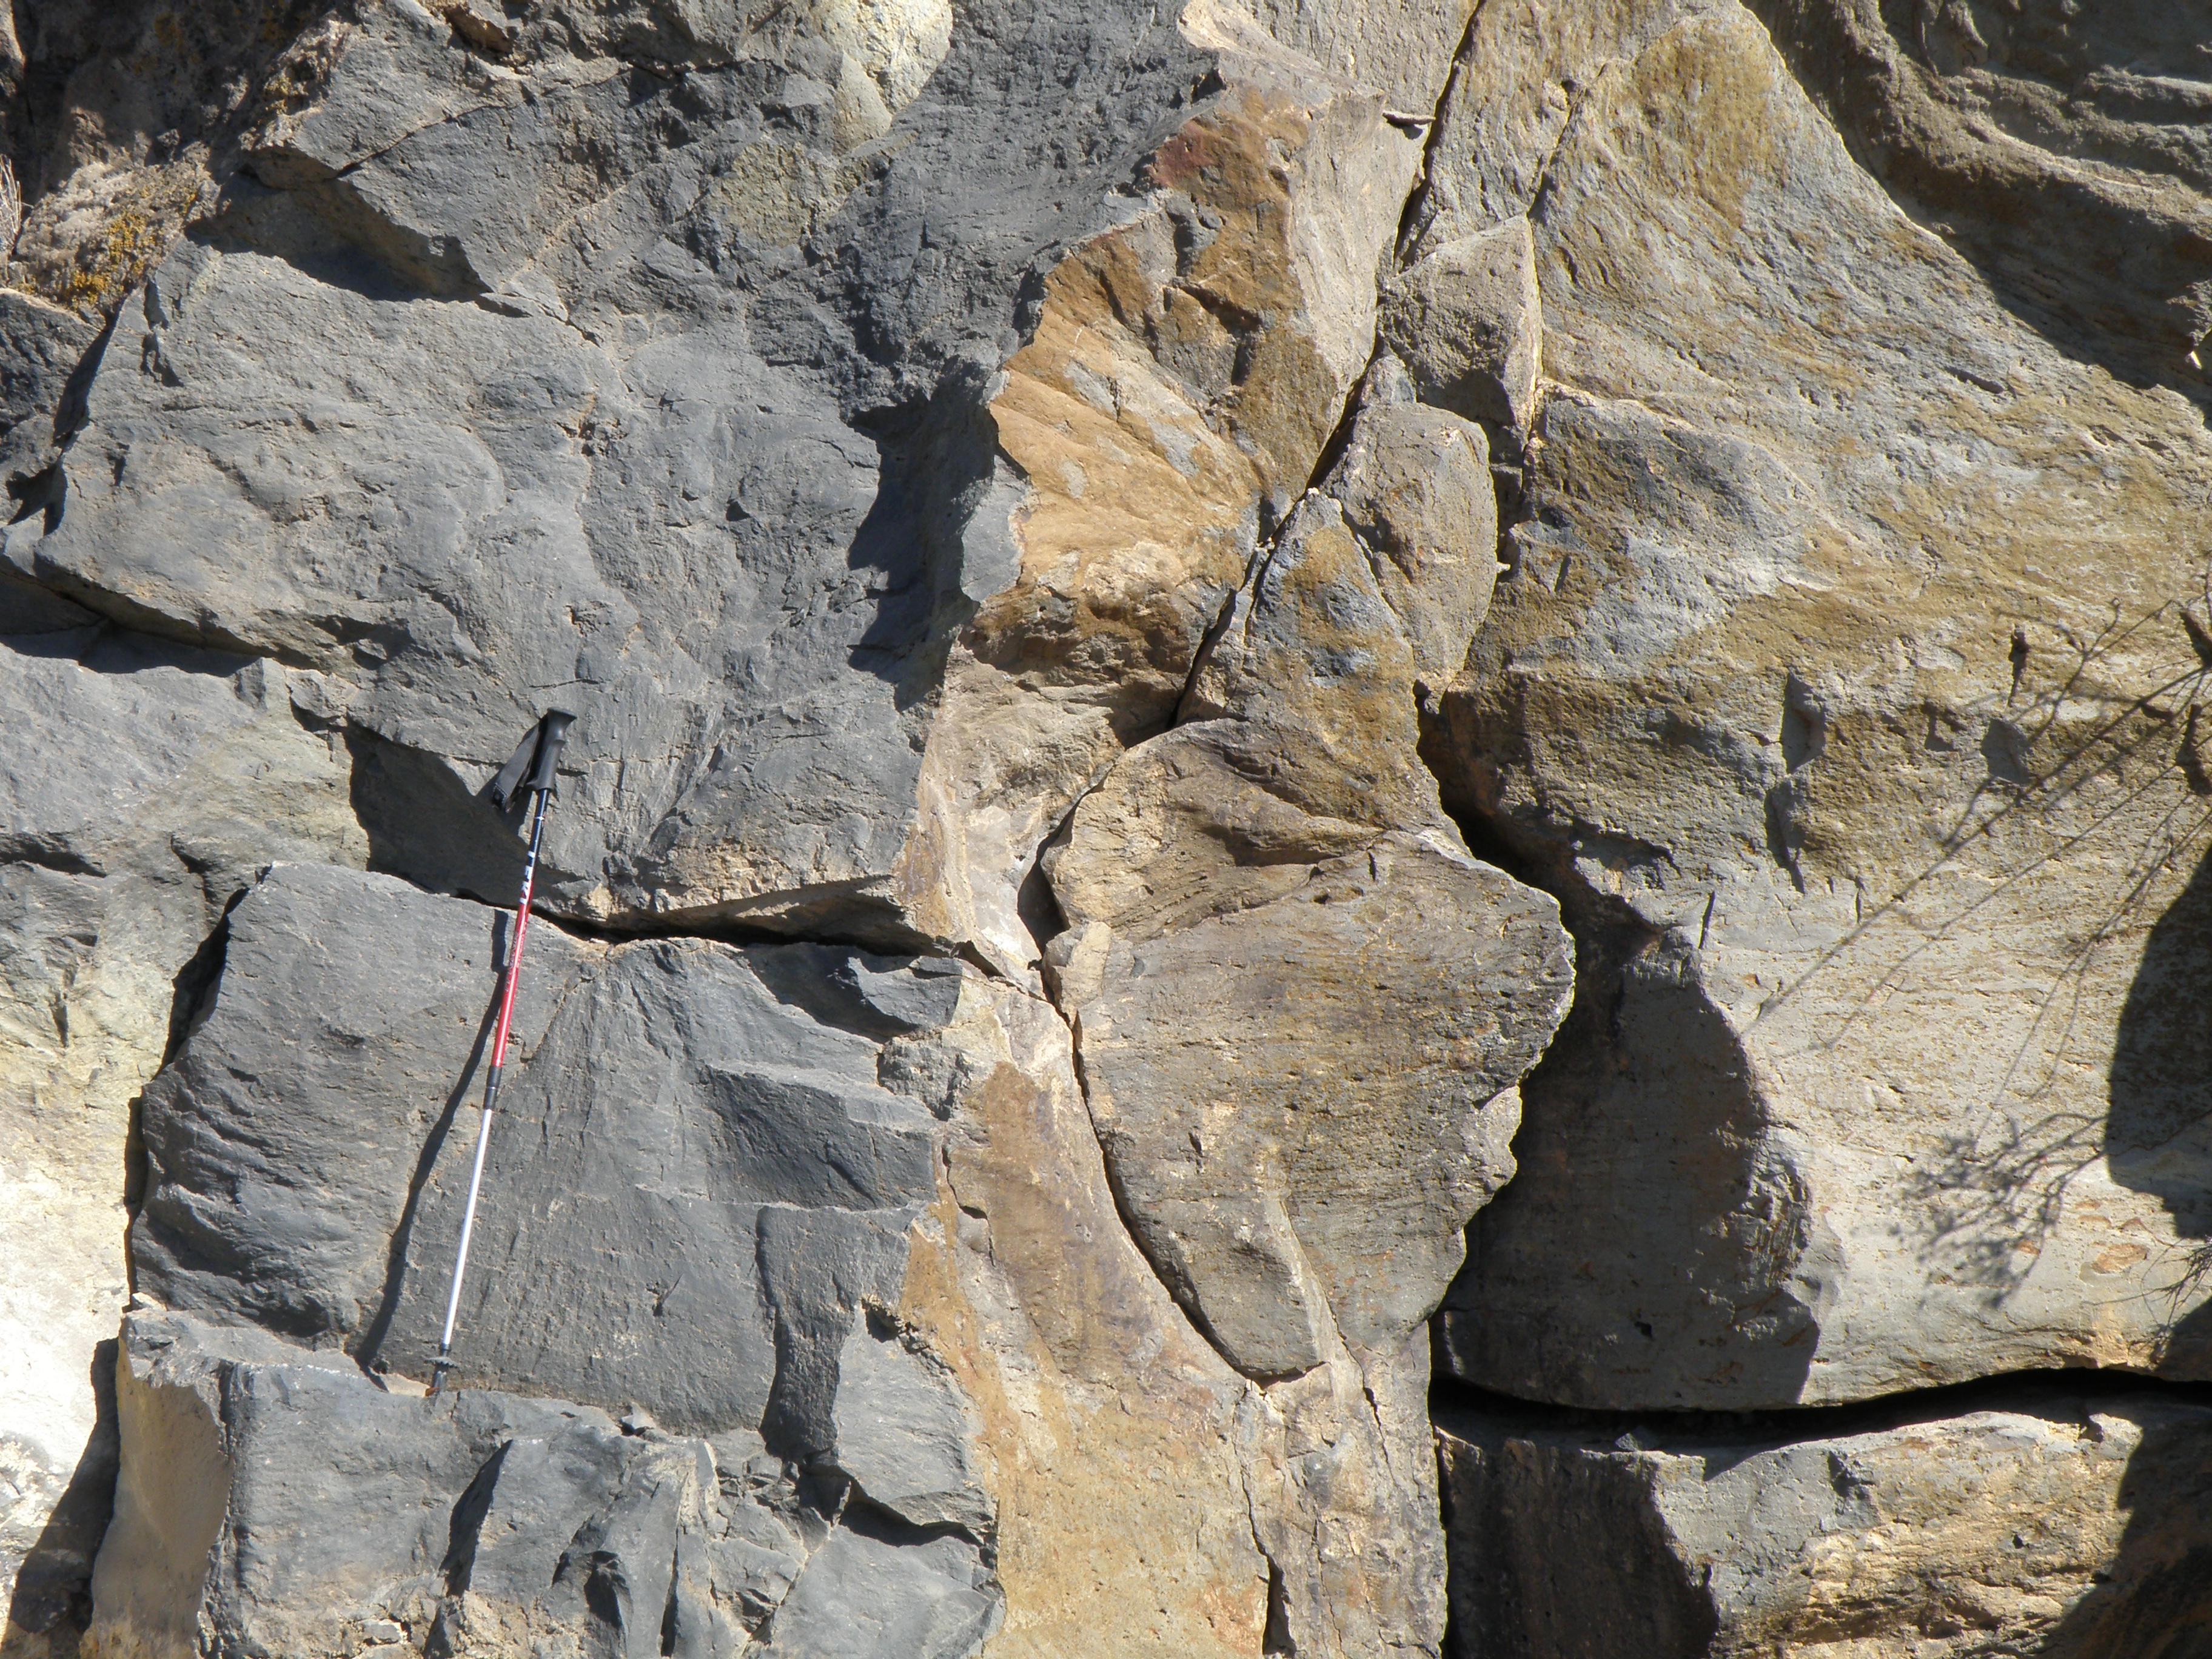
View of intervals B, above the road, and F, at the top of the outcrop; the intervals between are hidden by the wall and vegetation (including Opuntia - prickly pear cactus). |
Another view of interval B. This lithology is commonly carved out to make storage spaces, though the purpose of this one is unknown. |
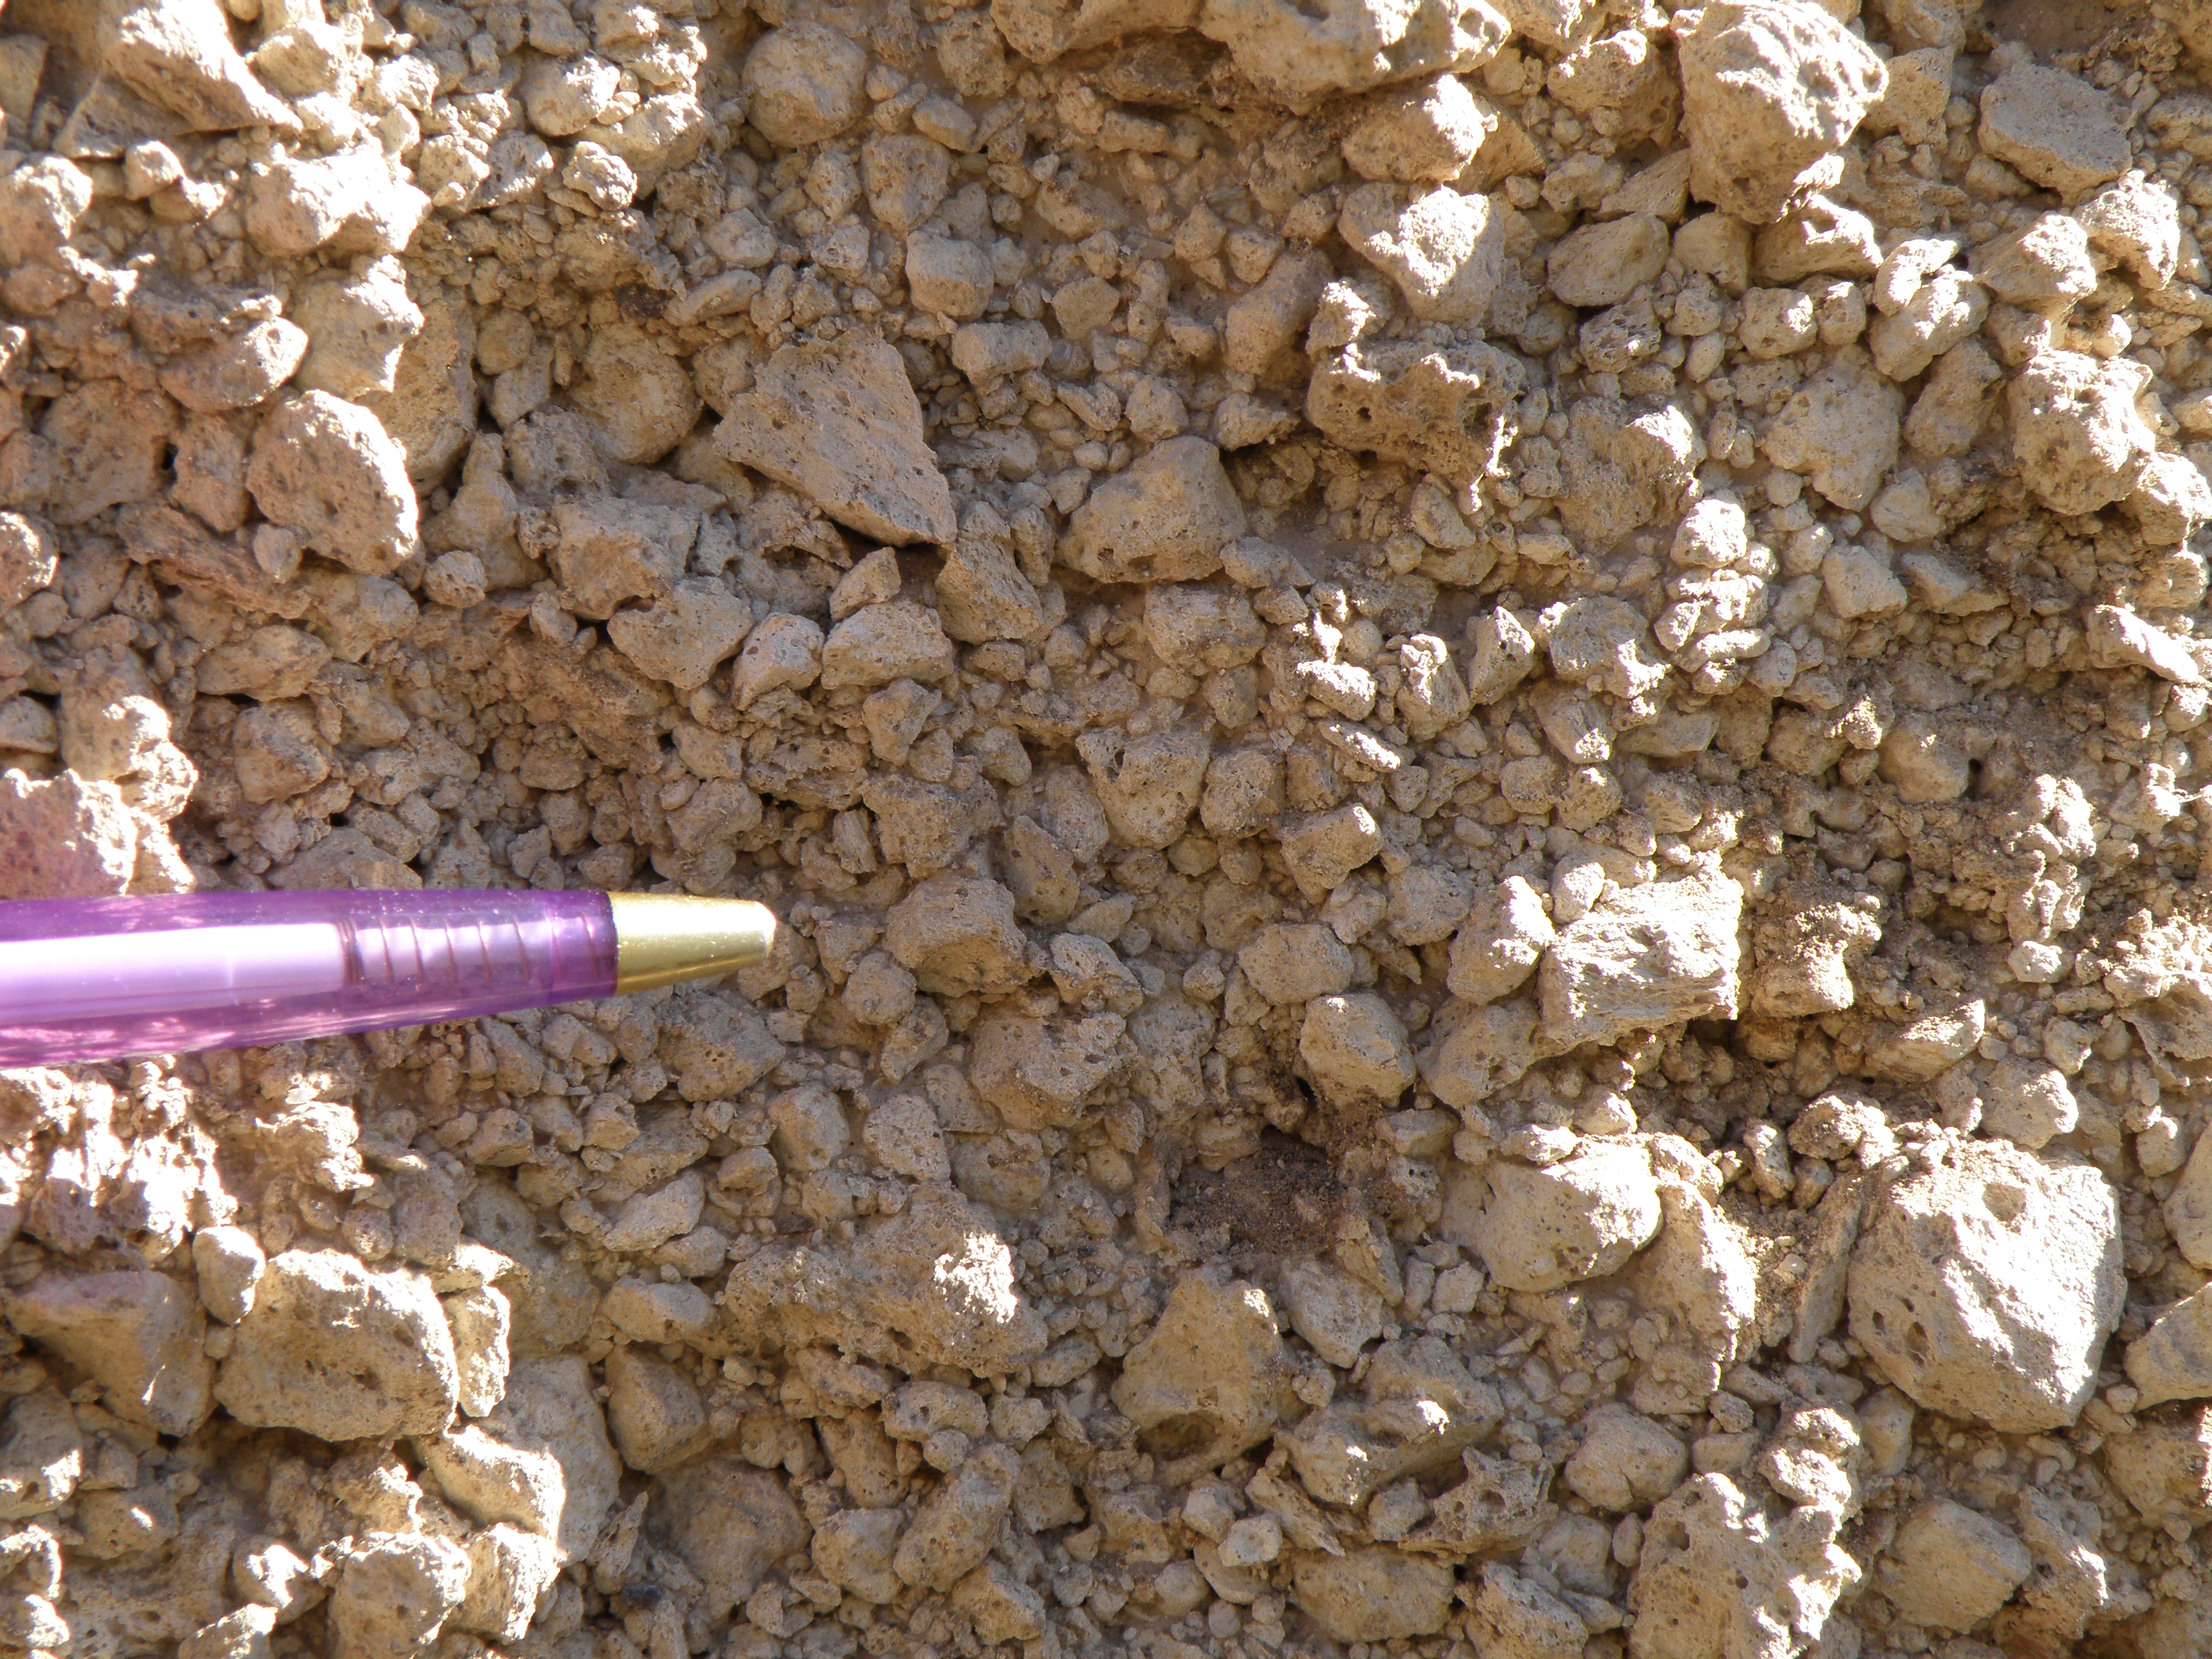
A close-up of the outcrop in Figure 14, ~ 1 m above the road. |
| General view of the section between locs 2.4.4 and 2.4.5 | Close-ups of the outcrops from loc 2.4.4 to the km 64 post | |
|
This is a view down the section from loc 2.4.5 to loc 2.4.4. |
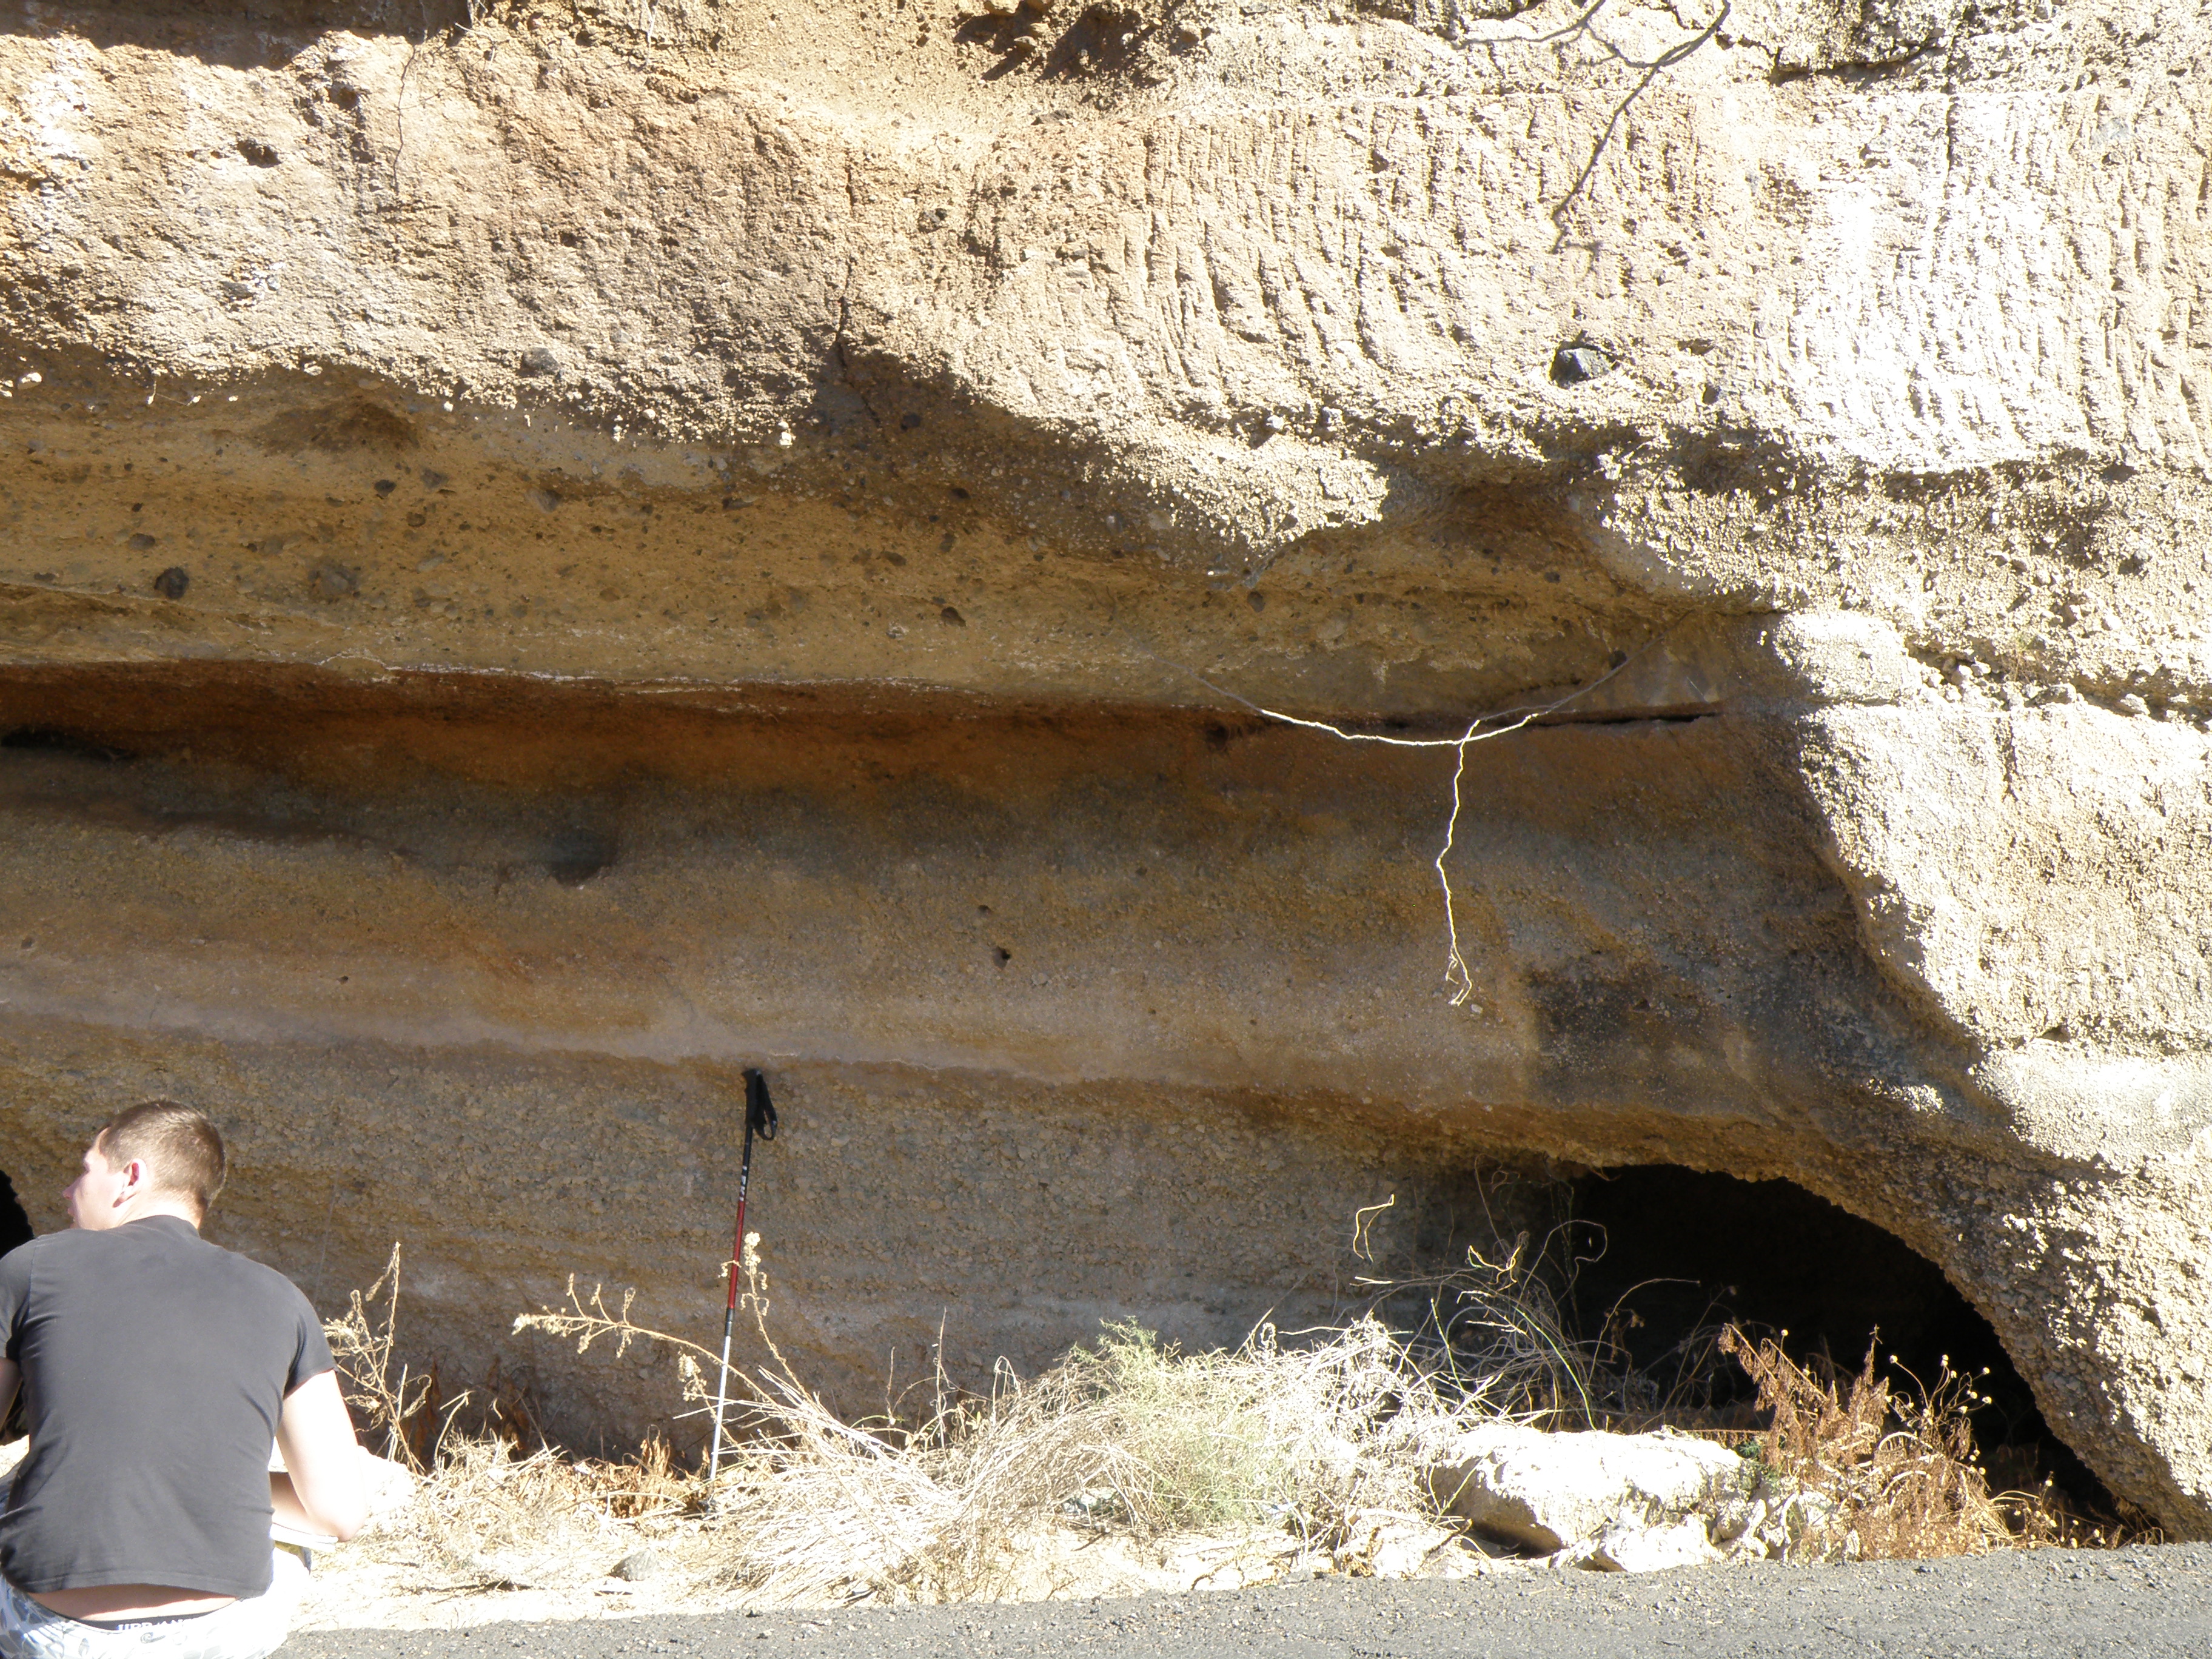
This is the left side of the alcove seen on the left side of Figure 16. |
The right side of the alcove in Figure 17. The roof of the alcove is the base of interval C.
|
|
Detail of Figure 18. |
The base of interval C is at neck level of the two geologists. The overhanging base of D is in shadow, just above their heads. |
|
| General view of the section at loc 2.4.5 | Close-ups of the outcrops | |
|
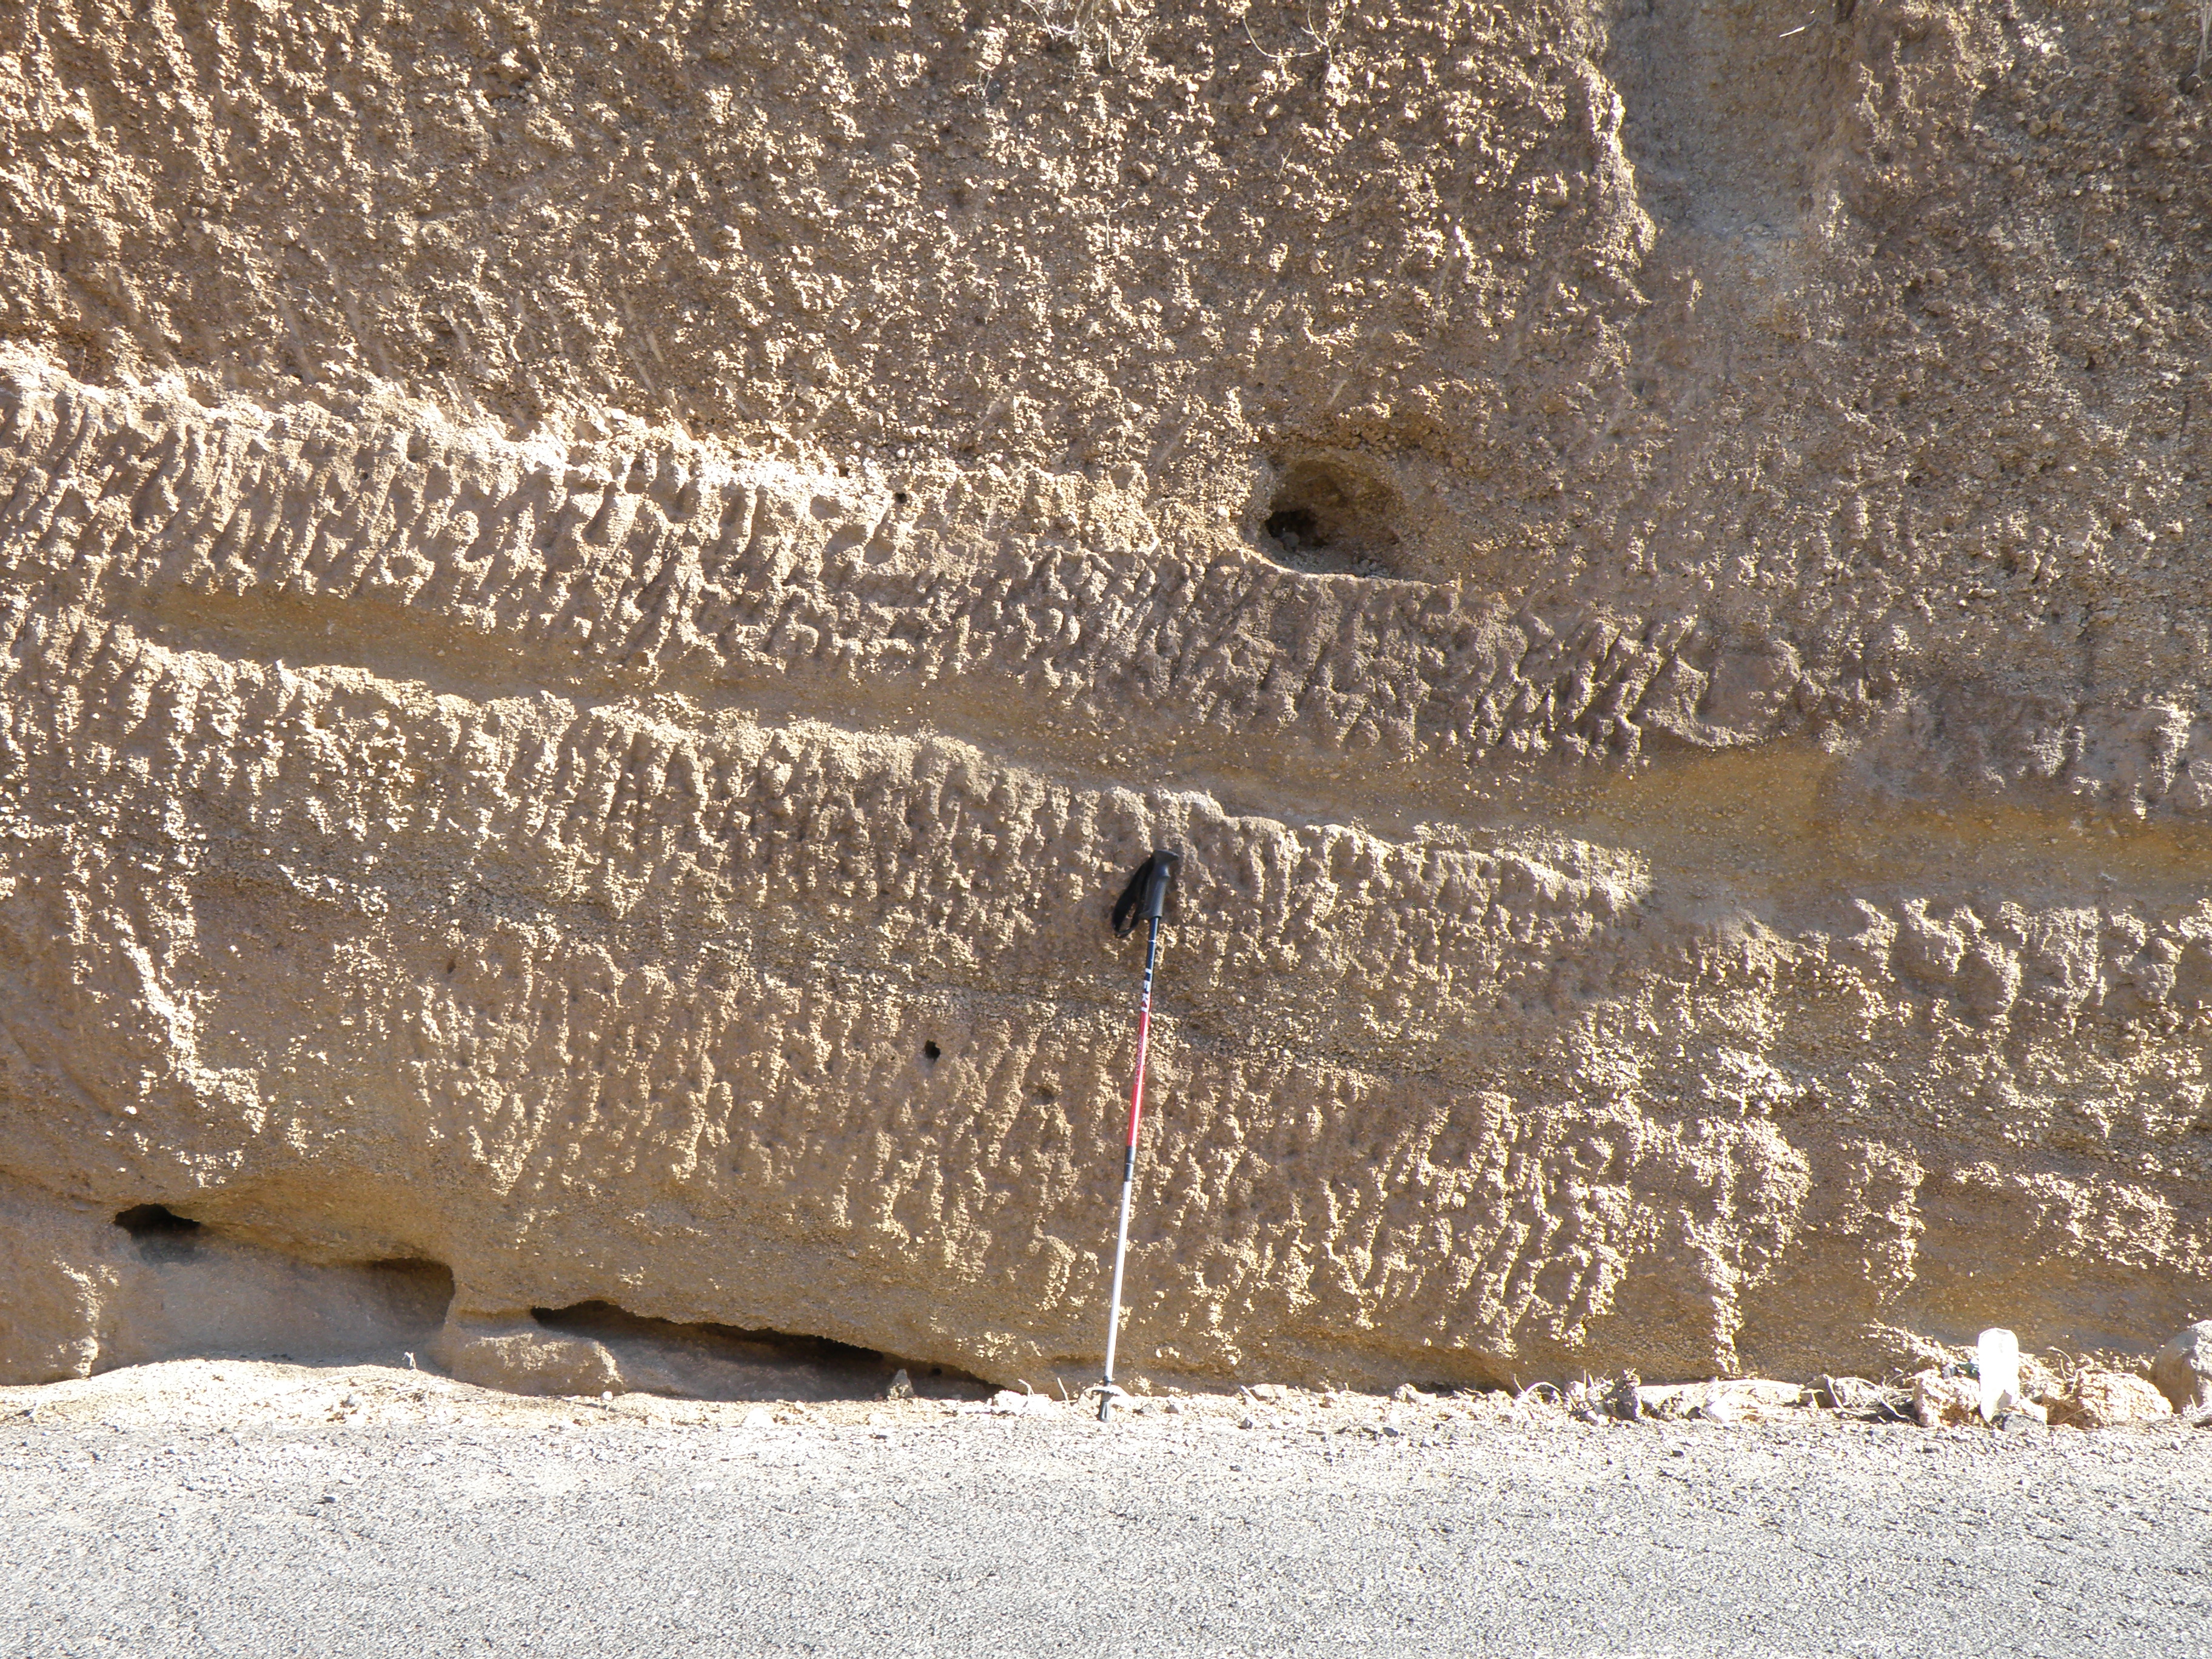
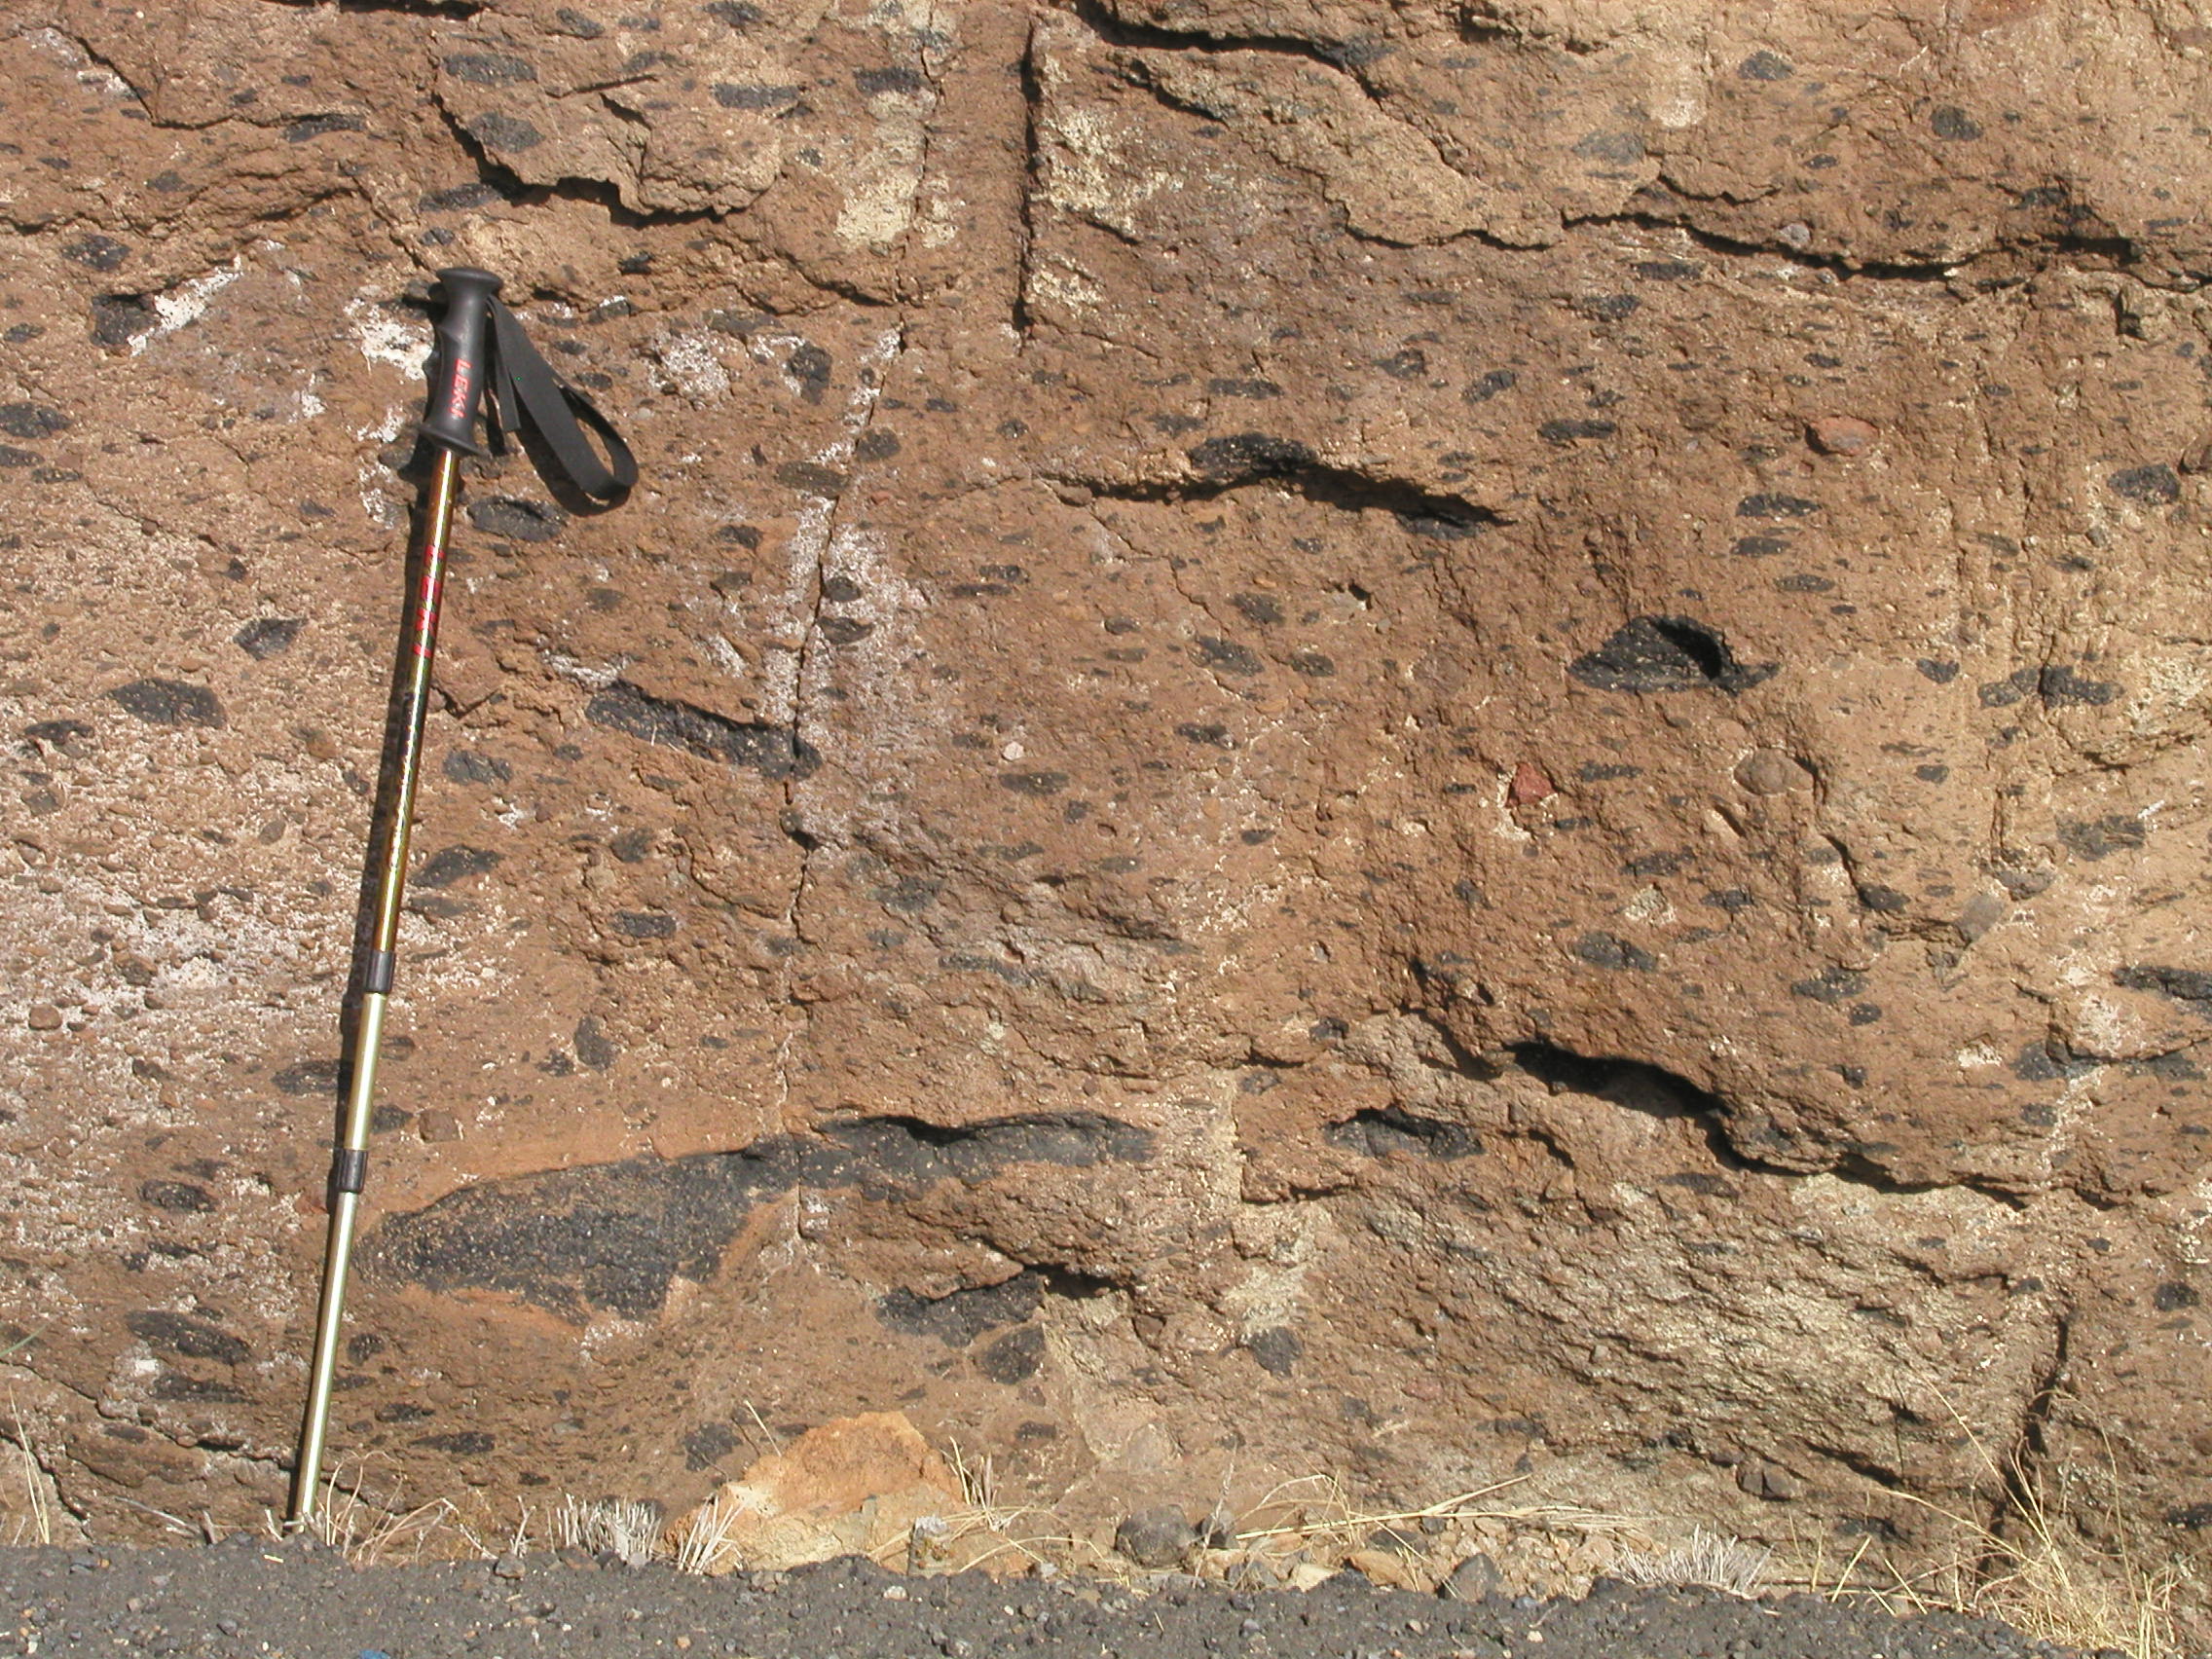
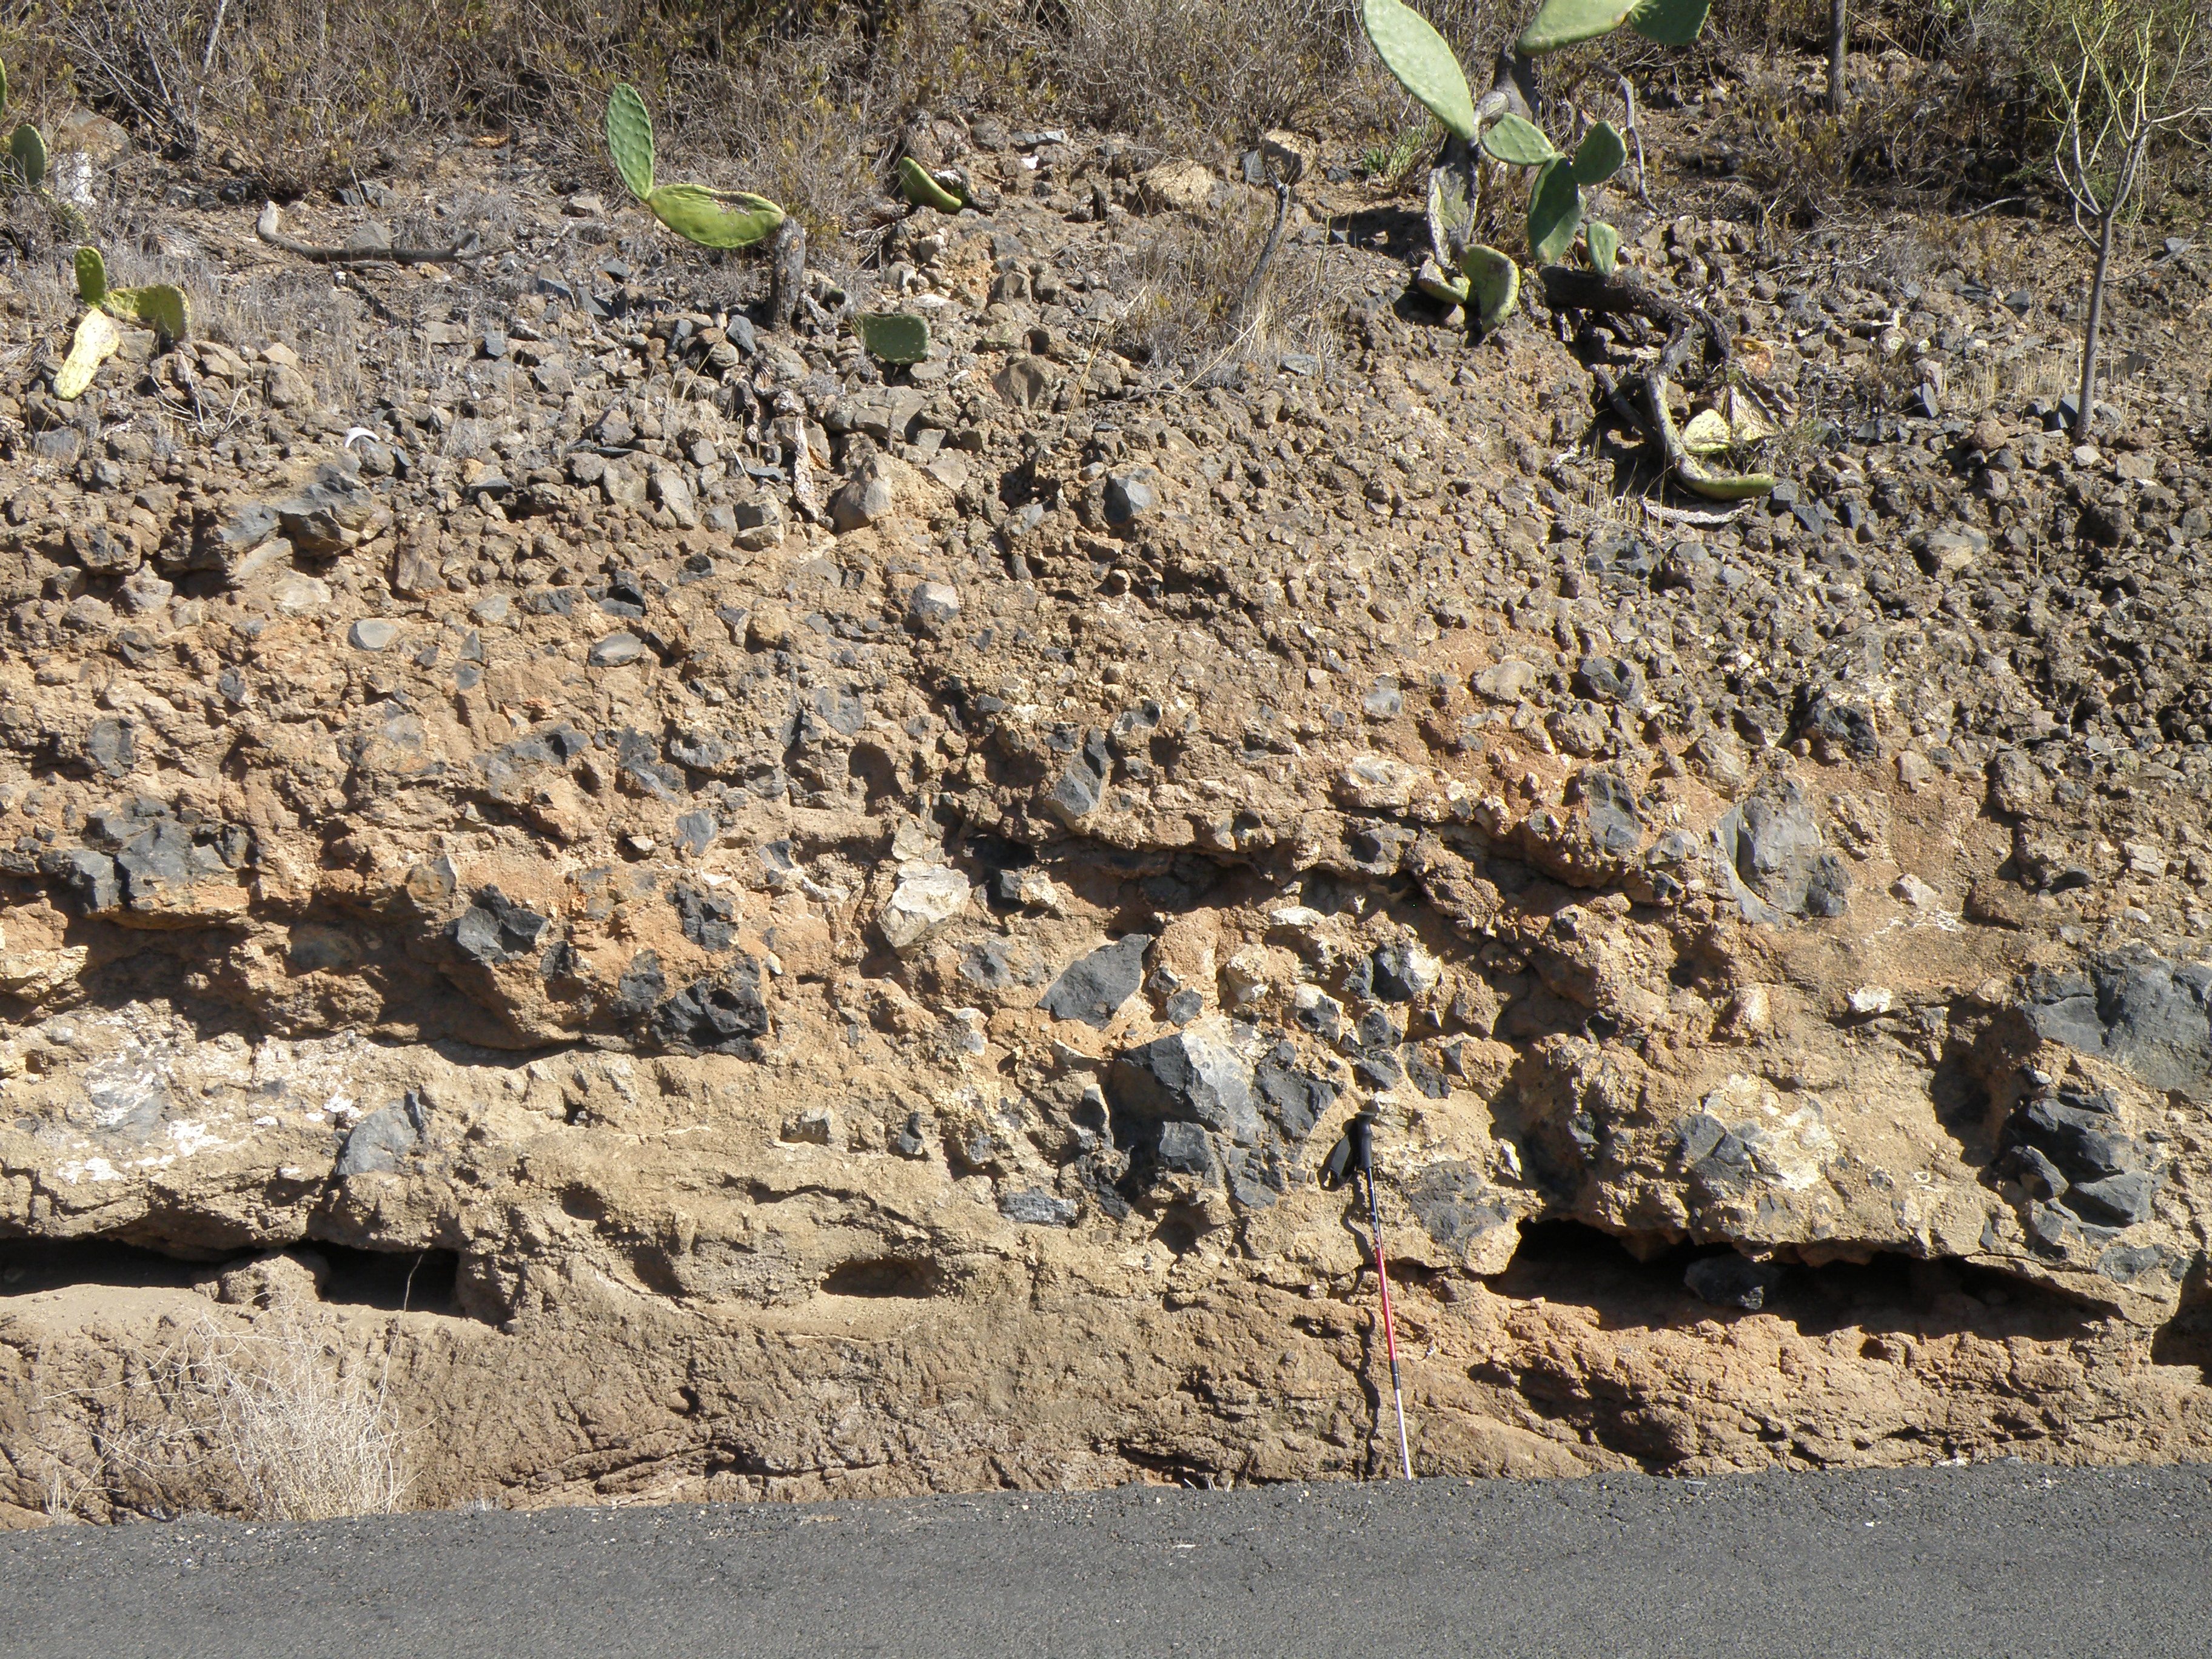
Interval C is seen at the base of the outcrop on the left. Interval D forms most of the outcrop. The base of E is difficult to see in this view: it is roughly at the level of the base of the electricity pole. |
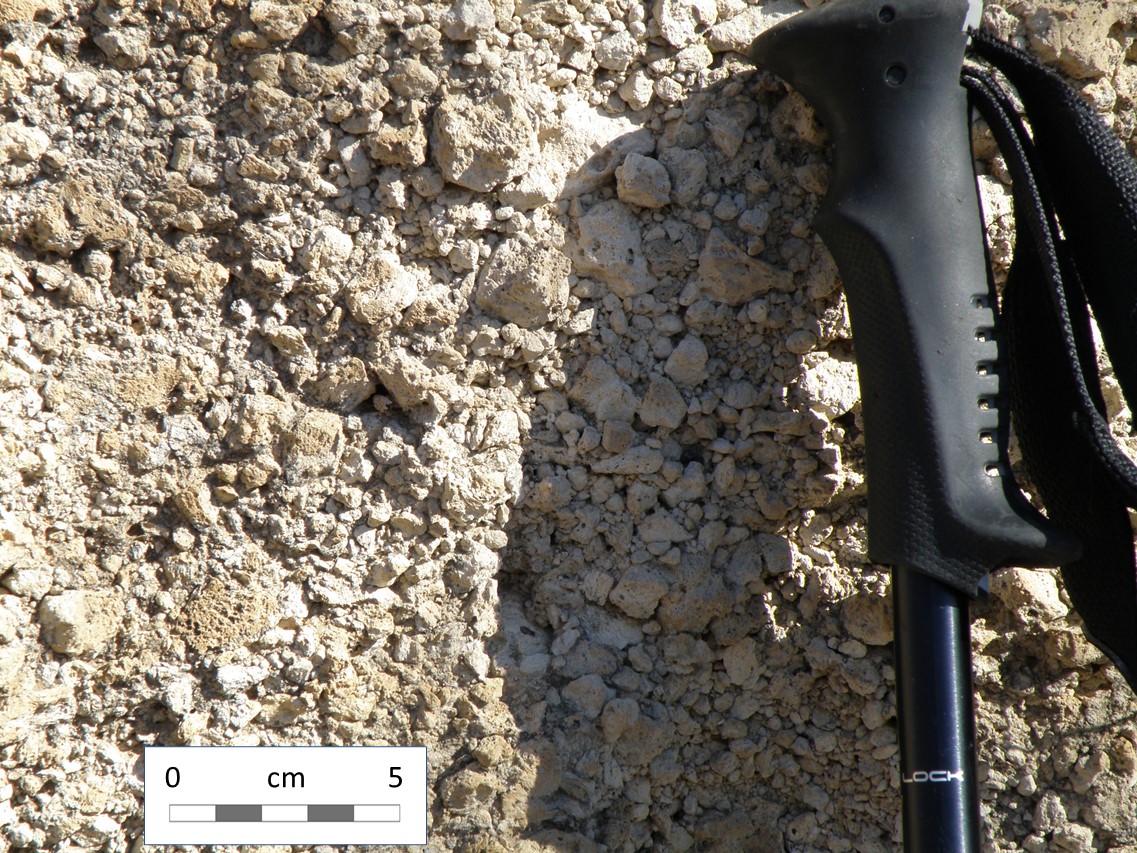
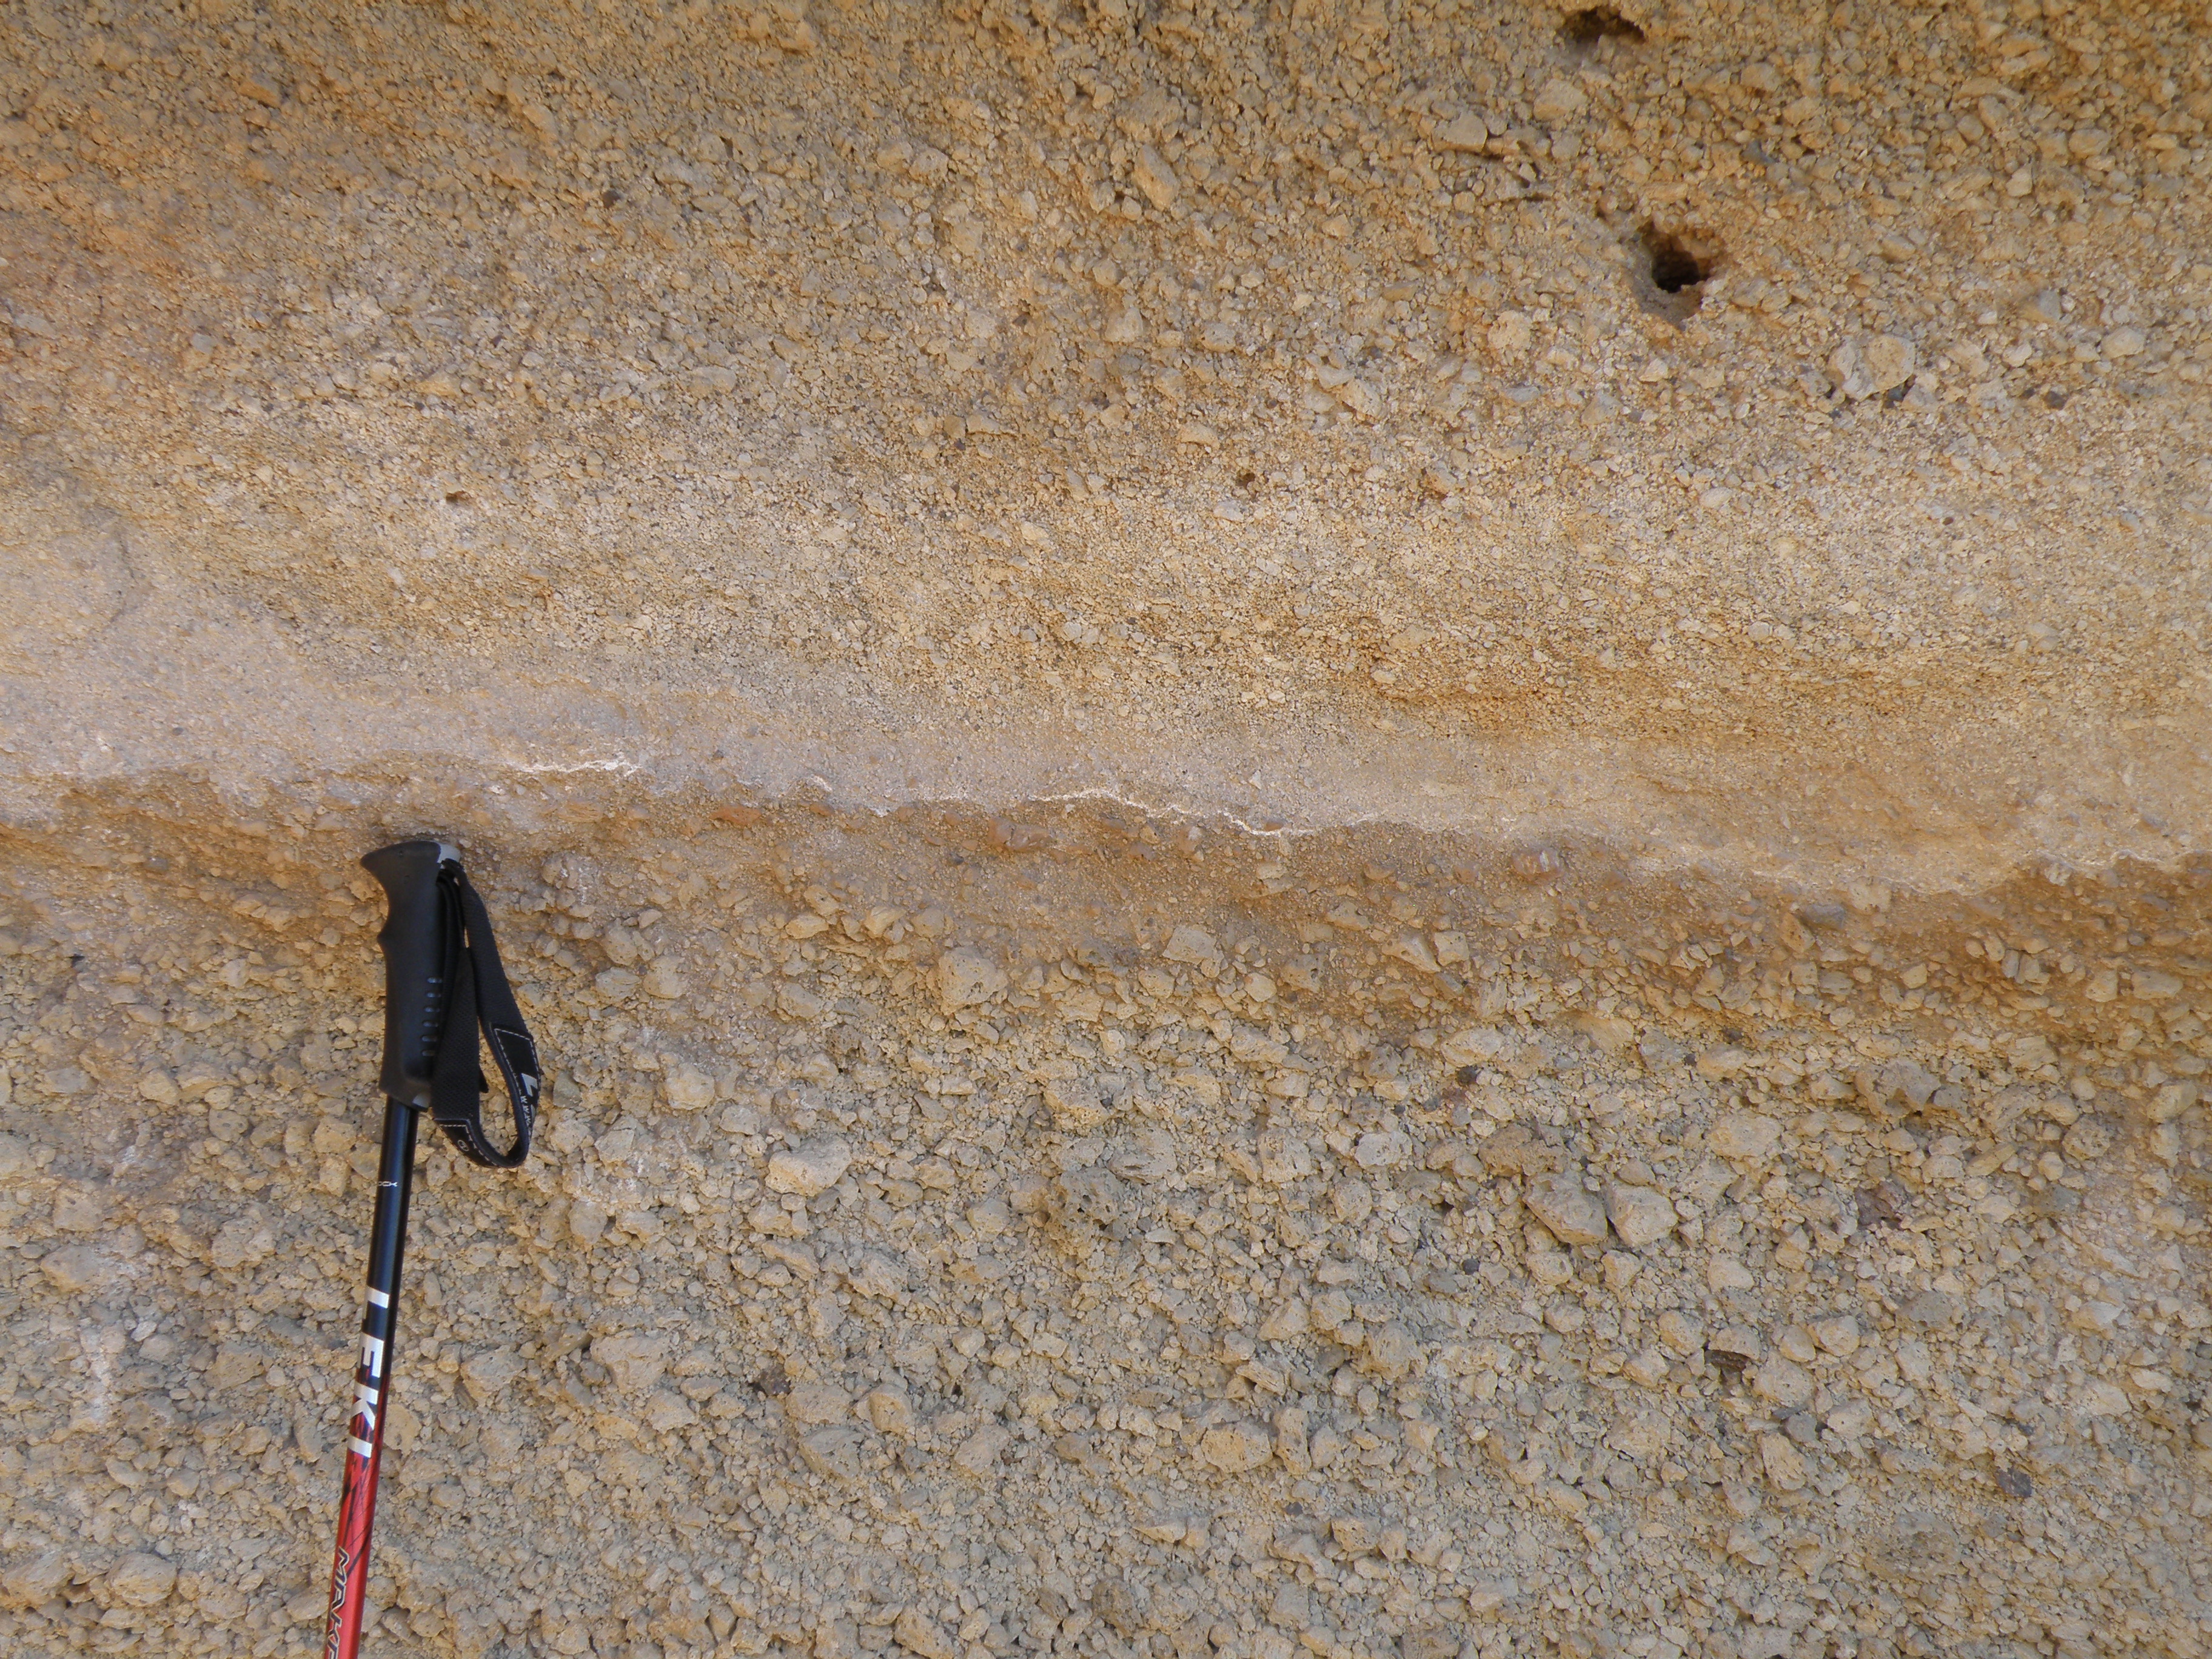
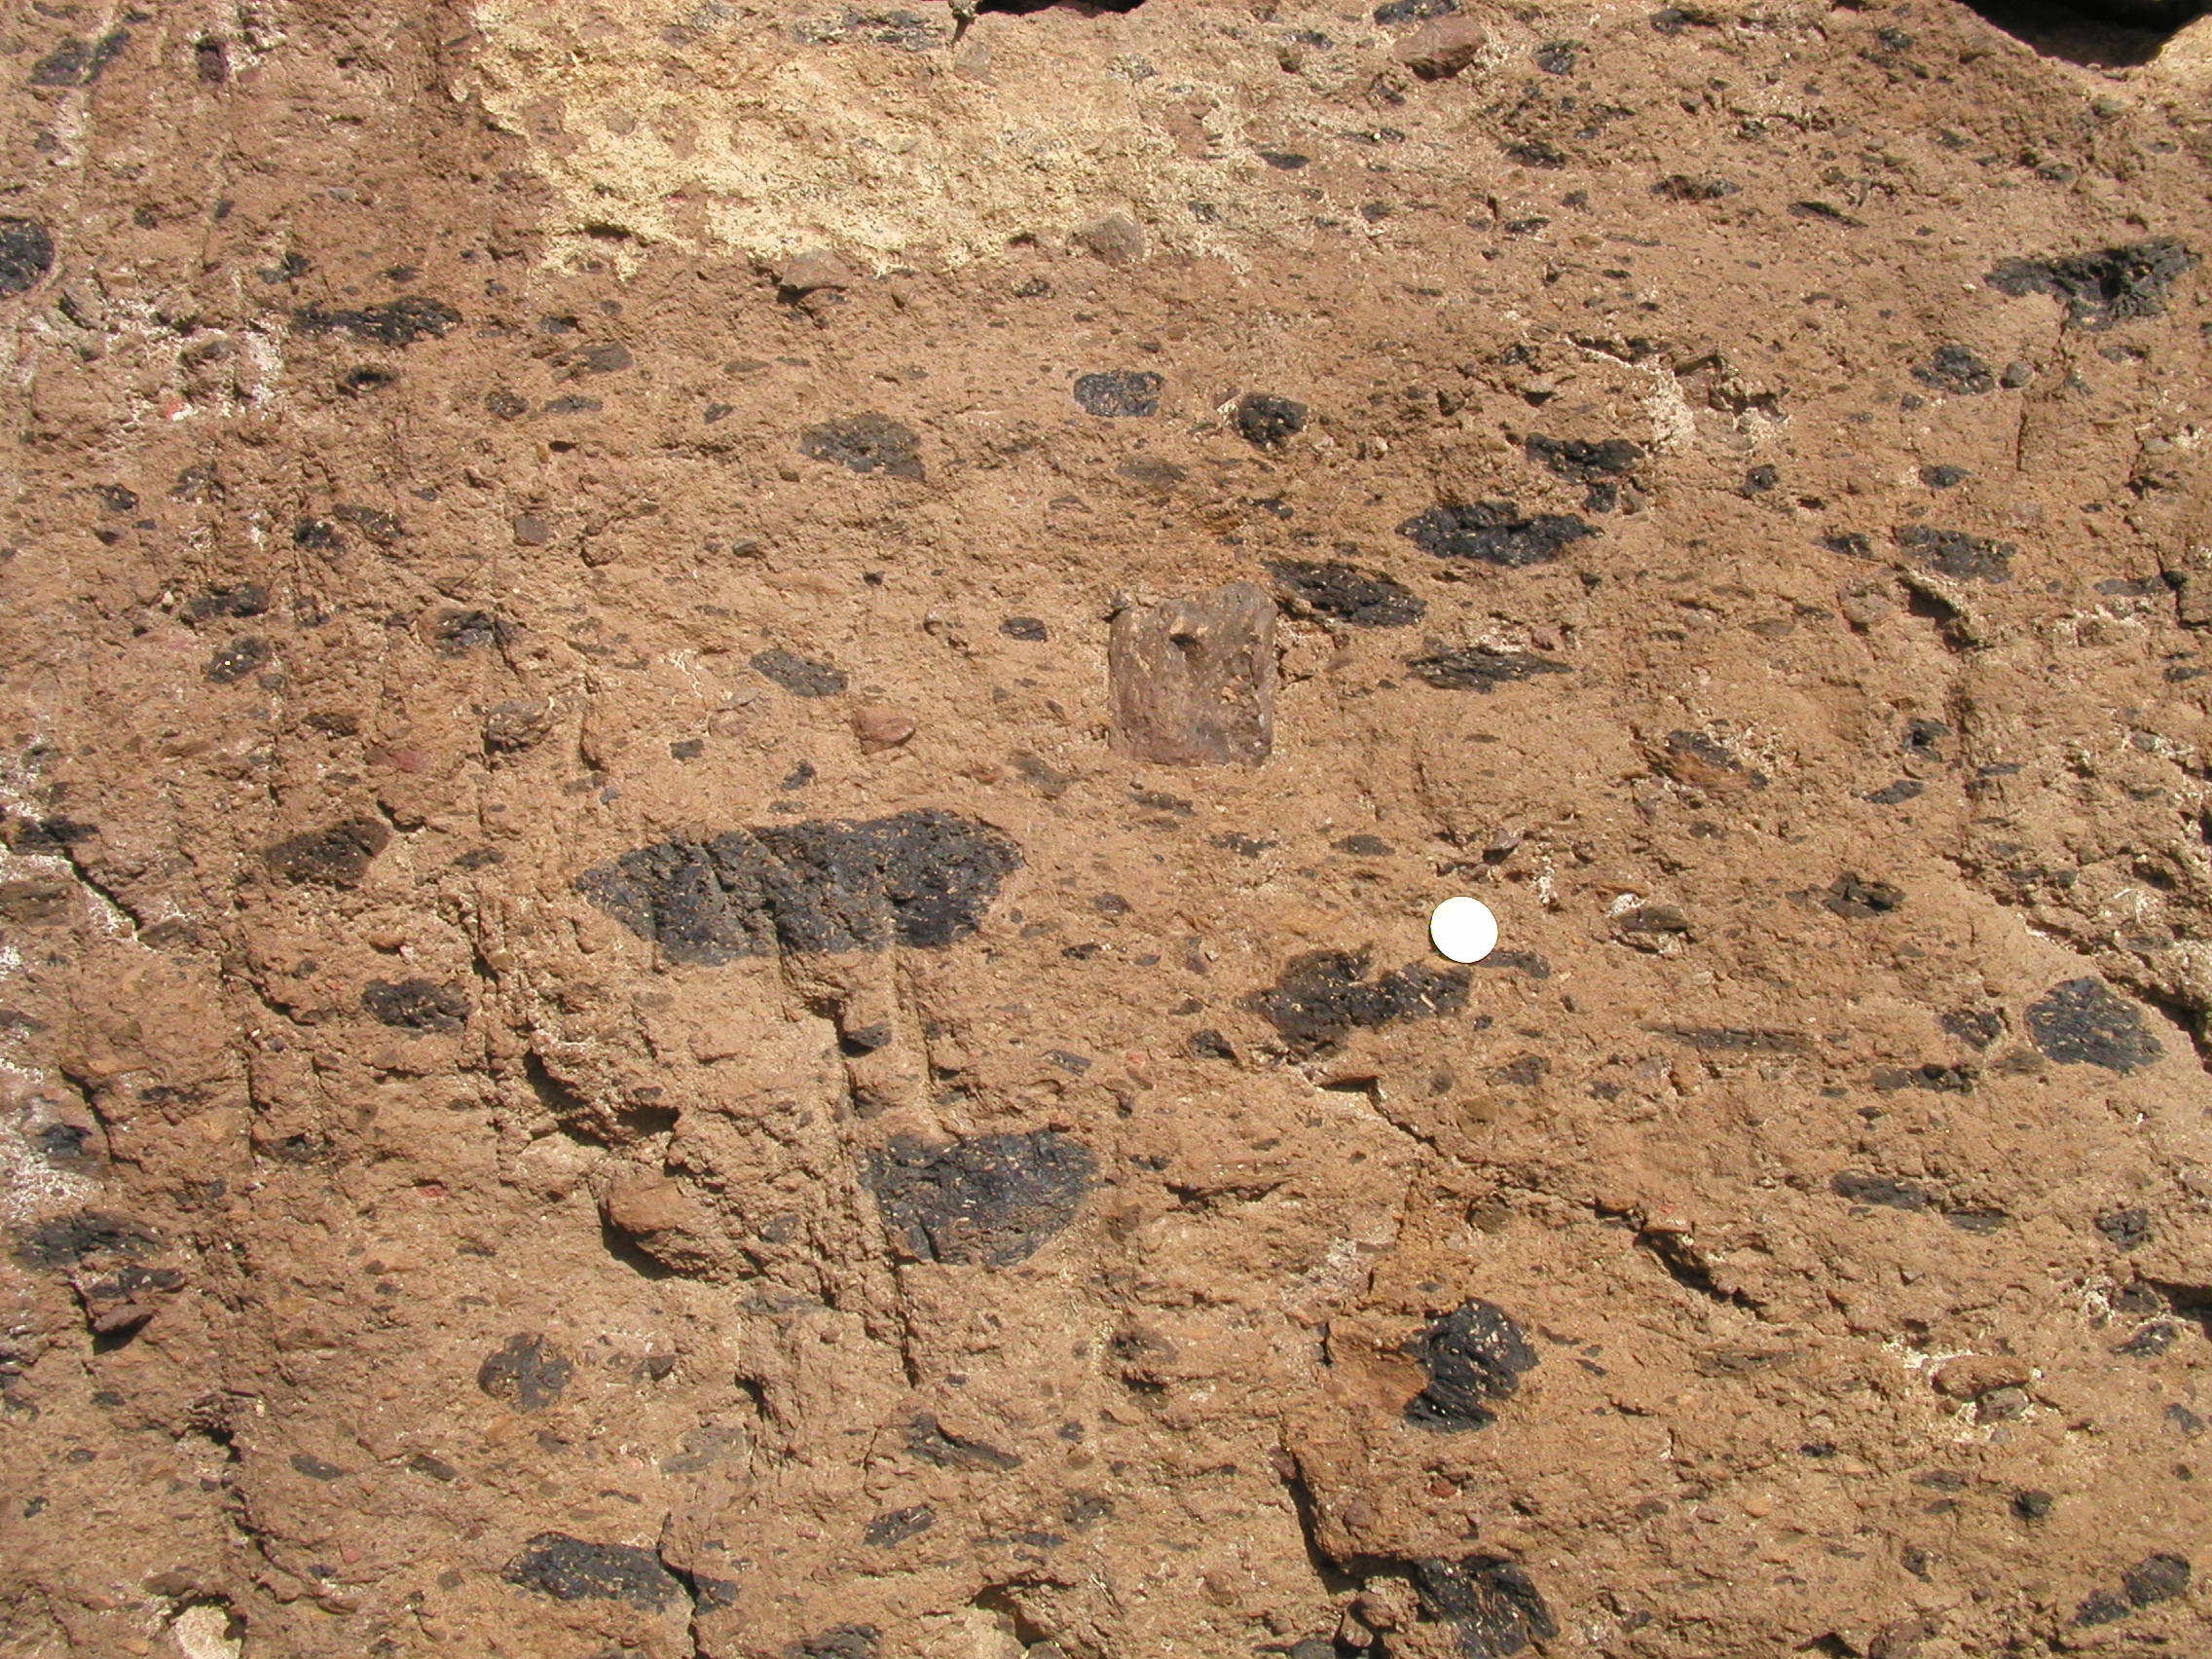
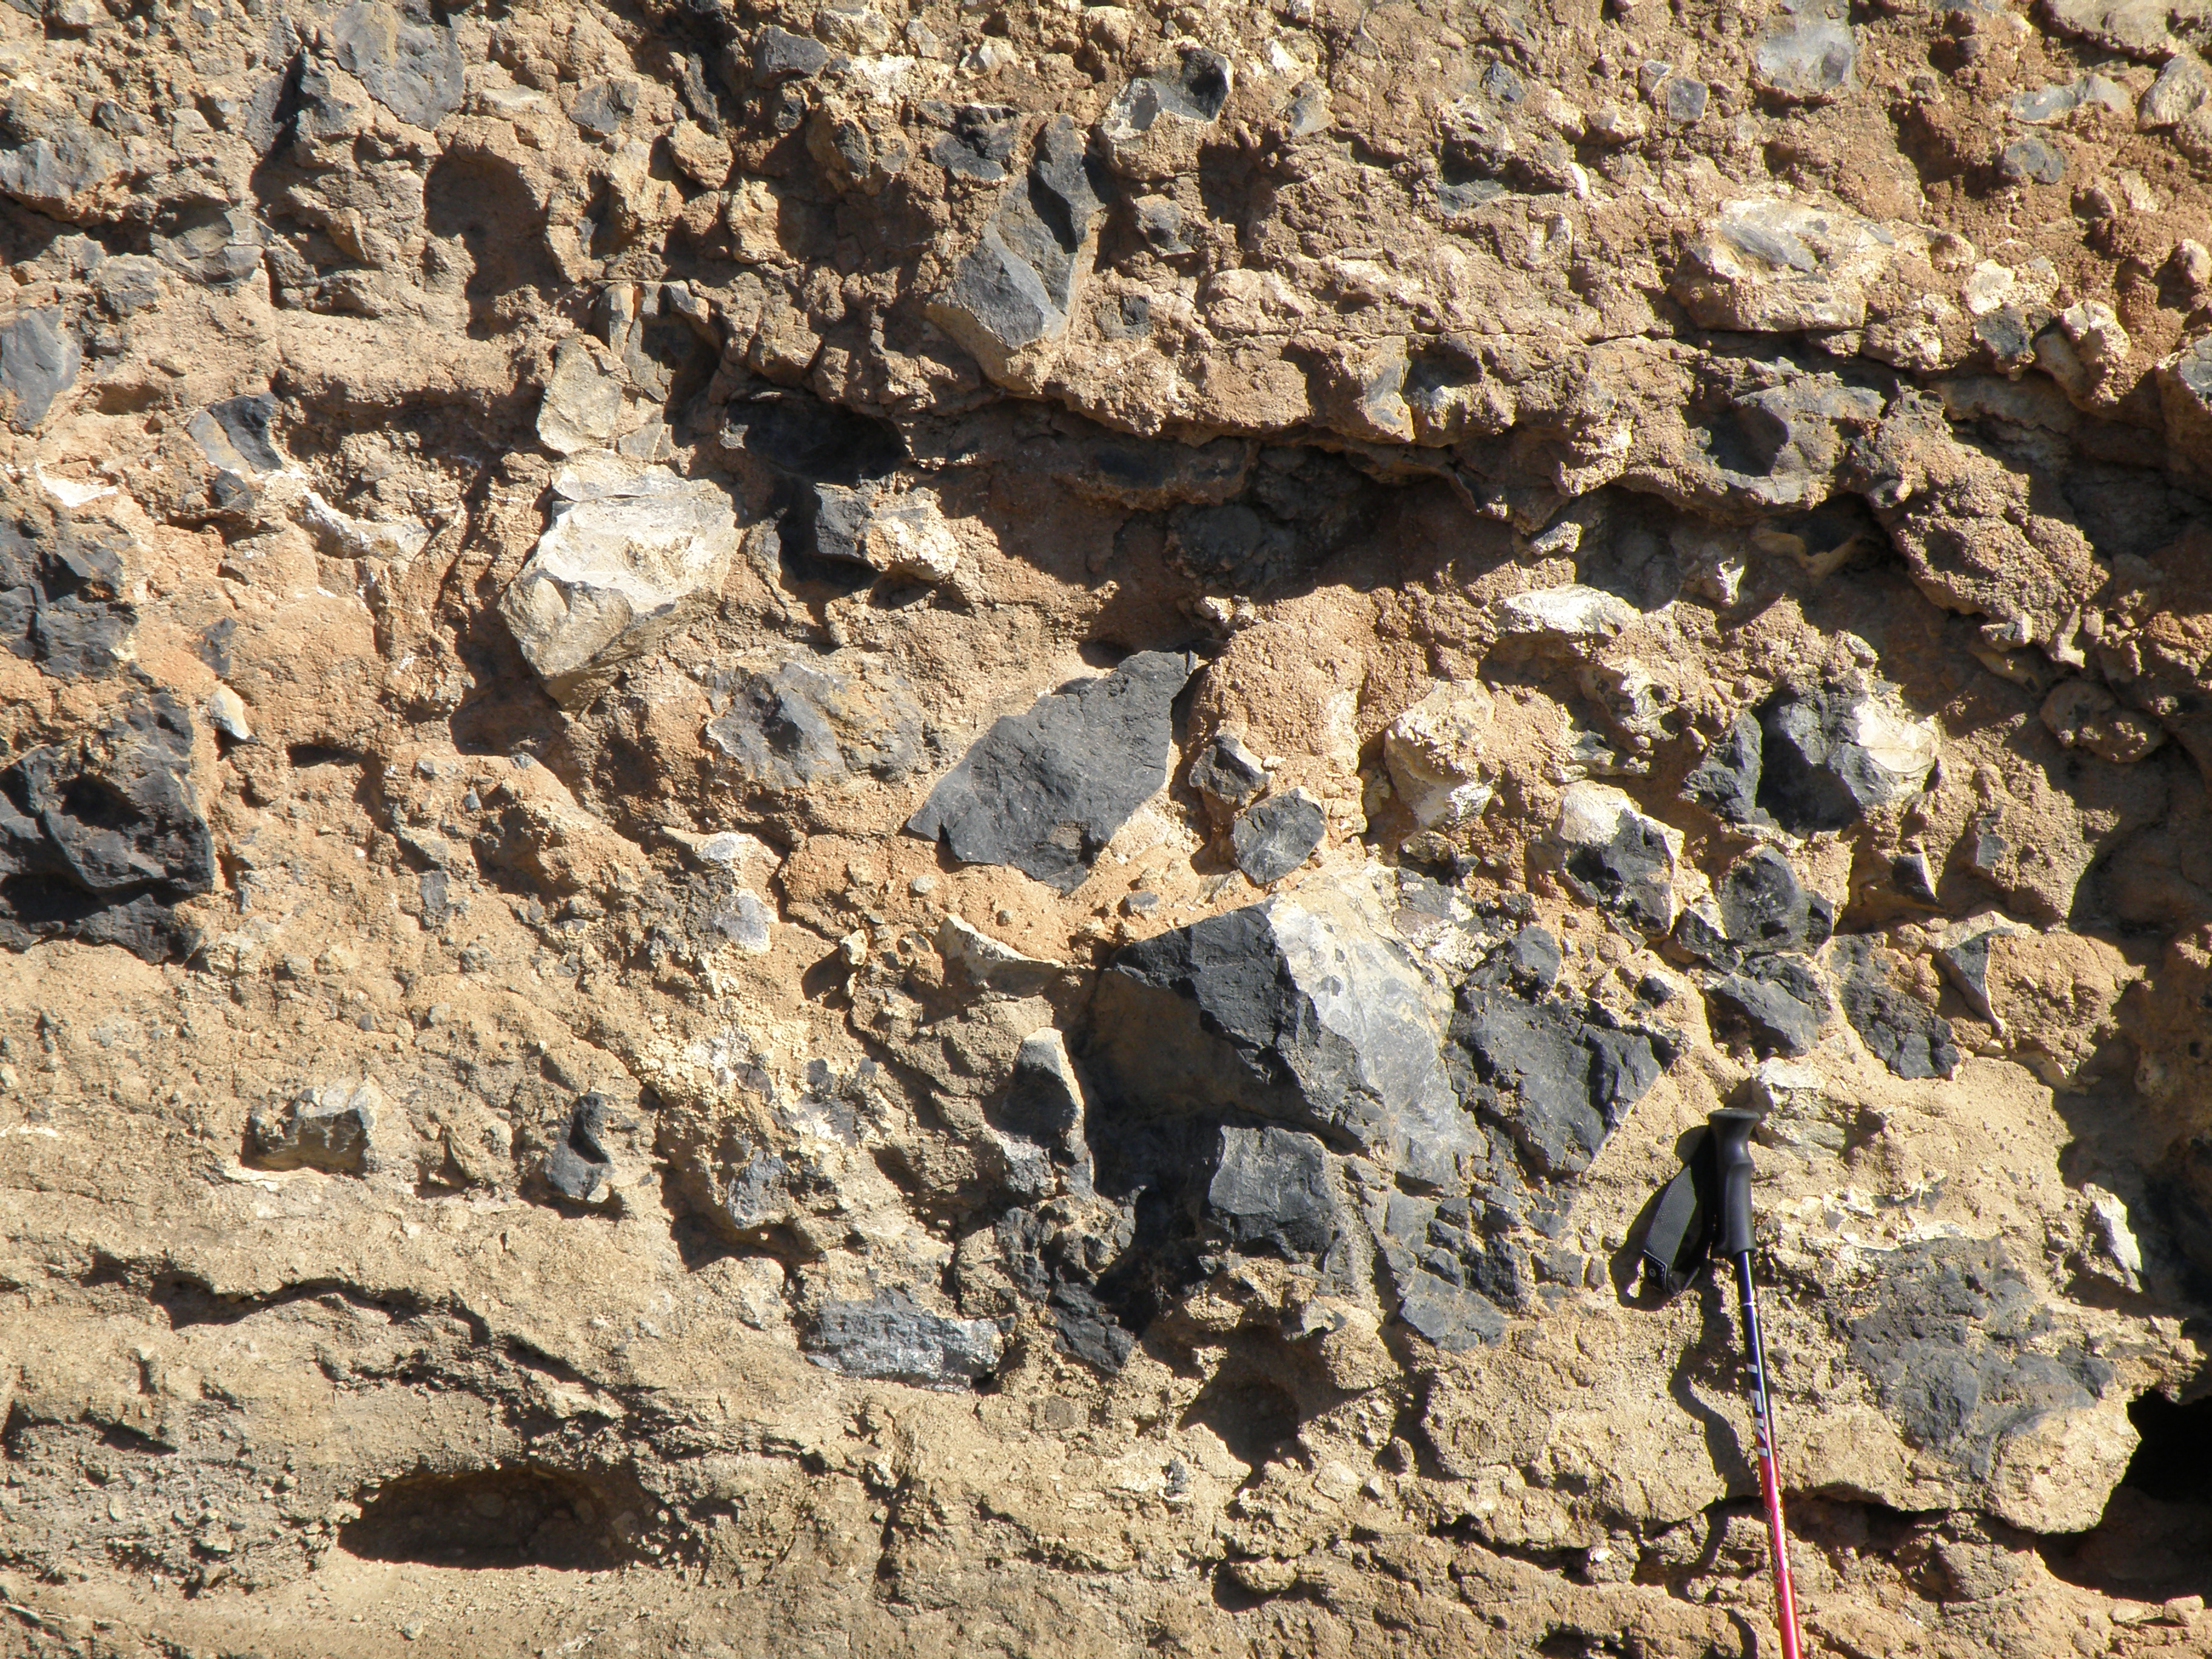
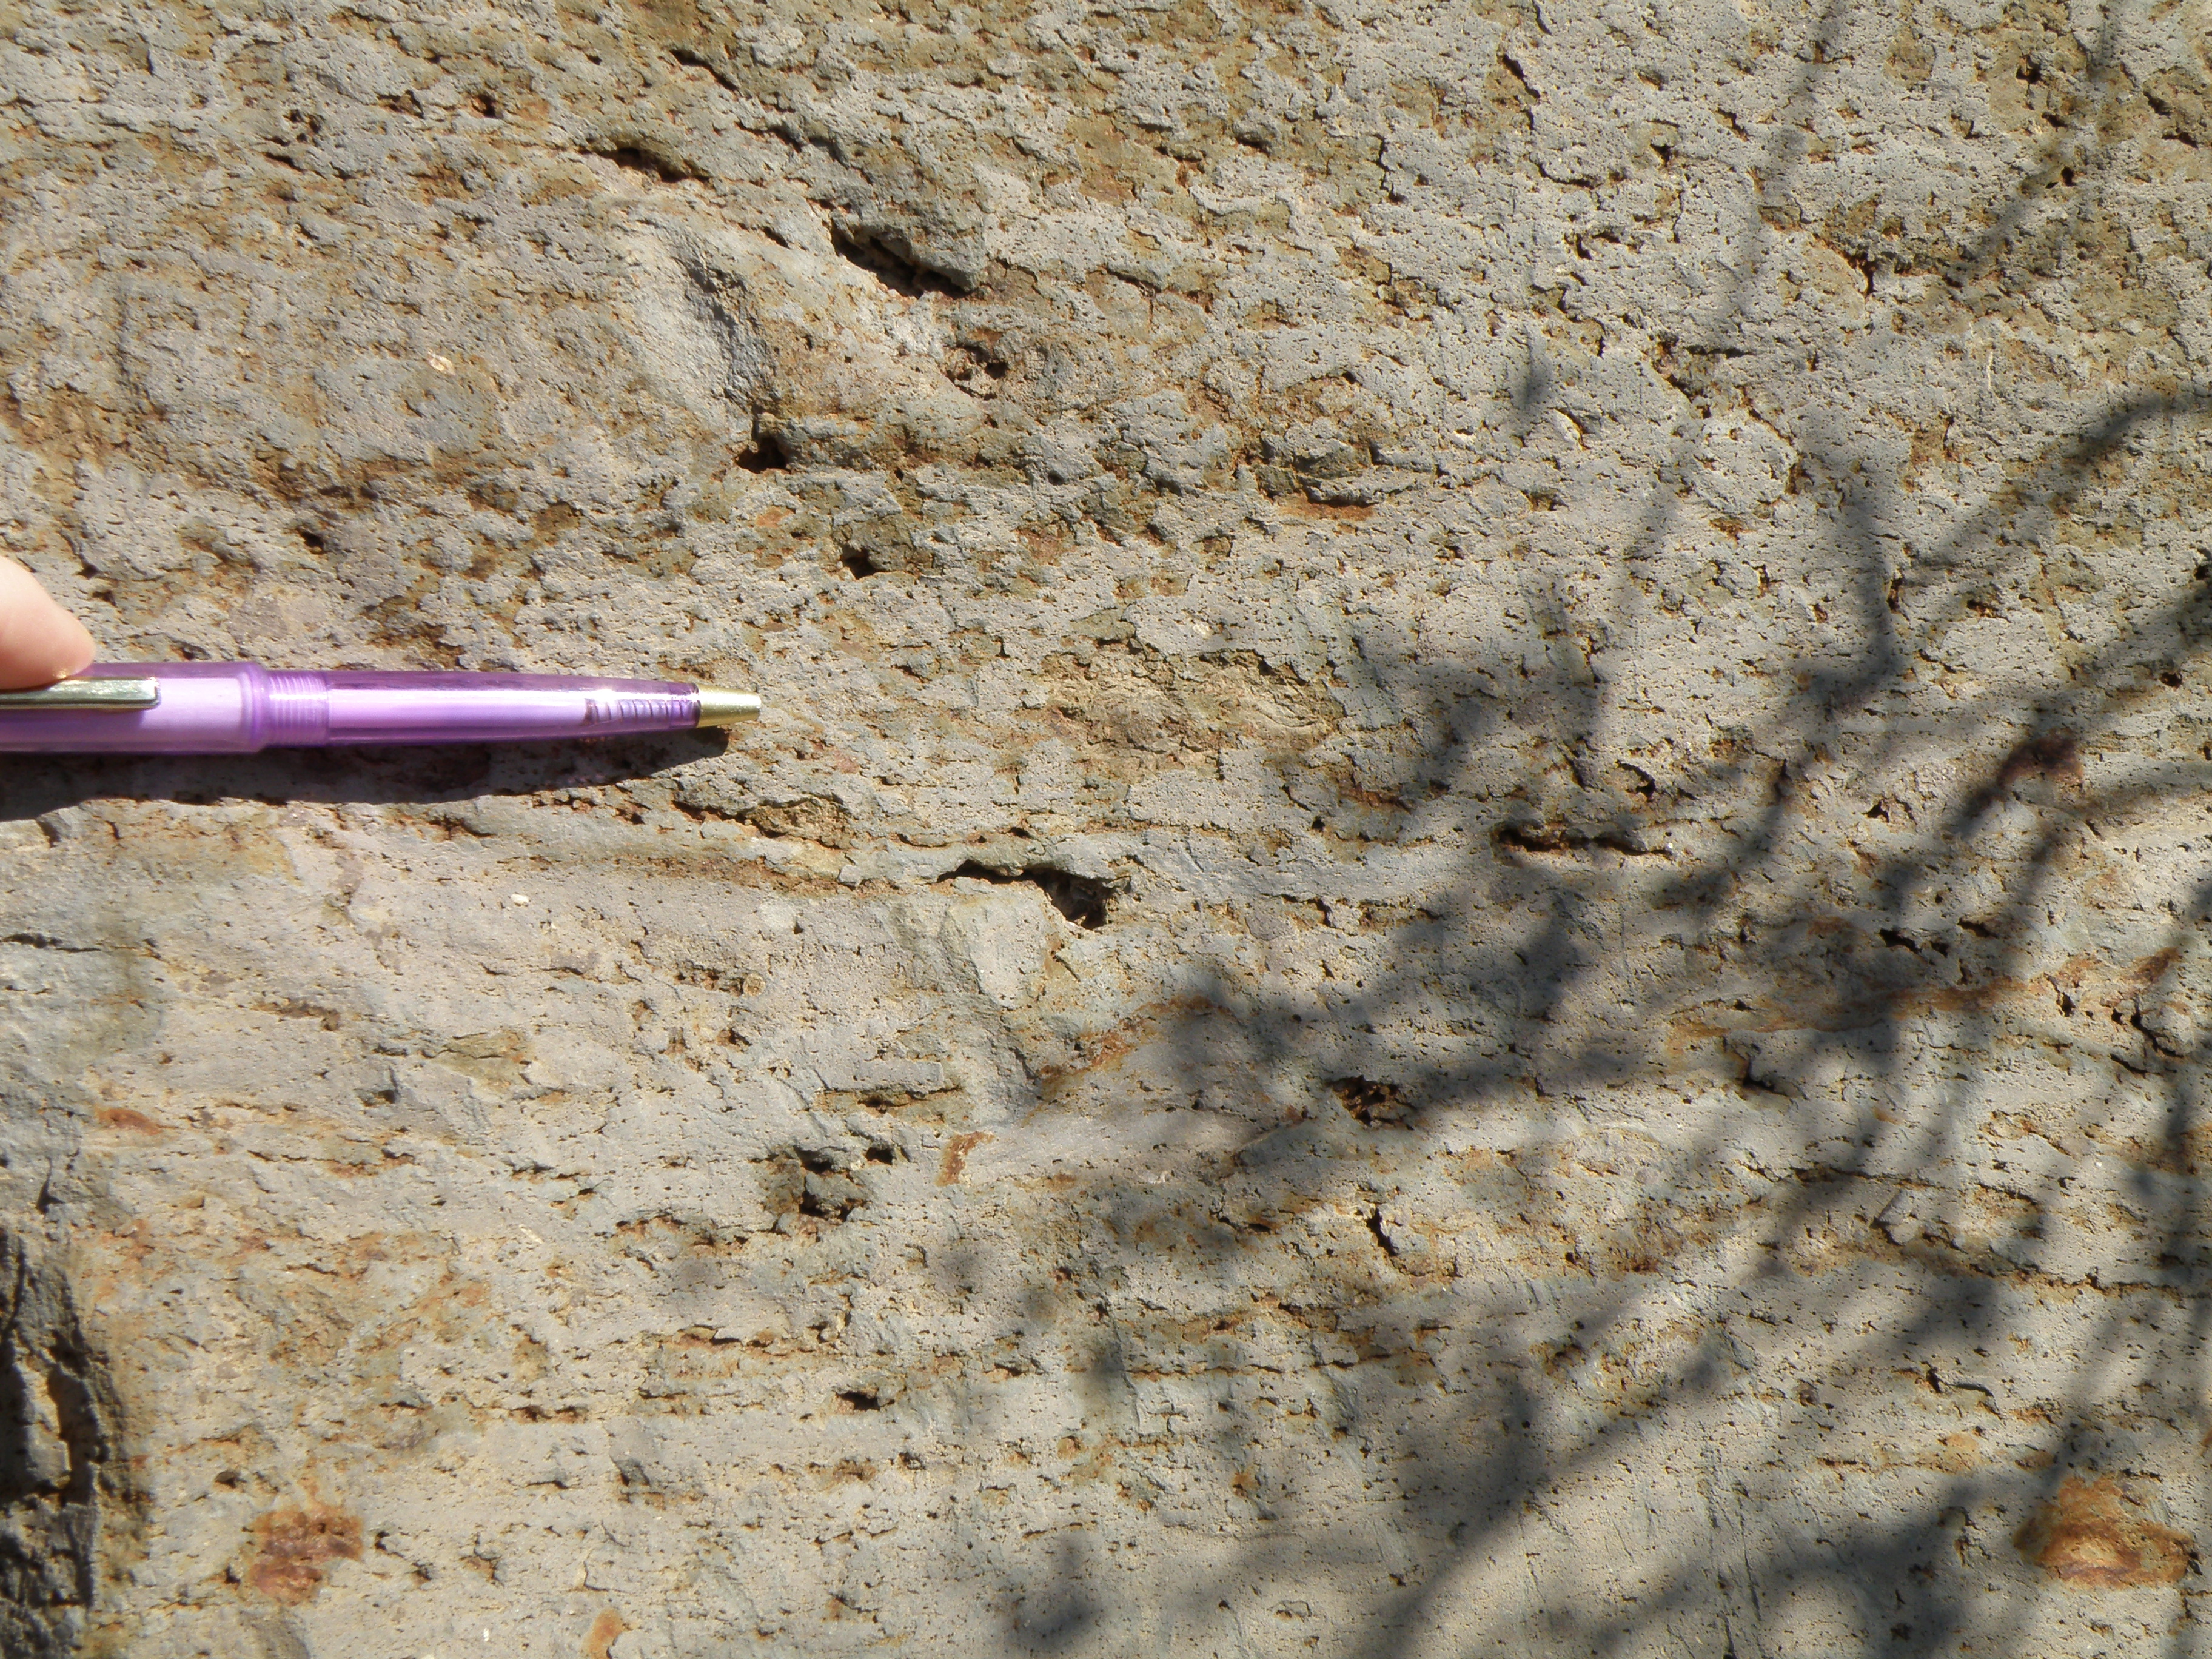
Detail of Figure 21, showing part of interval D. The white surfaces are small faults.
|
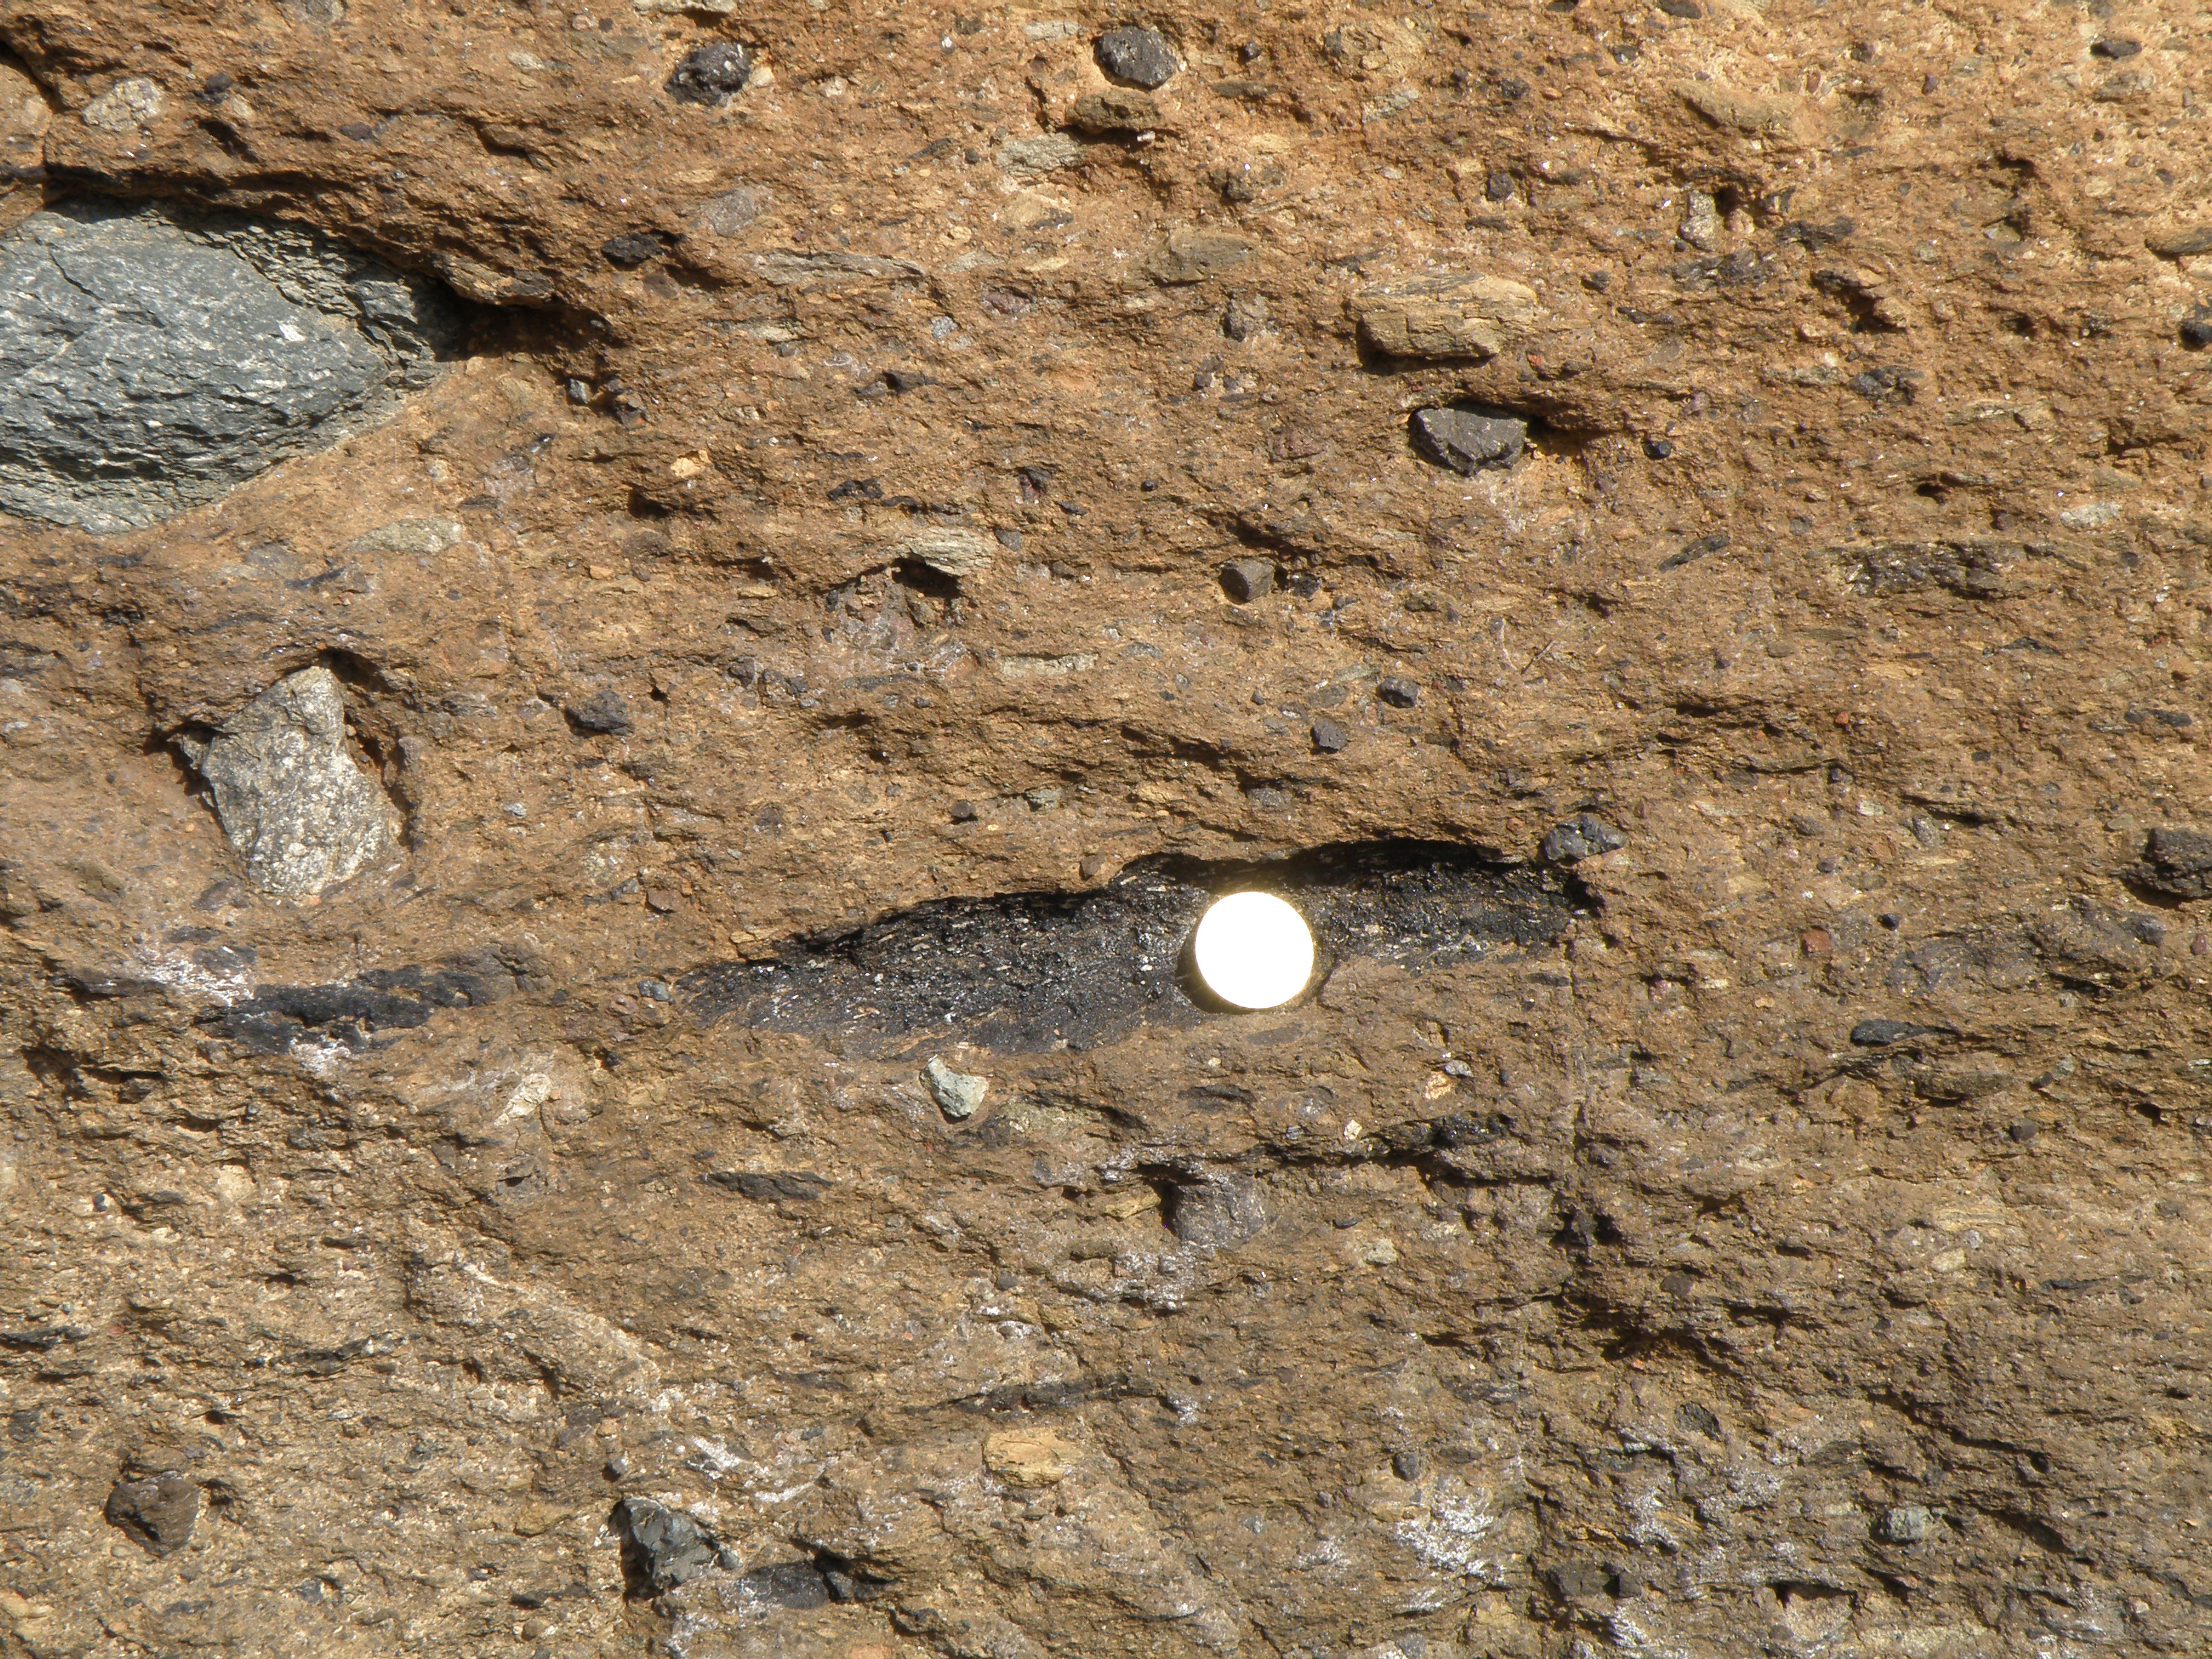
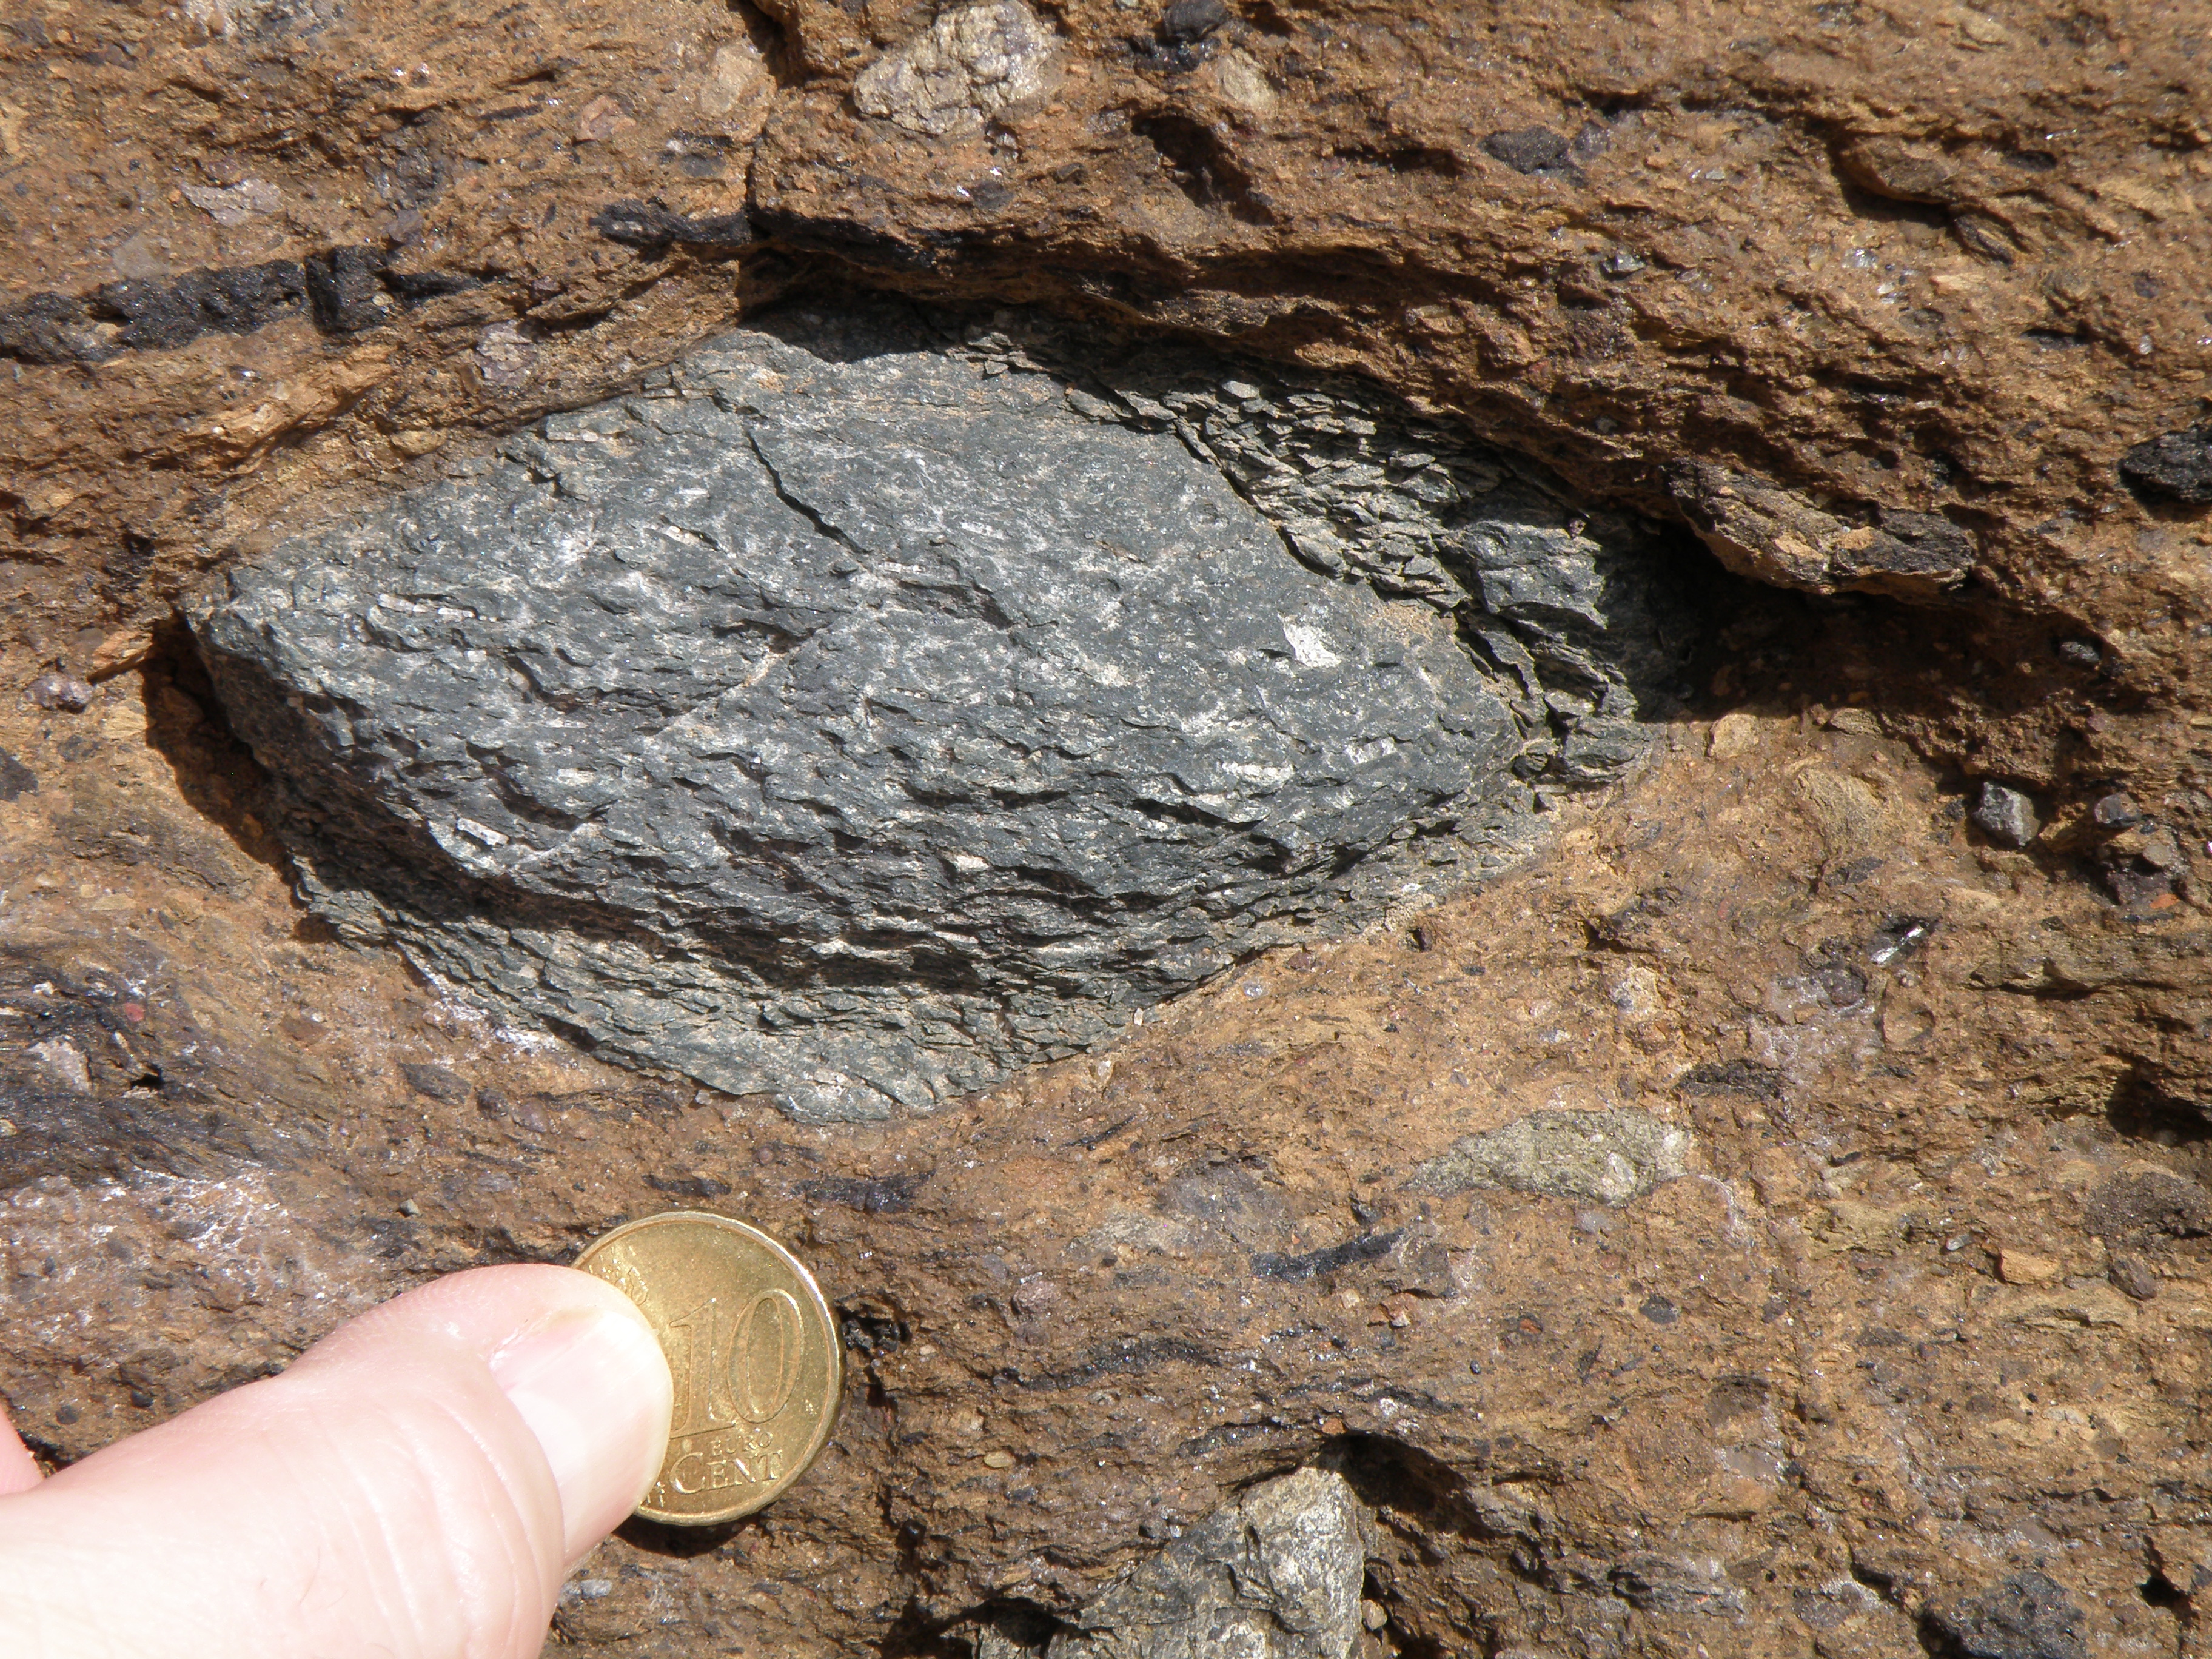
The large dark clasts consist of obsidian with a phonolite composition.
|
|
|
|
|
|
|
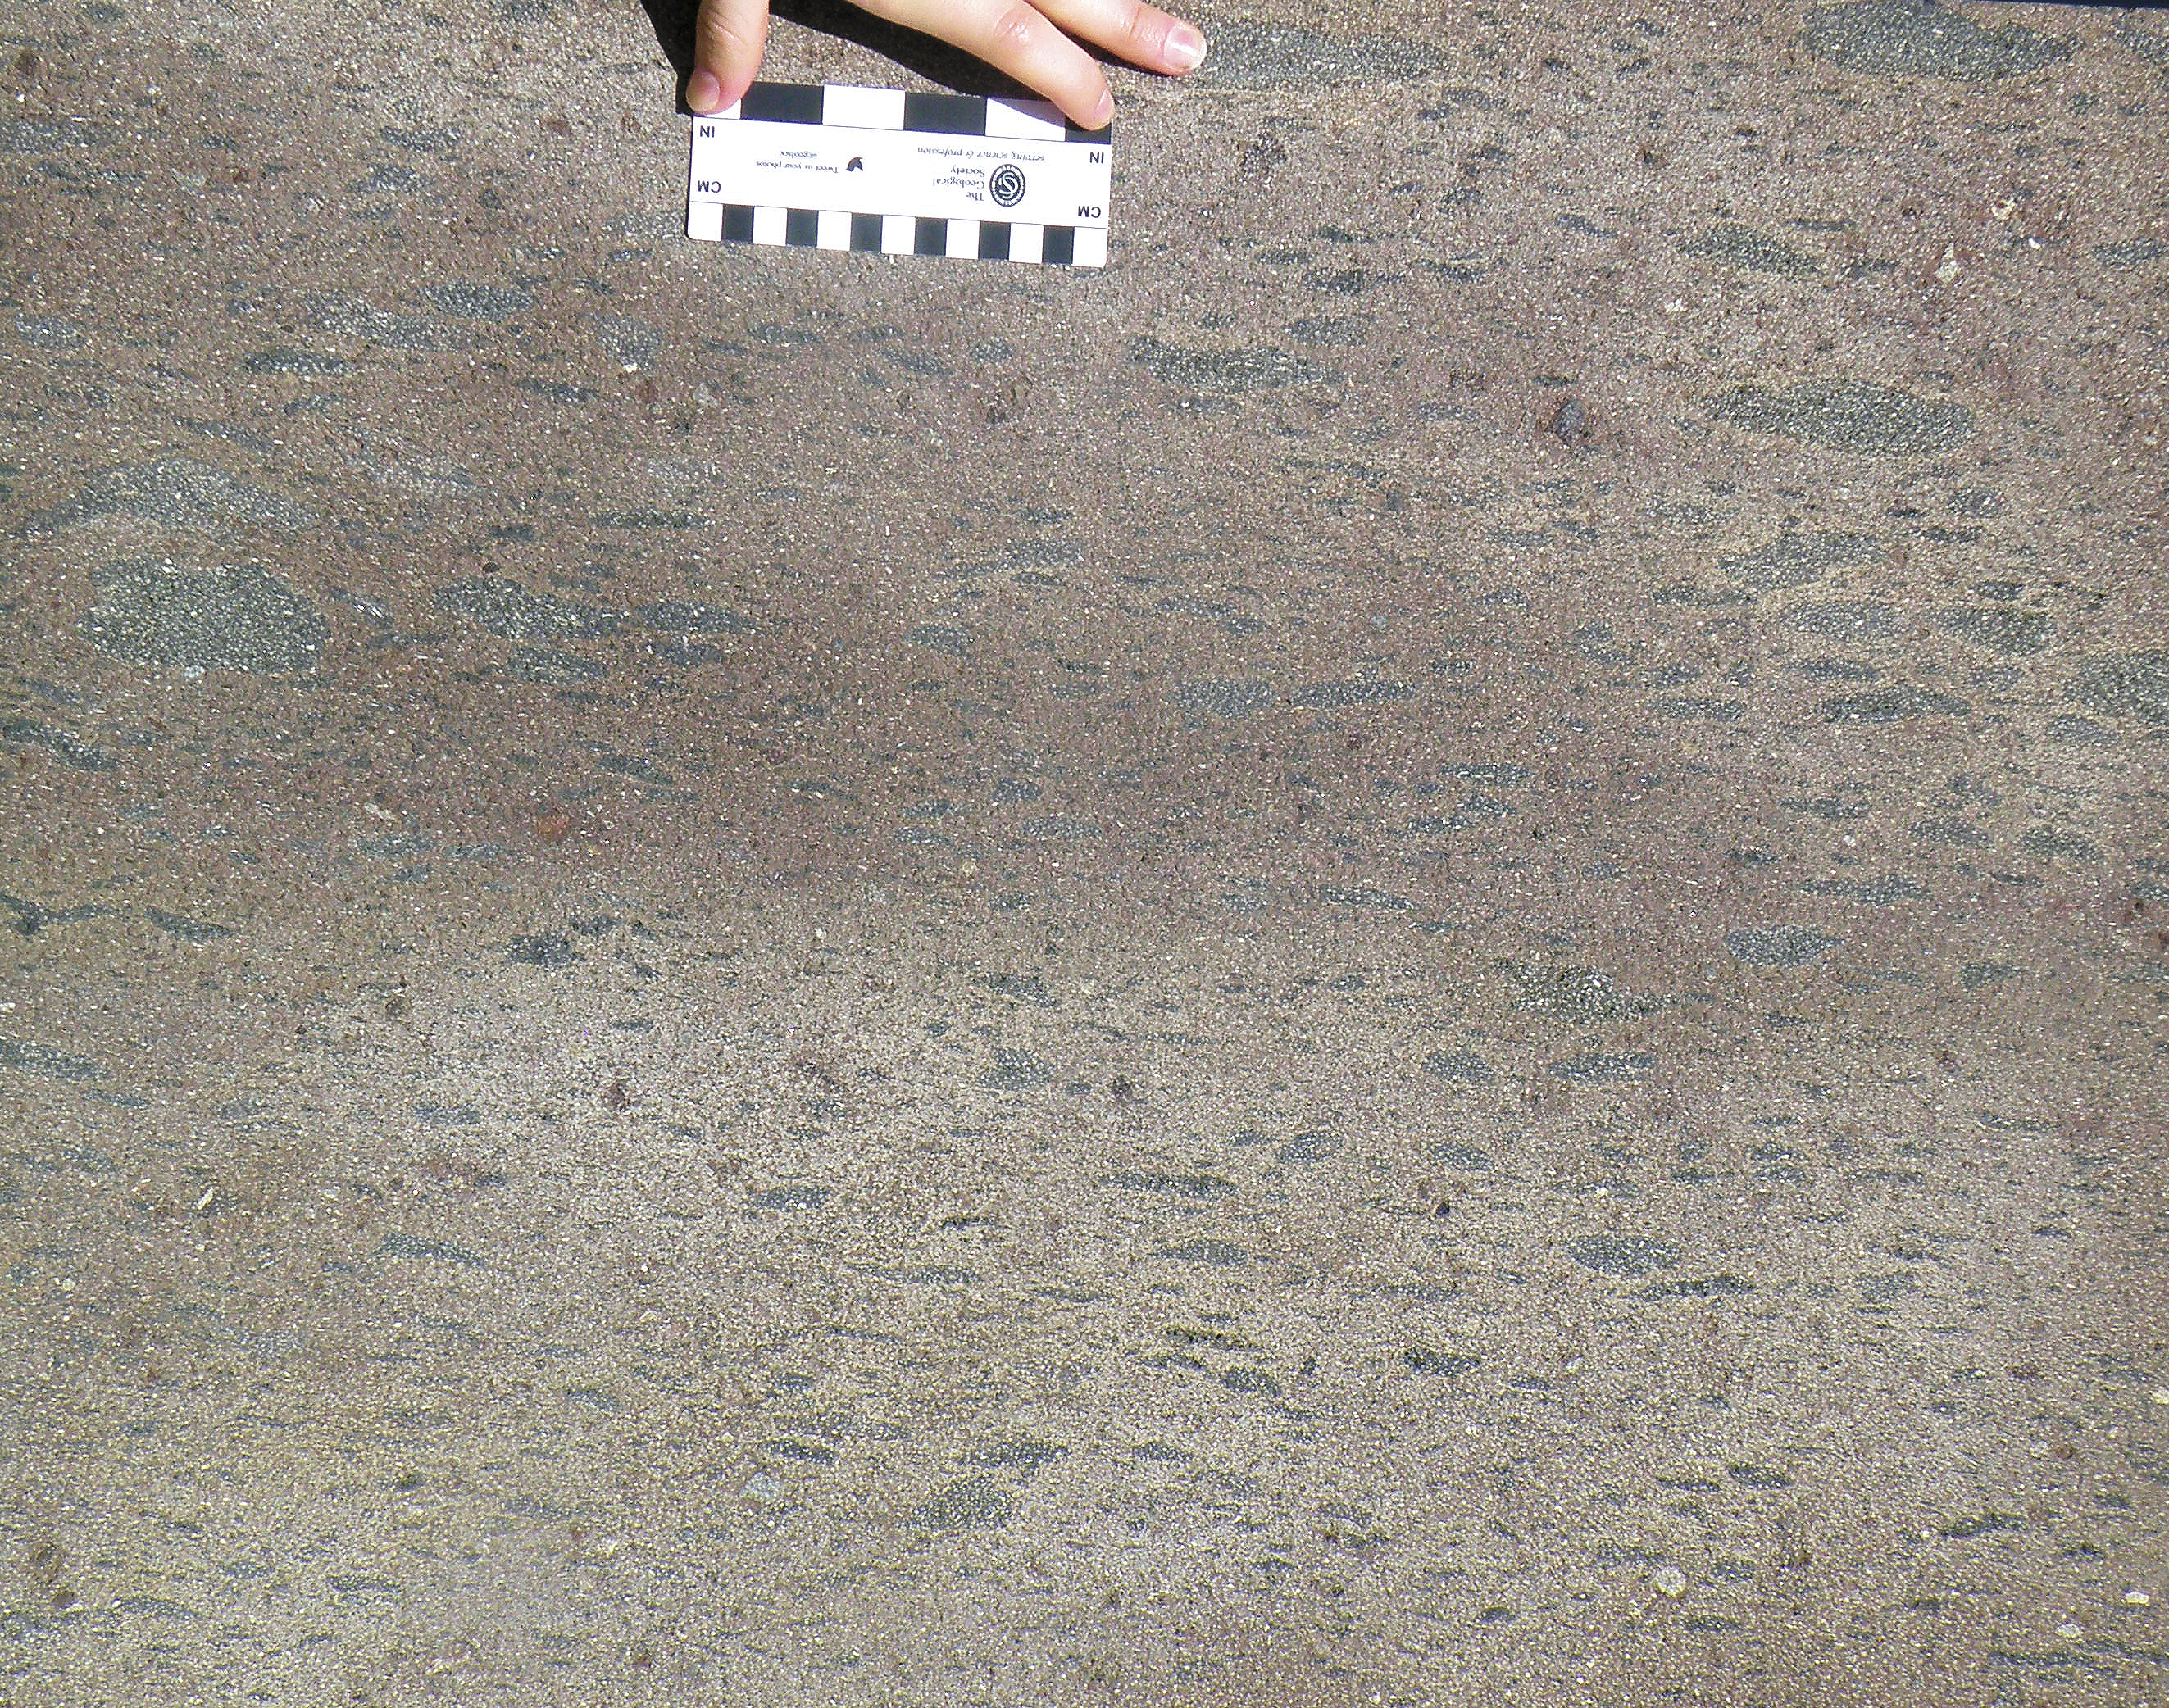
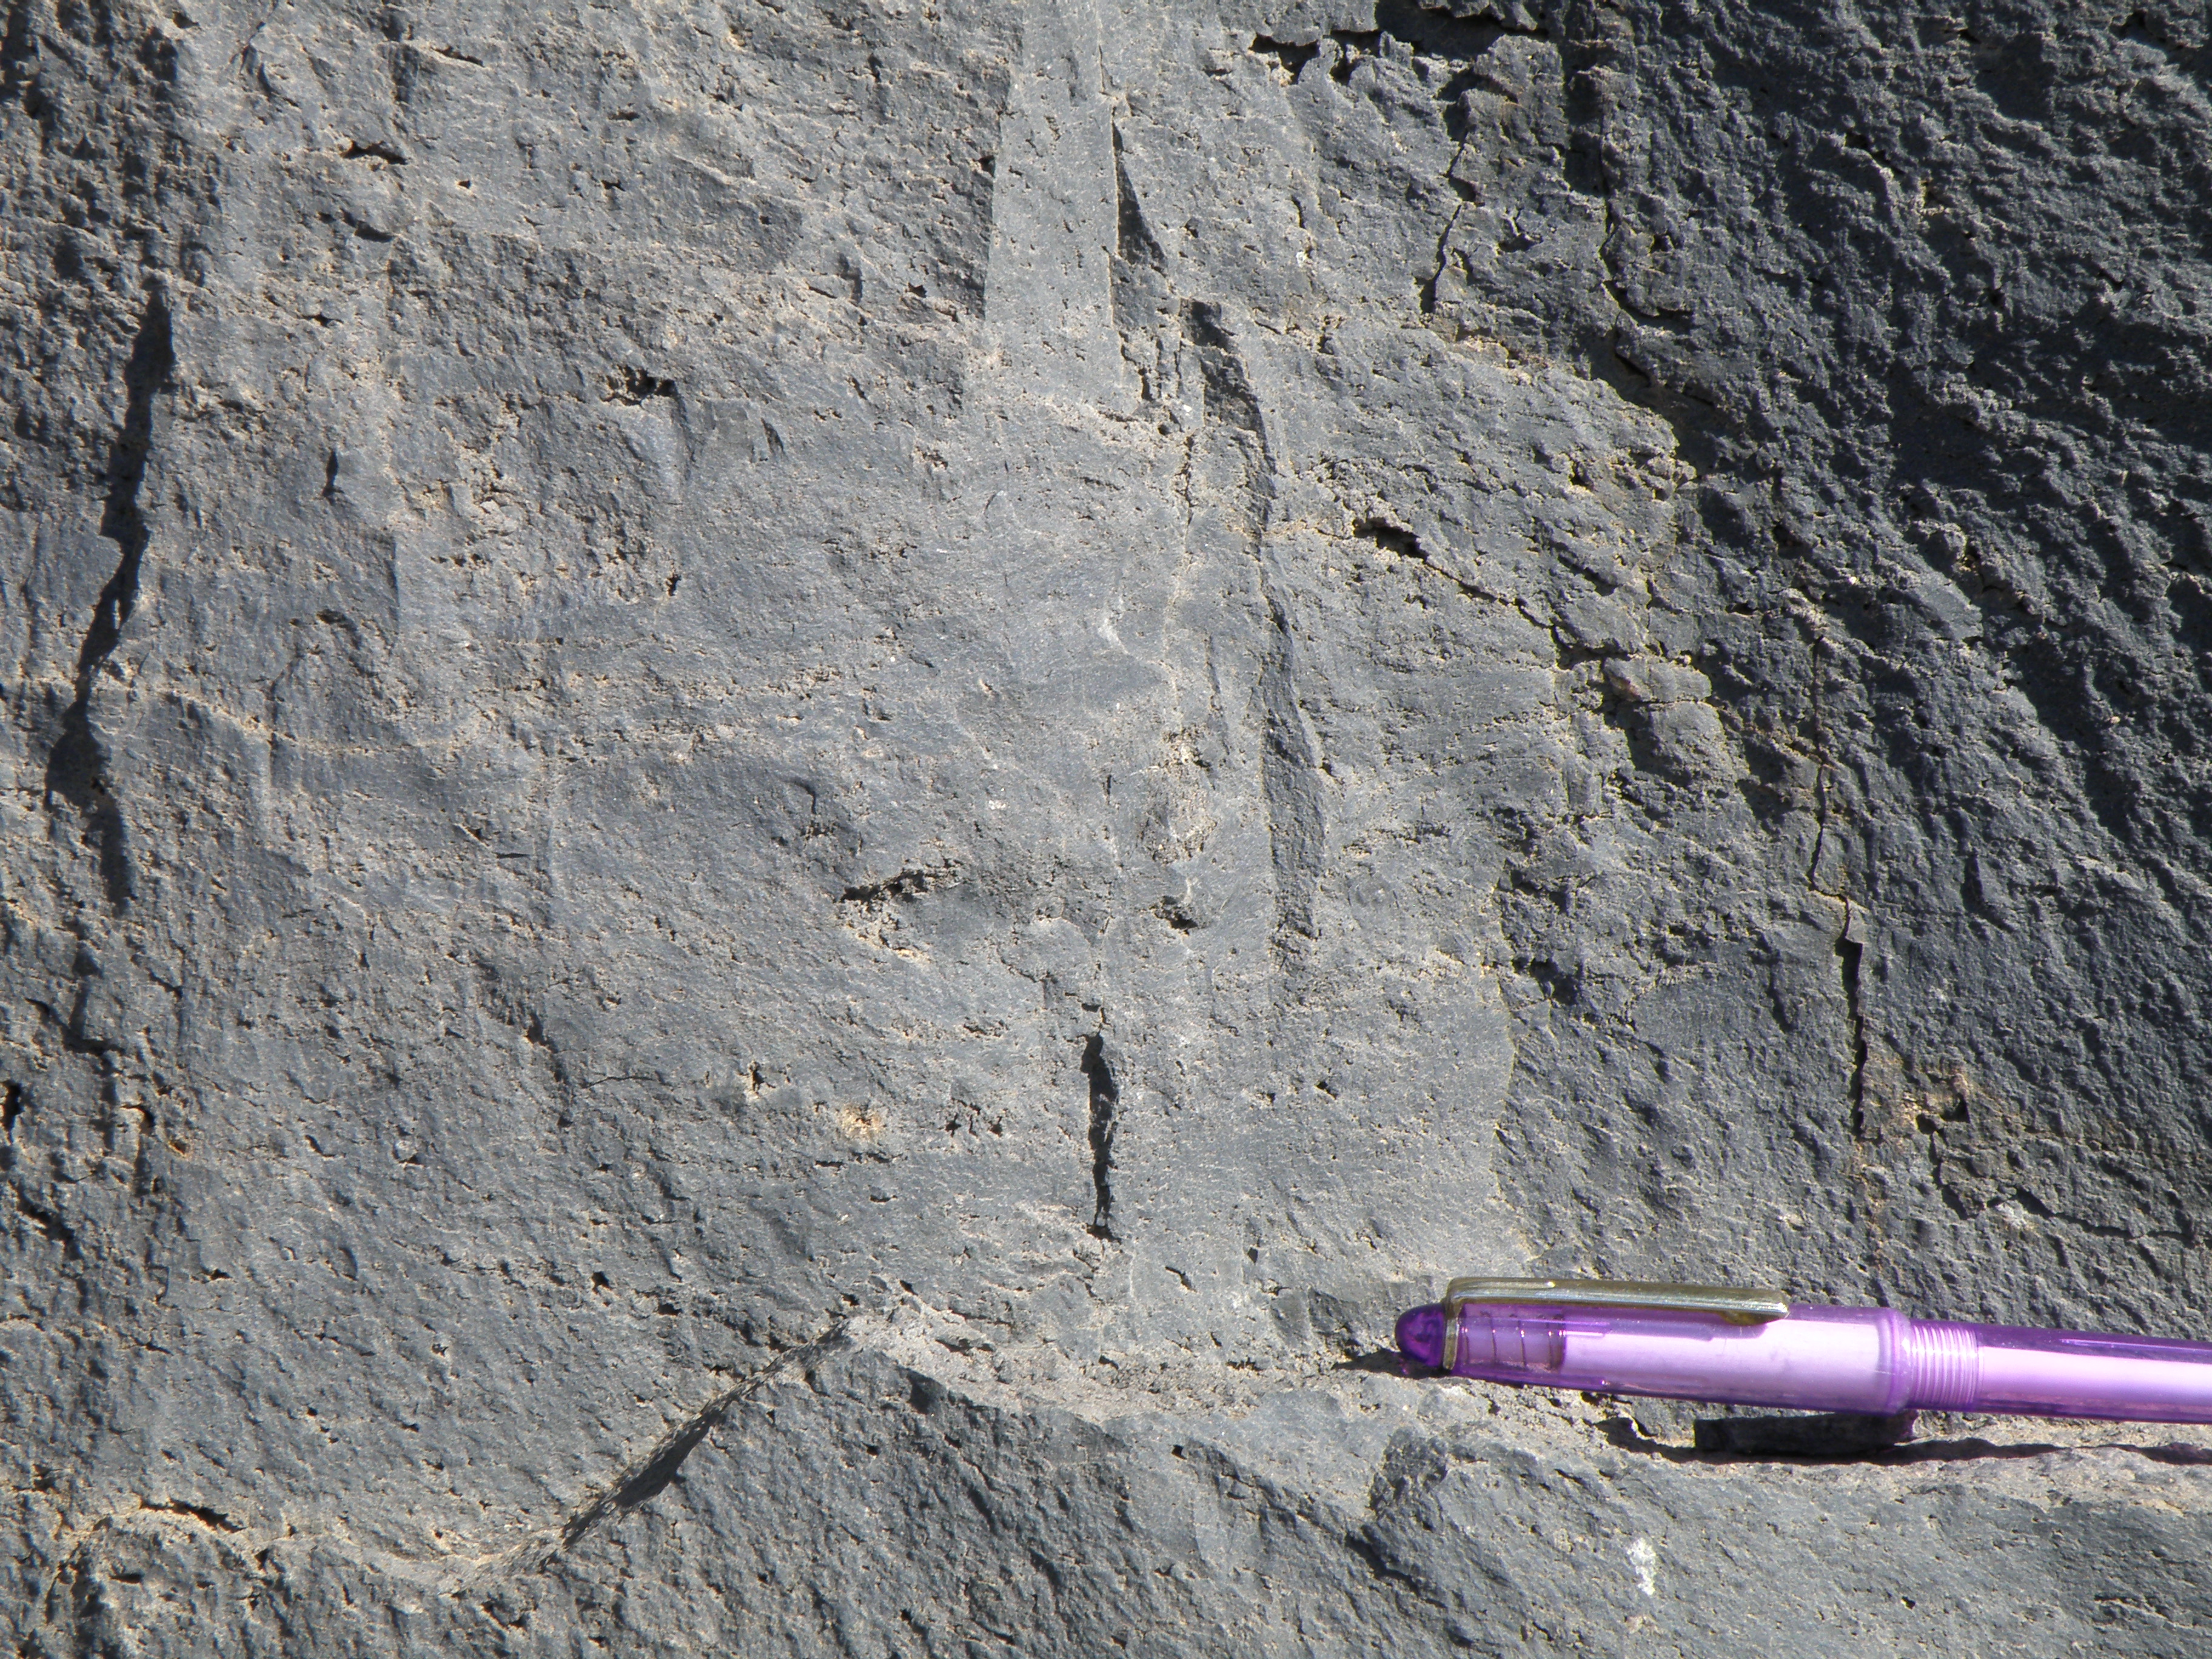
The streaky rocks seen in interval D are quarried at several locations in the Bandas del Sur, and sawn into blocks to use as ornamental building stone all over Tenerife.. This block has been sawn perpendicular to bedding. Look also at Figure 28, then answer these questions
|
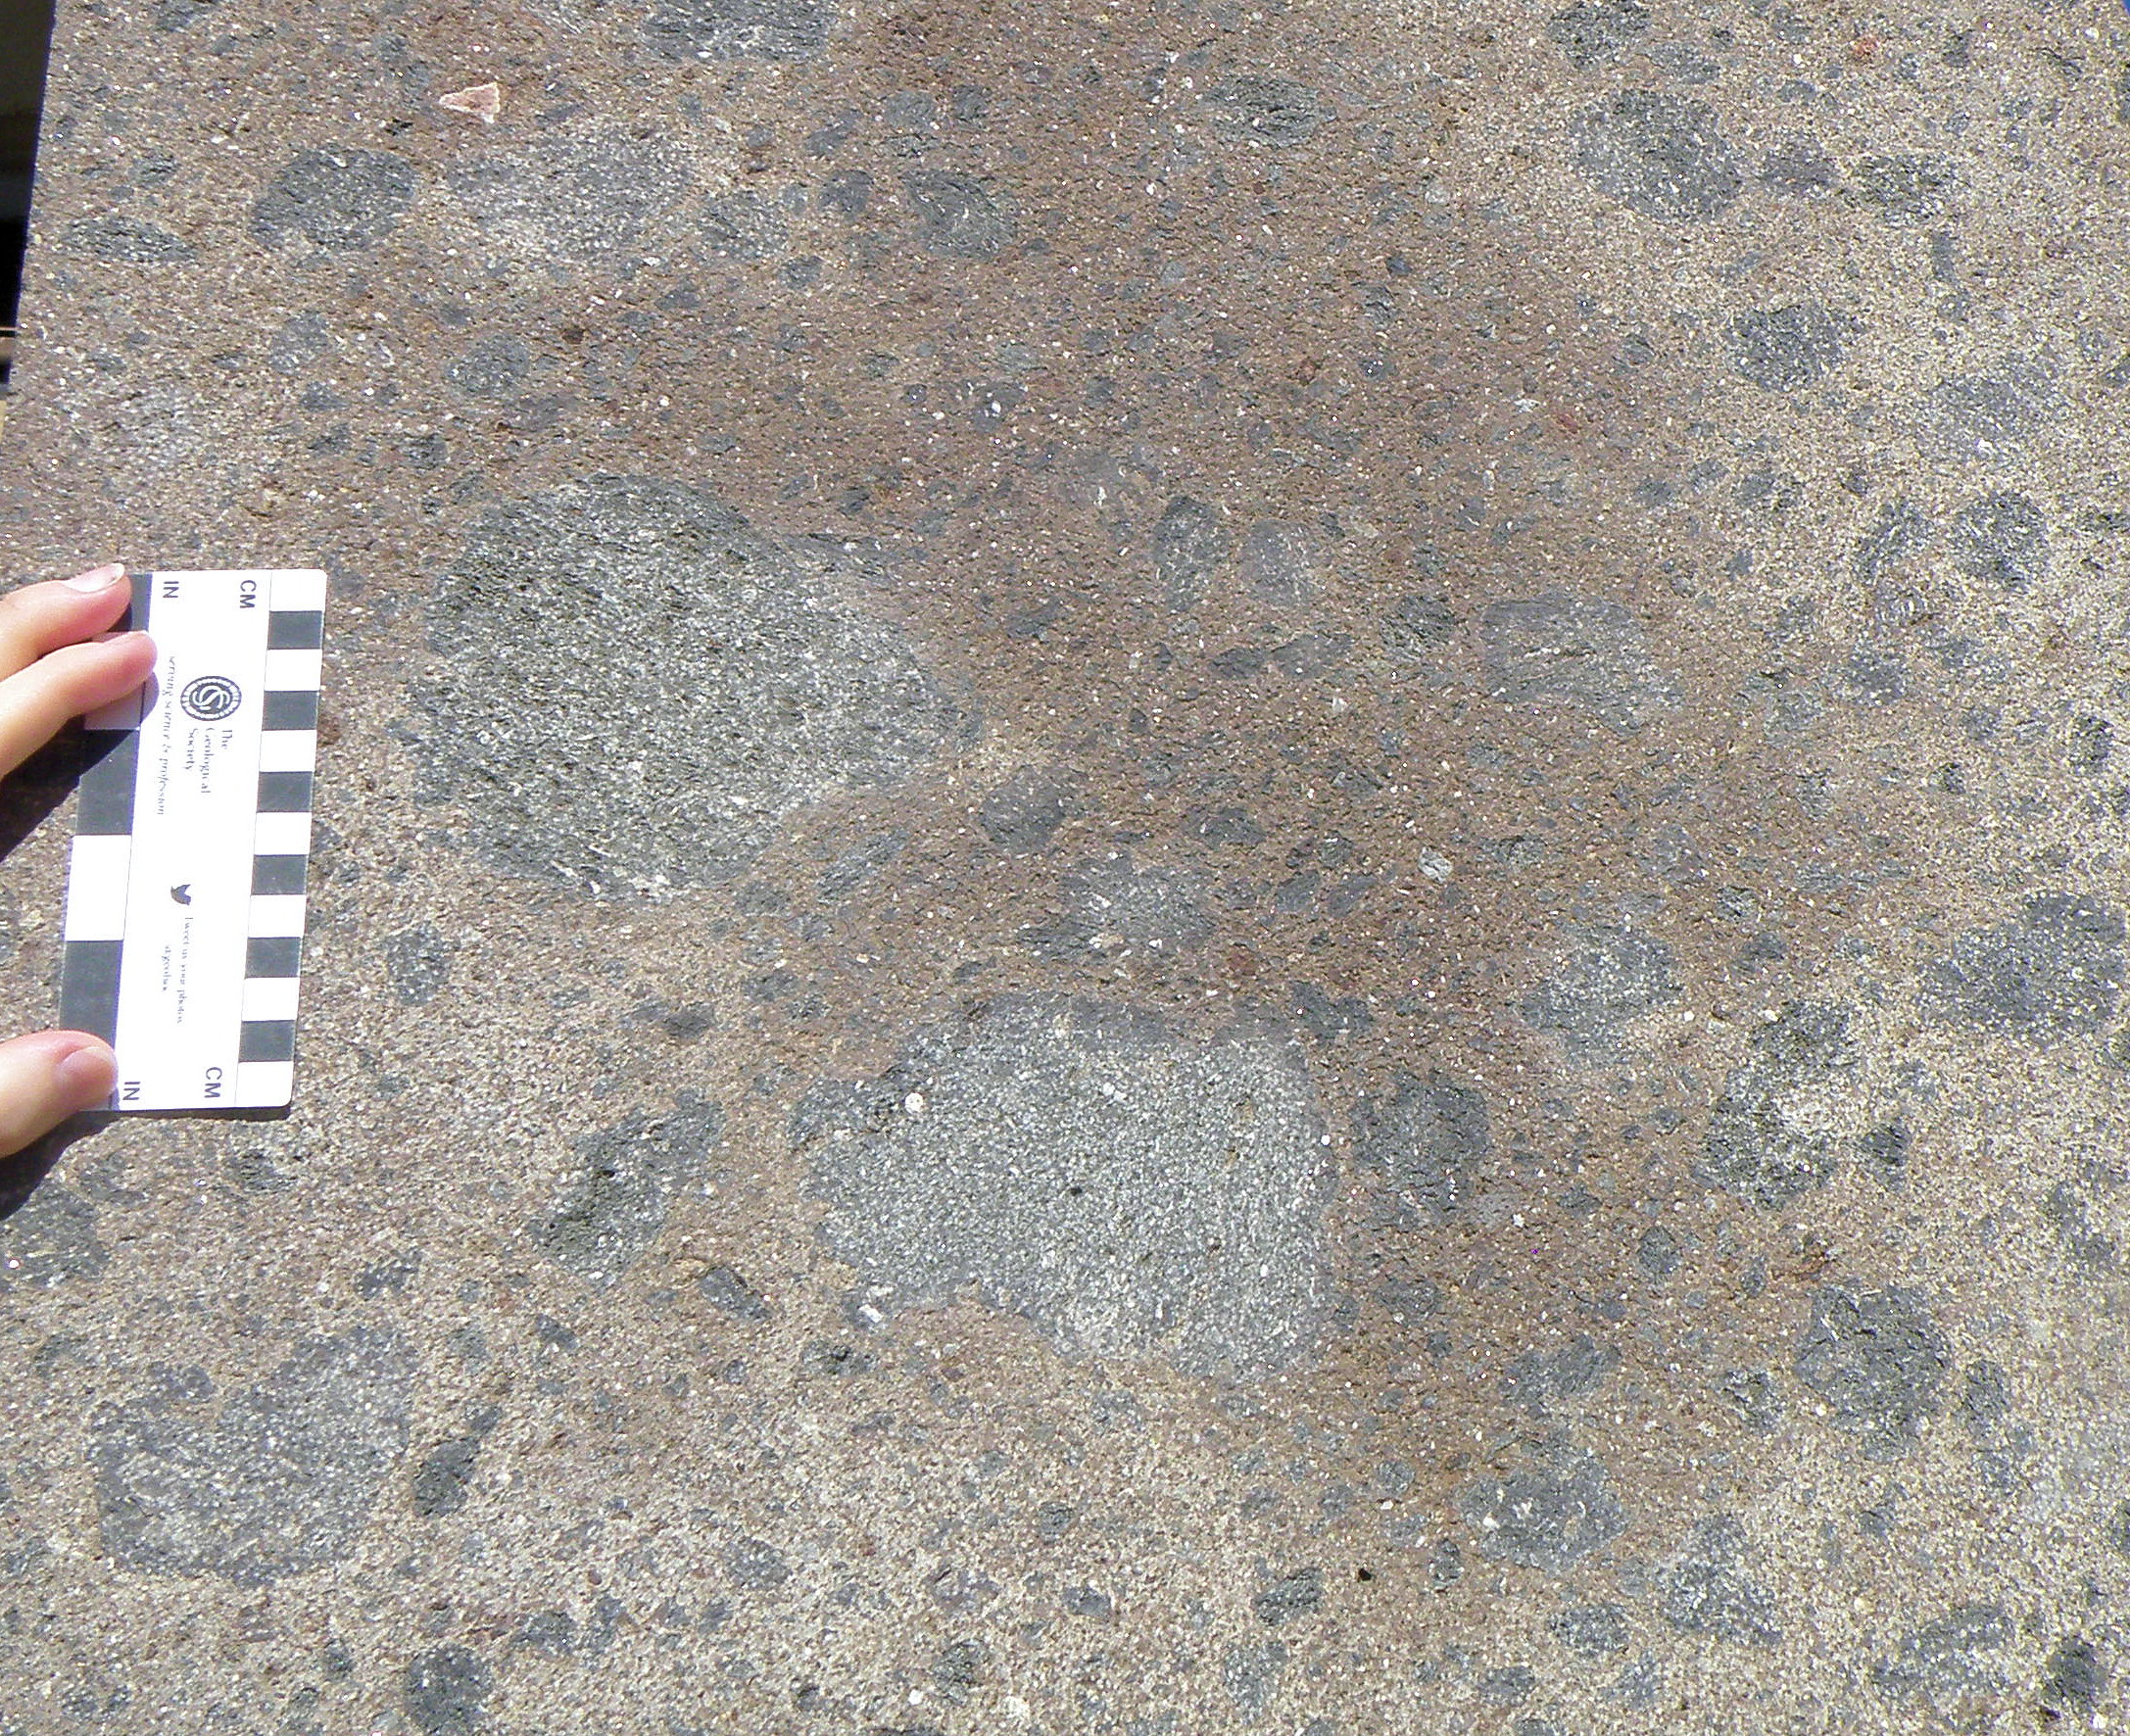
This block has been sawn parallel to bedding.
|
| General views of the section at loc 2.4.6 | Close-ups of the outcrops | |
|
|
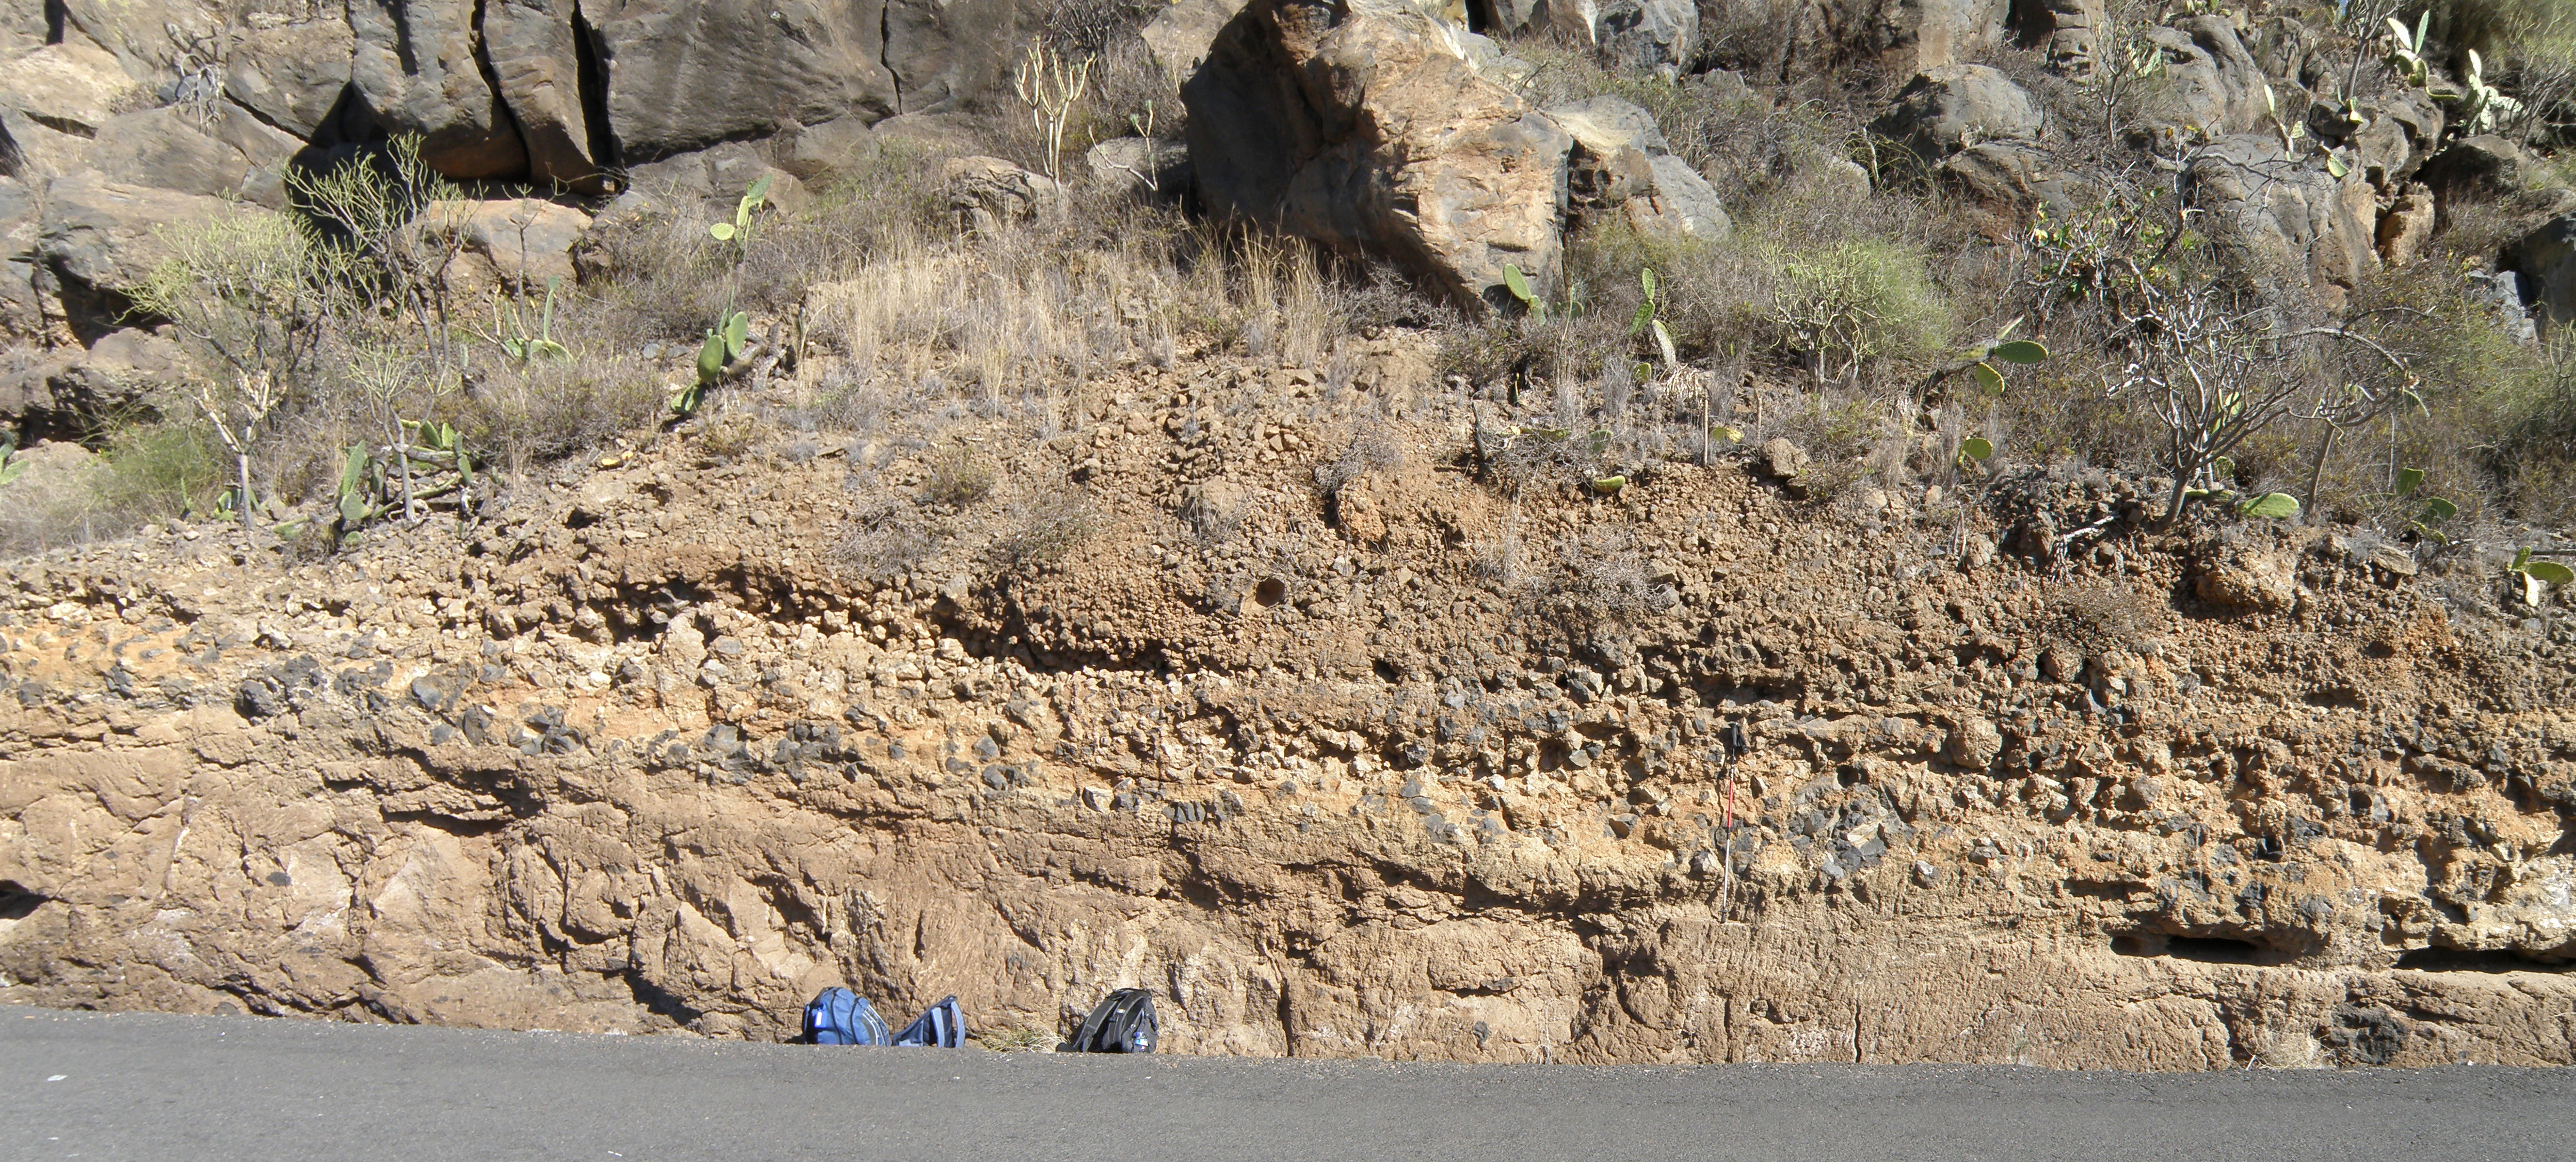
The base of interval E overhangs and is in shadow, ~ 50 cm above the road. |
|
|
Figure 32. Detail of the left-centre part of Figure 29. Backpack on right is ~50 cm tall. |
||
| General views of the section at loc 2.4.7 | Close-ups of the outcrops | |
|
The left-hand (northern) part of the outcrop.
|
Detail of the right-hand part of Figure 33. |
Detail of the area above the geologists' heads in Figure 34.
|
|
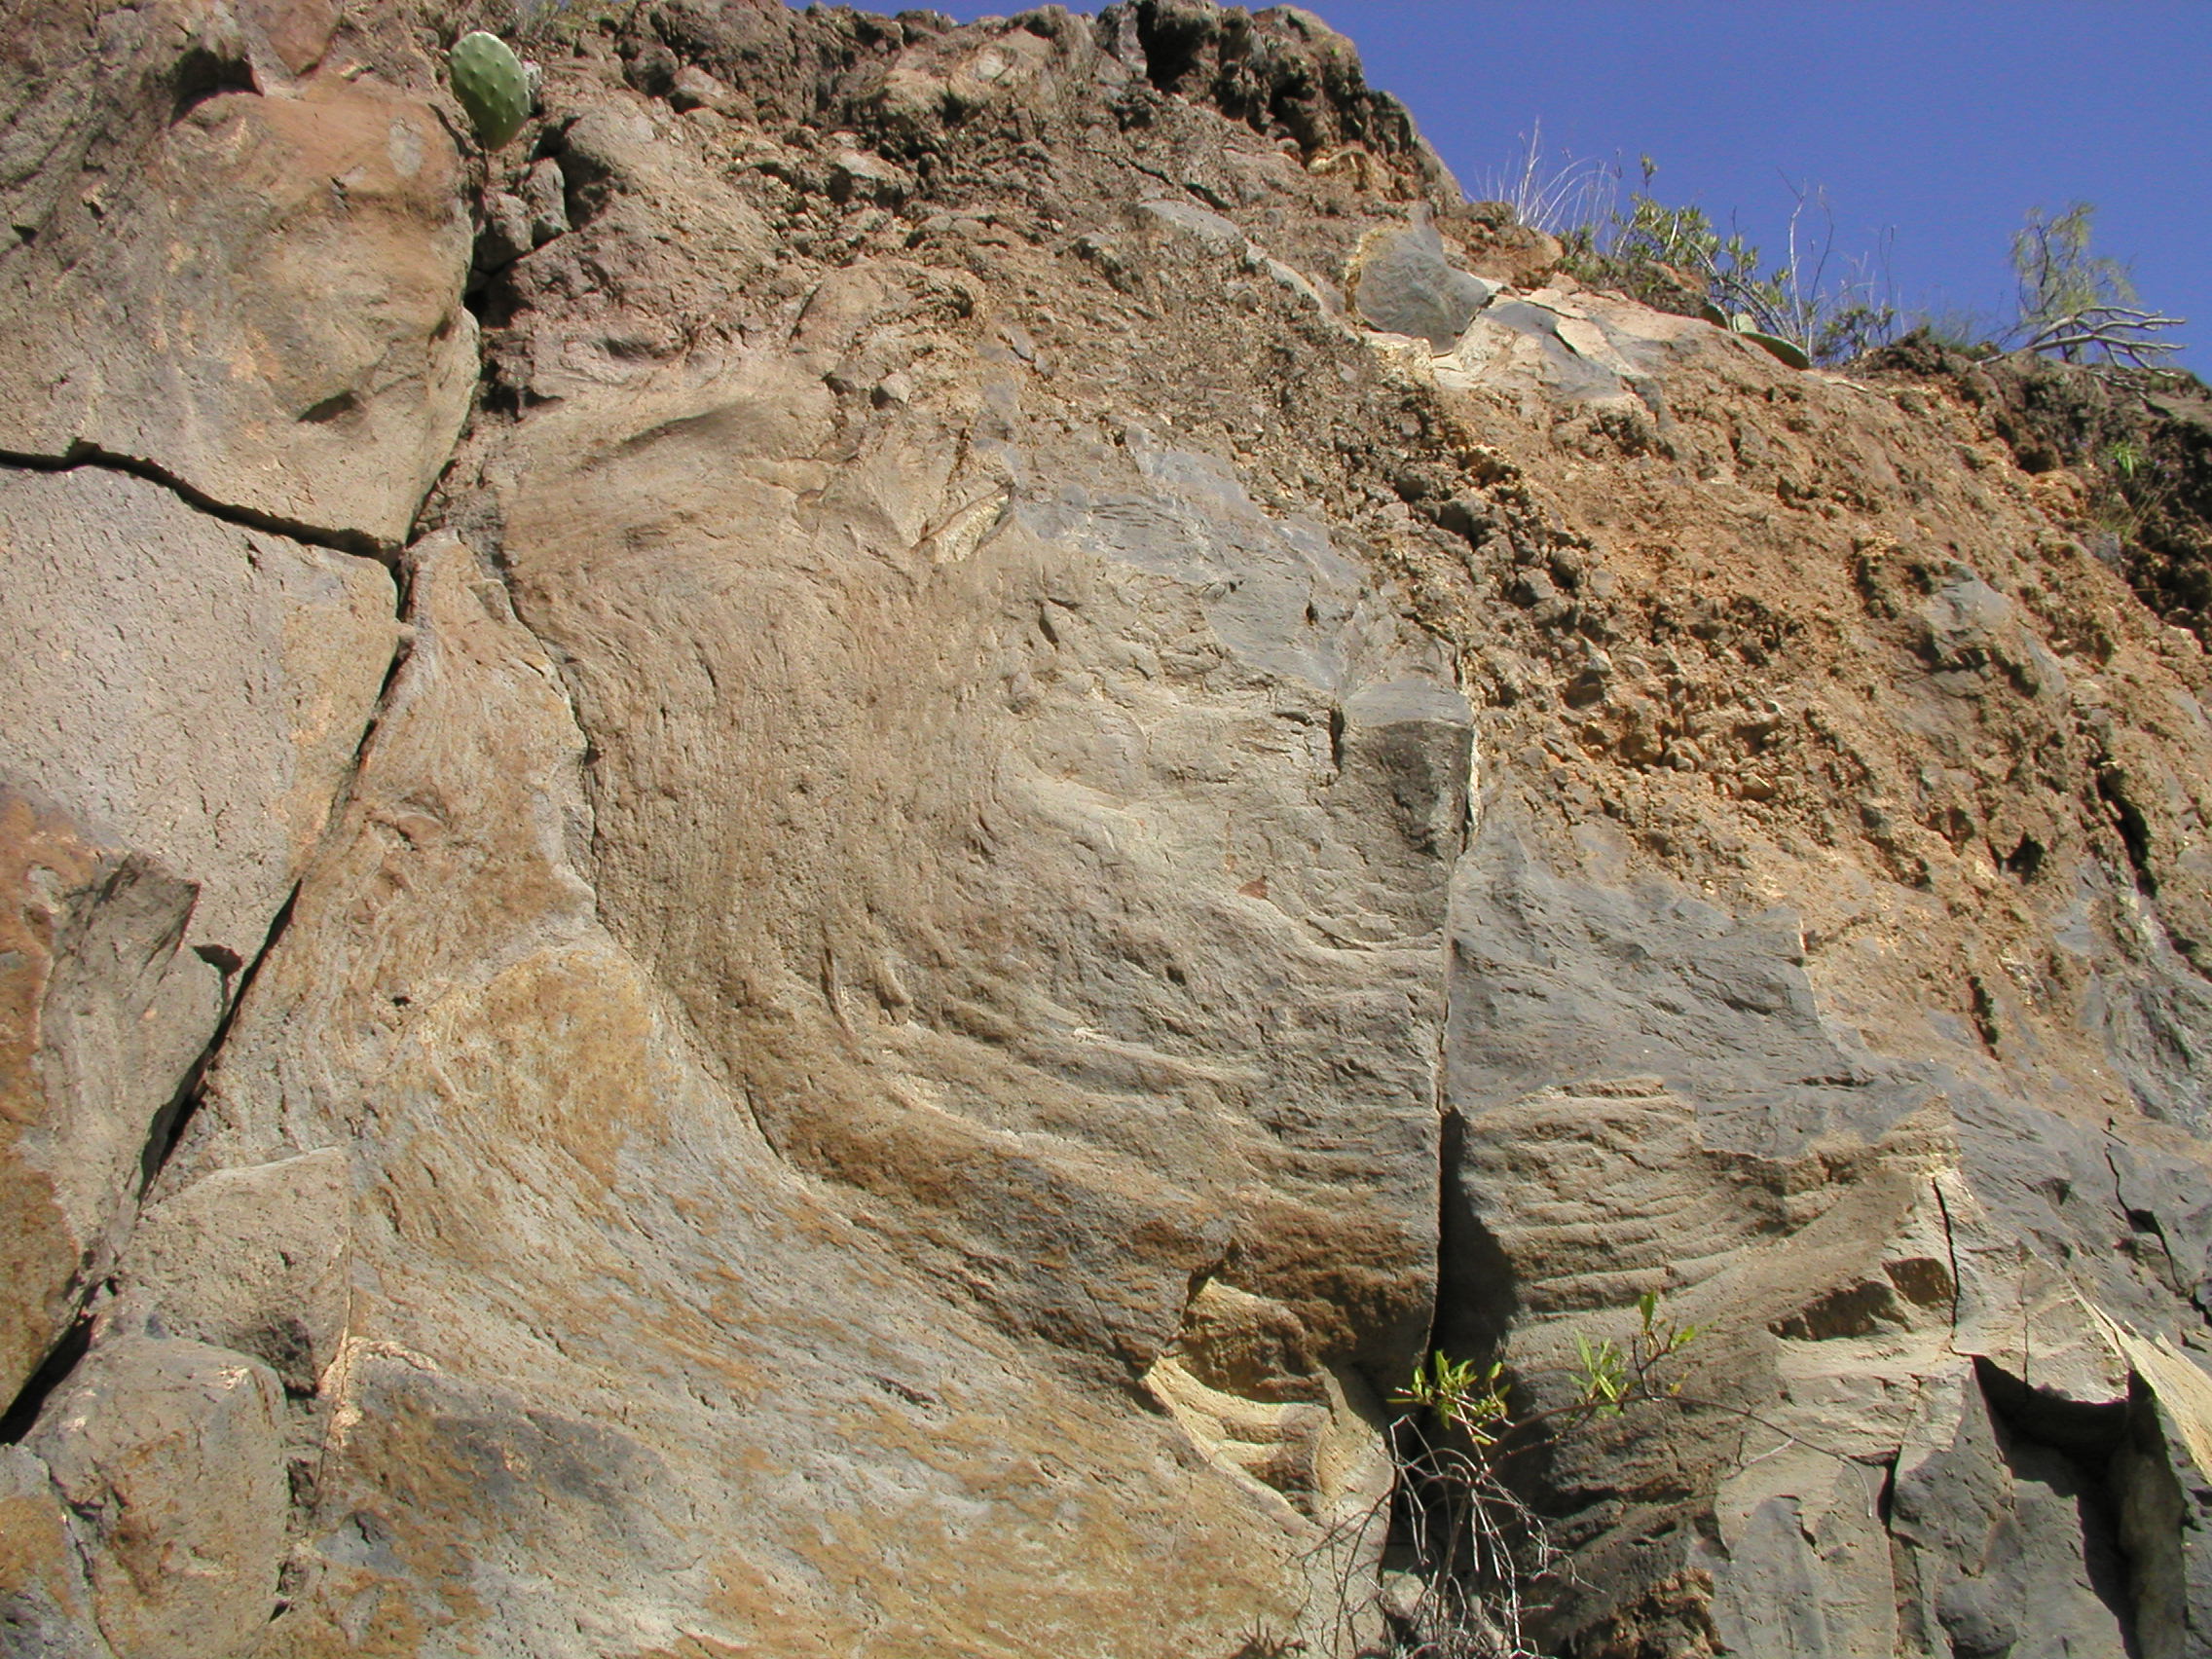
The right-hand (southern) part of the outcrop.
|
|
Close-up of the structures in Figure 37, seen on a weathered surface. |
|
This is clearly a lava flow. Chemical analysis shows that its composition is mugearite. Close examination of the outcrop reveals rare small blue crystals of the mineral sodalite. You won't see it in any of these photos, however.
Our section stops here, without seeing the next unit above interval F. Record this as top not seen on your log. |
Close-up of the structures in Figure 37, seen on a fresh surface. |
|
![]()
DAVILA HARRIS, P., BRANNEY, M.J. And STOREY, M. (2011). Large eruption-triggered ocean-island landslide at Tenerife: Onshore record and long-term effects on hazardous pyroclastic dispersal. Geology, vol 39; p951-954
![]()
Interpreting the field evidence
You have now acquired a variety of different types of data on the logged section. This includes lithology, structures and field relationships. Your task now is to draw up the log and interpret the data.
 |
Whilst we're in Tenerife, let's take full advantage of the culture as well as the geology. The barraquito is a local speciality, and a tasty restorative after a long day in the field, especially if the weather on the volcano was a bit chilly. |
![]()
Make sure you've completed all the work for this locality. Now we can get back on the virtual coach and head off to our next stop.
![]()
This page is maintained by Roger Suthren. Last updated 11 March, 2021 9:55 AM . All images © Roger Suthren unless otherwise stated. Images may be re-used for non-commercial purposes.