It is important that you access this field trip on a laptop or desktop PC.
Click on any image to enlarge it - you will need to zoom in to see sufficient detail.
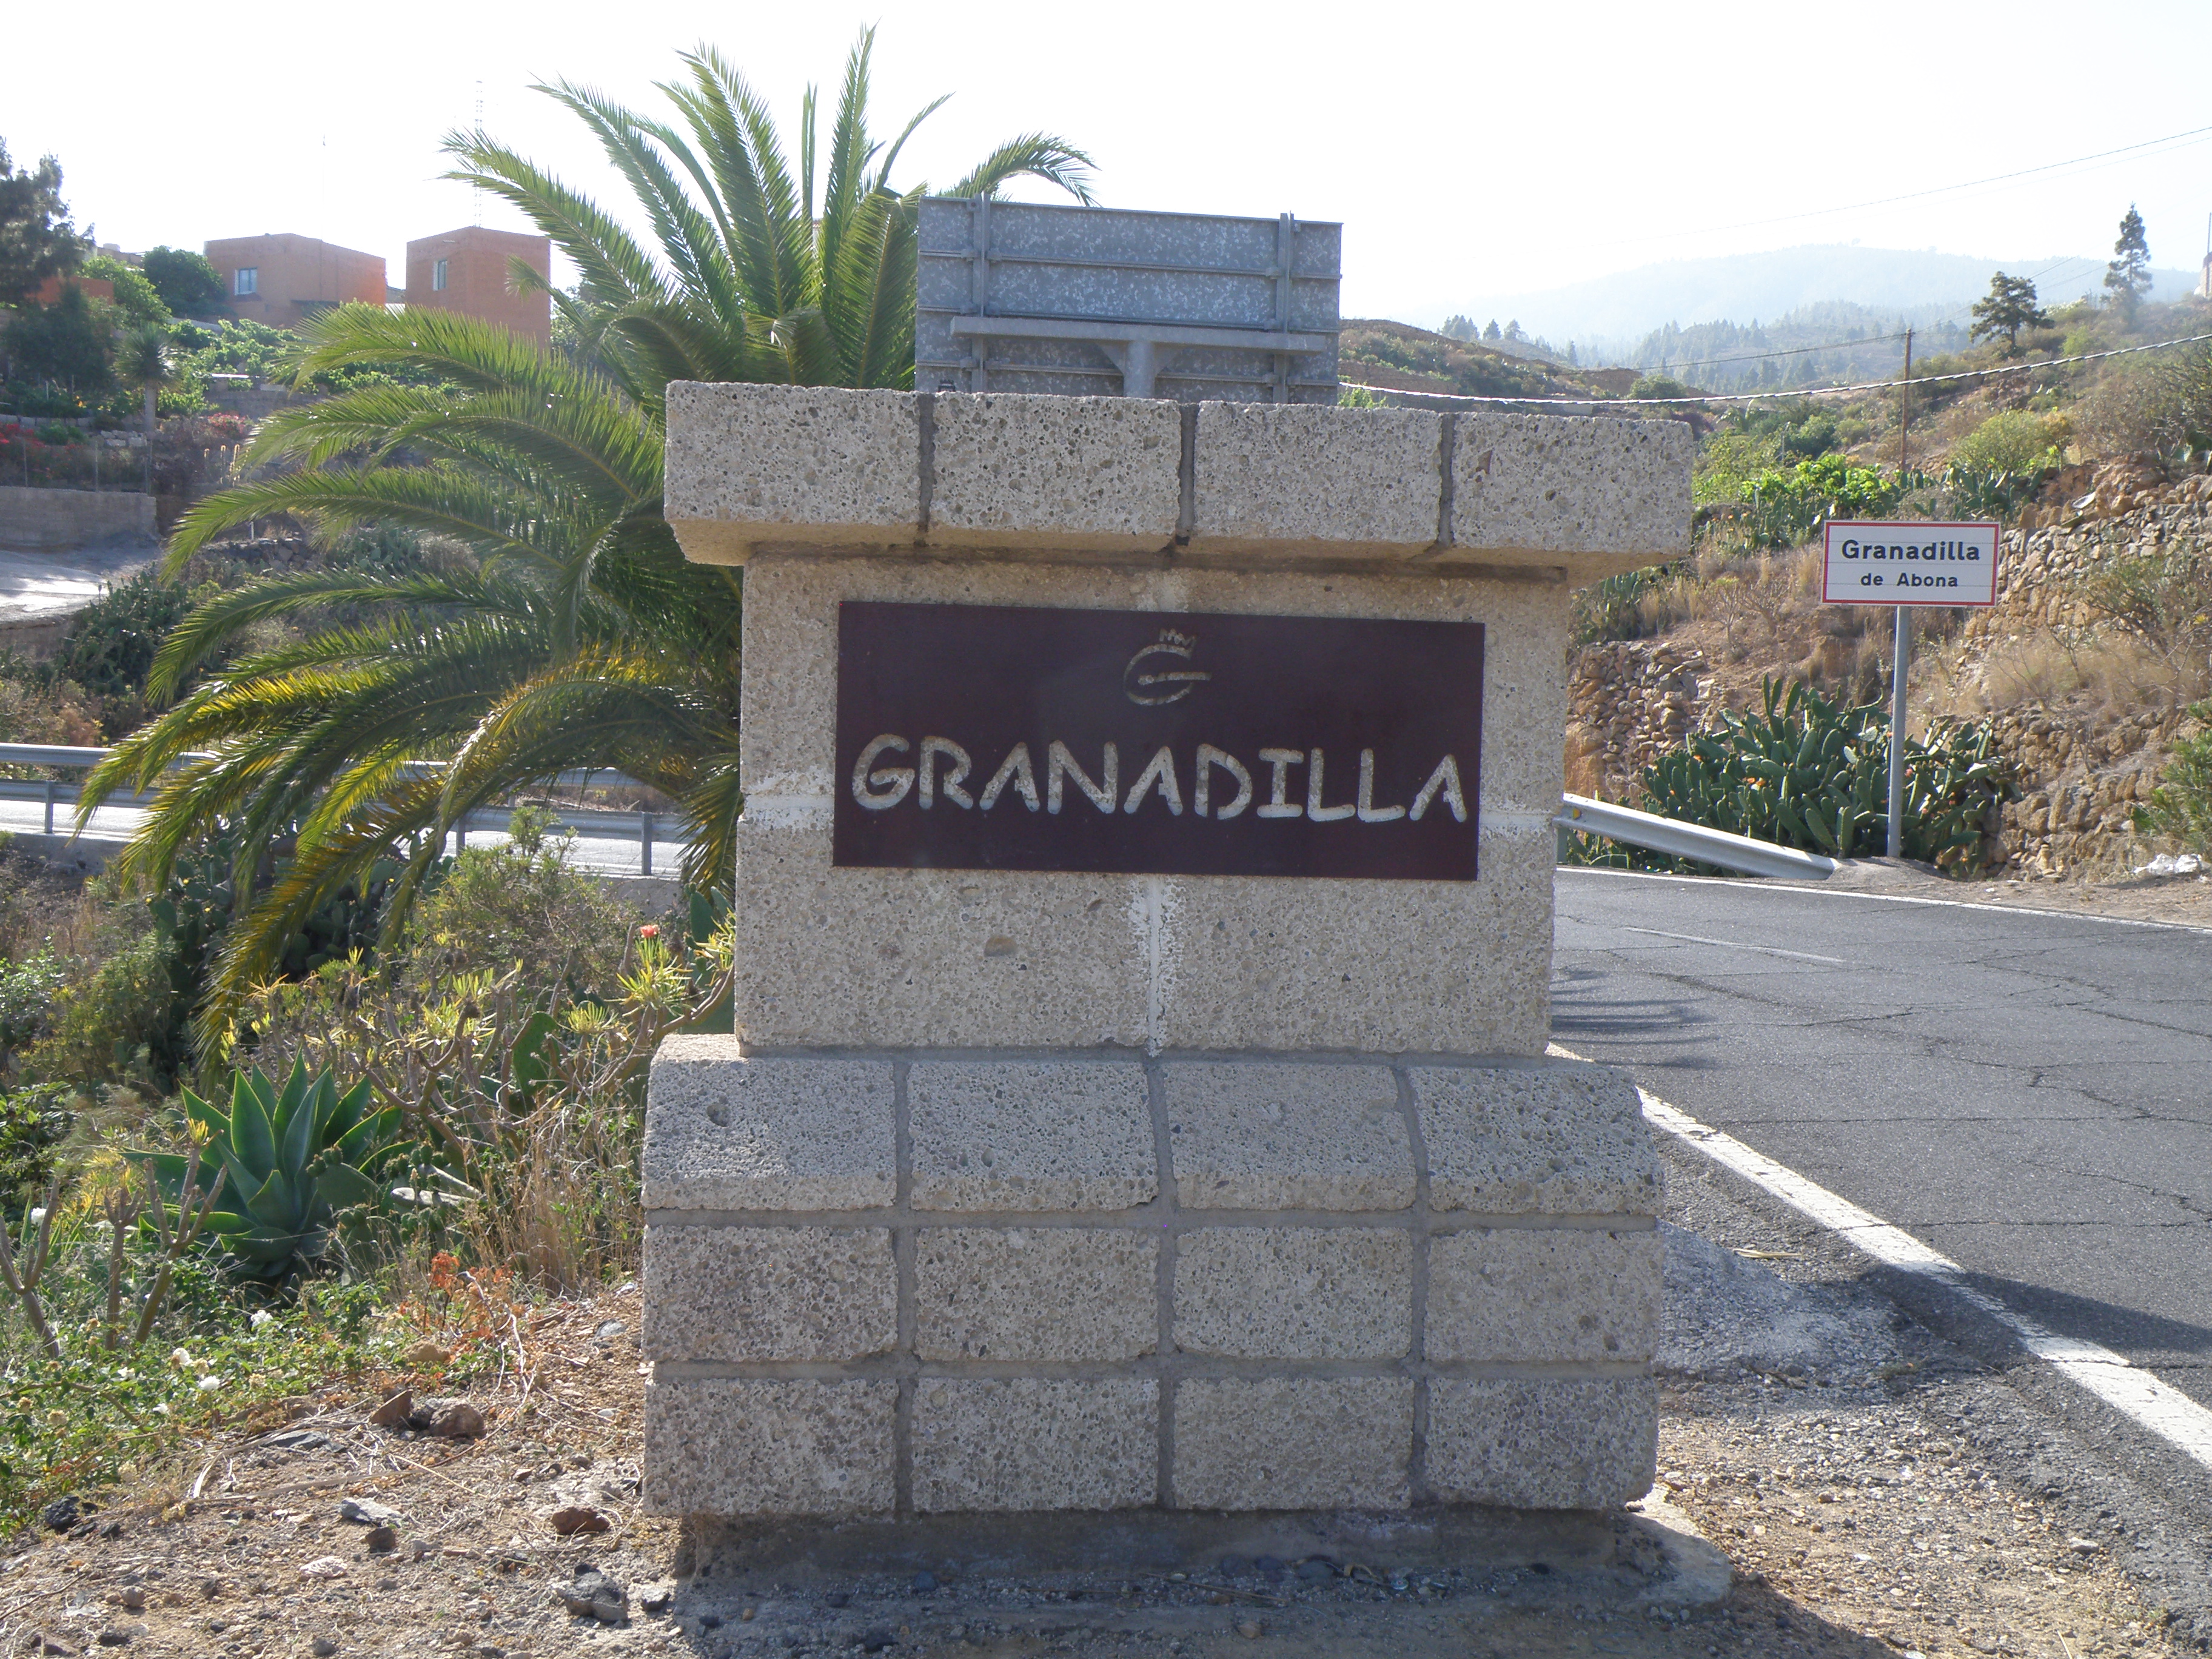
Where are we? We will study a section in disused quarries along road TF-28, about 600m north of the village of Chimiche, between km posts 66 and 67. The lower part of the section is exposed south of the road, and the upper part is in the quarry north of the road. Take a good look around the area in Google Maps and Streetview. There's a lot to see and do at this location, and we usually spend 2-3 hours here.
Stratigraphy: most of the section exposed here belongs to the Granadilla Formation, which is part of the Bandas del Sur Group of Pleistocene age. The age of the Granadilla Formation has been determined at 600 ± 9 ka (i.e. 600,000 ± 9000 years), dated by 40Ar/39Ar analyses of sanidine crystals (Brown et al., 2003). The rocks seen here are all phonolitic in composition.
|
|
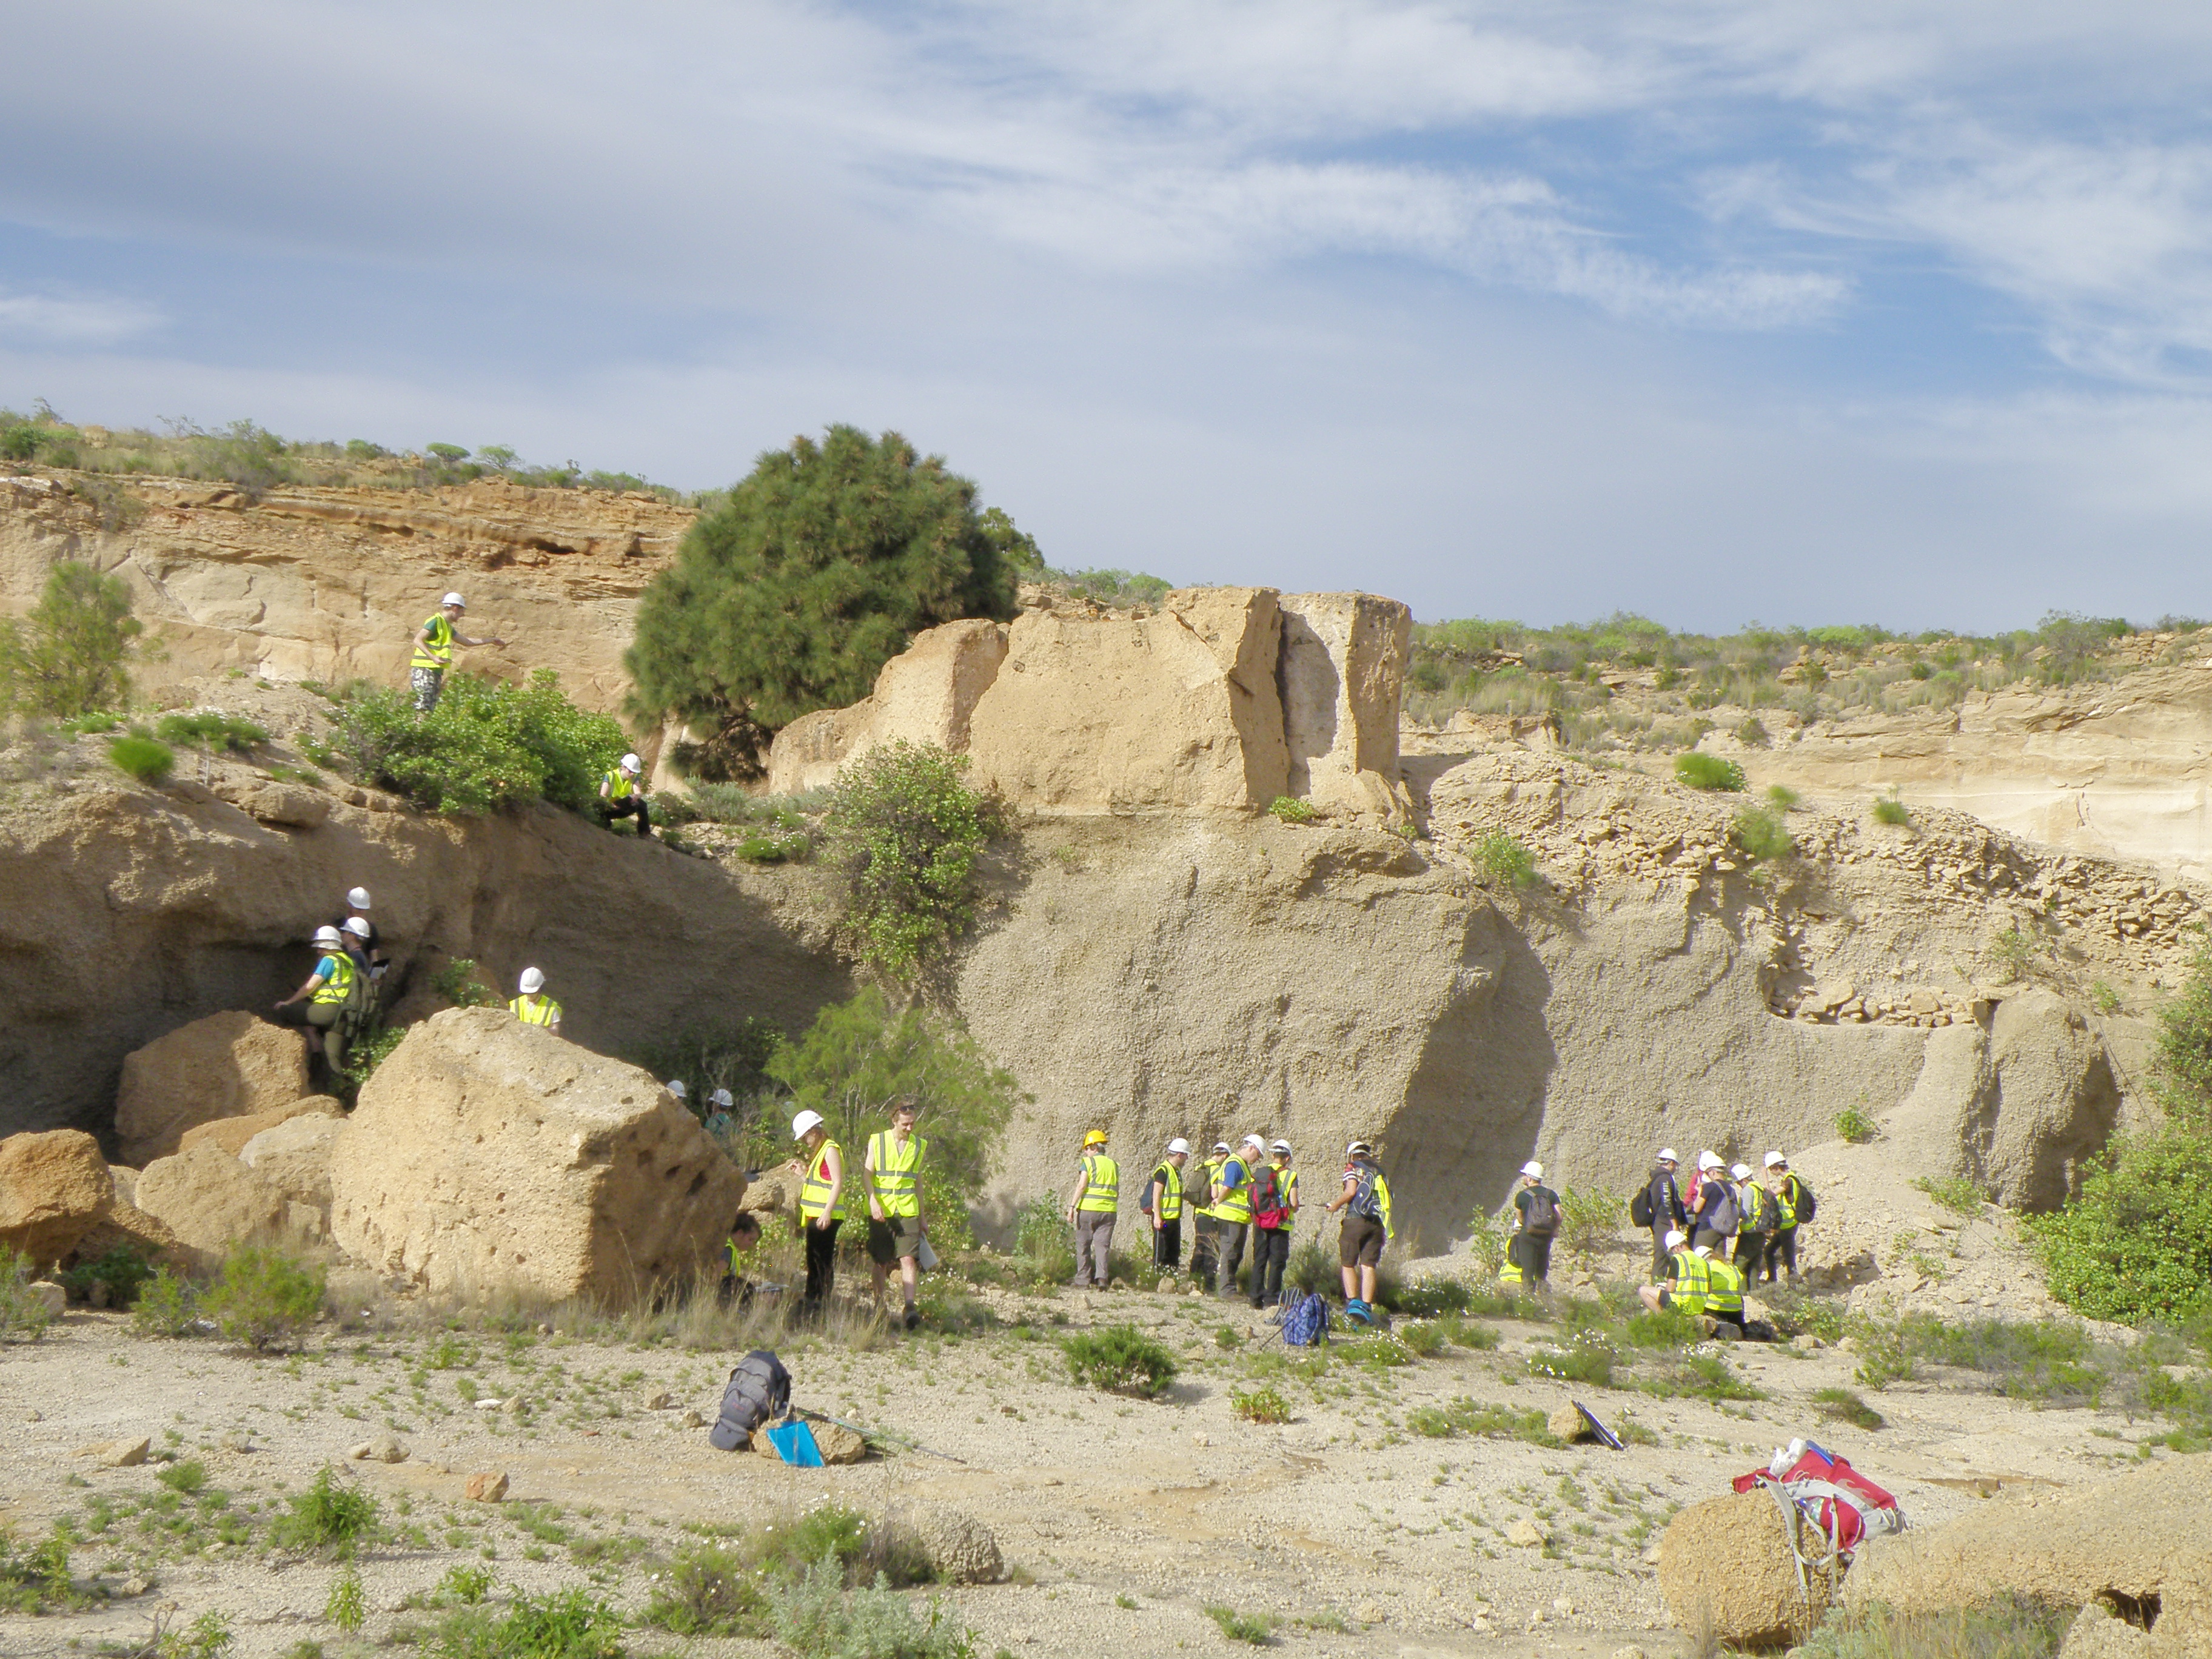
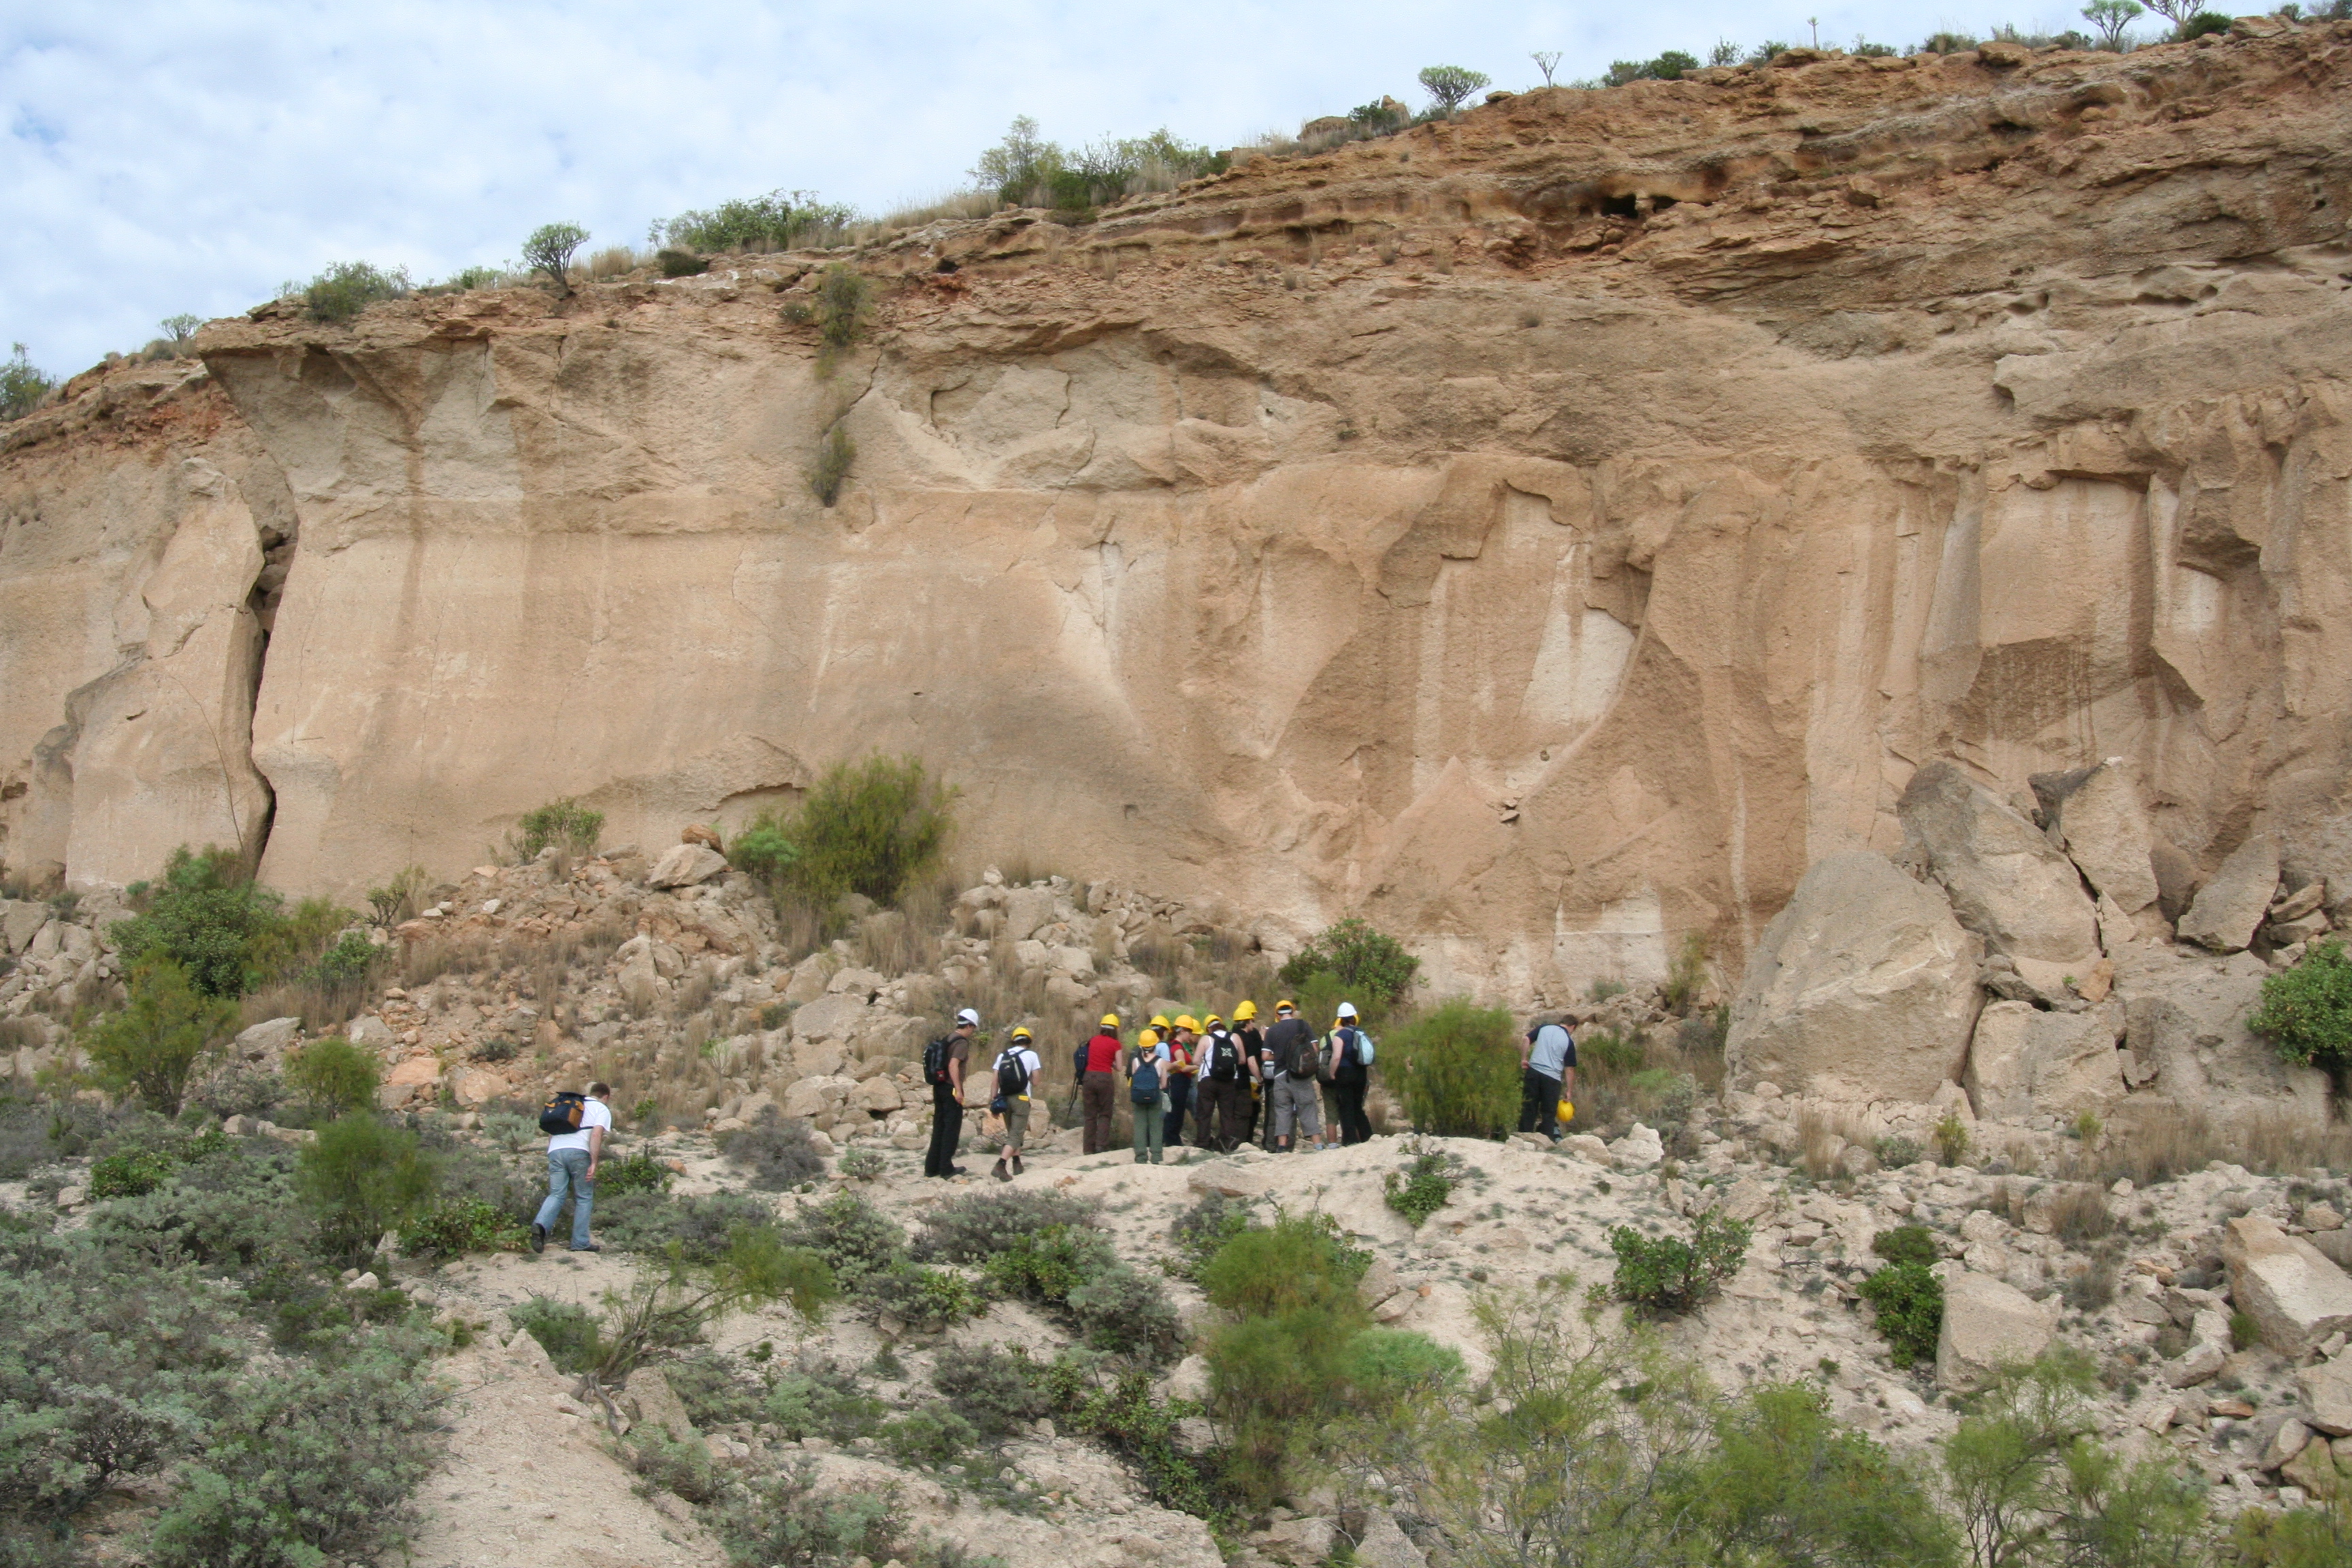 Figure 2. View of the upper part of the section in the quarry on the north side of the road. |
![]()
Economic geology: let's think
briefly about why there are quarries here. Two types of material have been quarried:
poorly consolidated pumice from the lower (south) part of the section (we'll
call it Unit G1), and the compact, massive rock (Unit G3) in the quarry north
of the road.
|
|
|
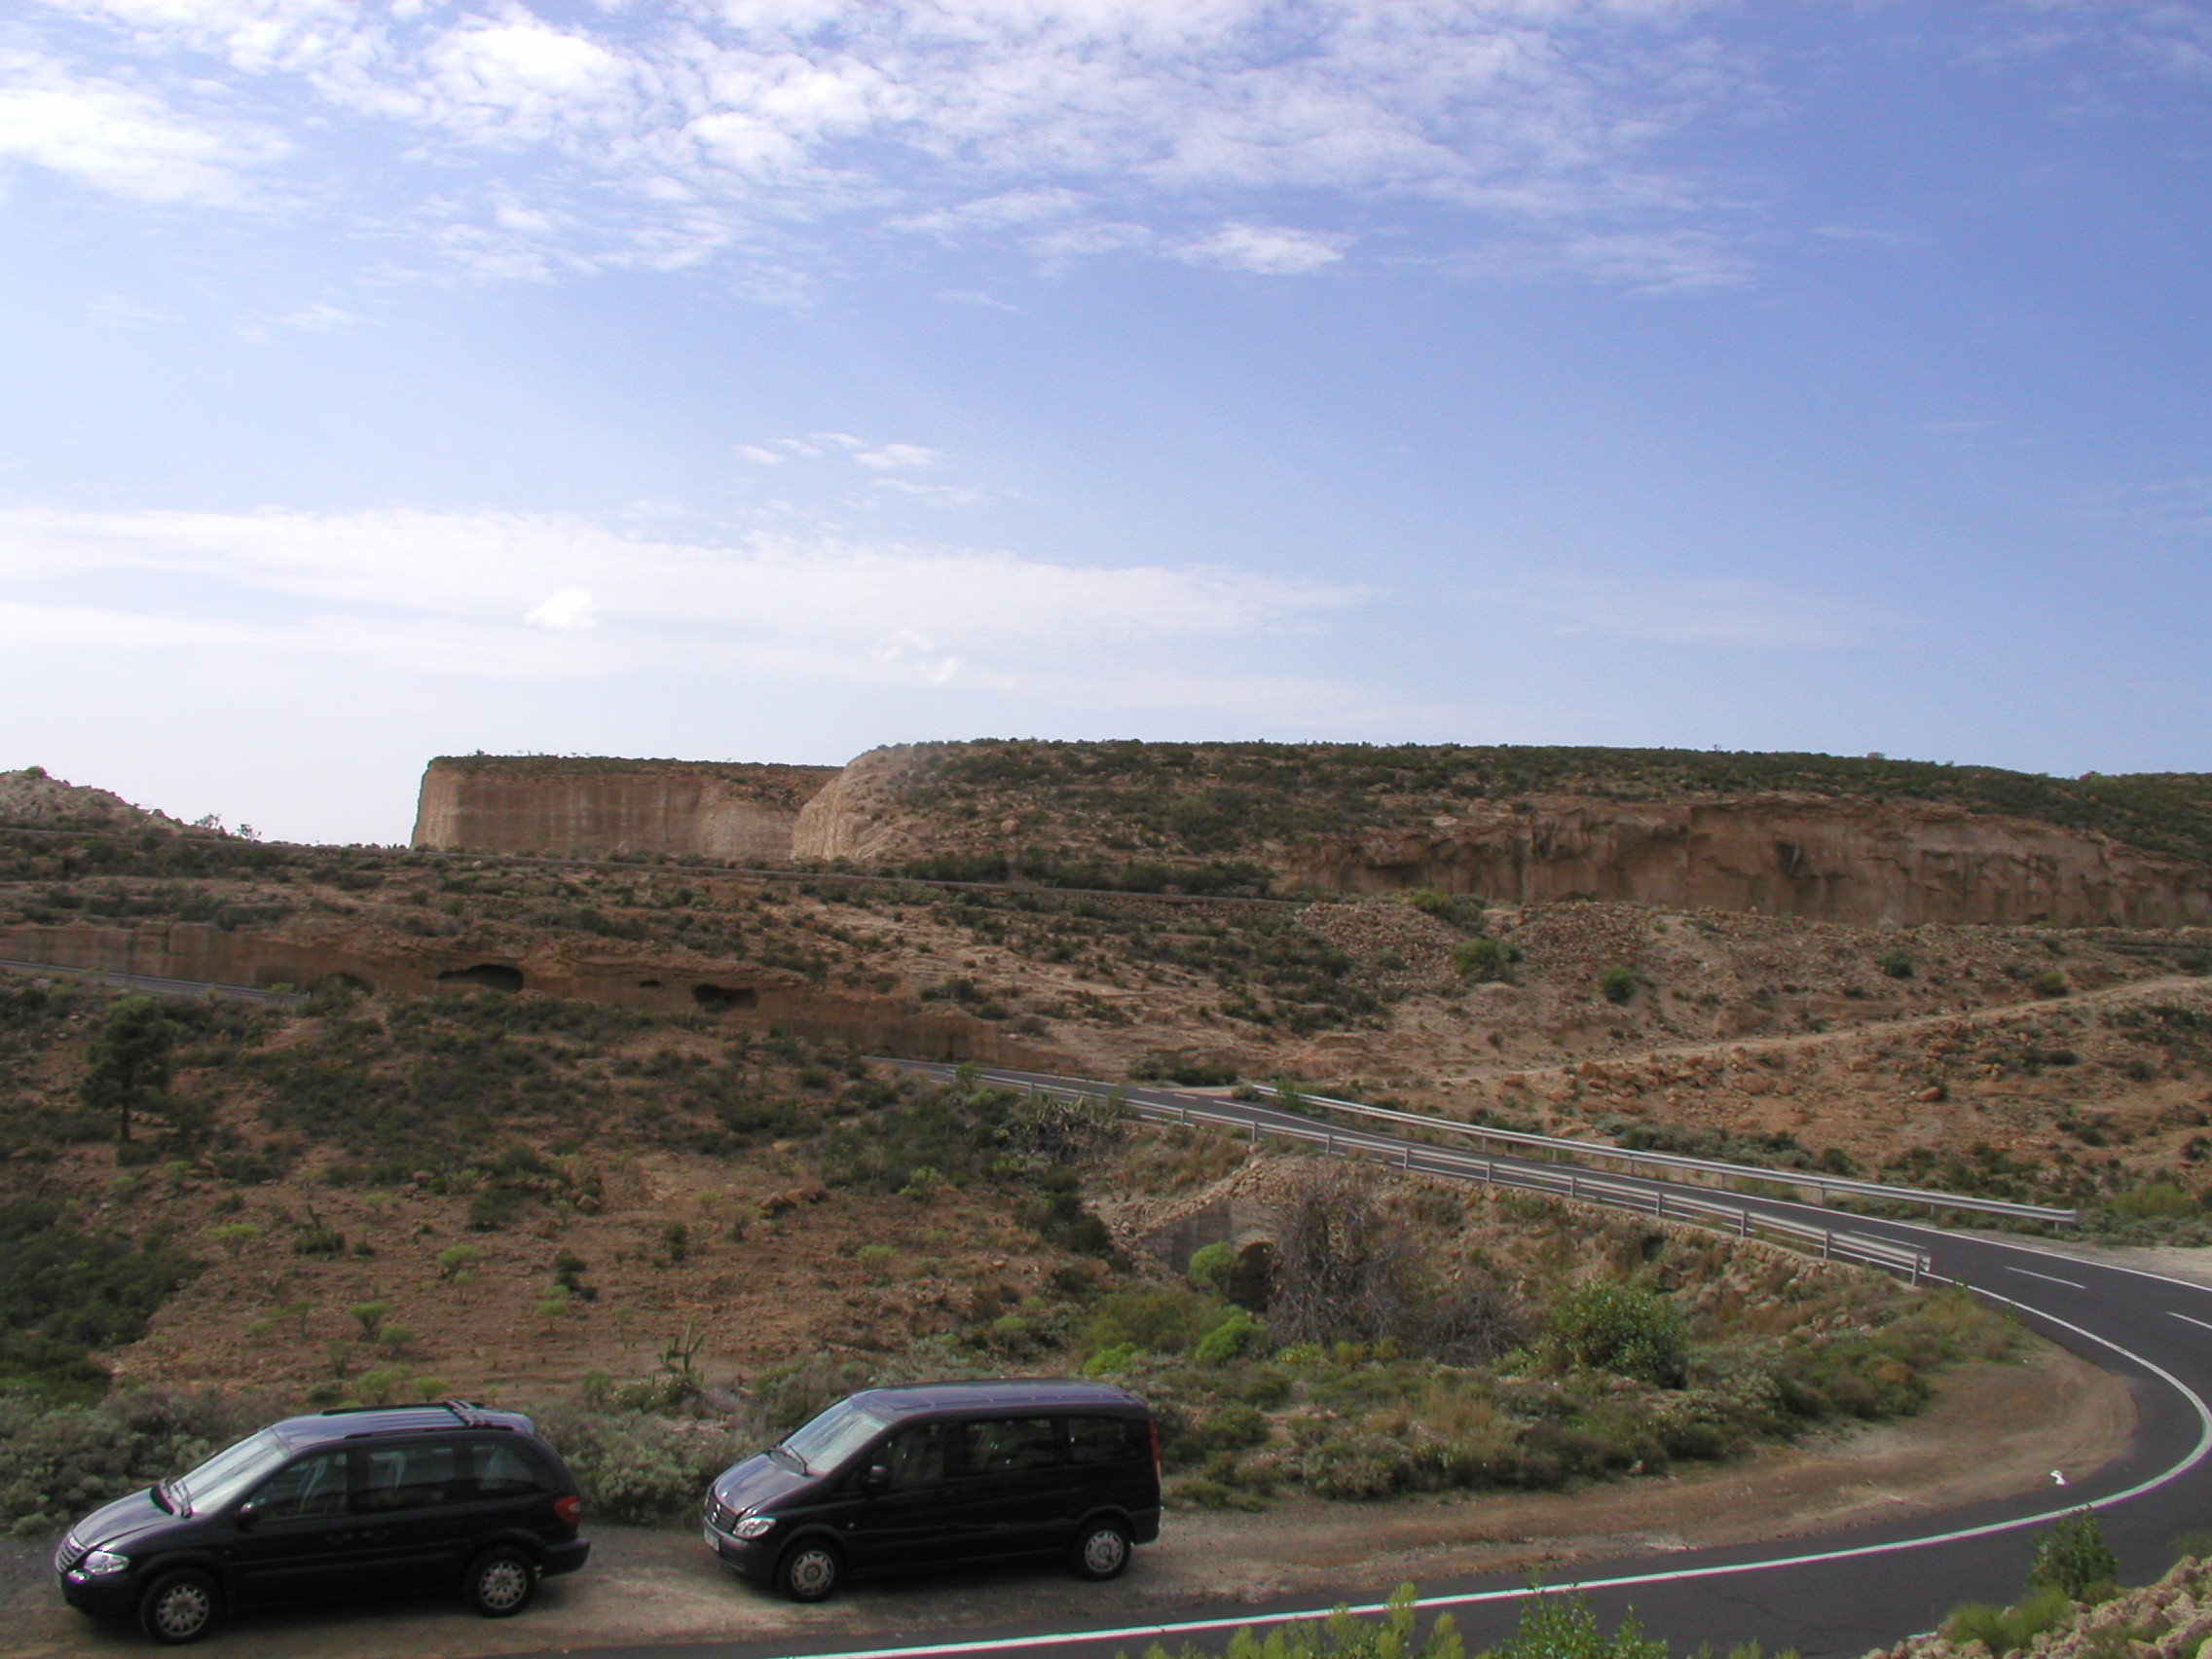 Figure 5. View of extensive quarries in Unit G3, south of the studied section. The rock is easily sawed into lightweight blocks used for construction - effectively these are natural breeze blocks. |
|
|
|
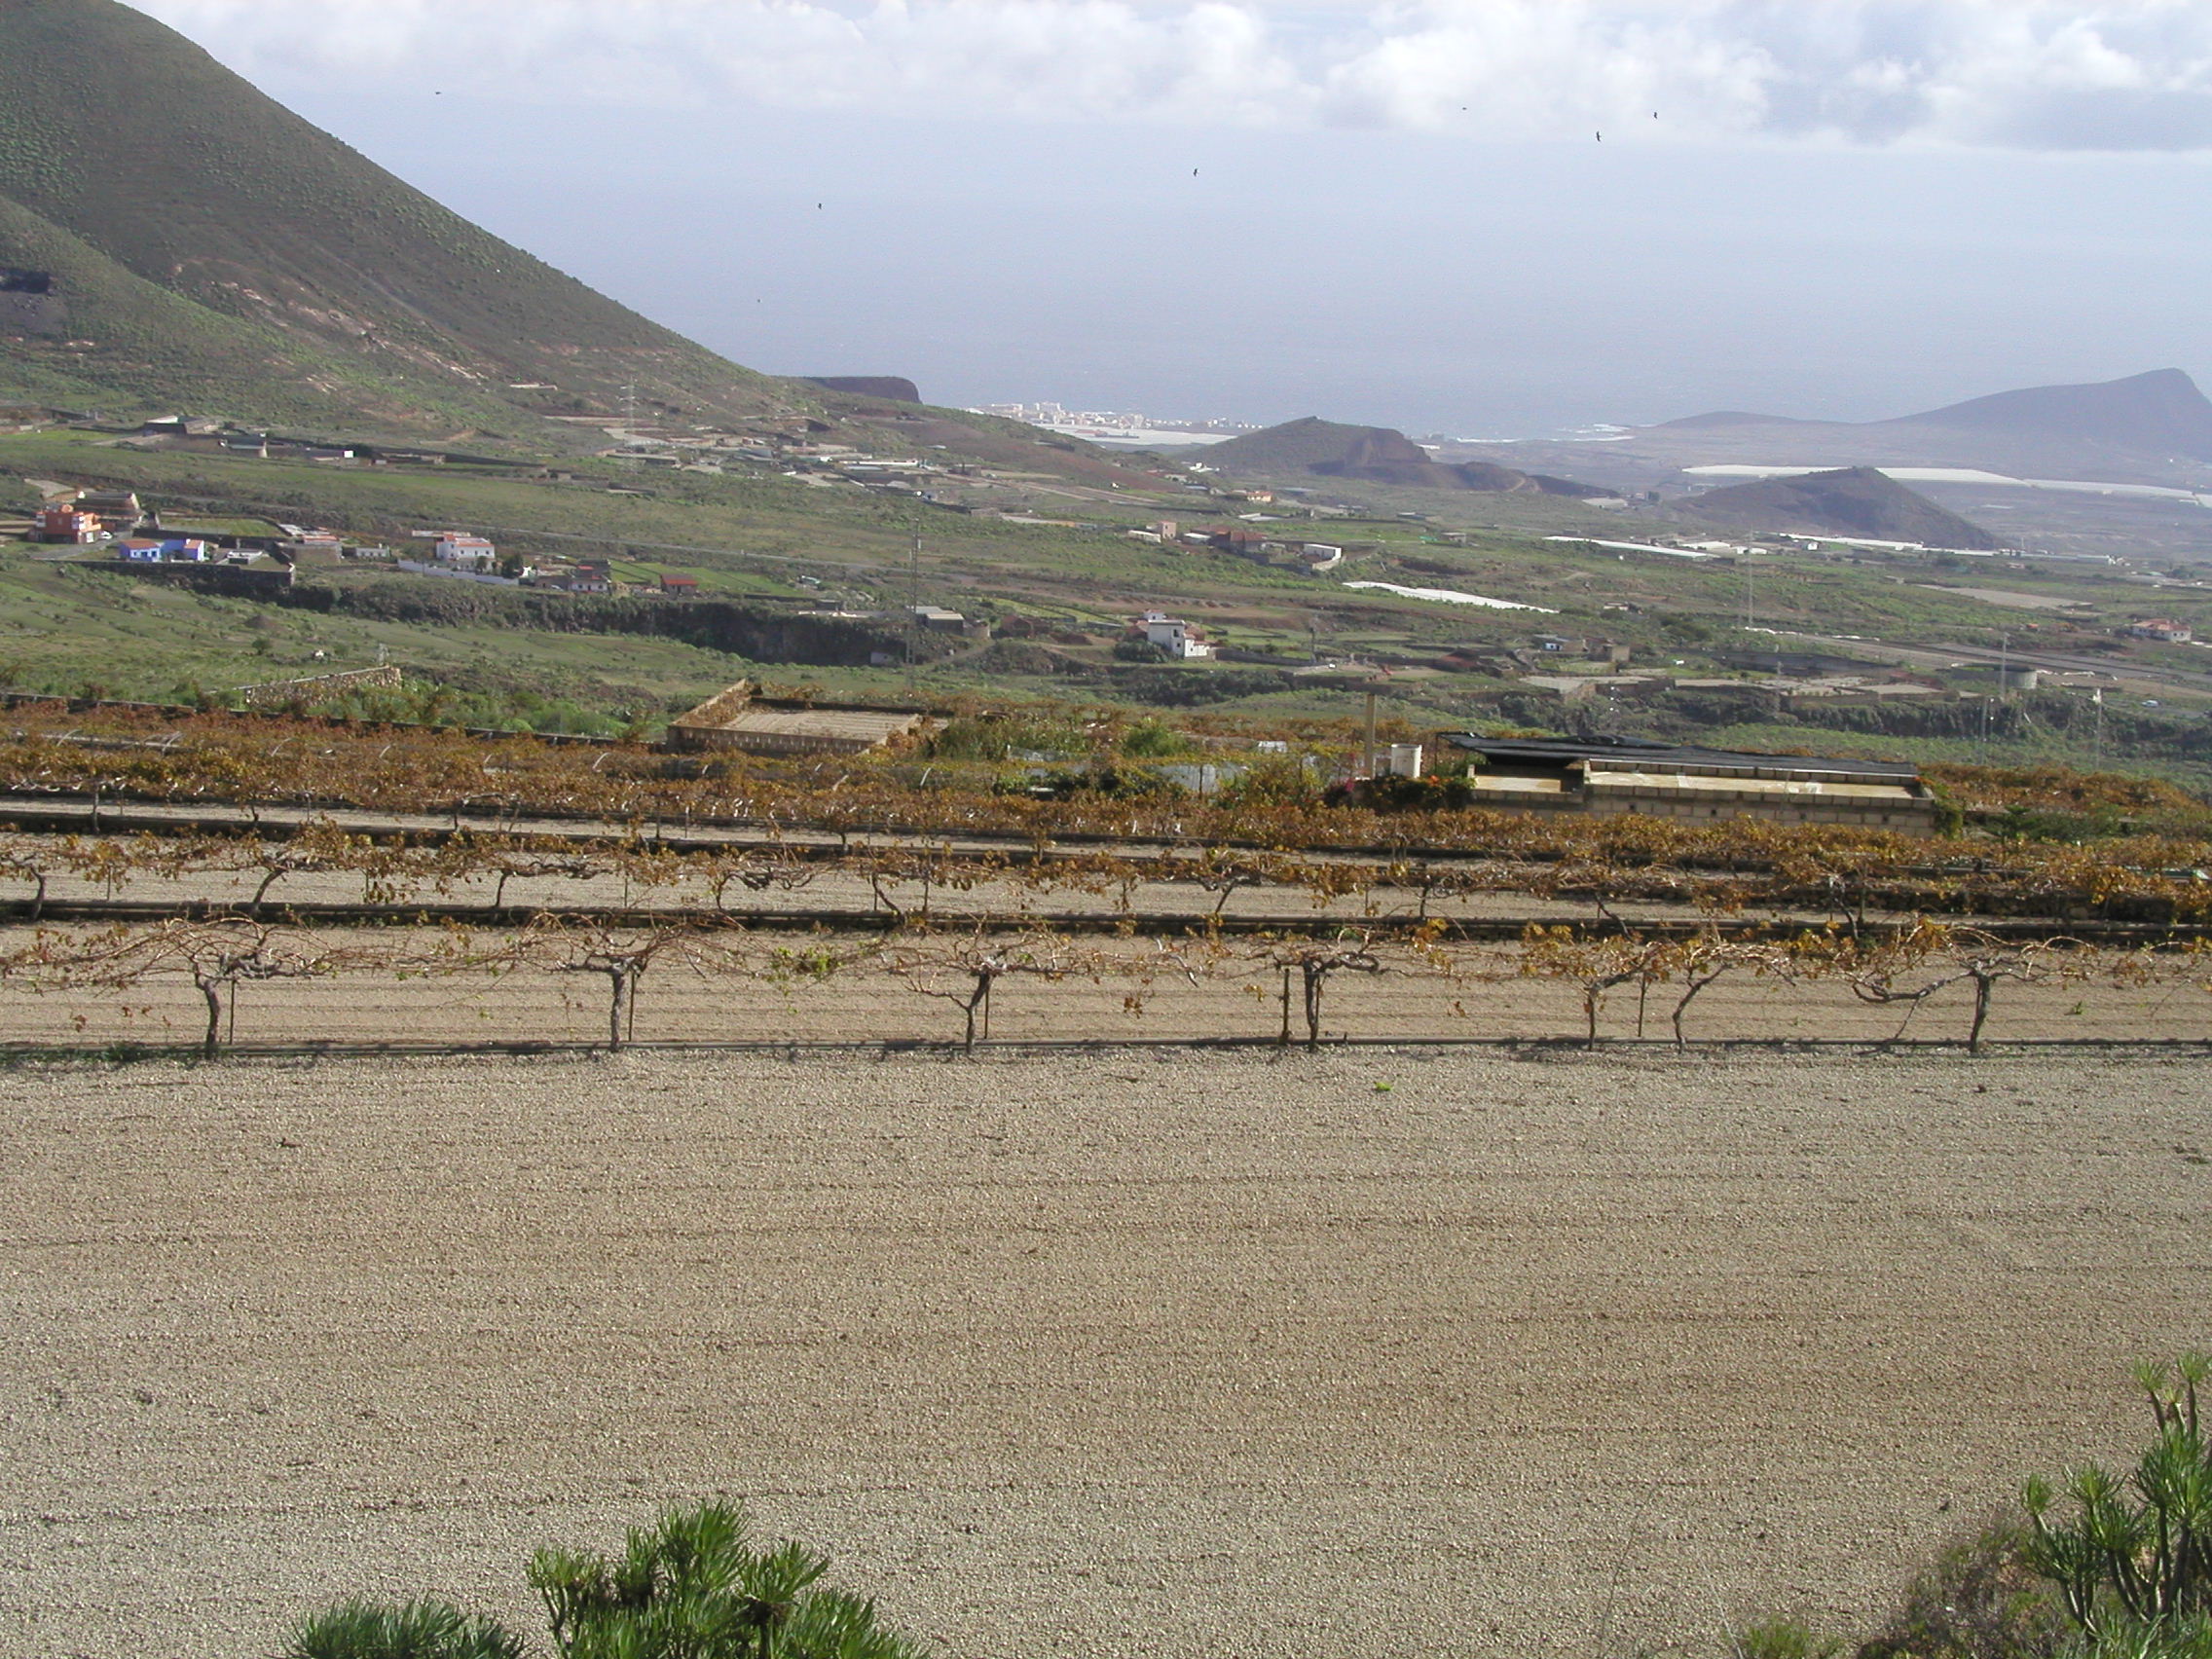
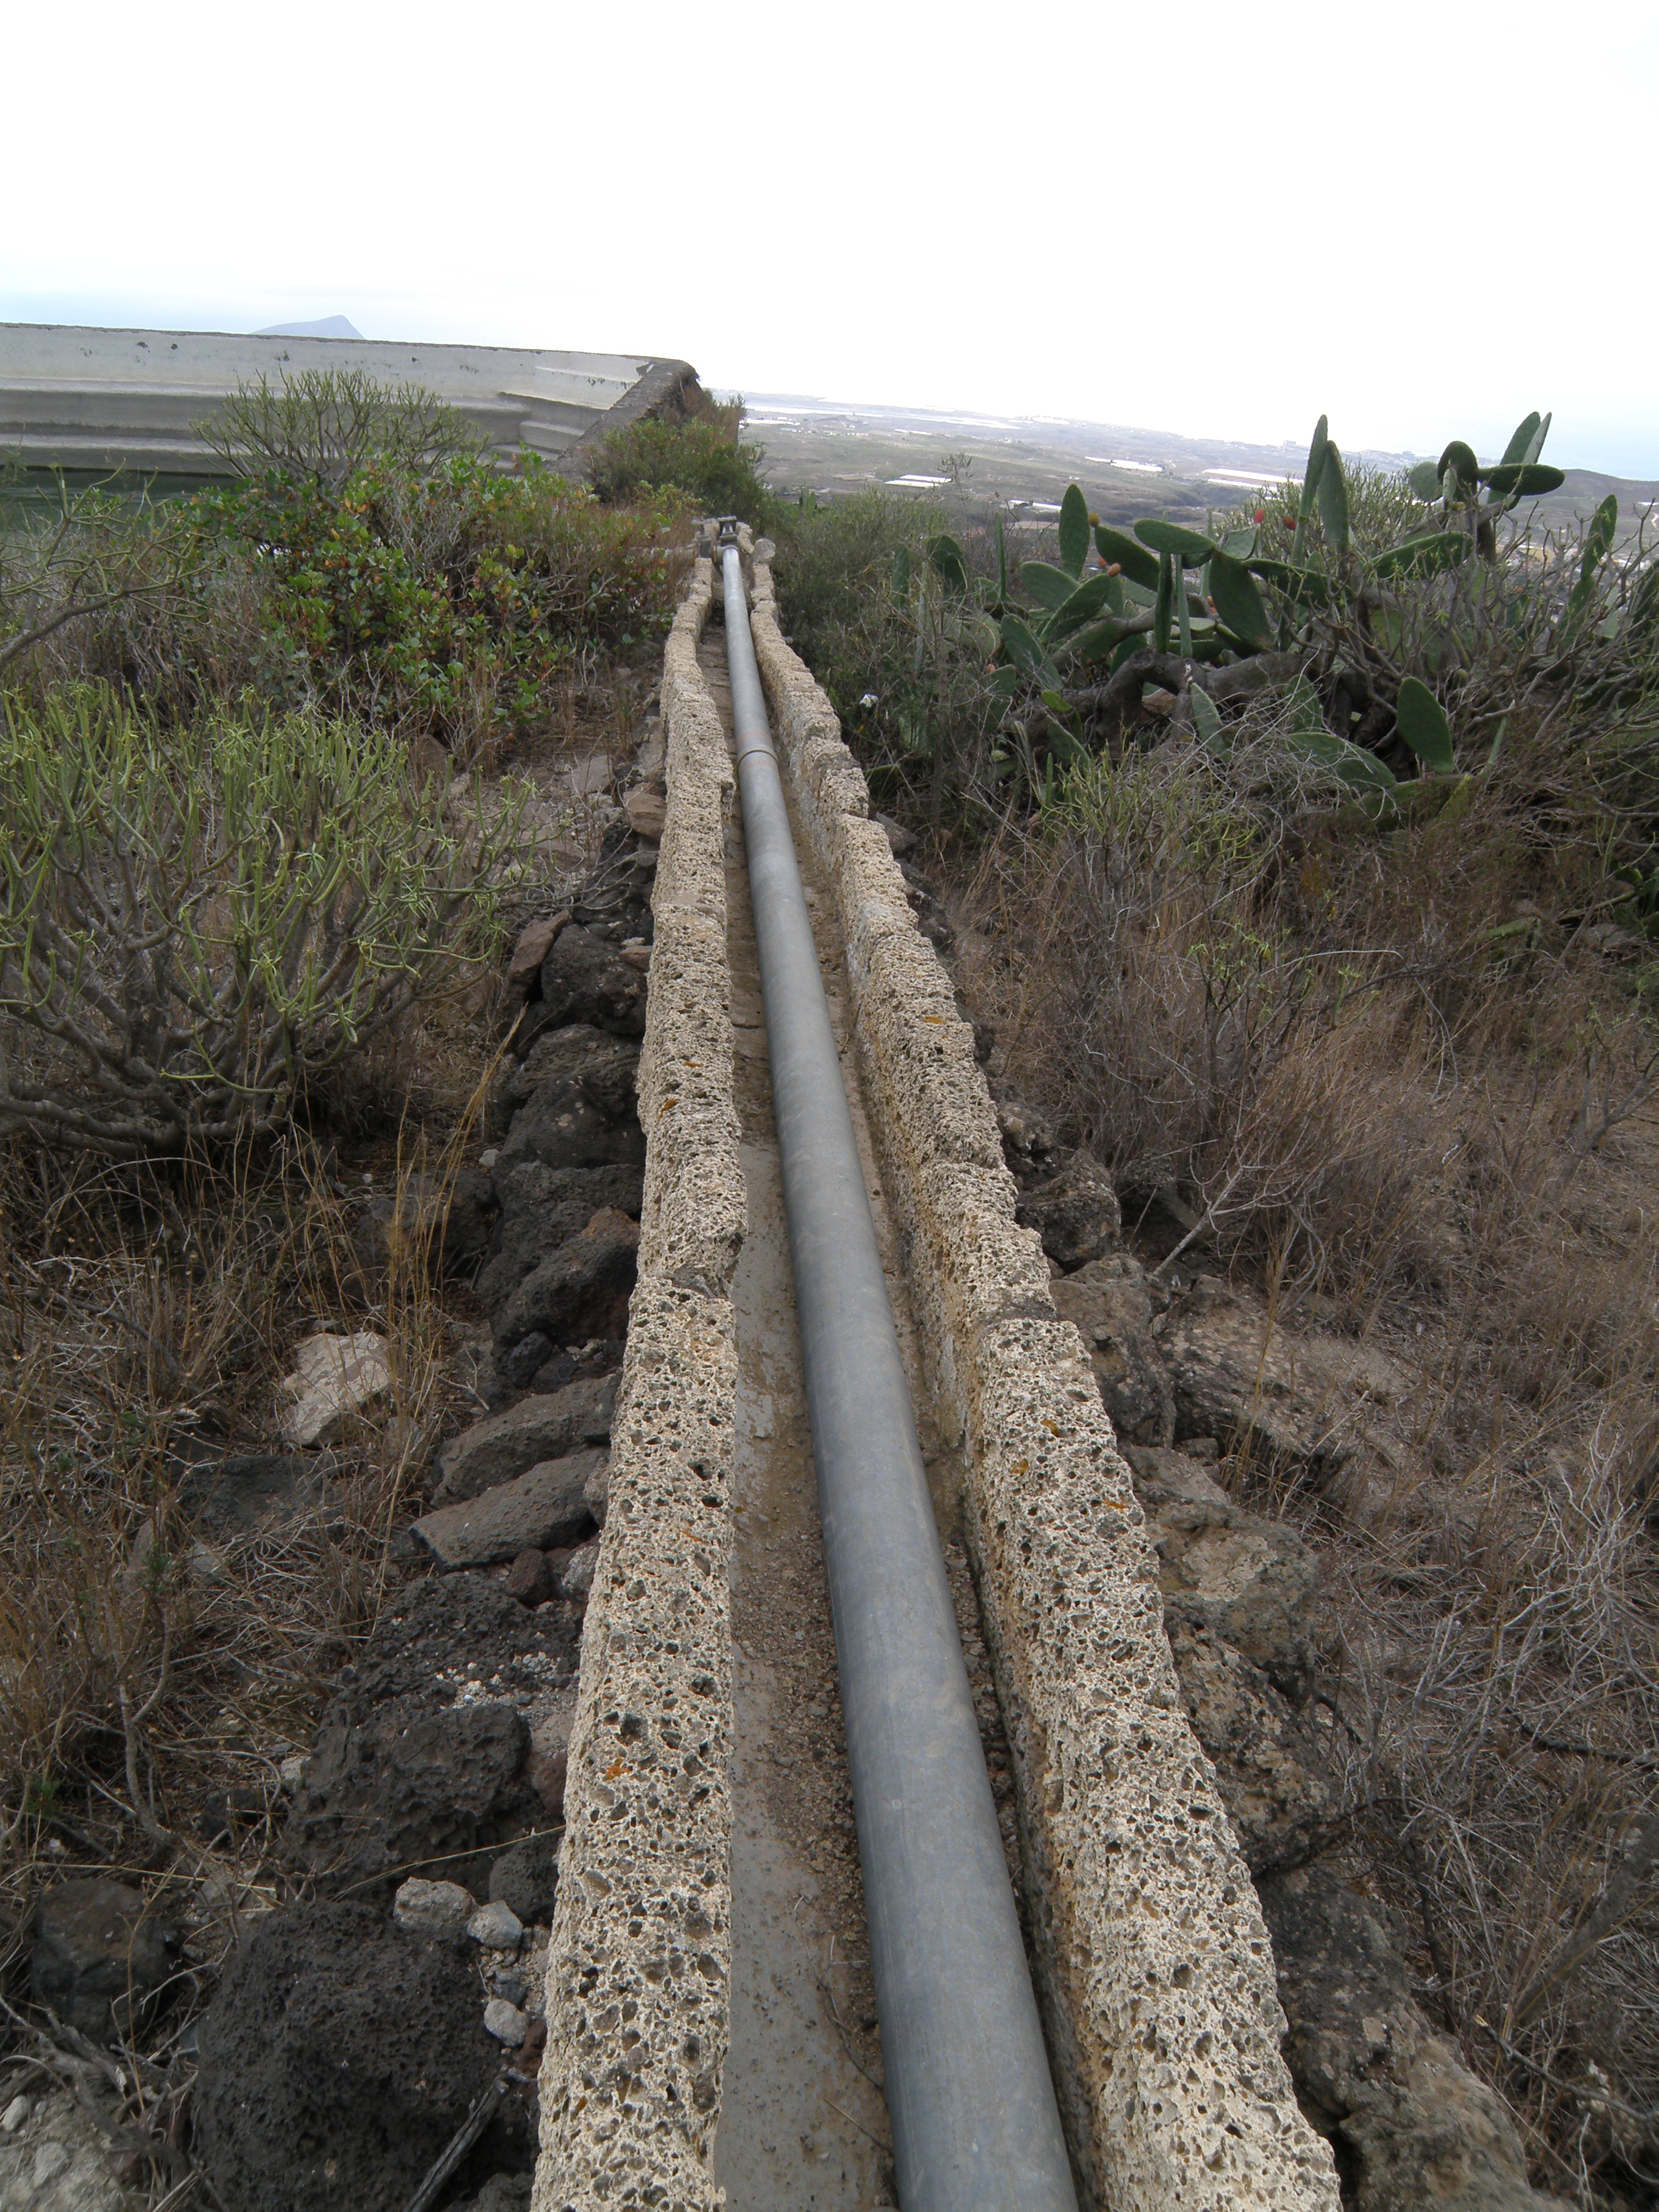 Figure 7. Aqueduct for crop irrigation, made of carved blocks of Unit G3. A plastic pipe has been added later to reduce water loss through seepage and evaporation. |
![]() Question: what are some other economic uses of pumice, from Tenerife or
elsewhere?
Question: what are some other economic uses of pumice, from Tenerife or
elsewhere?
![]()
At this location, we will make a detailed log of the Granadilla Formation.
Logging
instructions. Log paper (pdf;
PowerPoint; odp)
Logging the section
We have divided the section up into lettered units to get you off to a good start.
For each unit, record:
The section south of the road: Unit G1
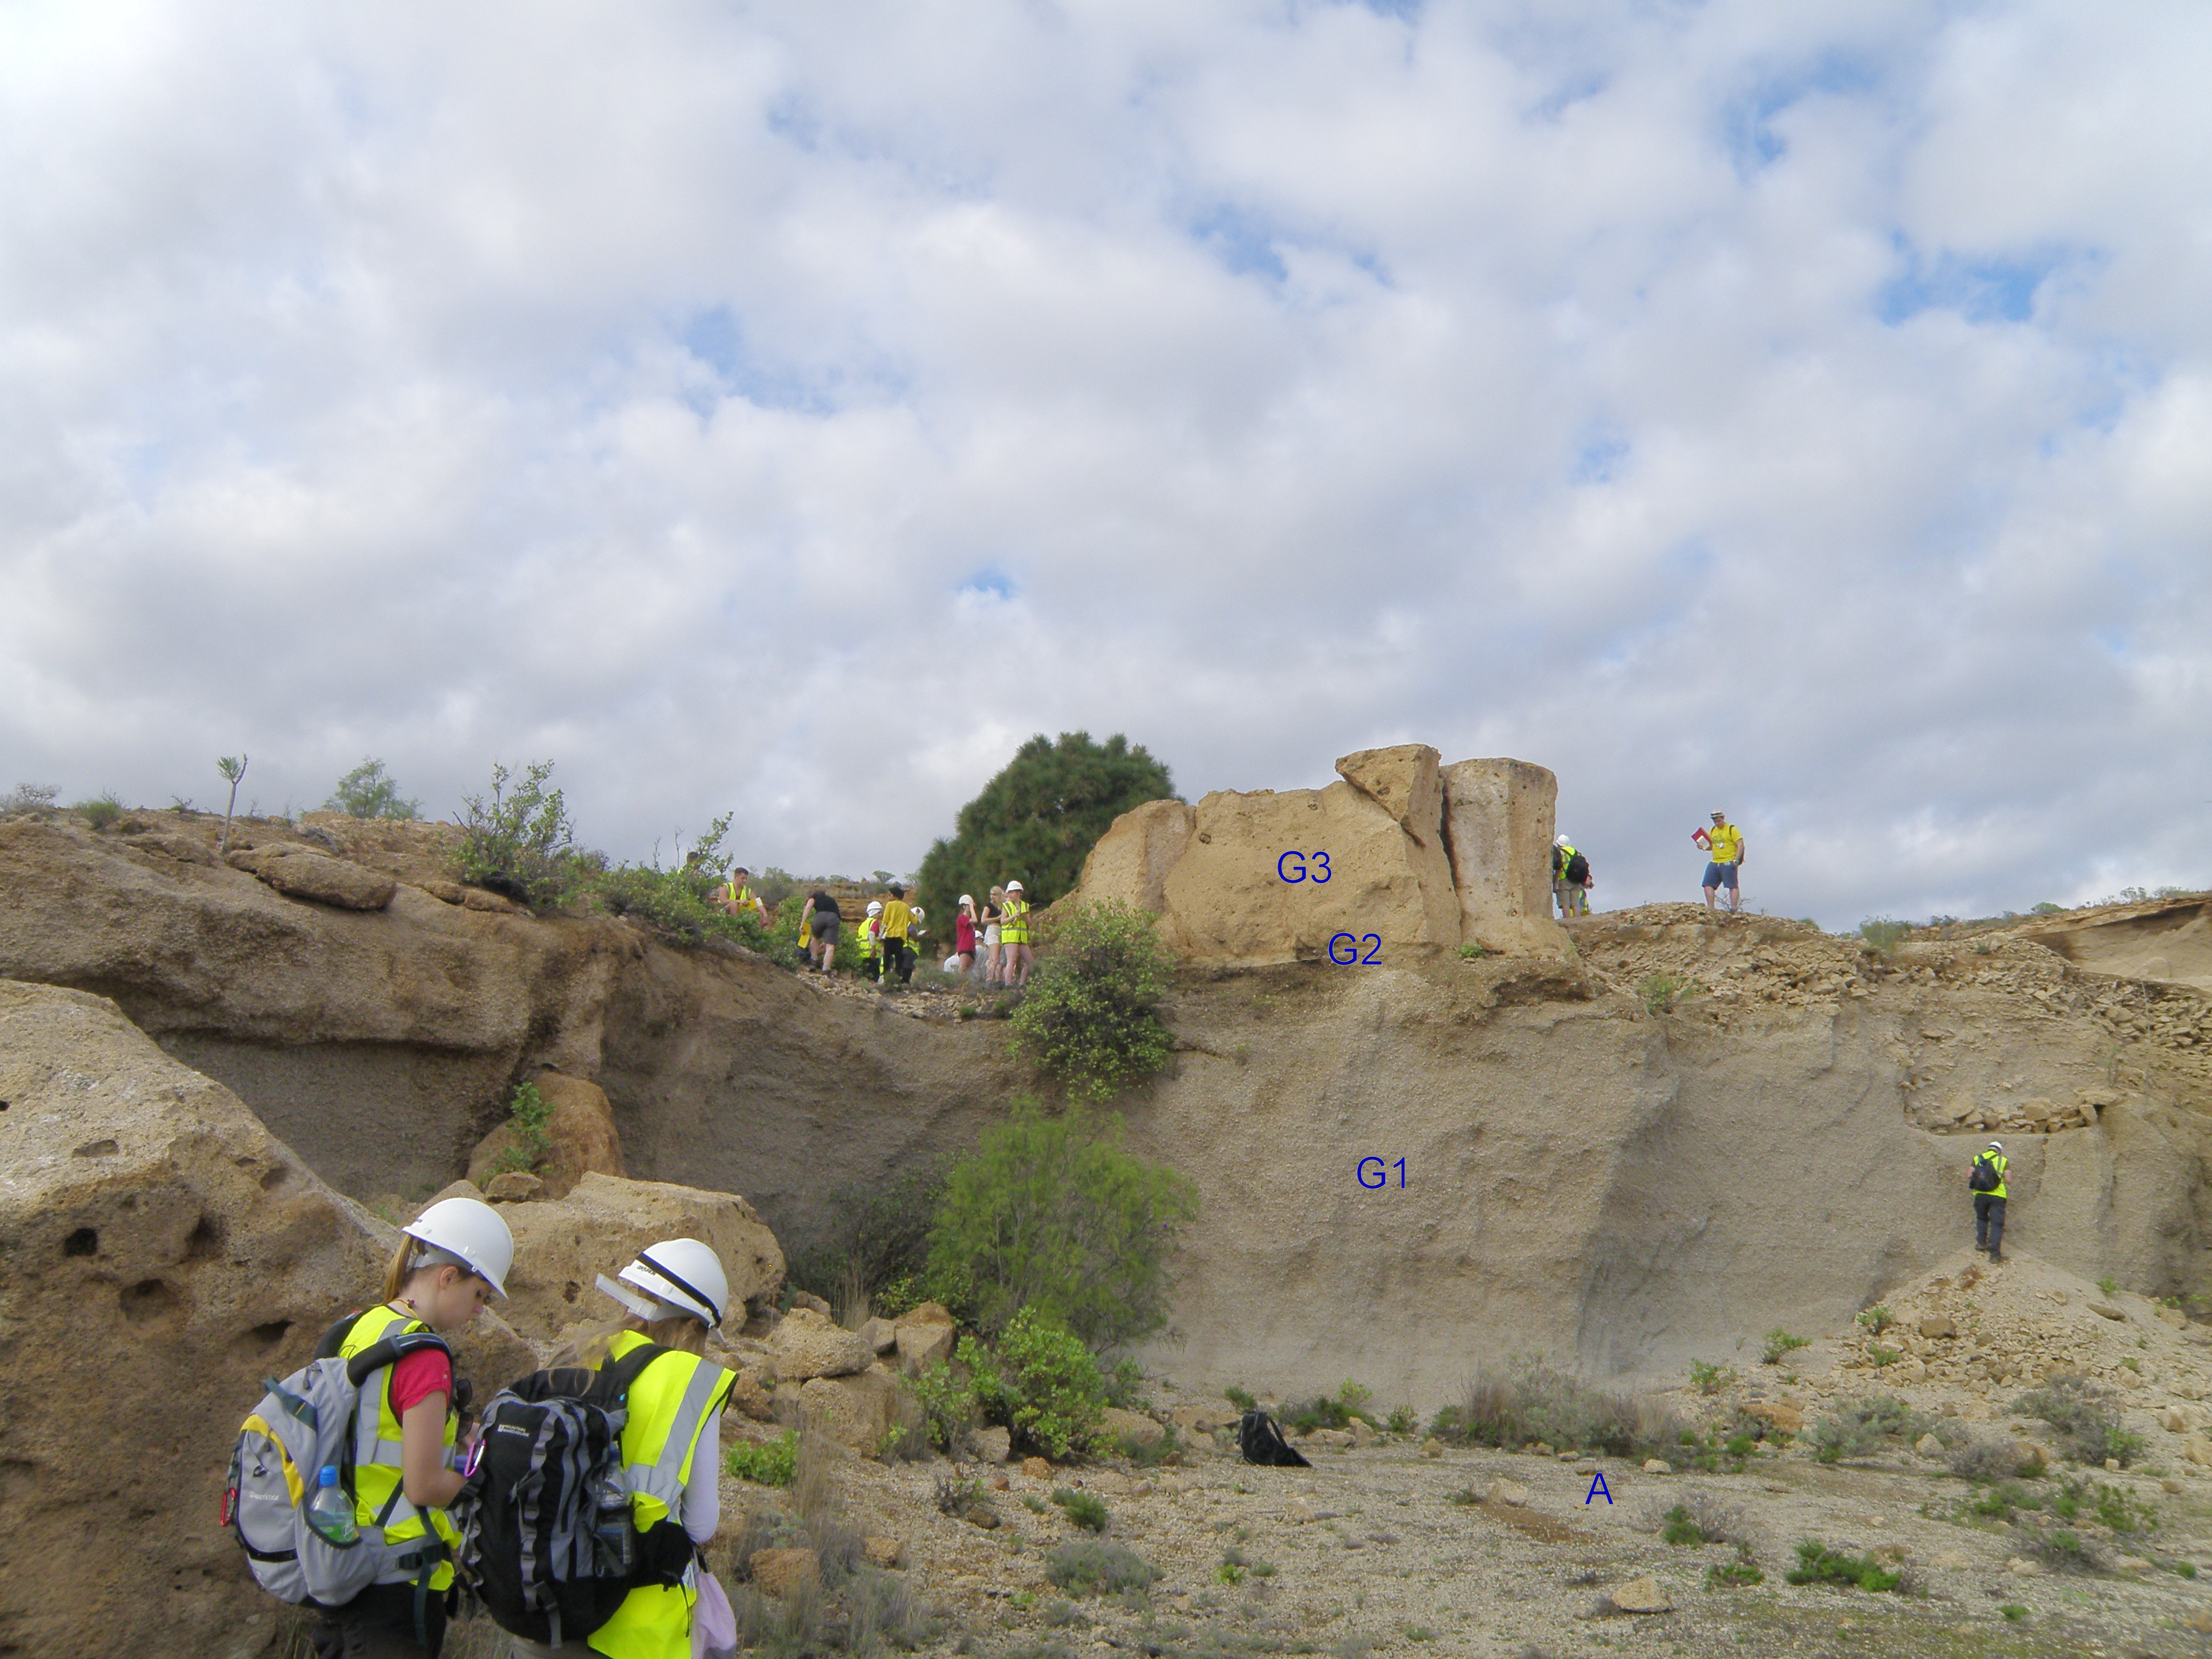 Figure 8. The quarry face, showing Units G1, G2 and G3. A indicates the top of the underlying Abades Formation, exposed in the quarry floor. |
|
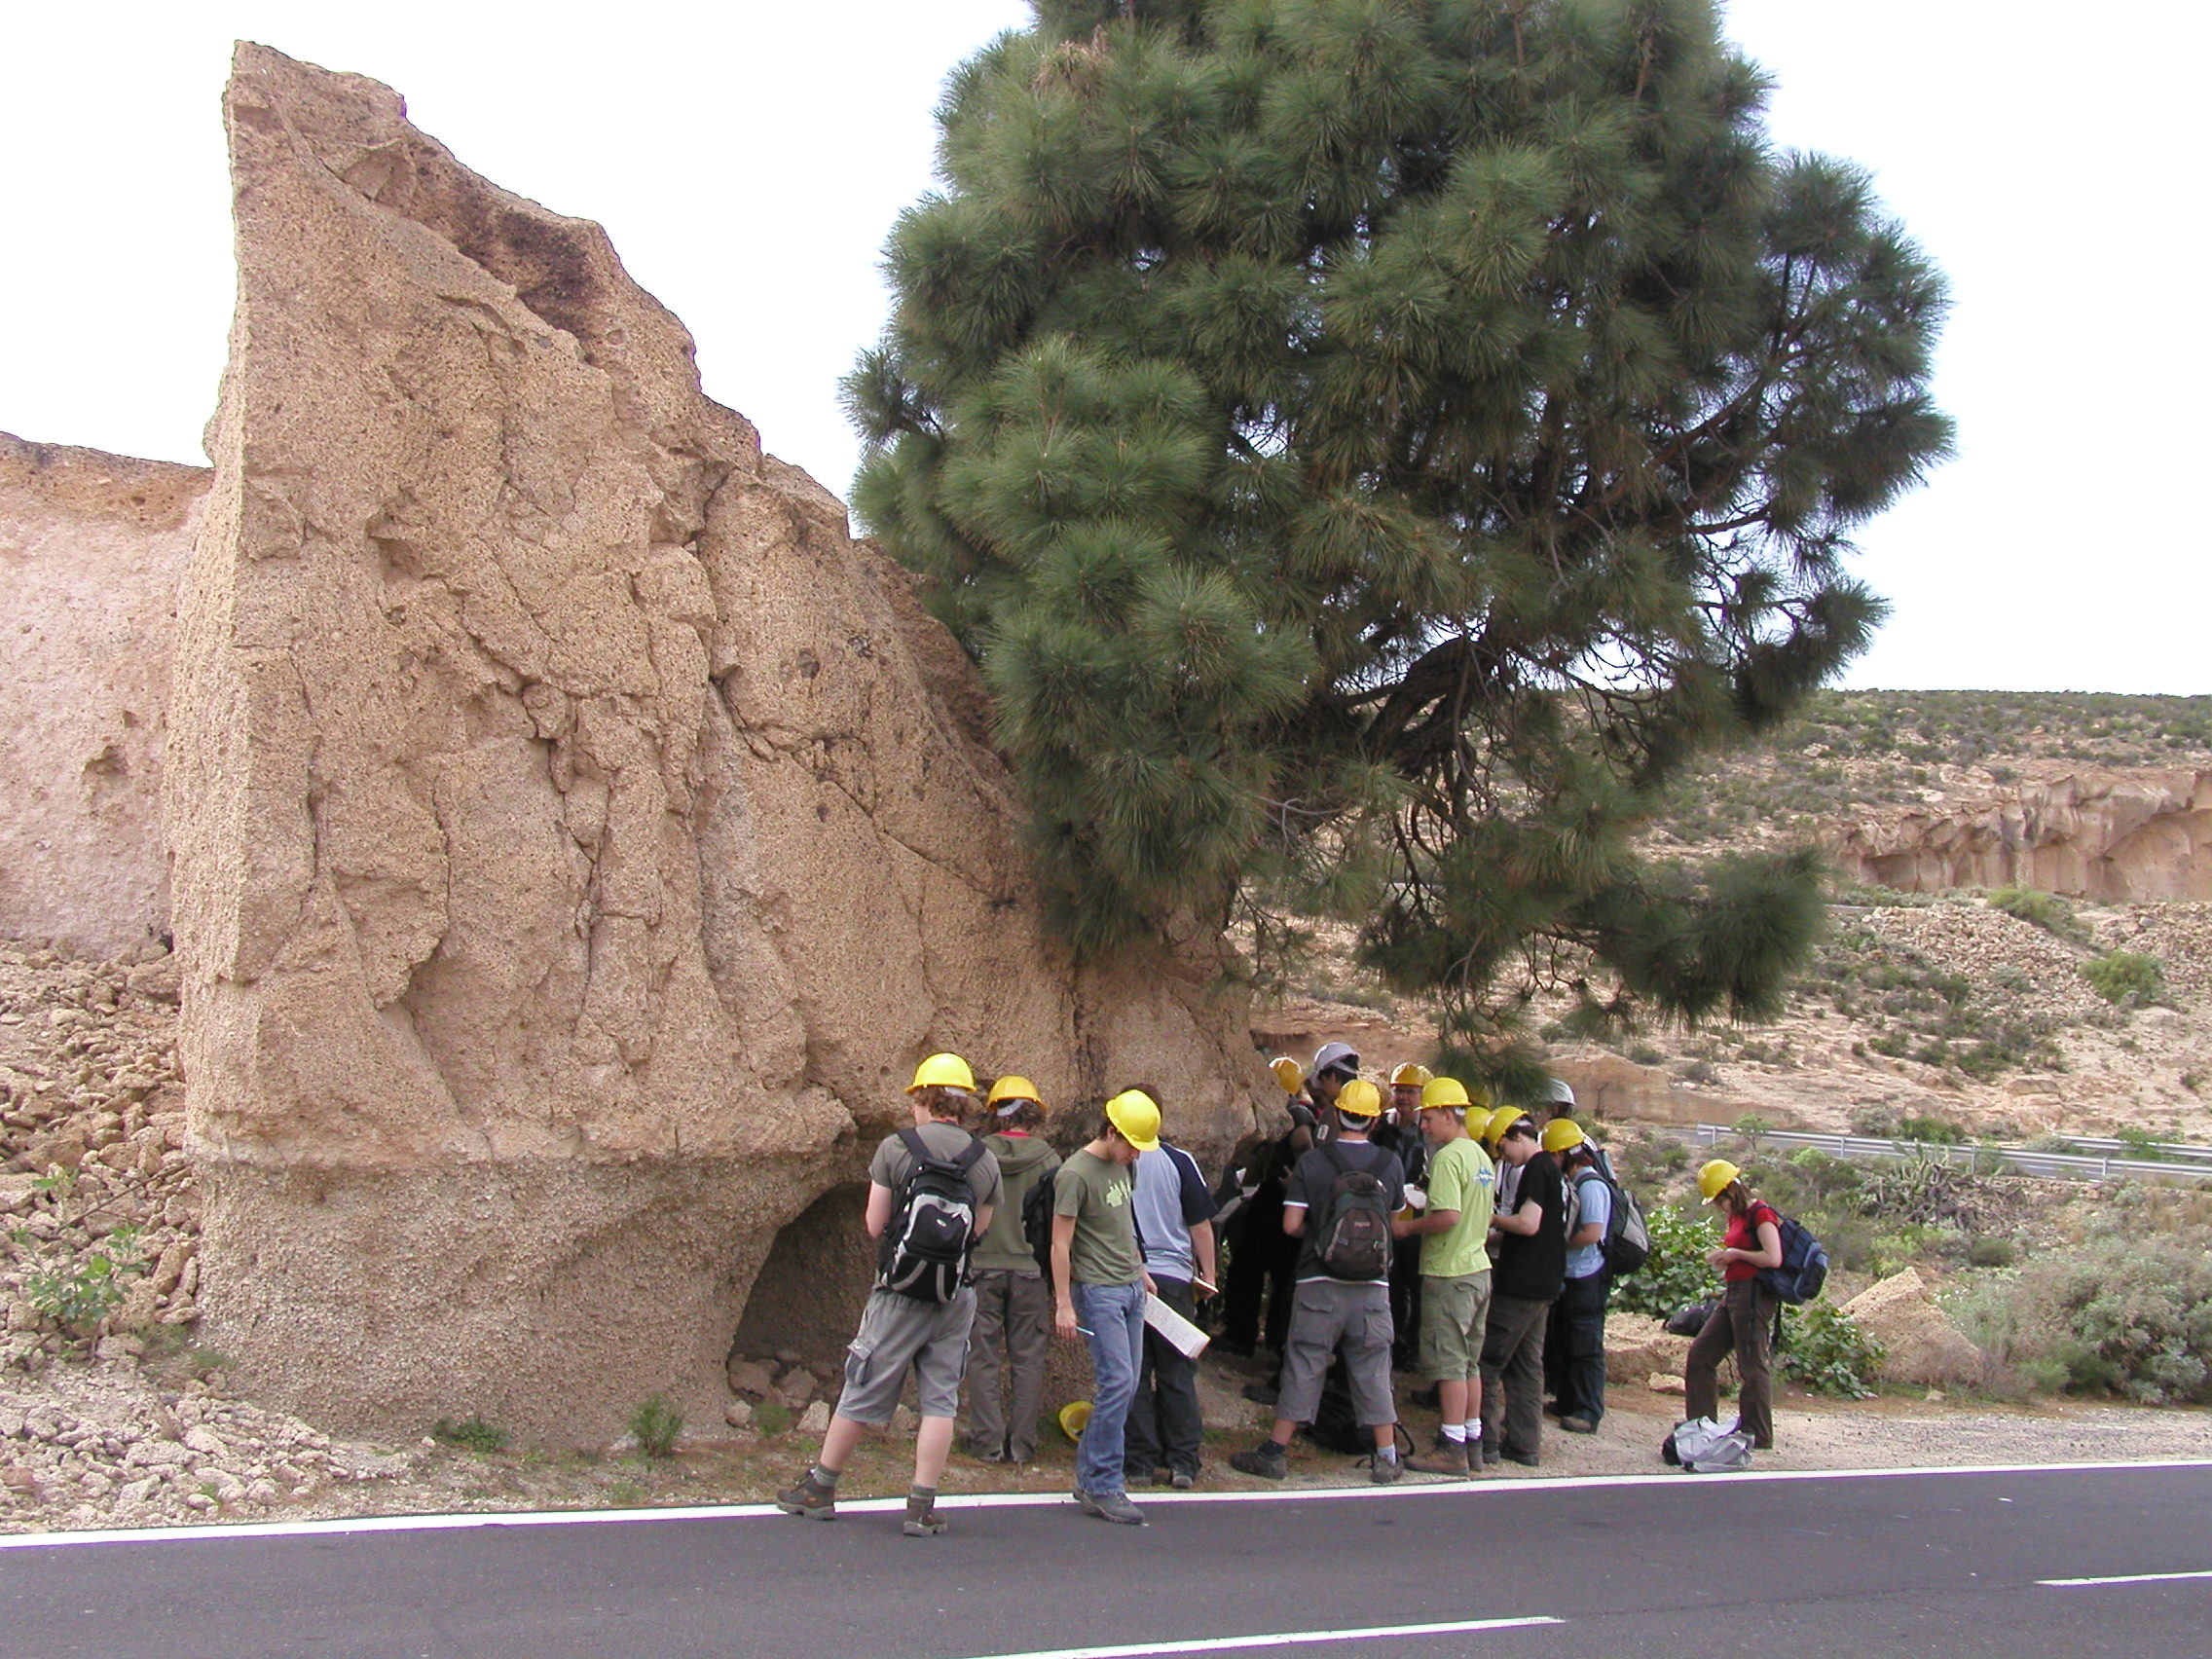
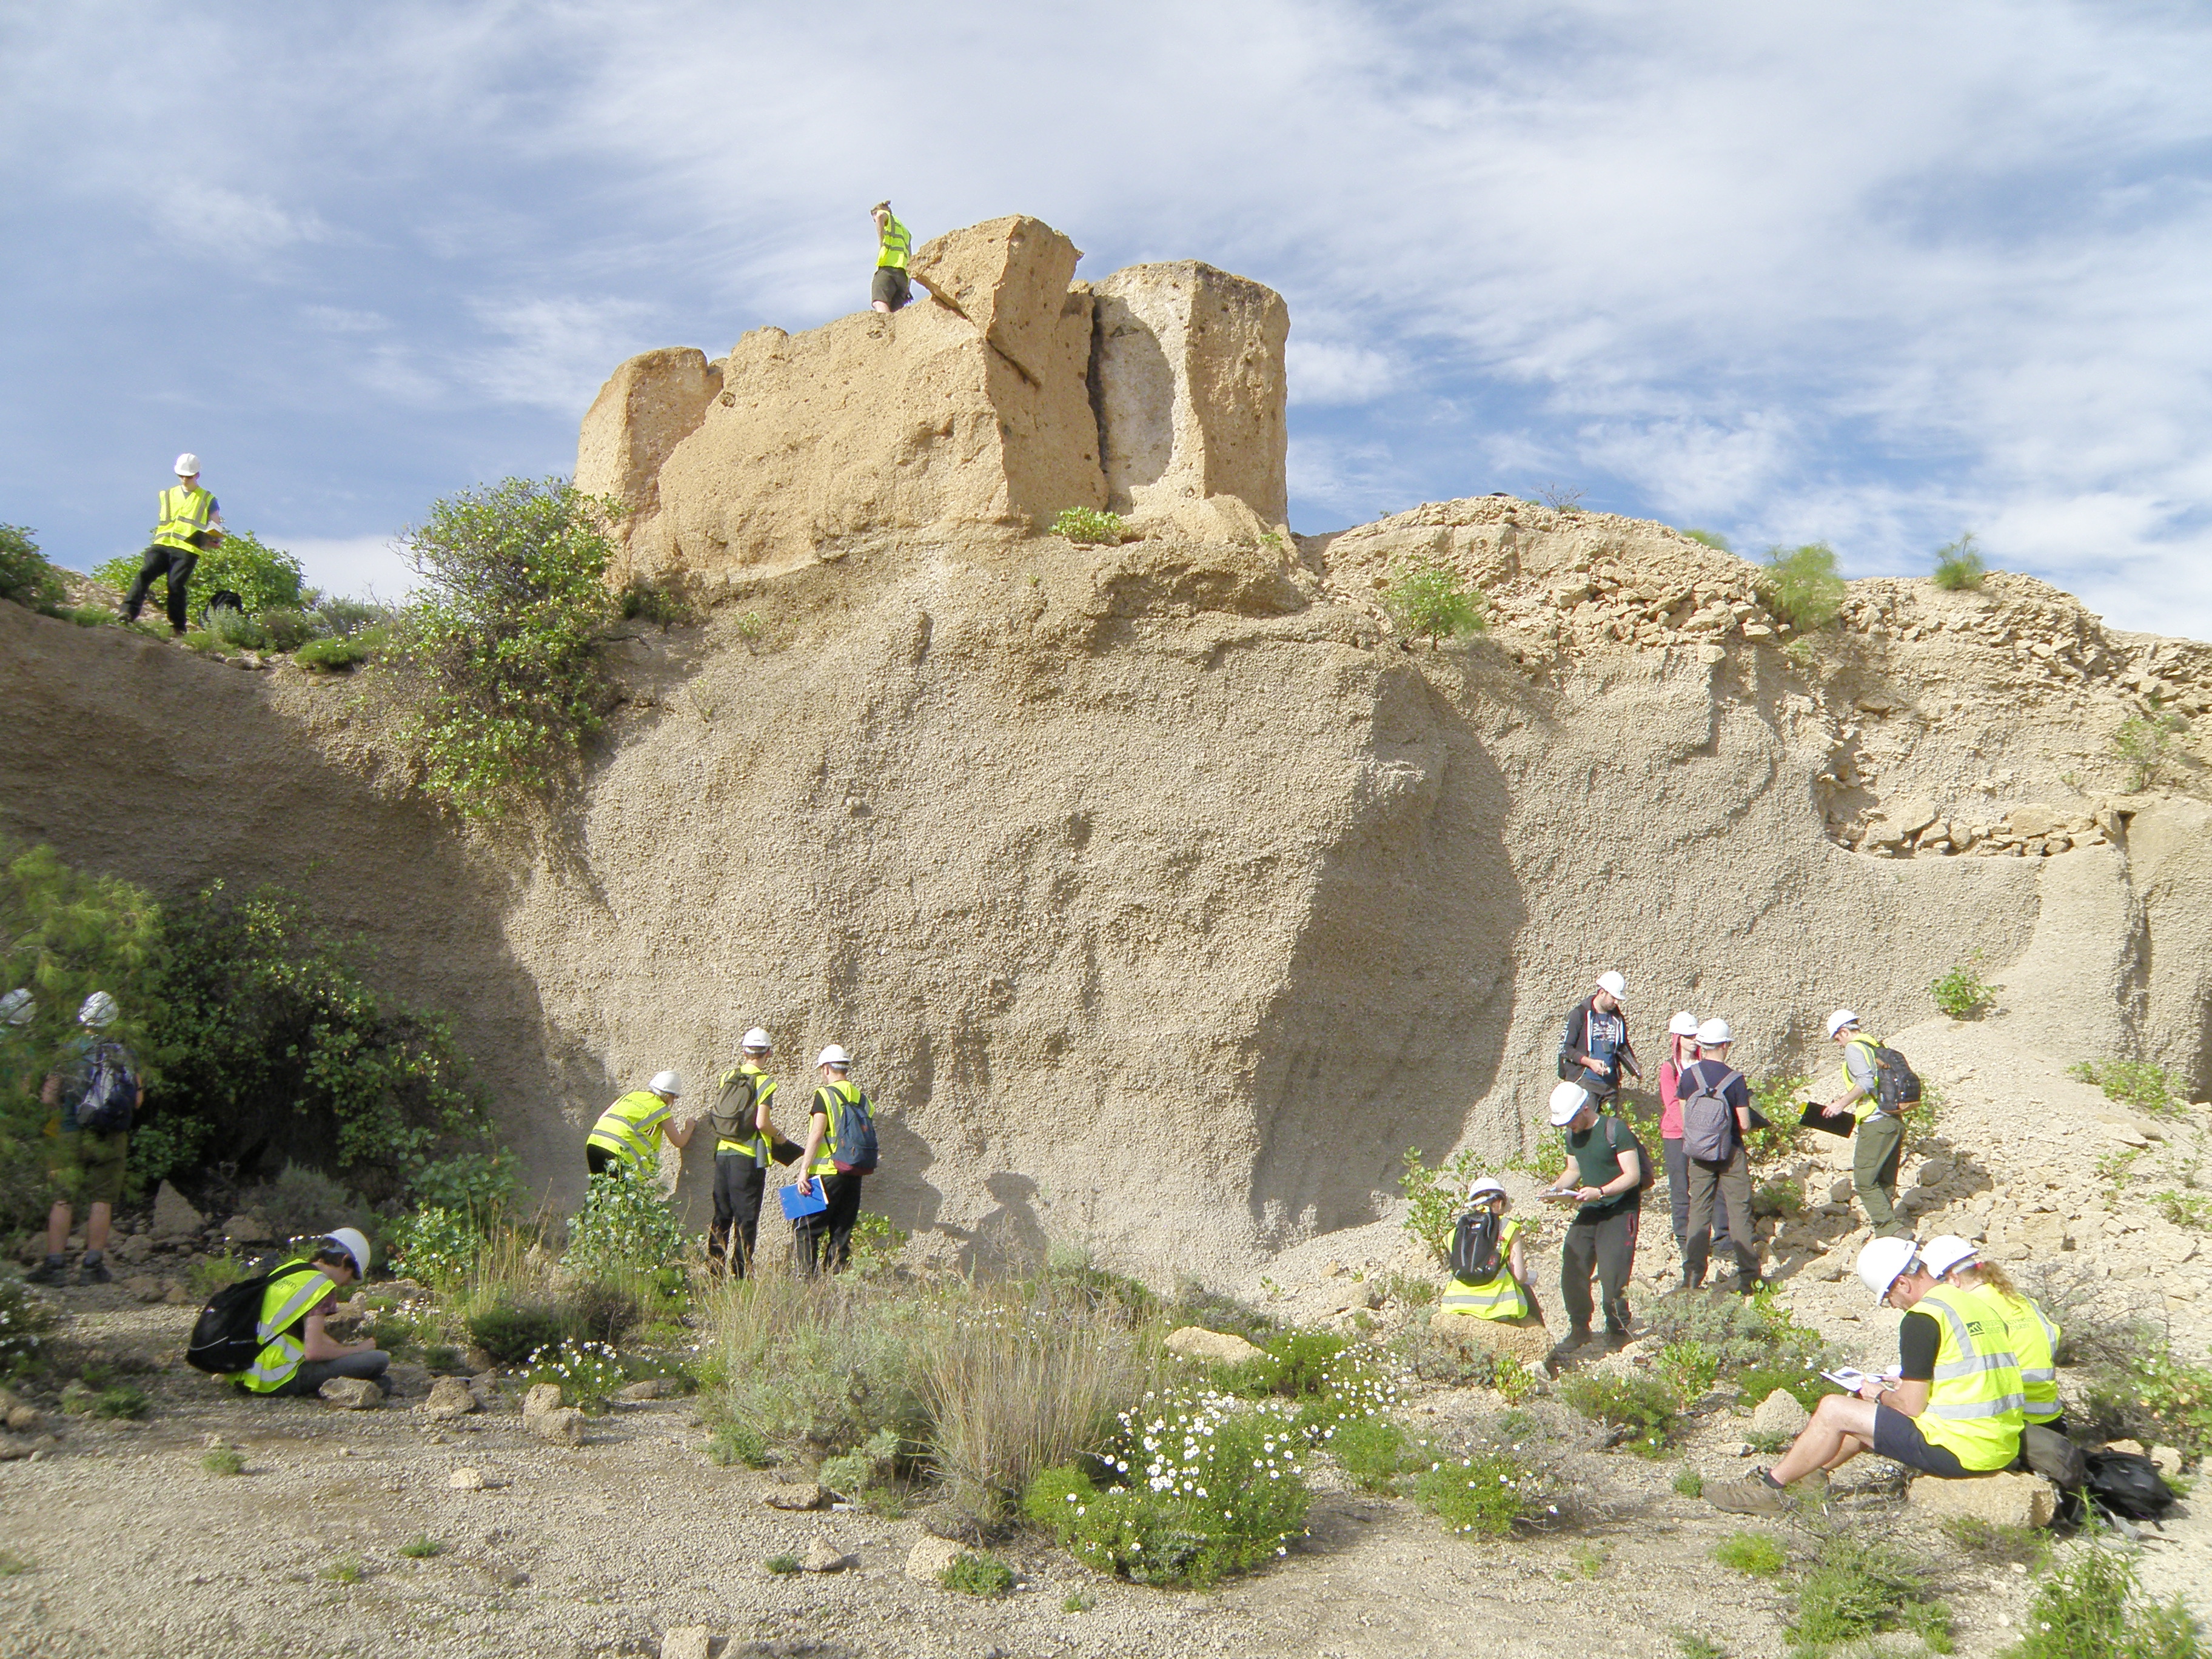 Figure 10. The quarry face. Obtain a thickness for Unit G1. Assume that there is 50 cm of G1 in the quarry floor, from the base of G1 (Figure 9) to the foot of the face, and that the tallest geologist (centre of the group of 3) is 1.8 metres tall. |
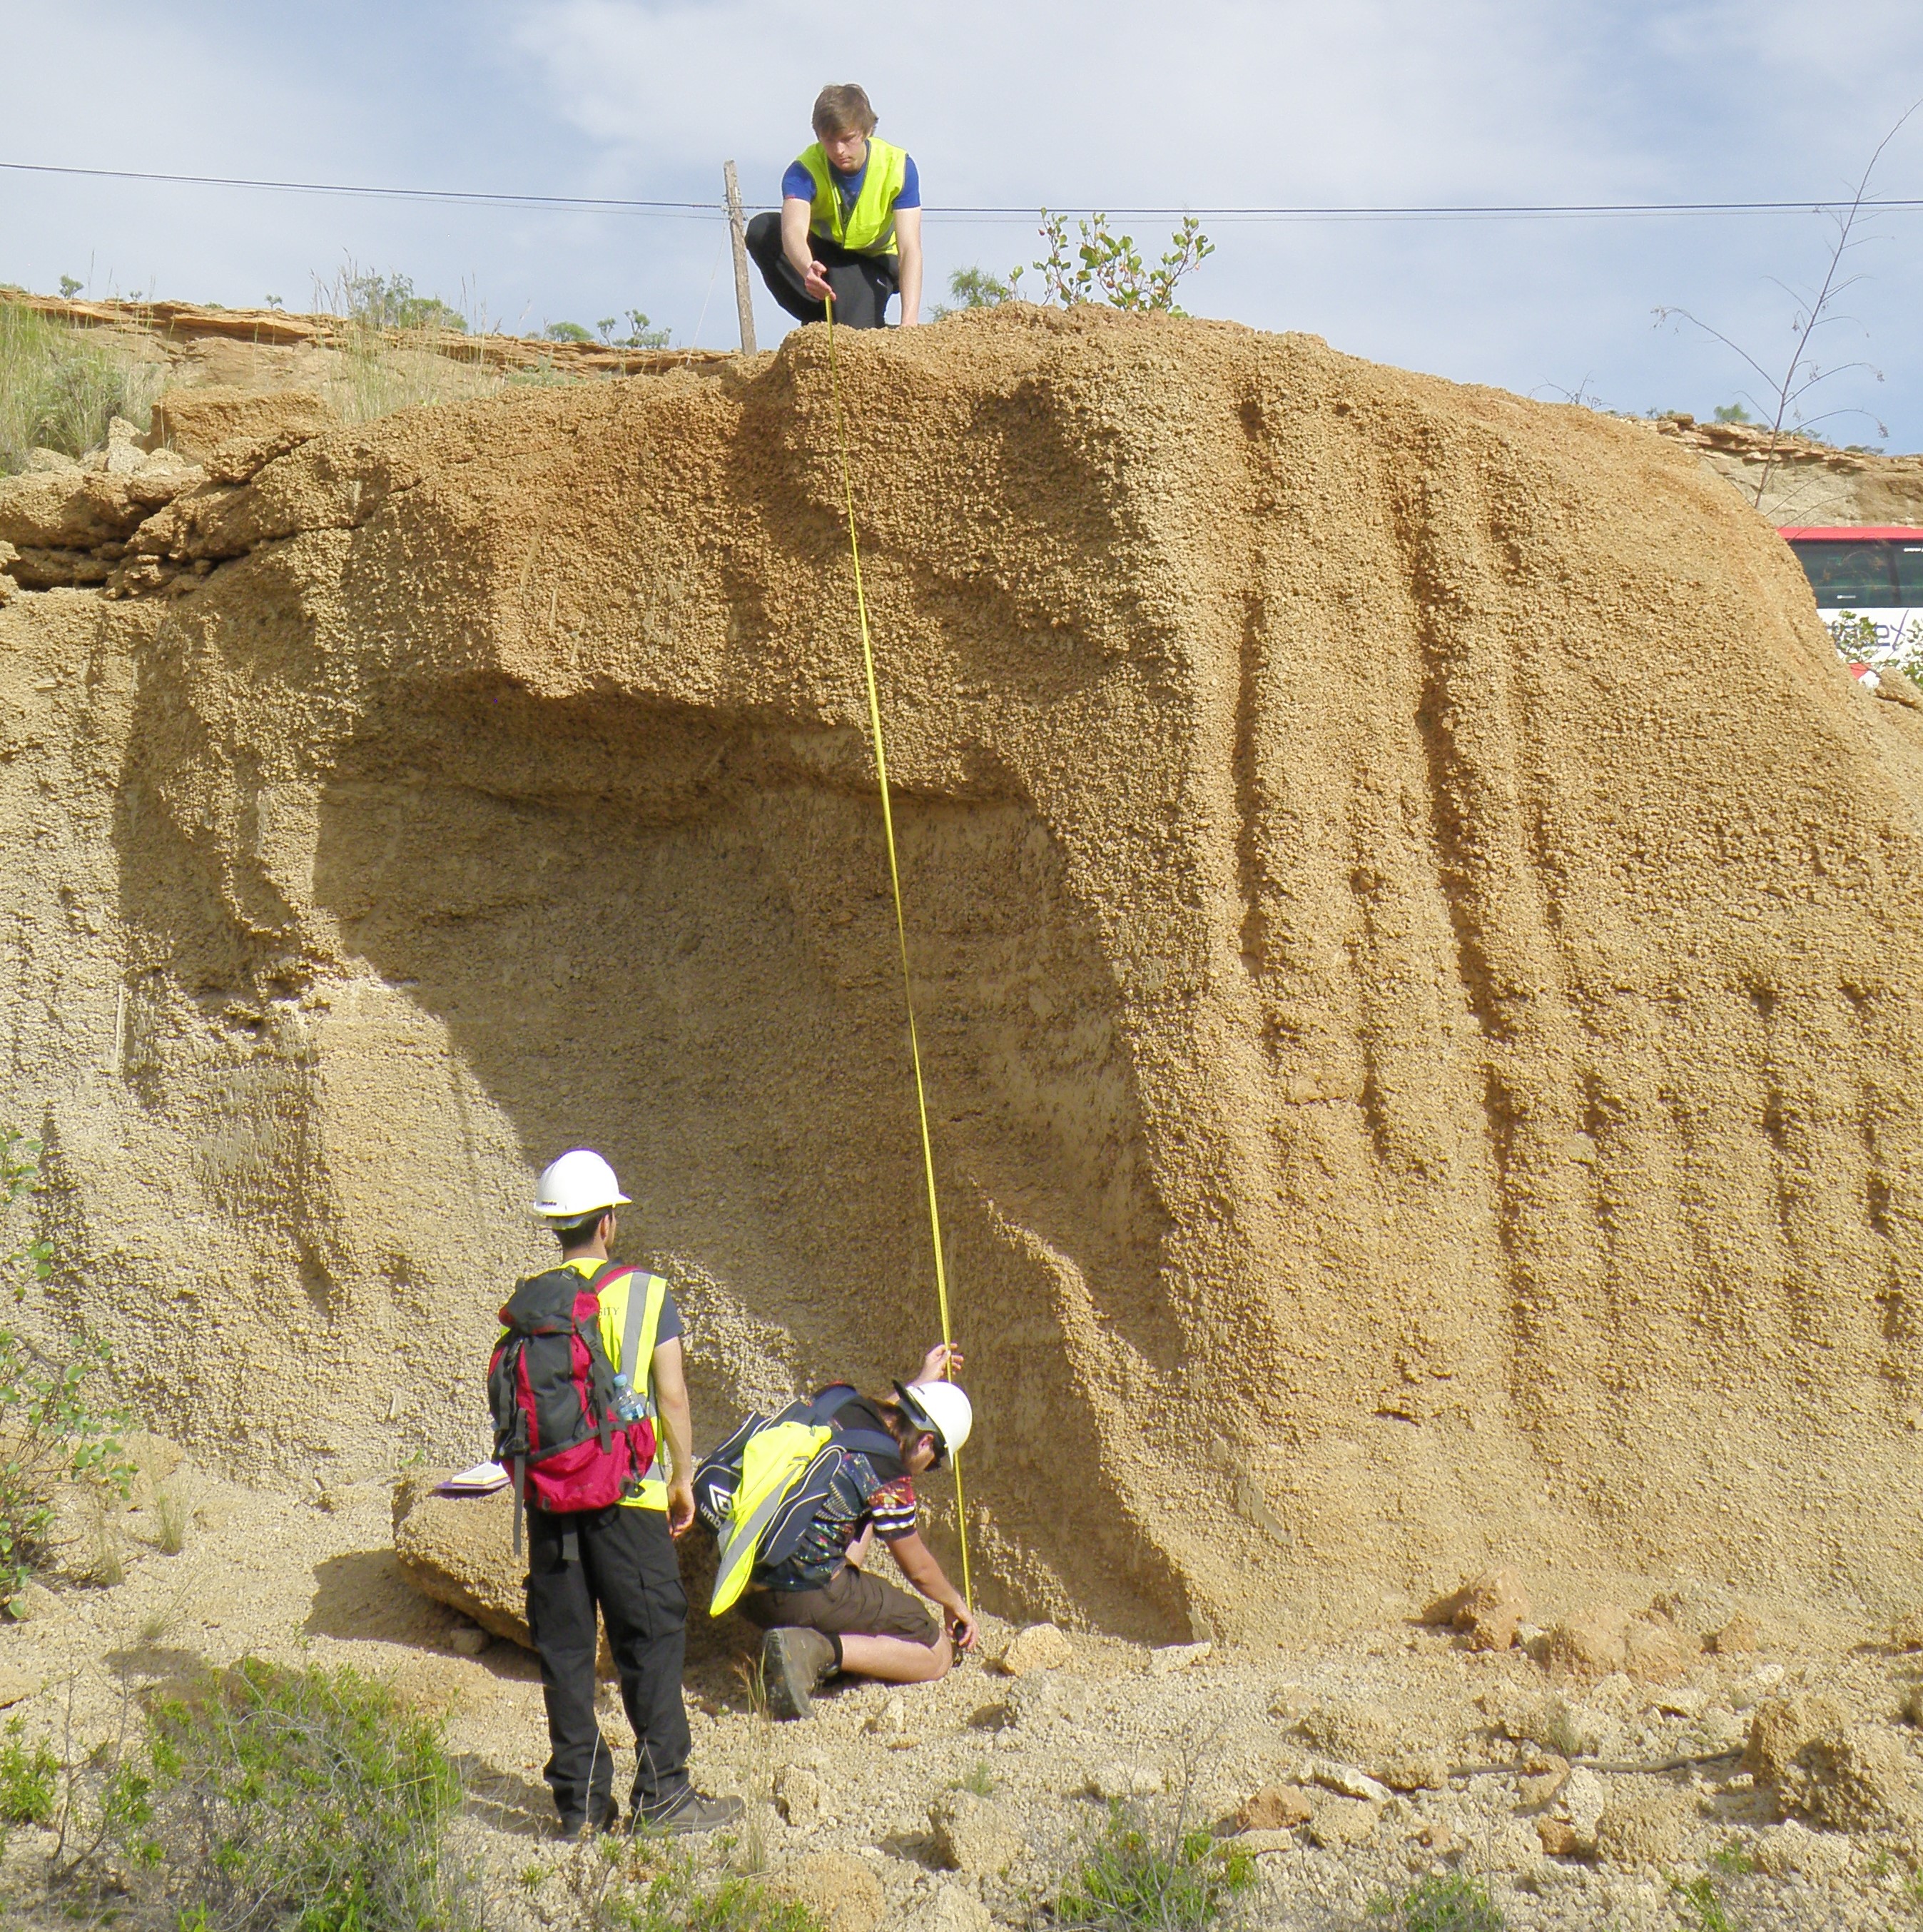 Figure 11. Measuring a section through Unit G1. Study this part of the section in detail in Figures 10 and 11. Can you see any structures or variations within G1? If so, describe them, and show that information graphically on your log. |
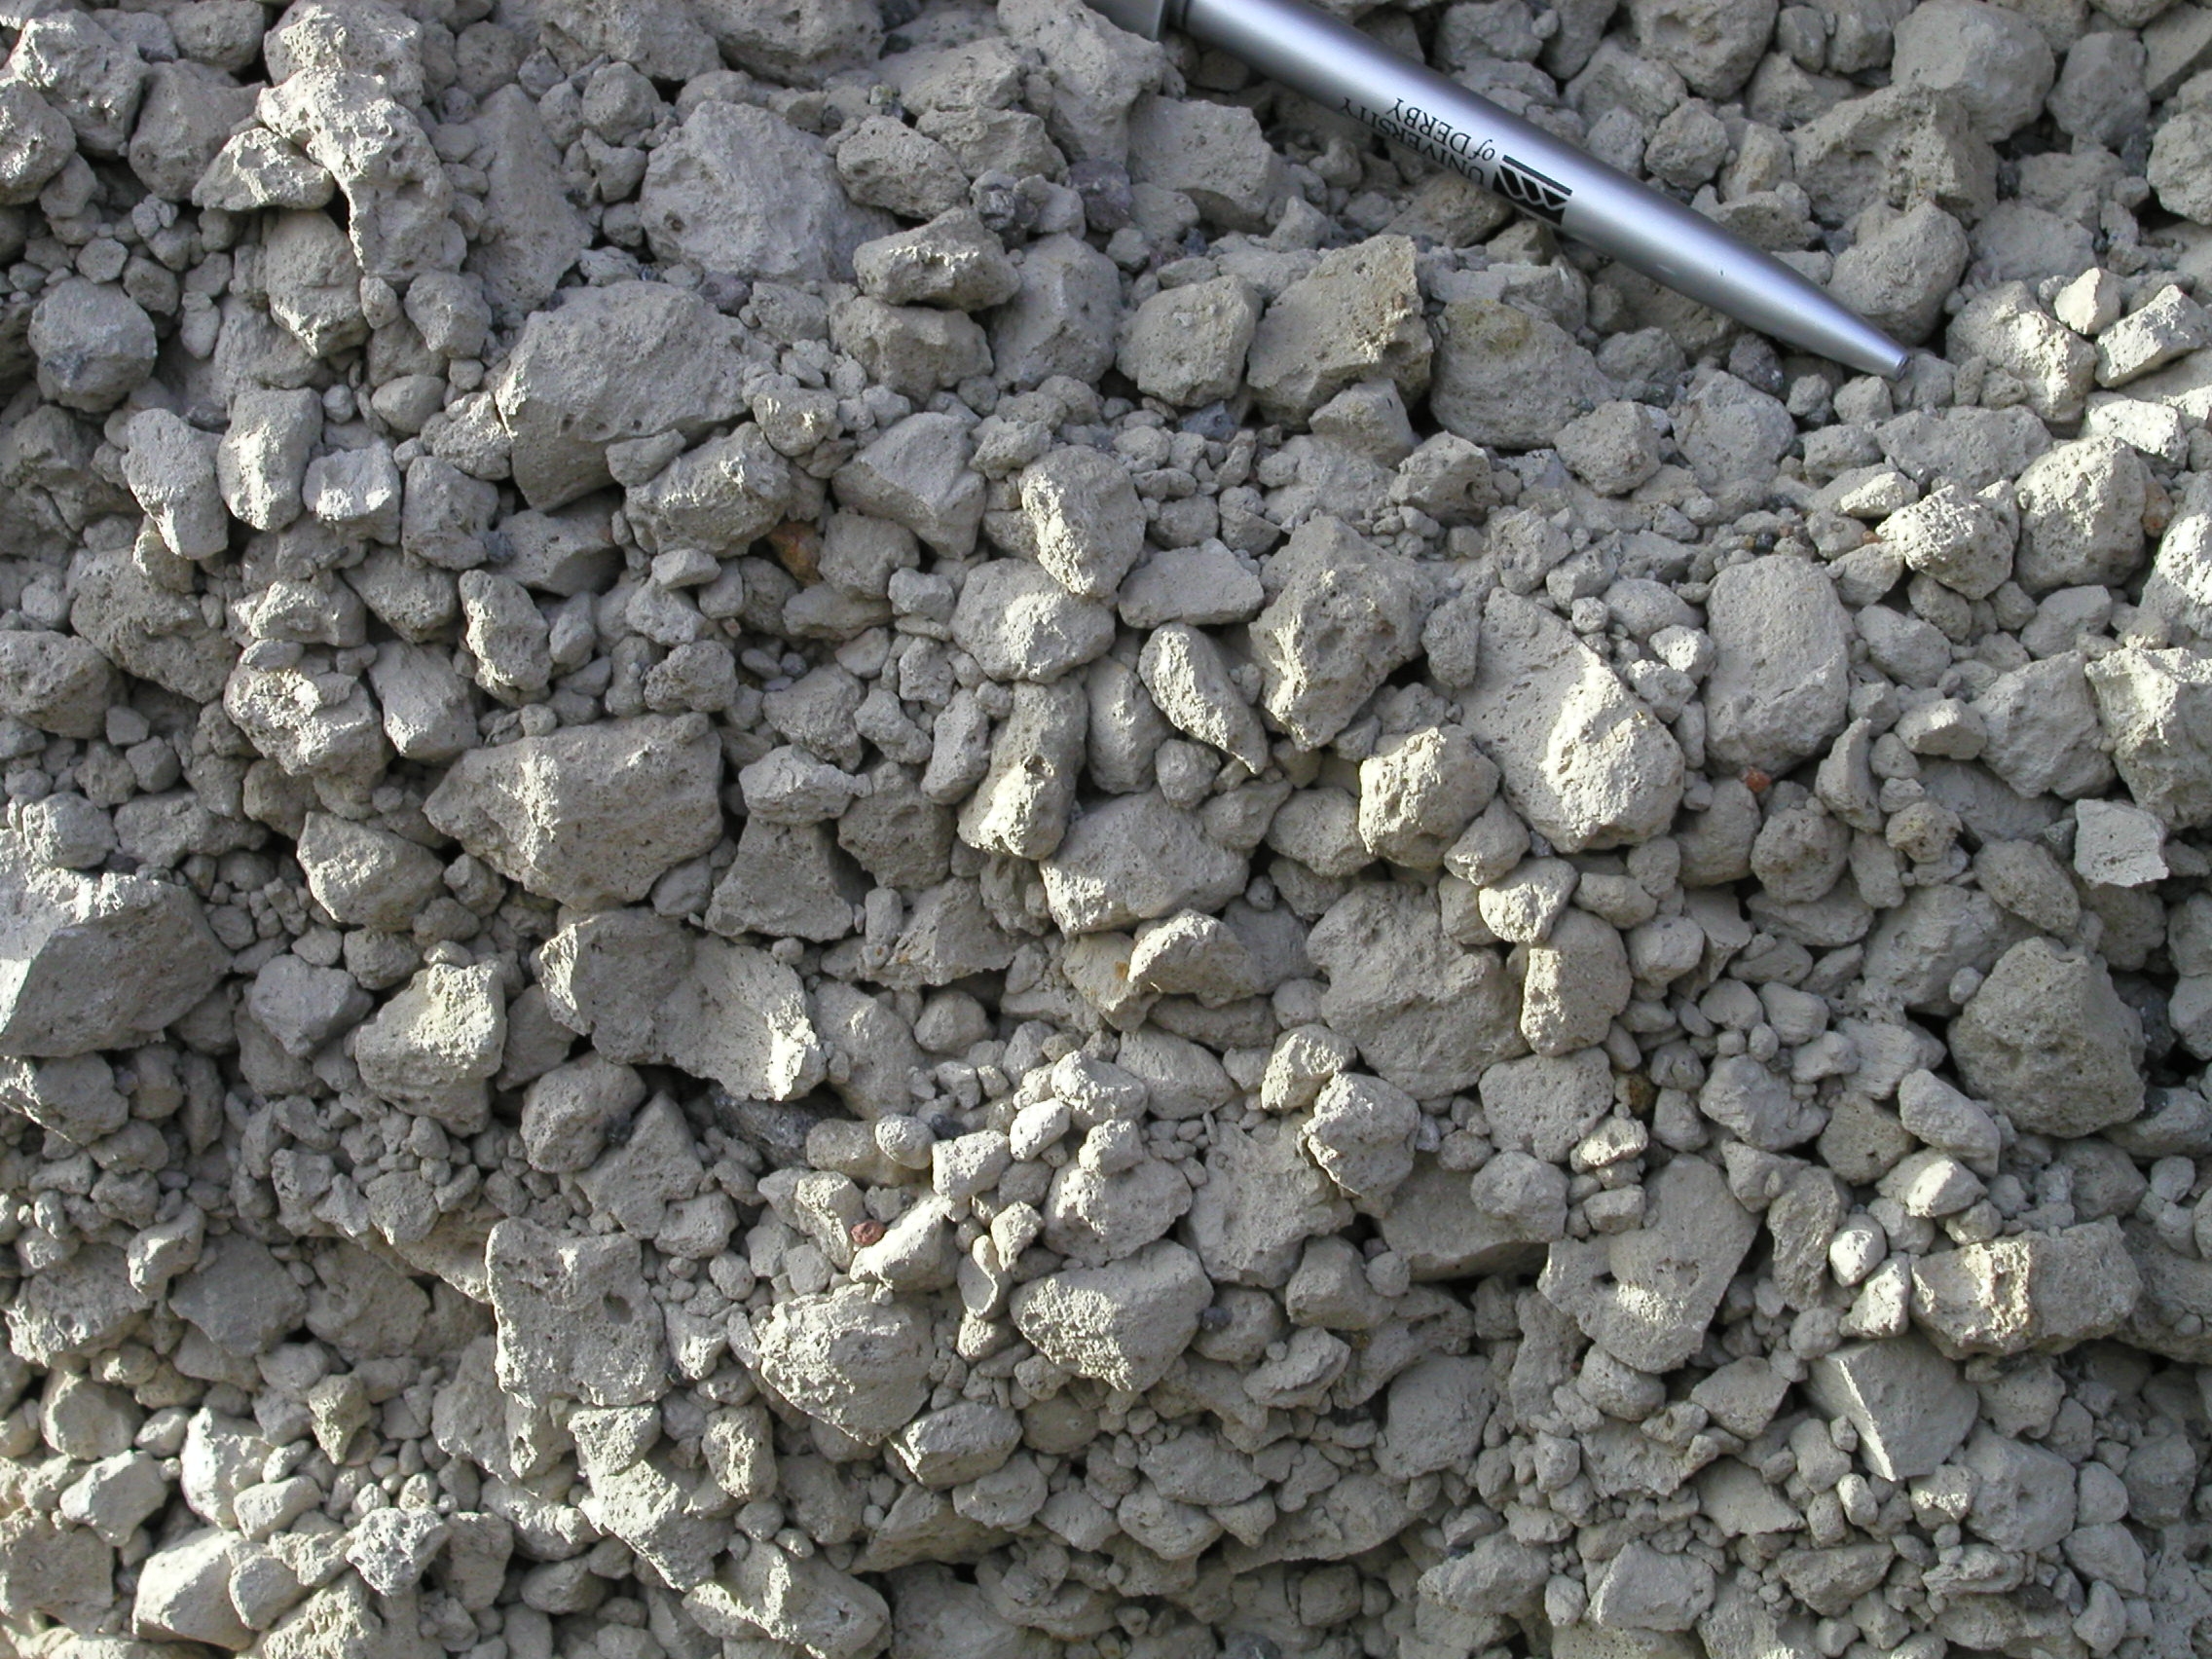
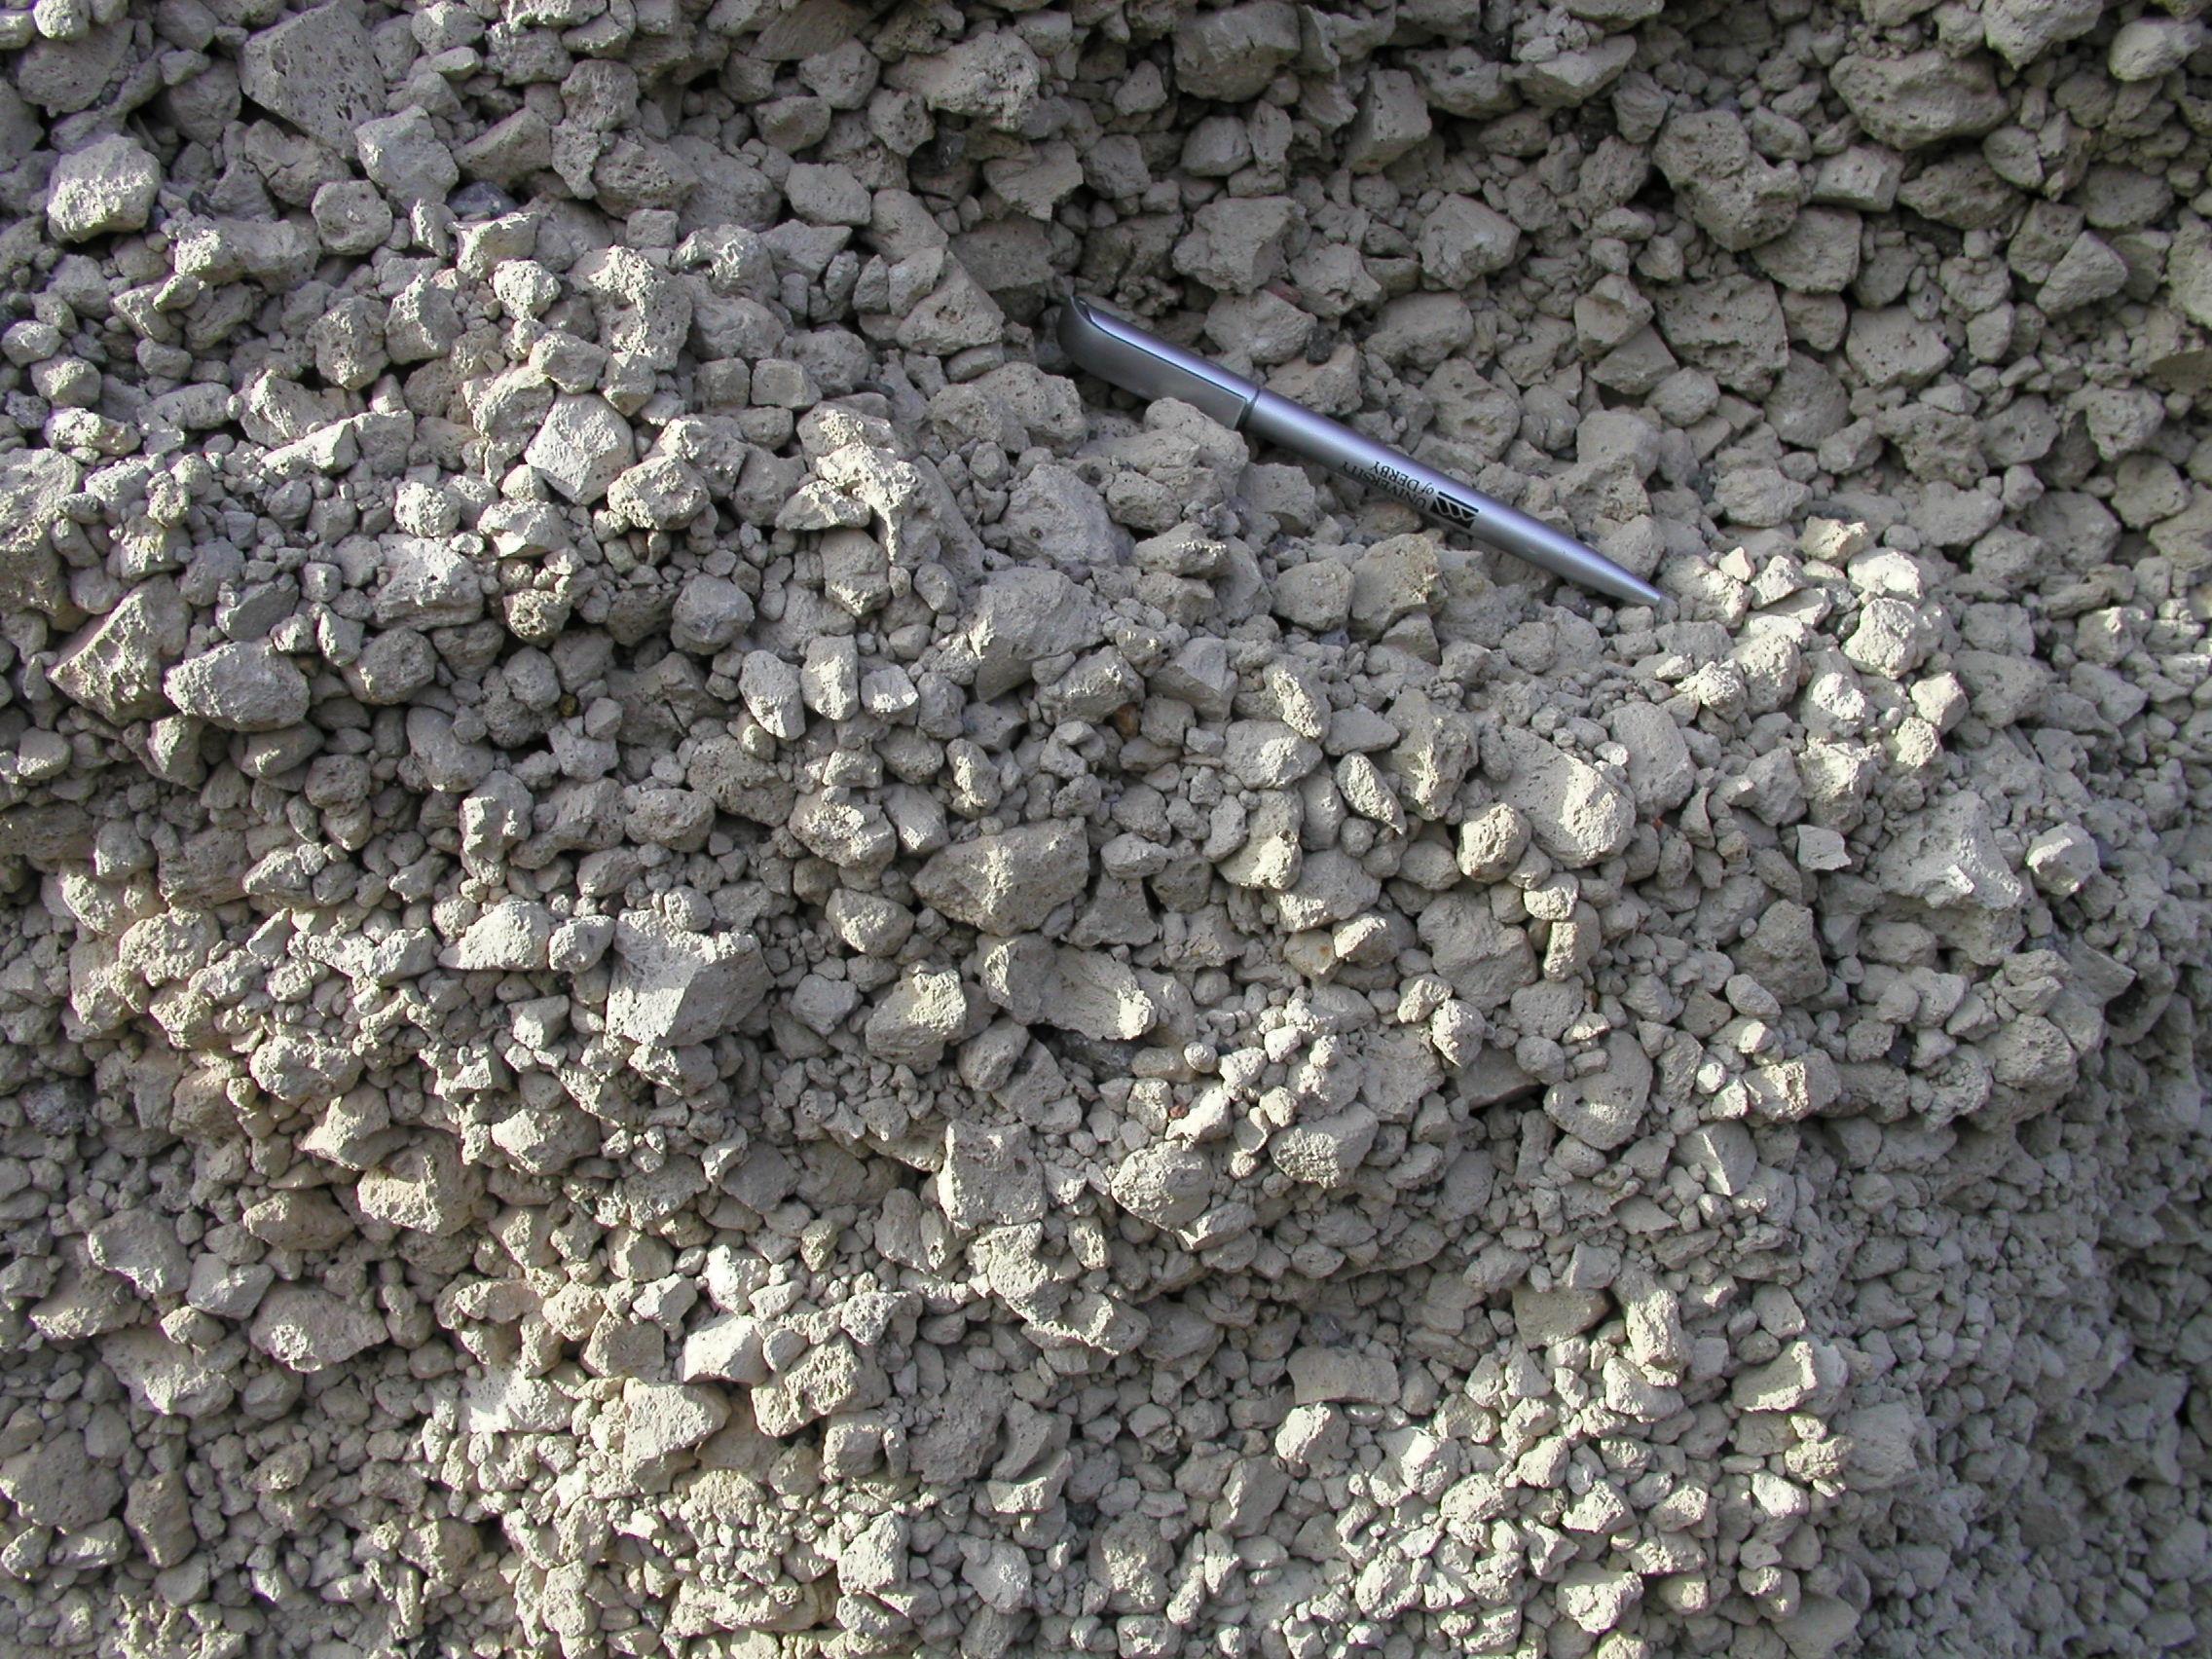 Figure 12. Close-up of the phonolitic pumice of Unit G1. The pen is 15 cm long. Describe this in detail, using the hand specimen description scheme. Make sure you include features such as grain size, sorting and grain shape. |
|
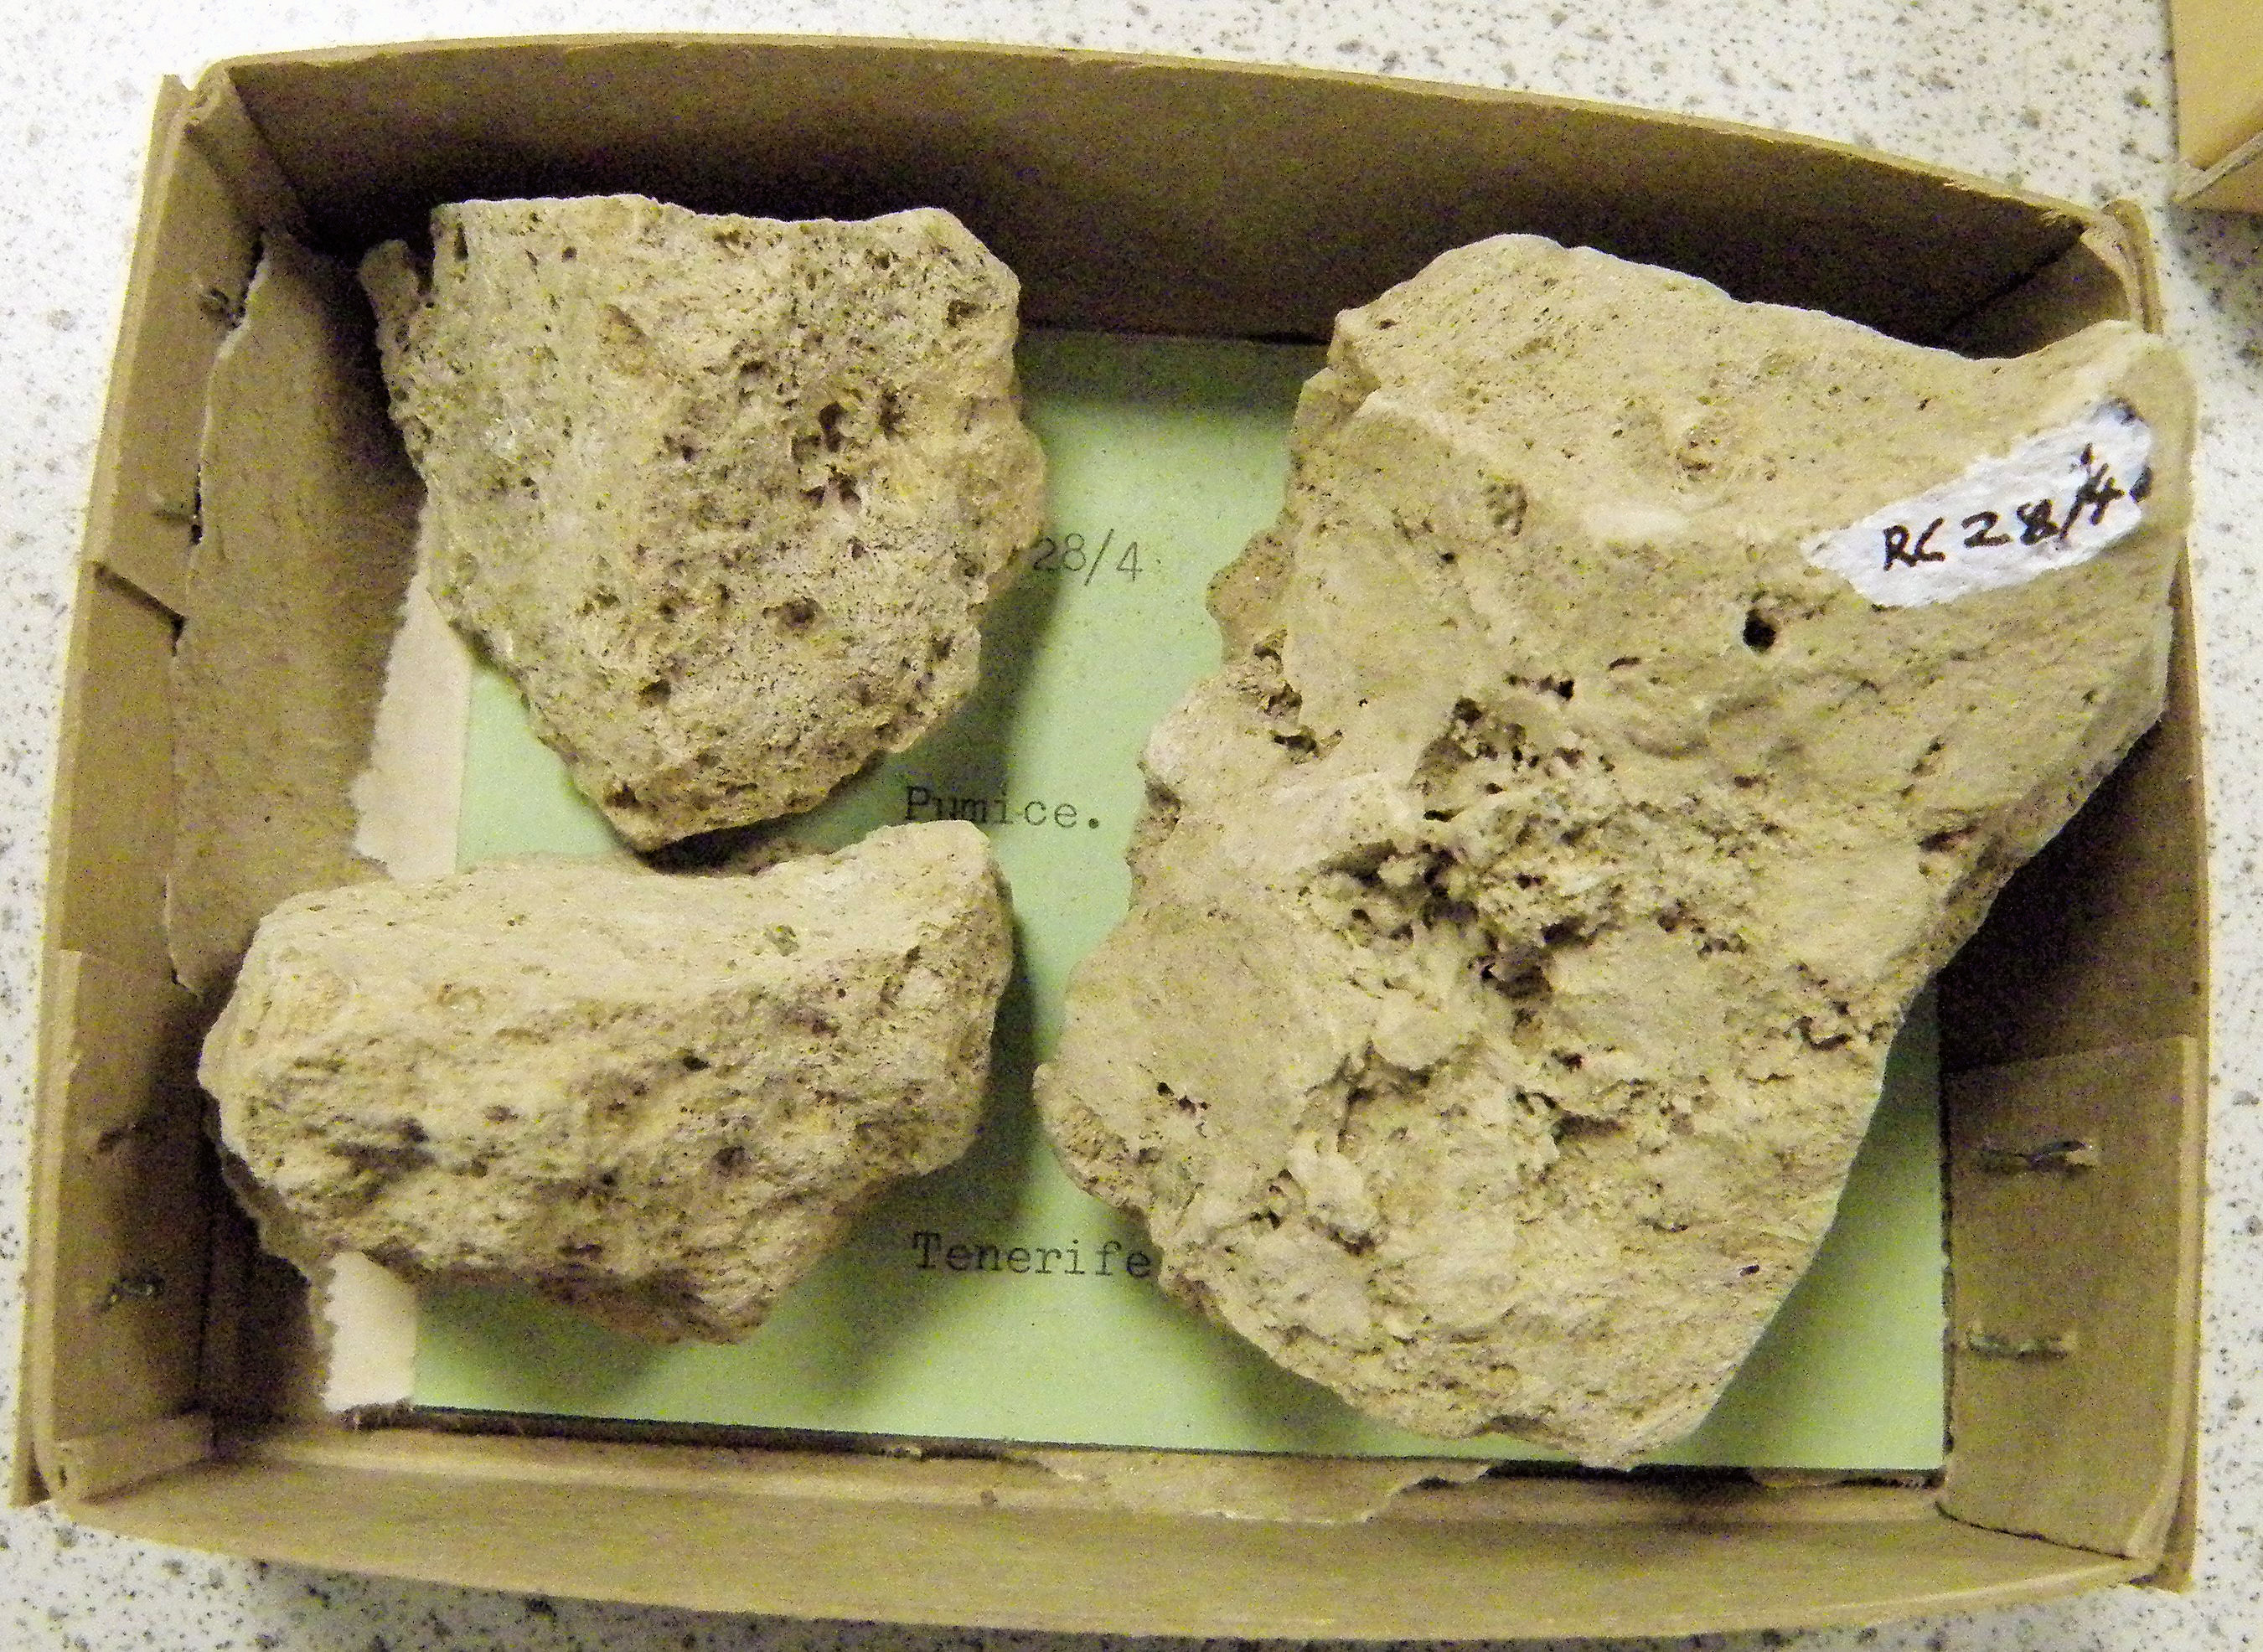 Figure 14. Hand specimens of pumice clasts from Unit G1. Describe features such as vesicle percentage, size and shape. |
|
Unit G2
Don't forget to zoom in to see and record the detail in these outcrops.
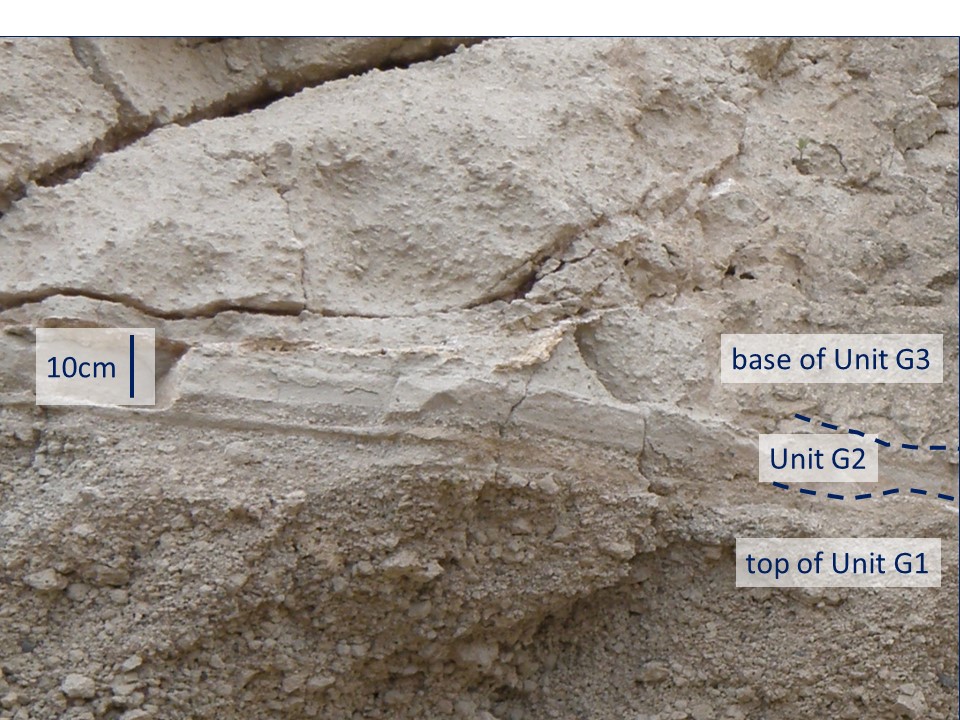
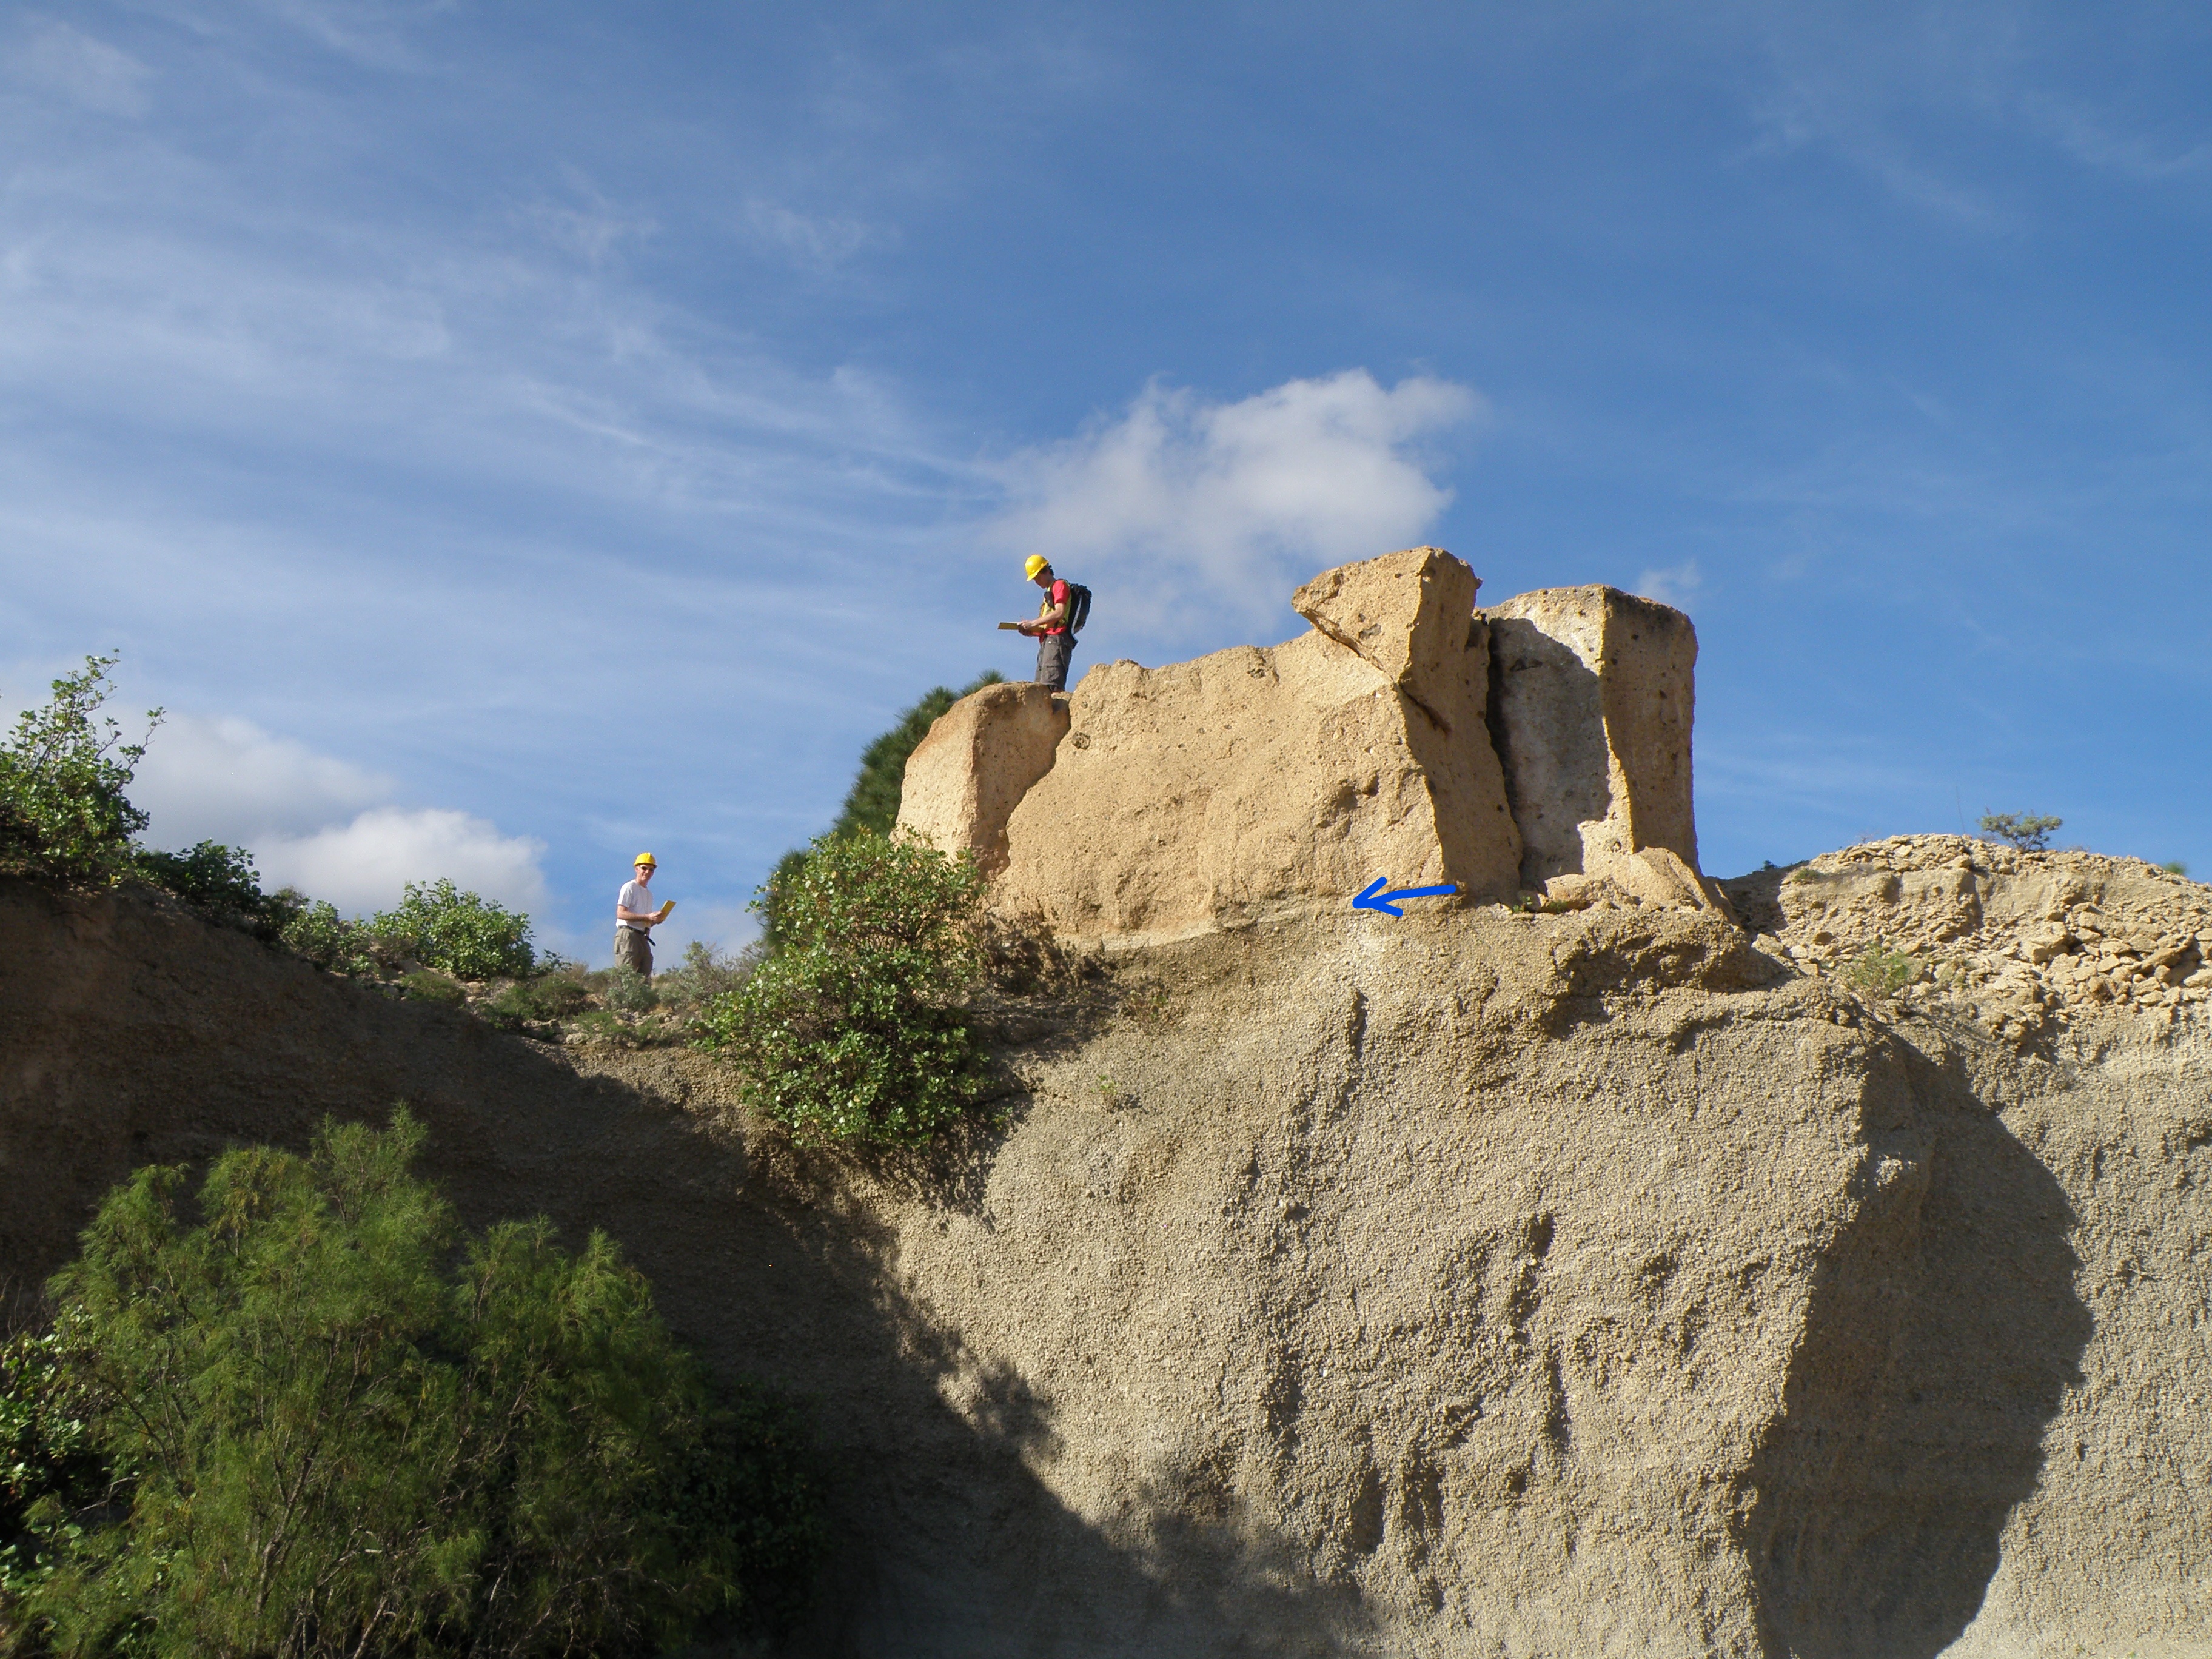 Figure 15. The upper part of G1, the thin Unit G2 (arrow) and the lower part of G3. |
|
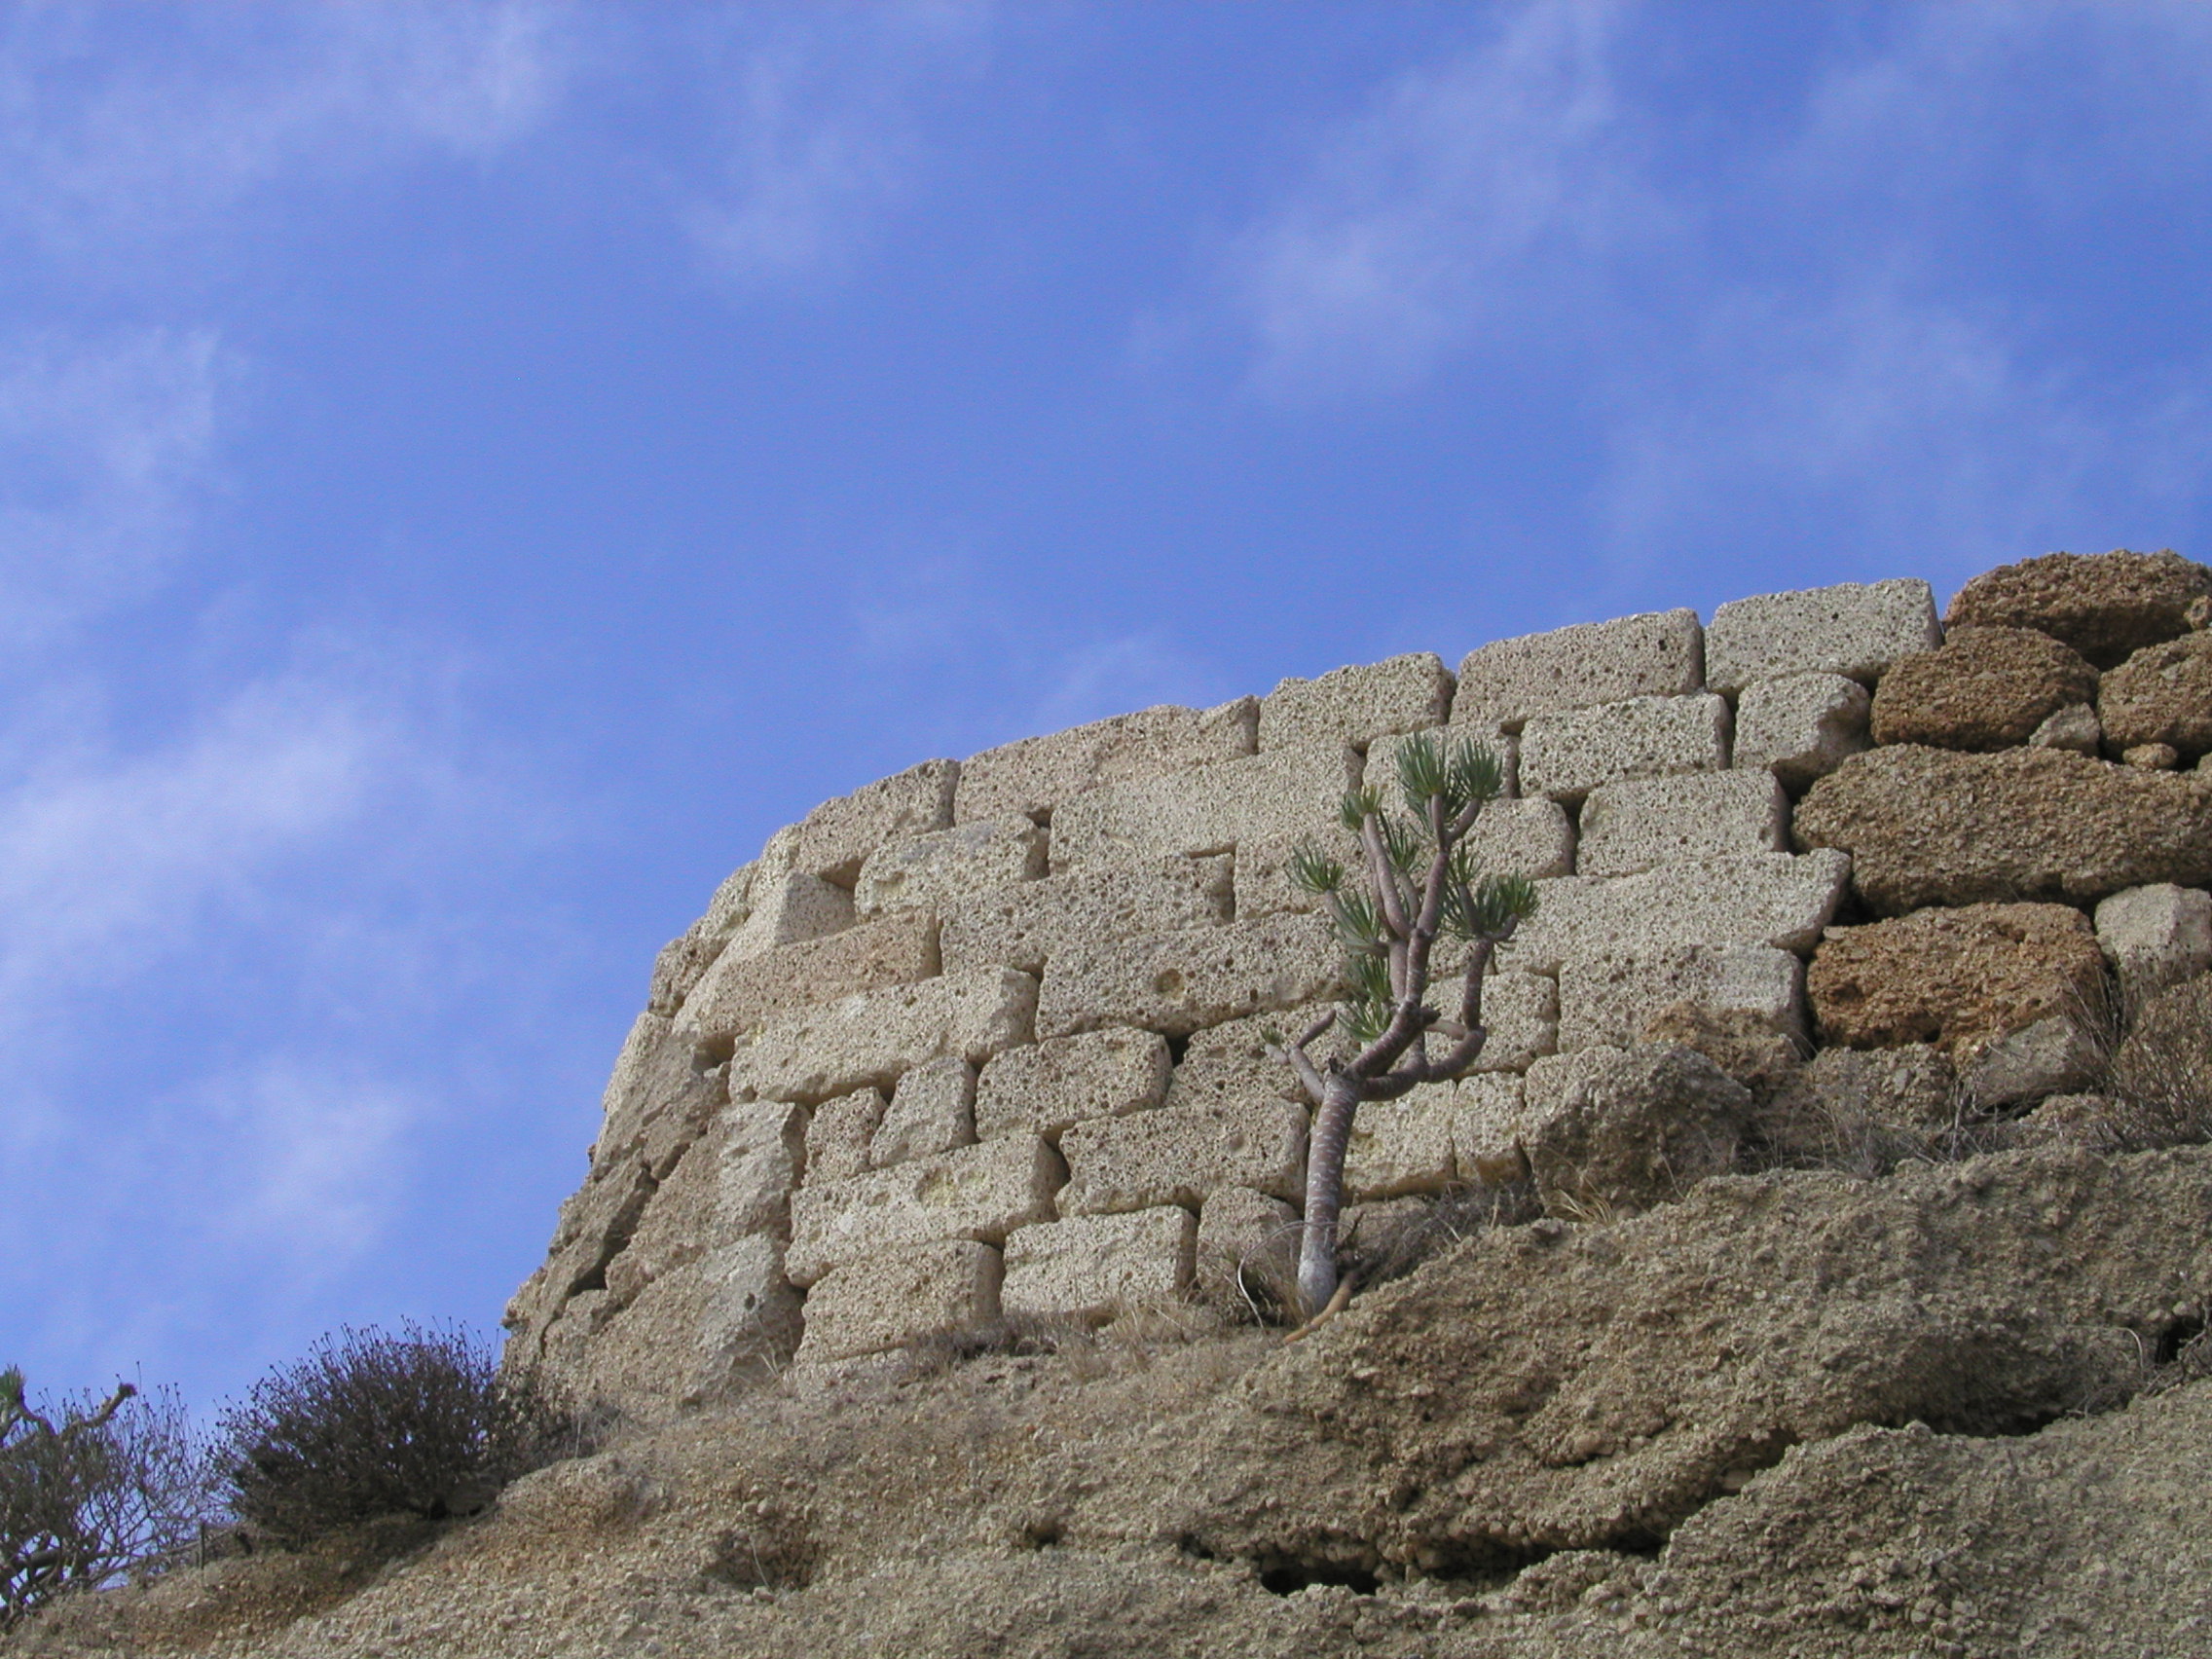
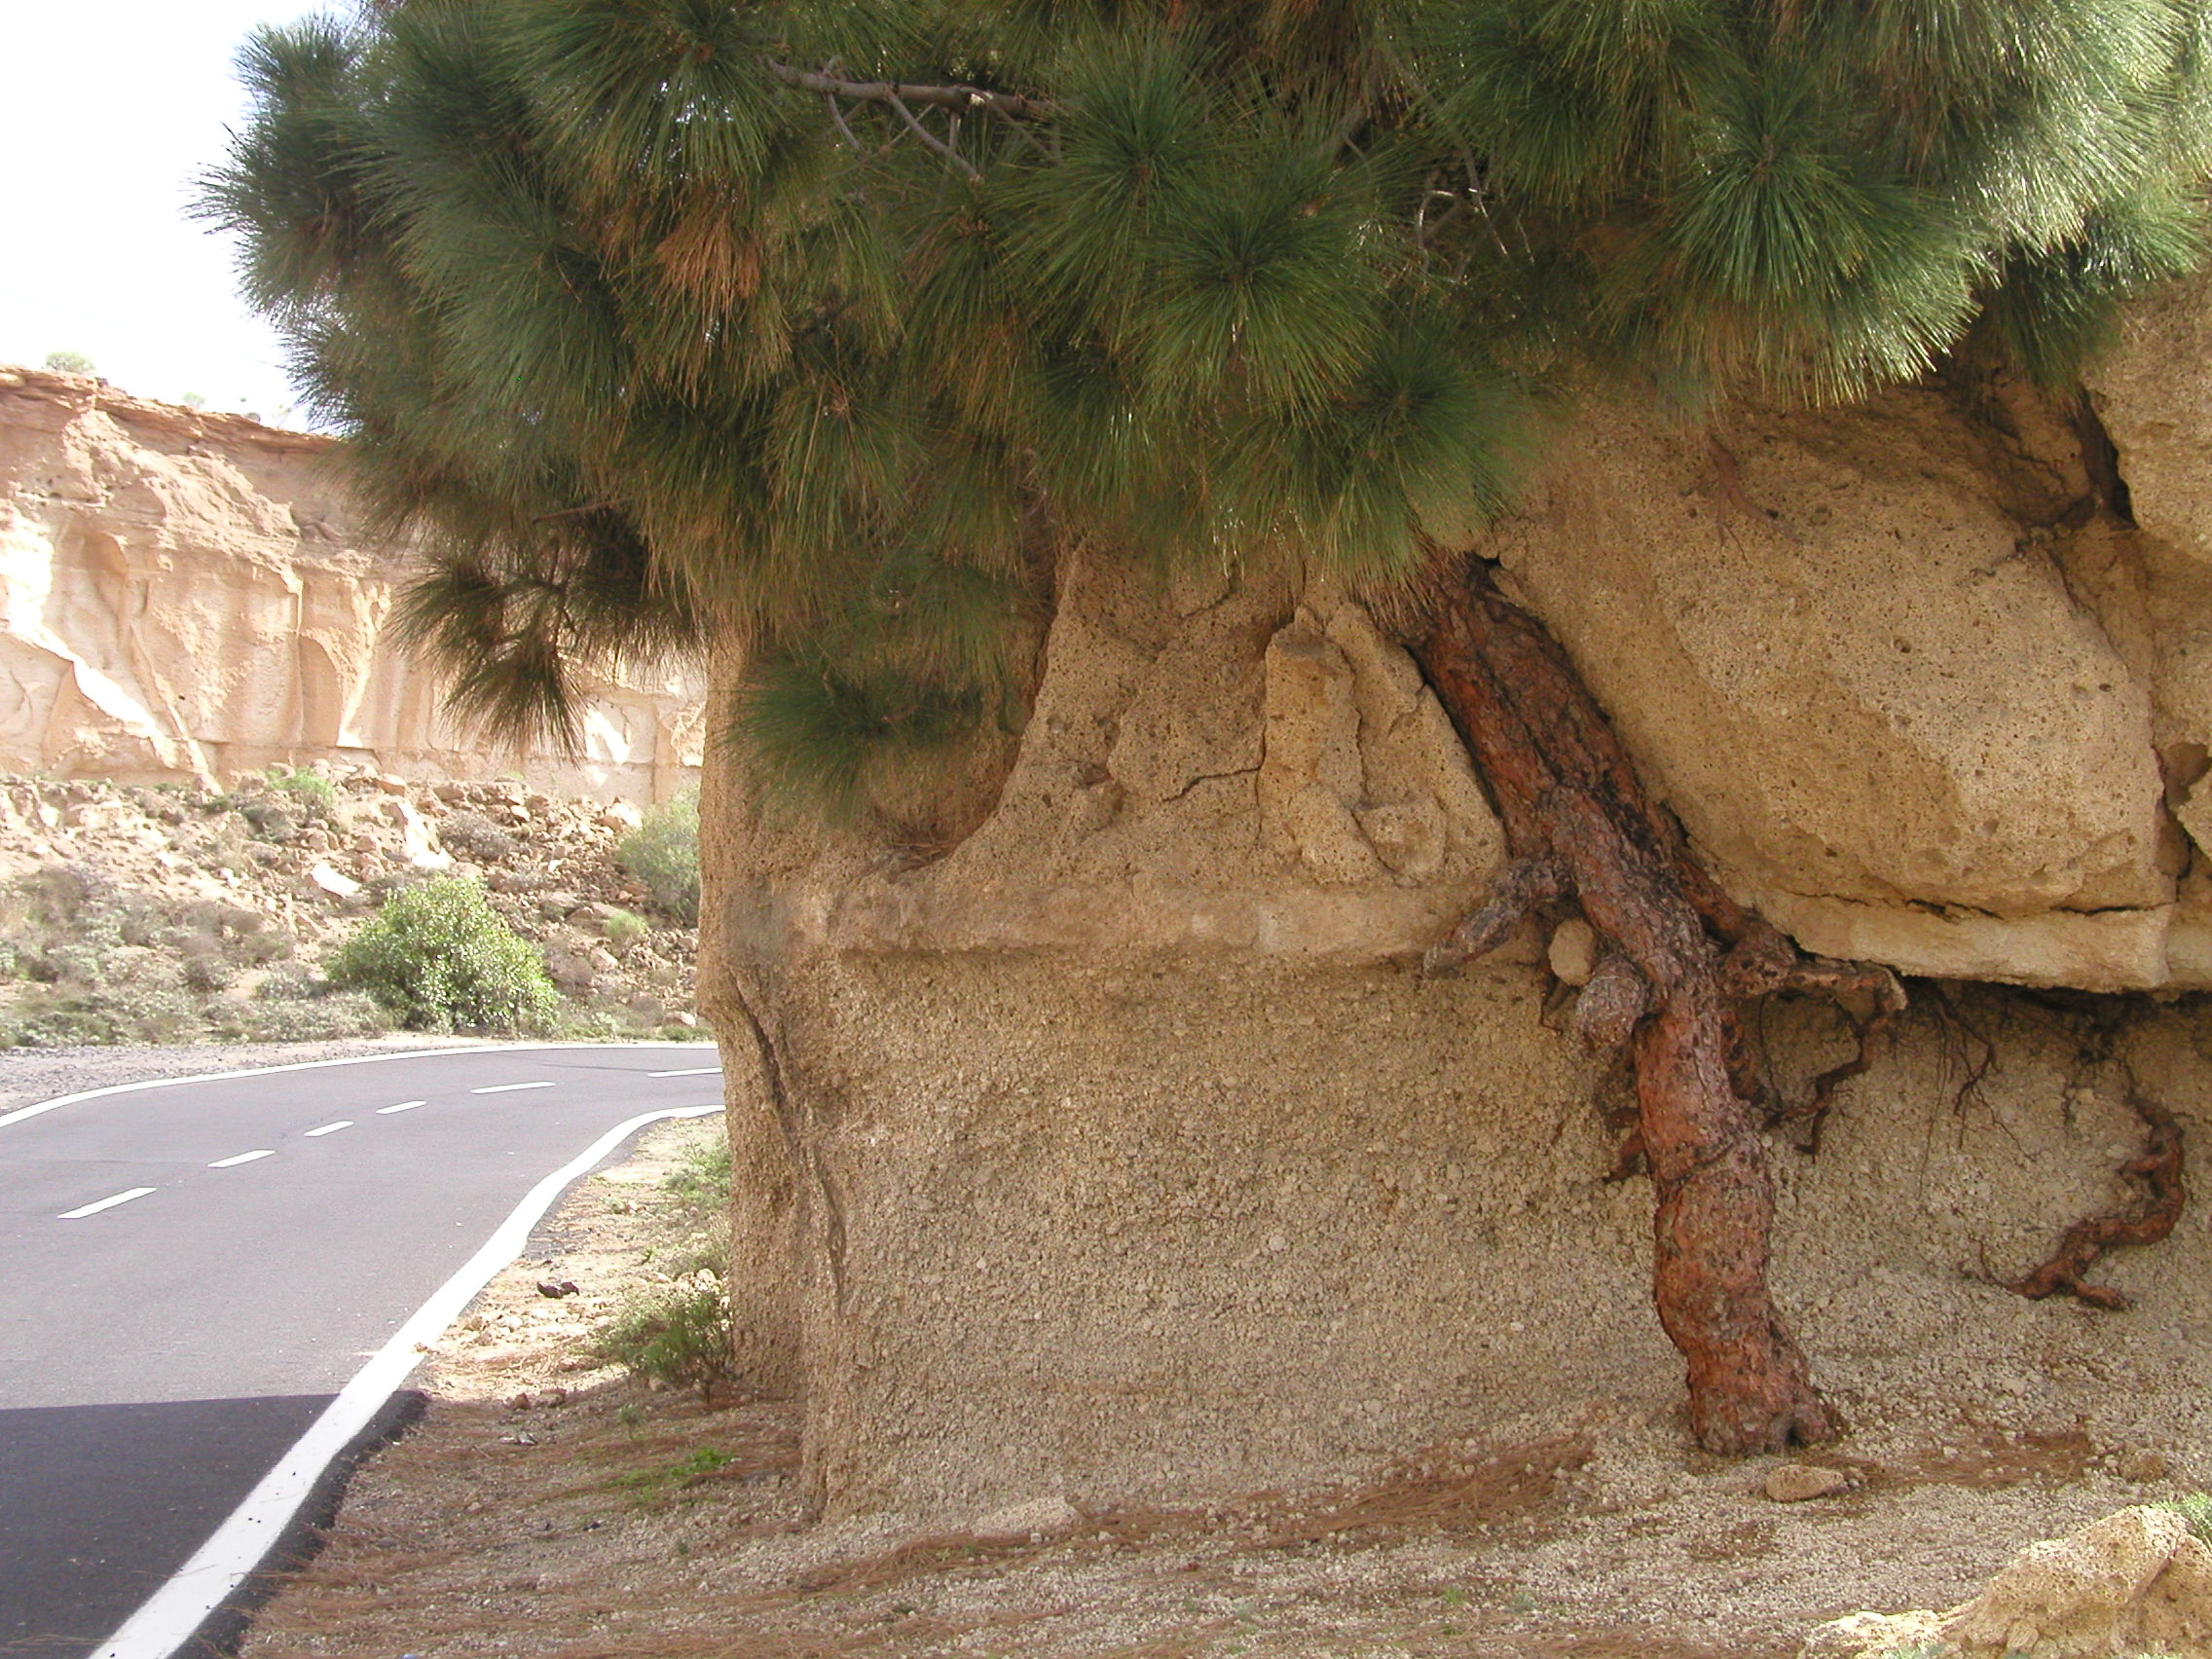 Figure 17. Another view of the road cut showing the top of G1, G2 and the base of G3 beneath the large pine tree - the endemic Pinus canariensis. |
Using Figures 15 - 18, describe all the visible characteristics of Unit G2. |
Unit G3
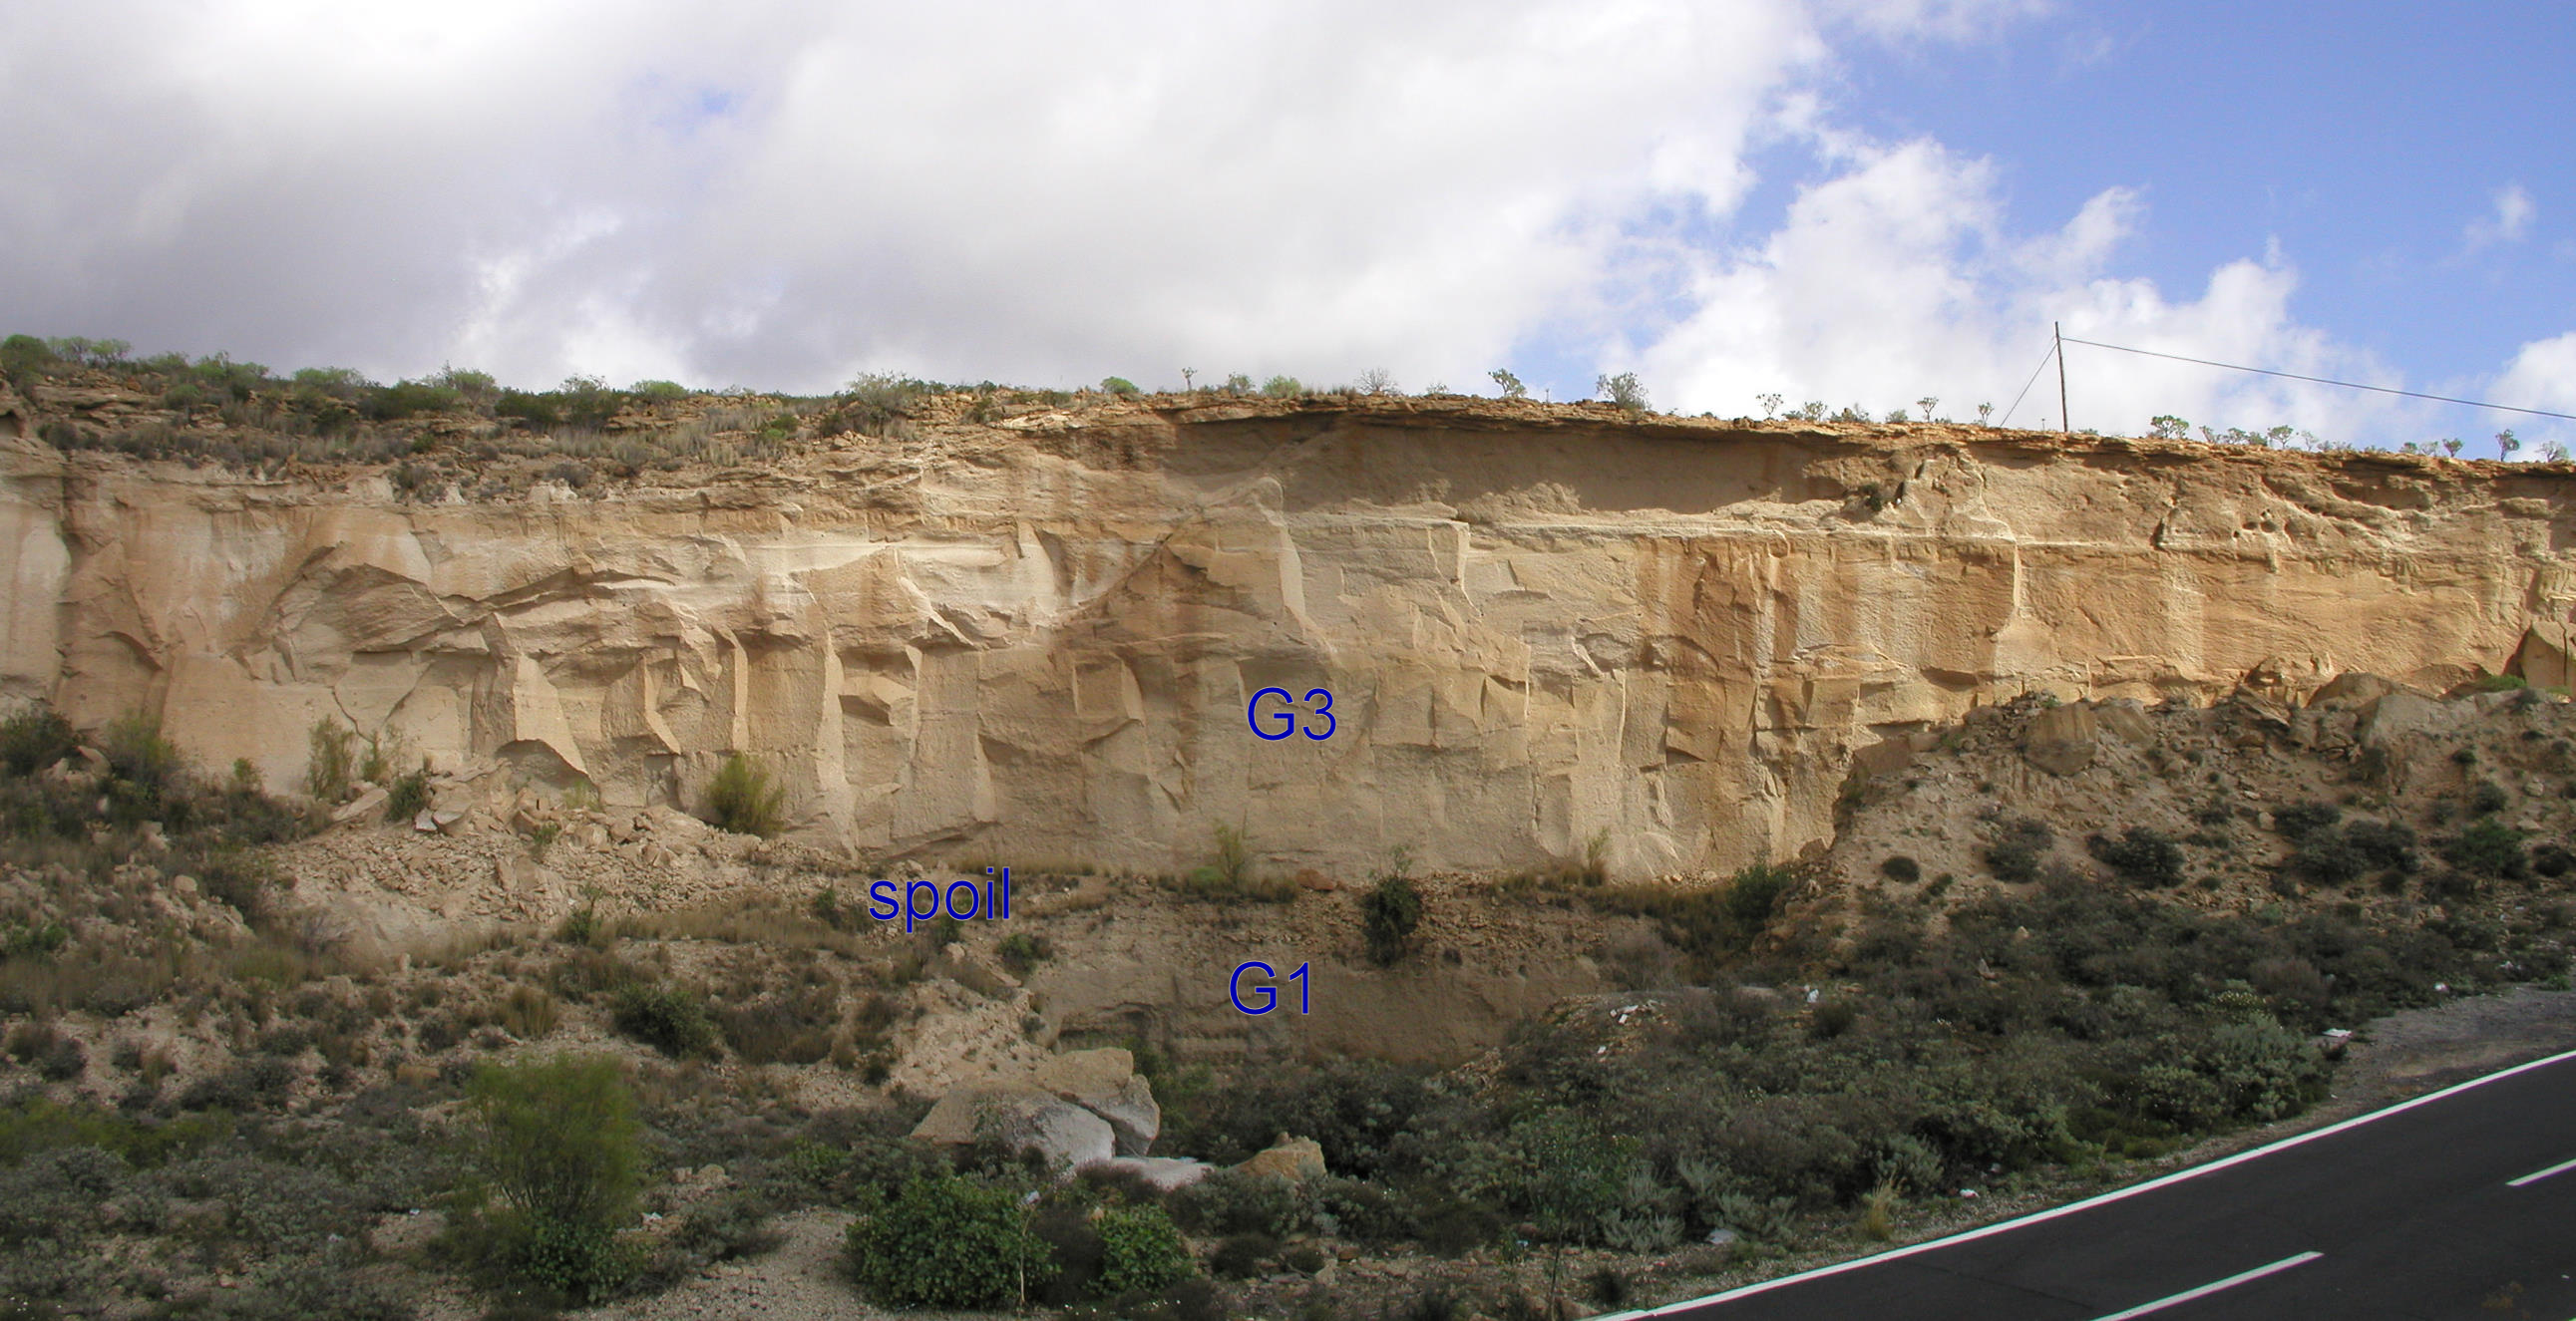 Figure 19. A general view of the quarry north of the road. G1 is exposed in the lower part of the quarry. G2 and its lower and upper contacts are obscured beneath spoil (quarry waste). |
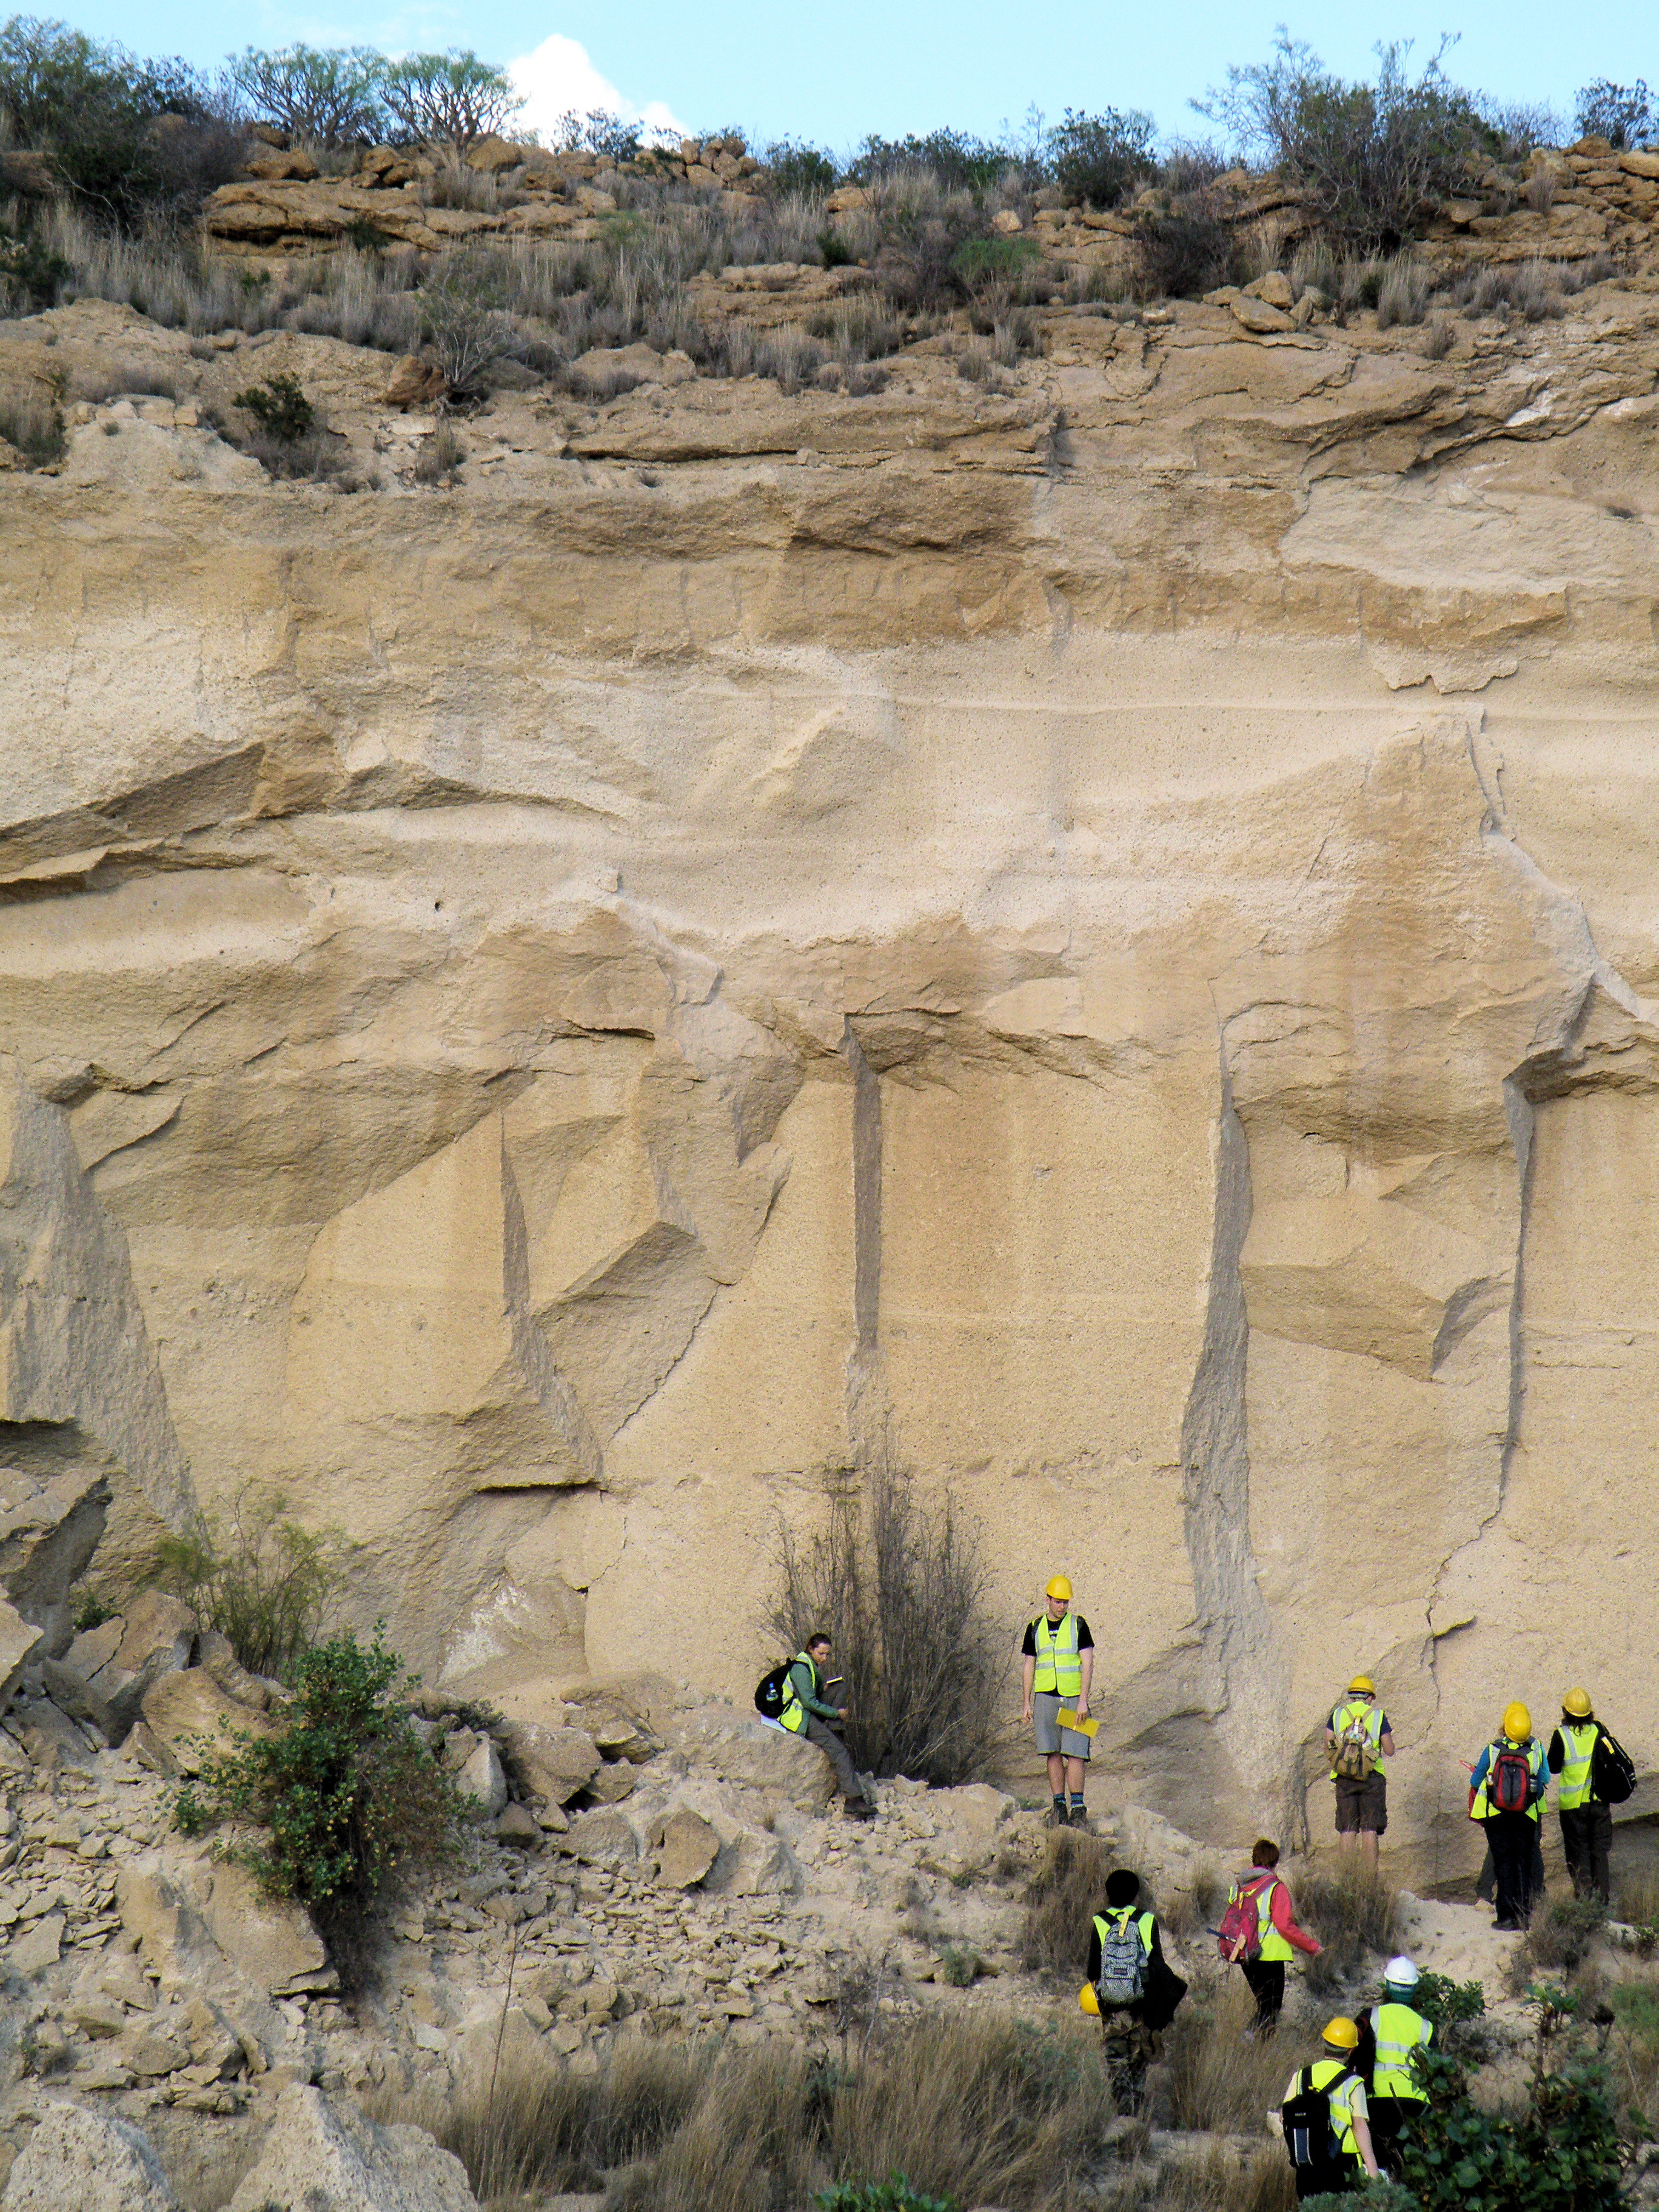
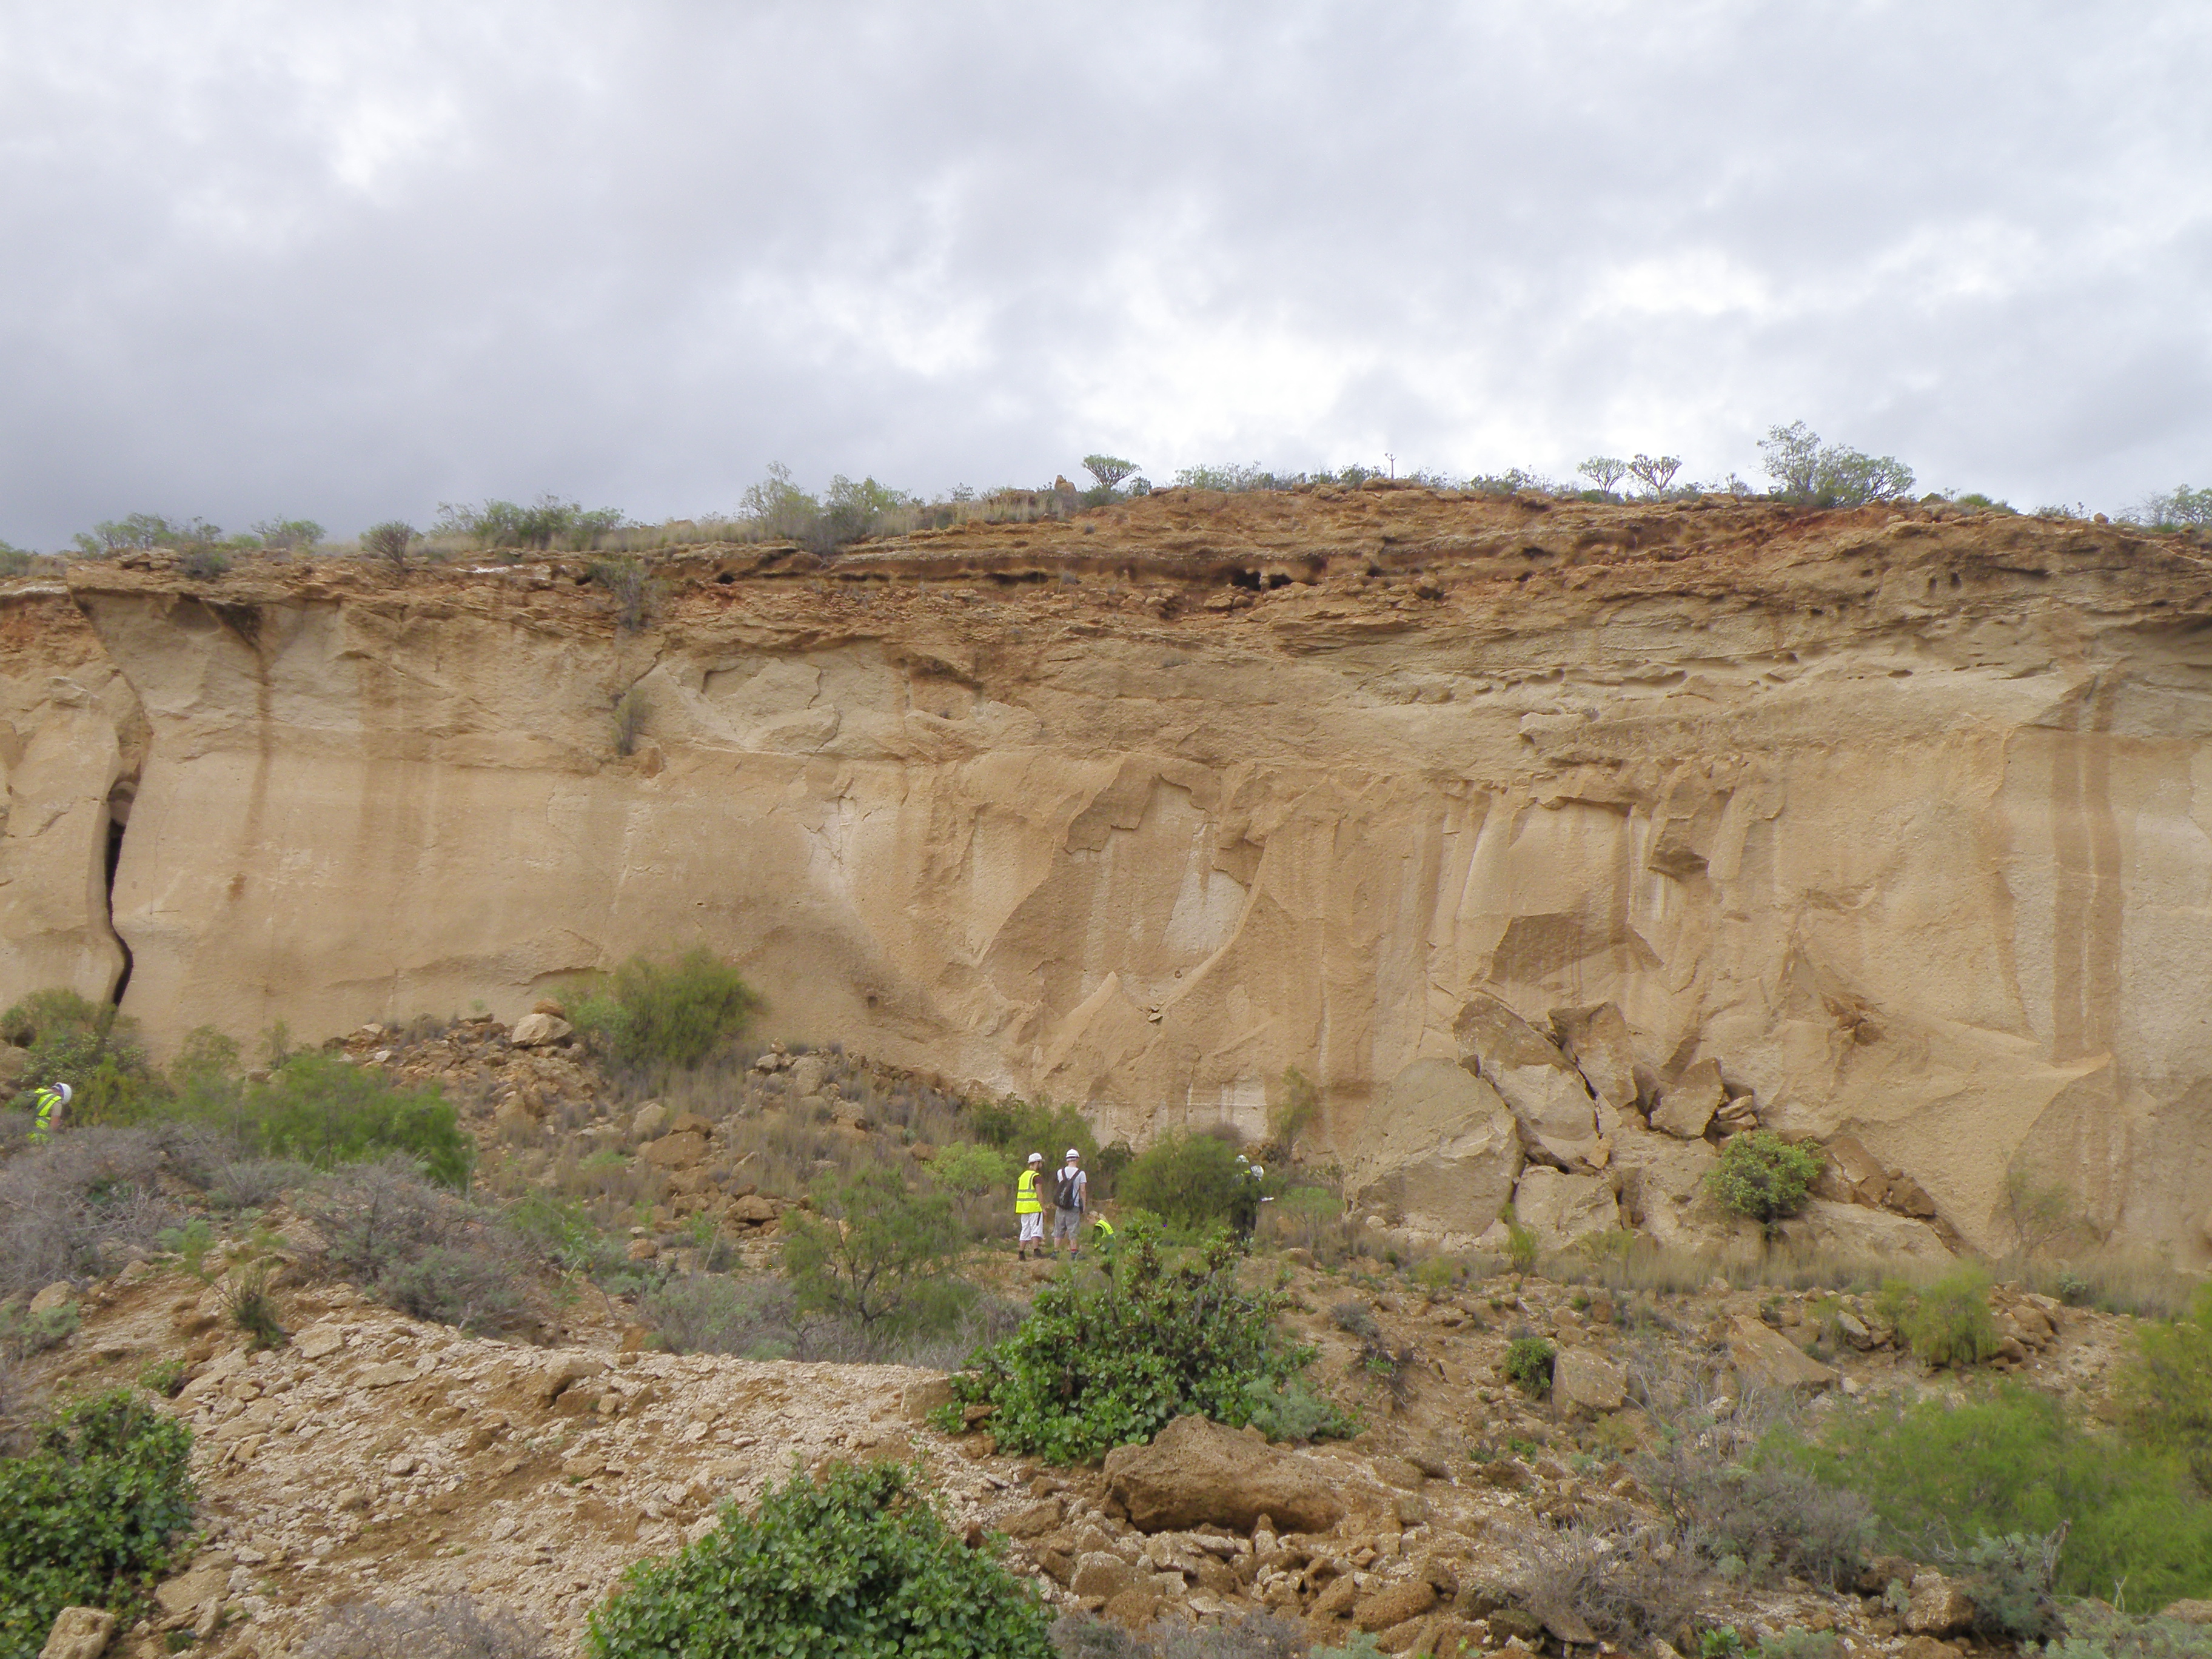 Figure 20. Estimate the thickness of Unit G3. Assumptions: the geologists in the centre of the photo are 1.7 m tall; the base of G3 is approximately at the position of their feet; at the top, G3 is overlain by Unit H, which is a darker orange colour. |
 Figure 21. Closer view of the quarry face in Figure 20. Zoom in and describe all the features you can see in Unit G3 in this view and in Figure 21. |
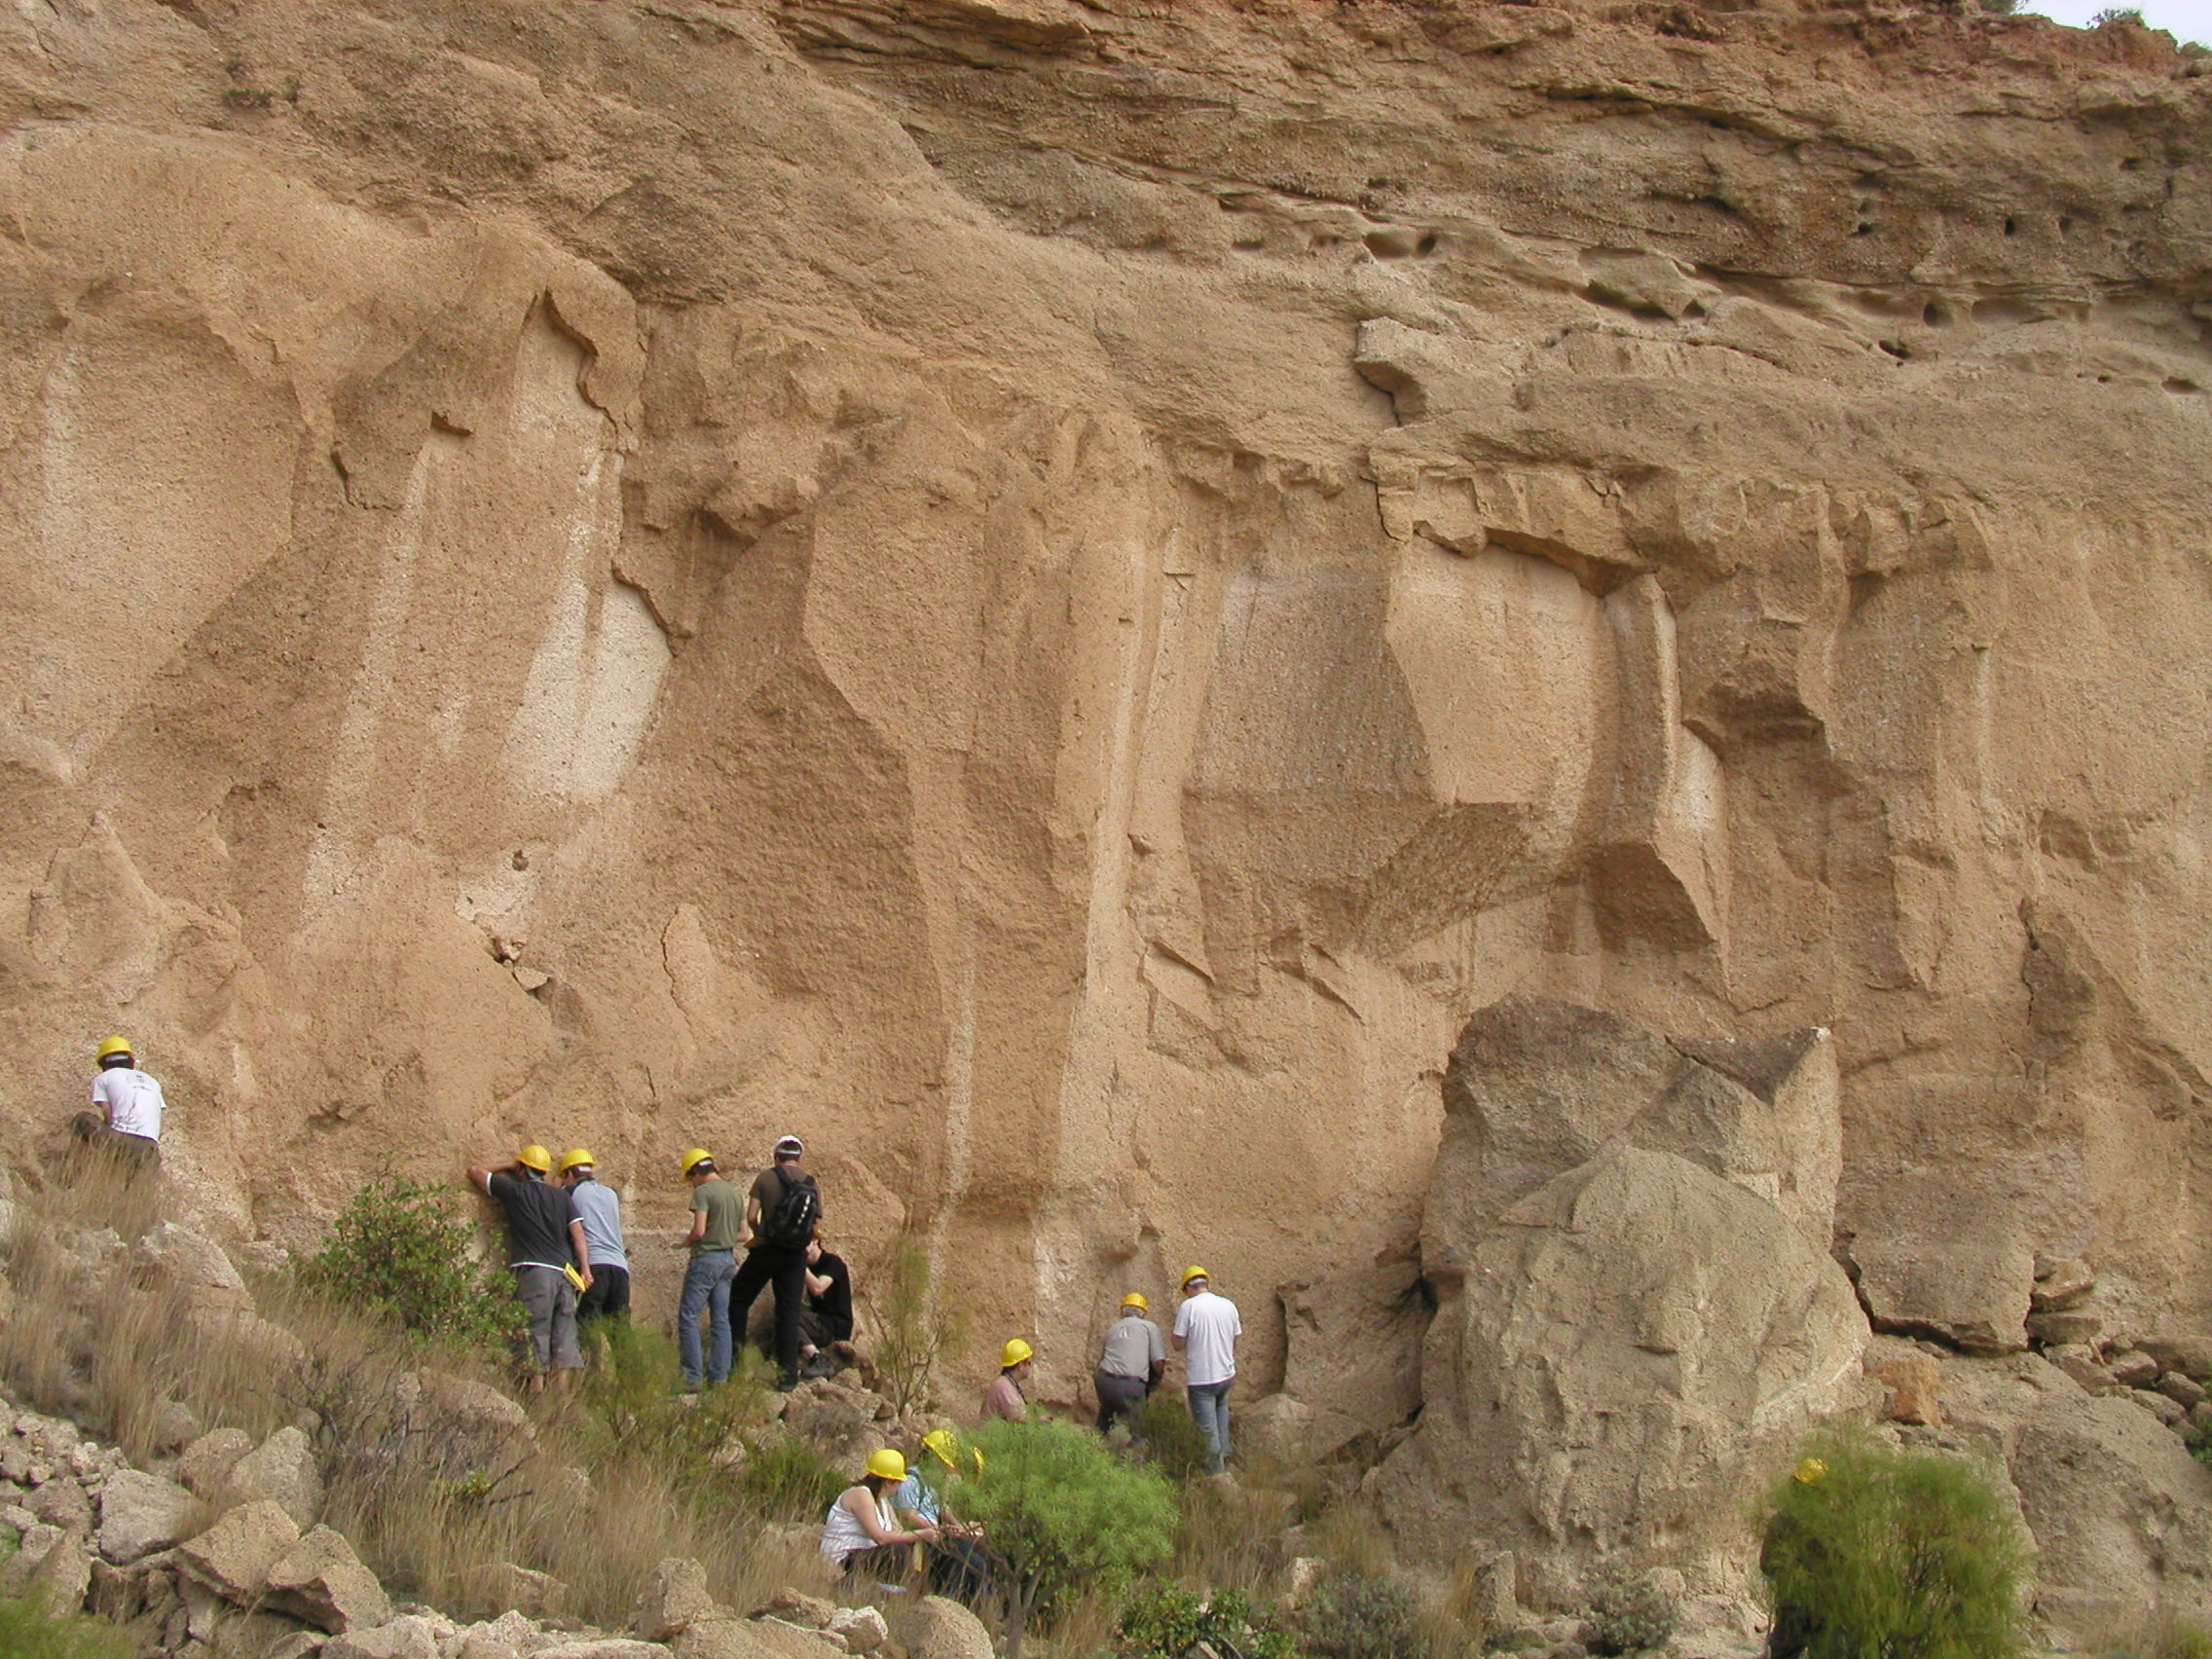 Figure 22. Close-up of Figure 21. |
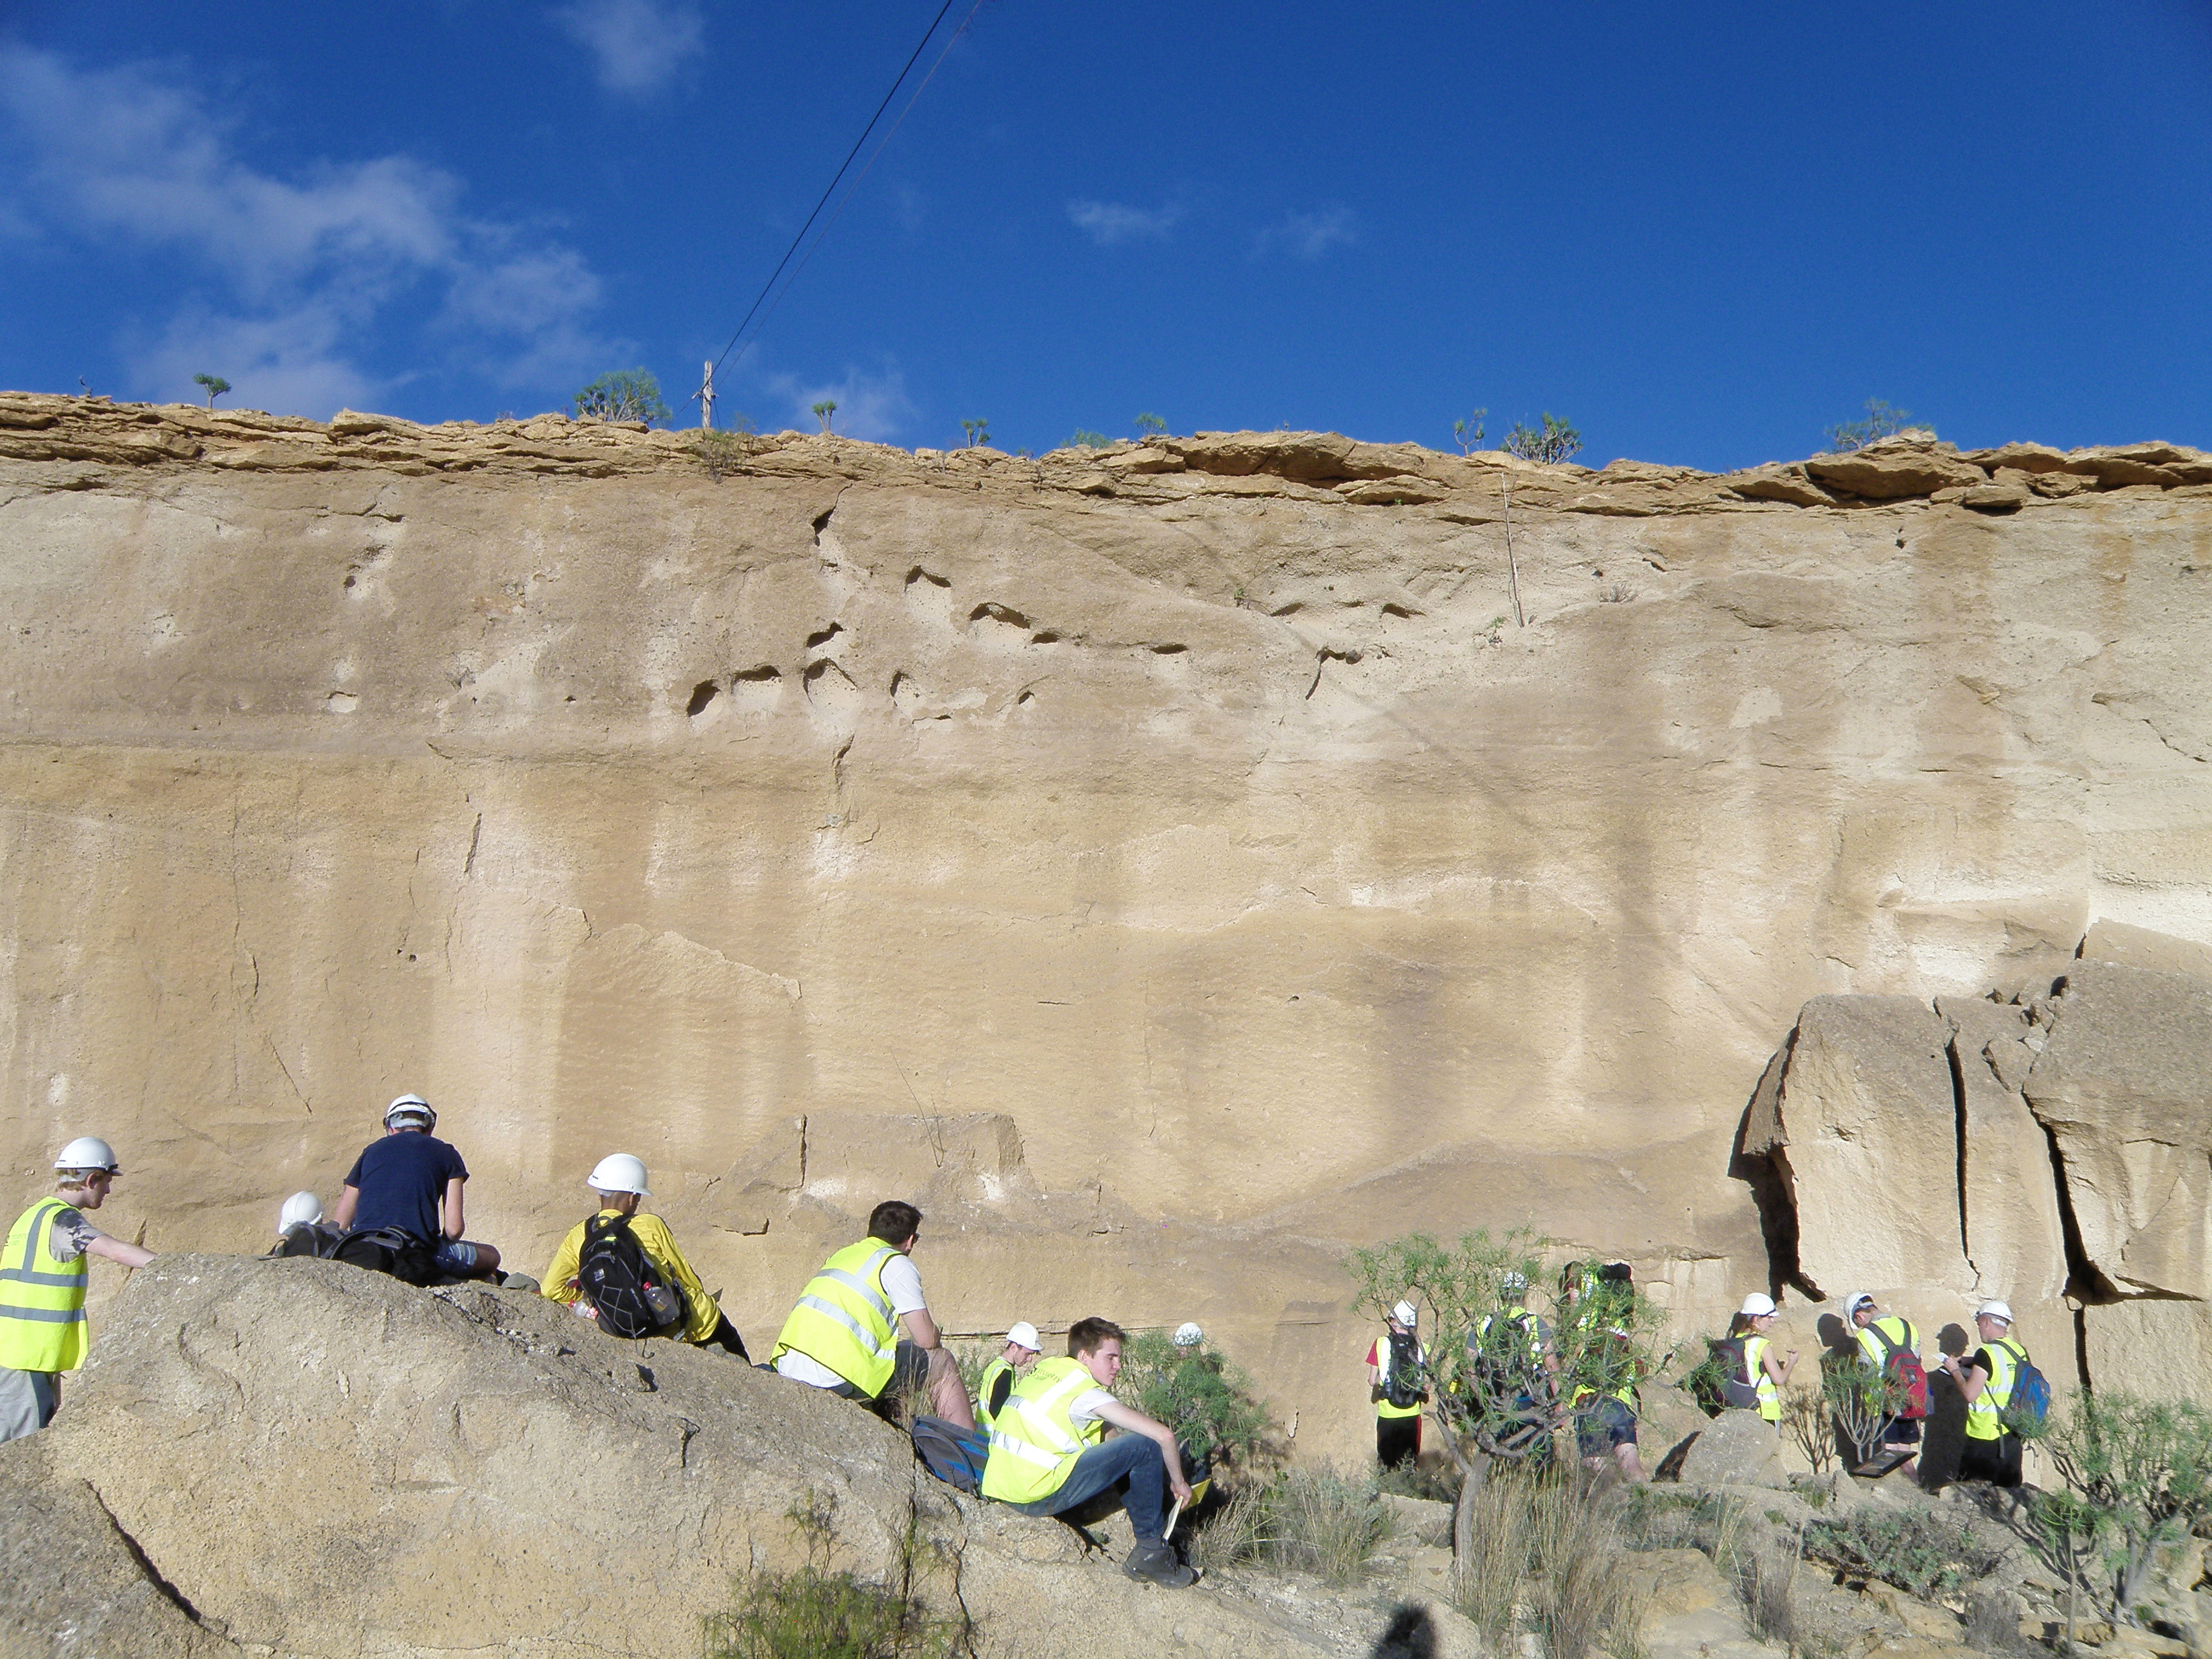 Figure 23. The quarry face through most of Unit G3. Its base lies below the photograph. At the top, the overlying thin Unit H is darker and partly overhanging. Is G3 a single, massive unit, or can you see any features or changes within it? |
|
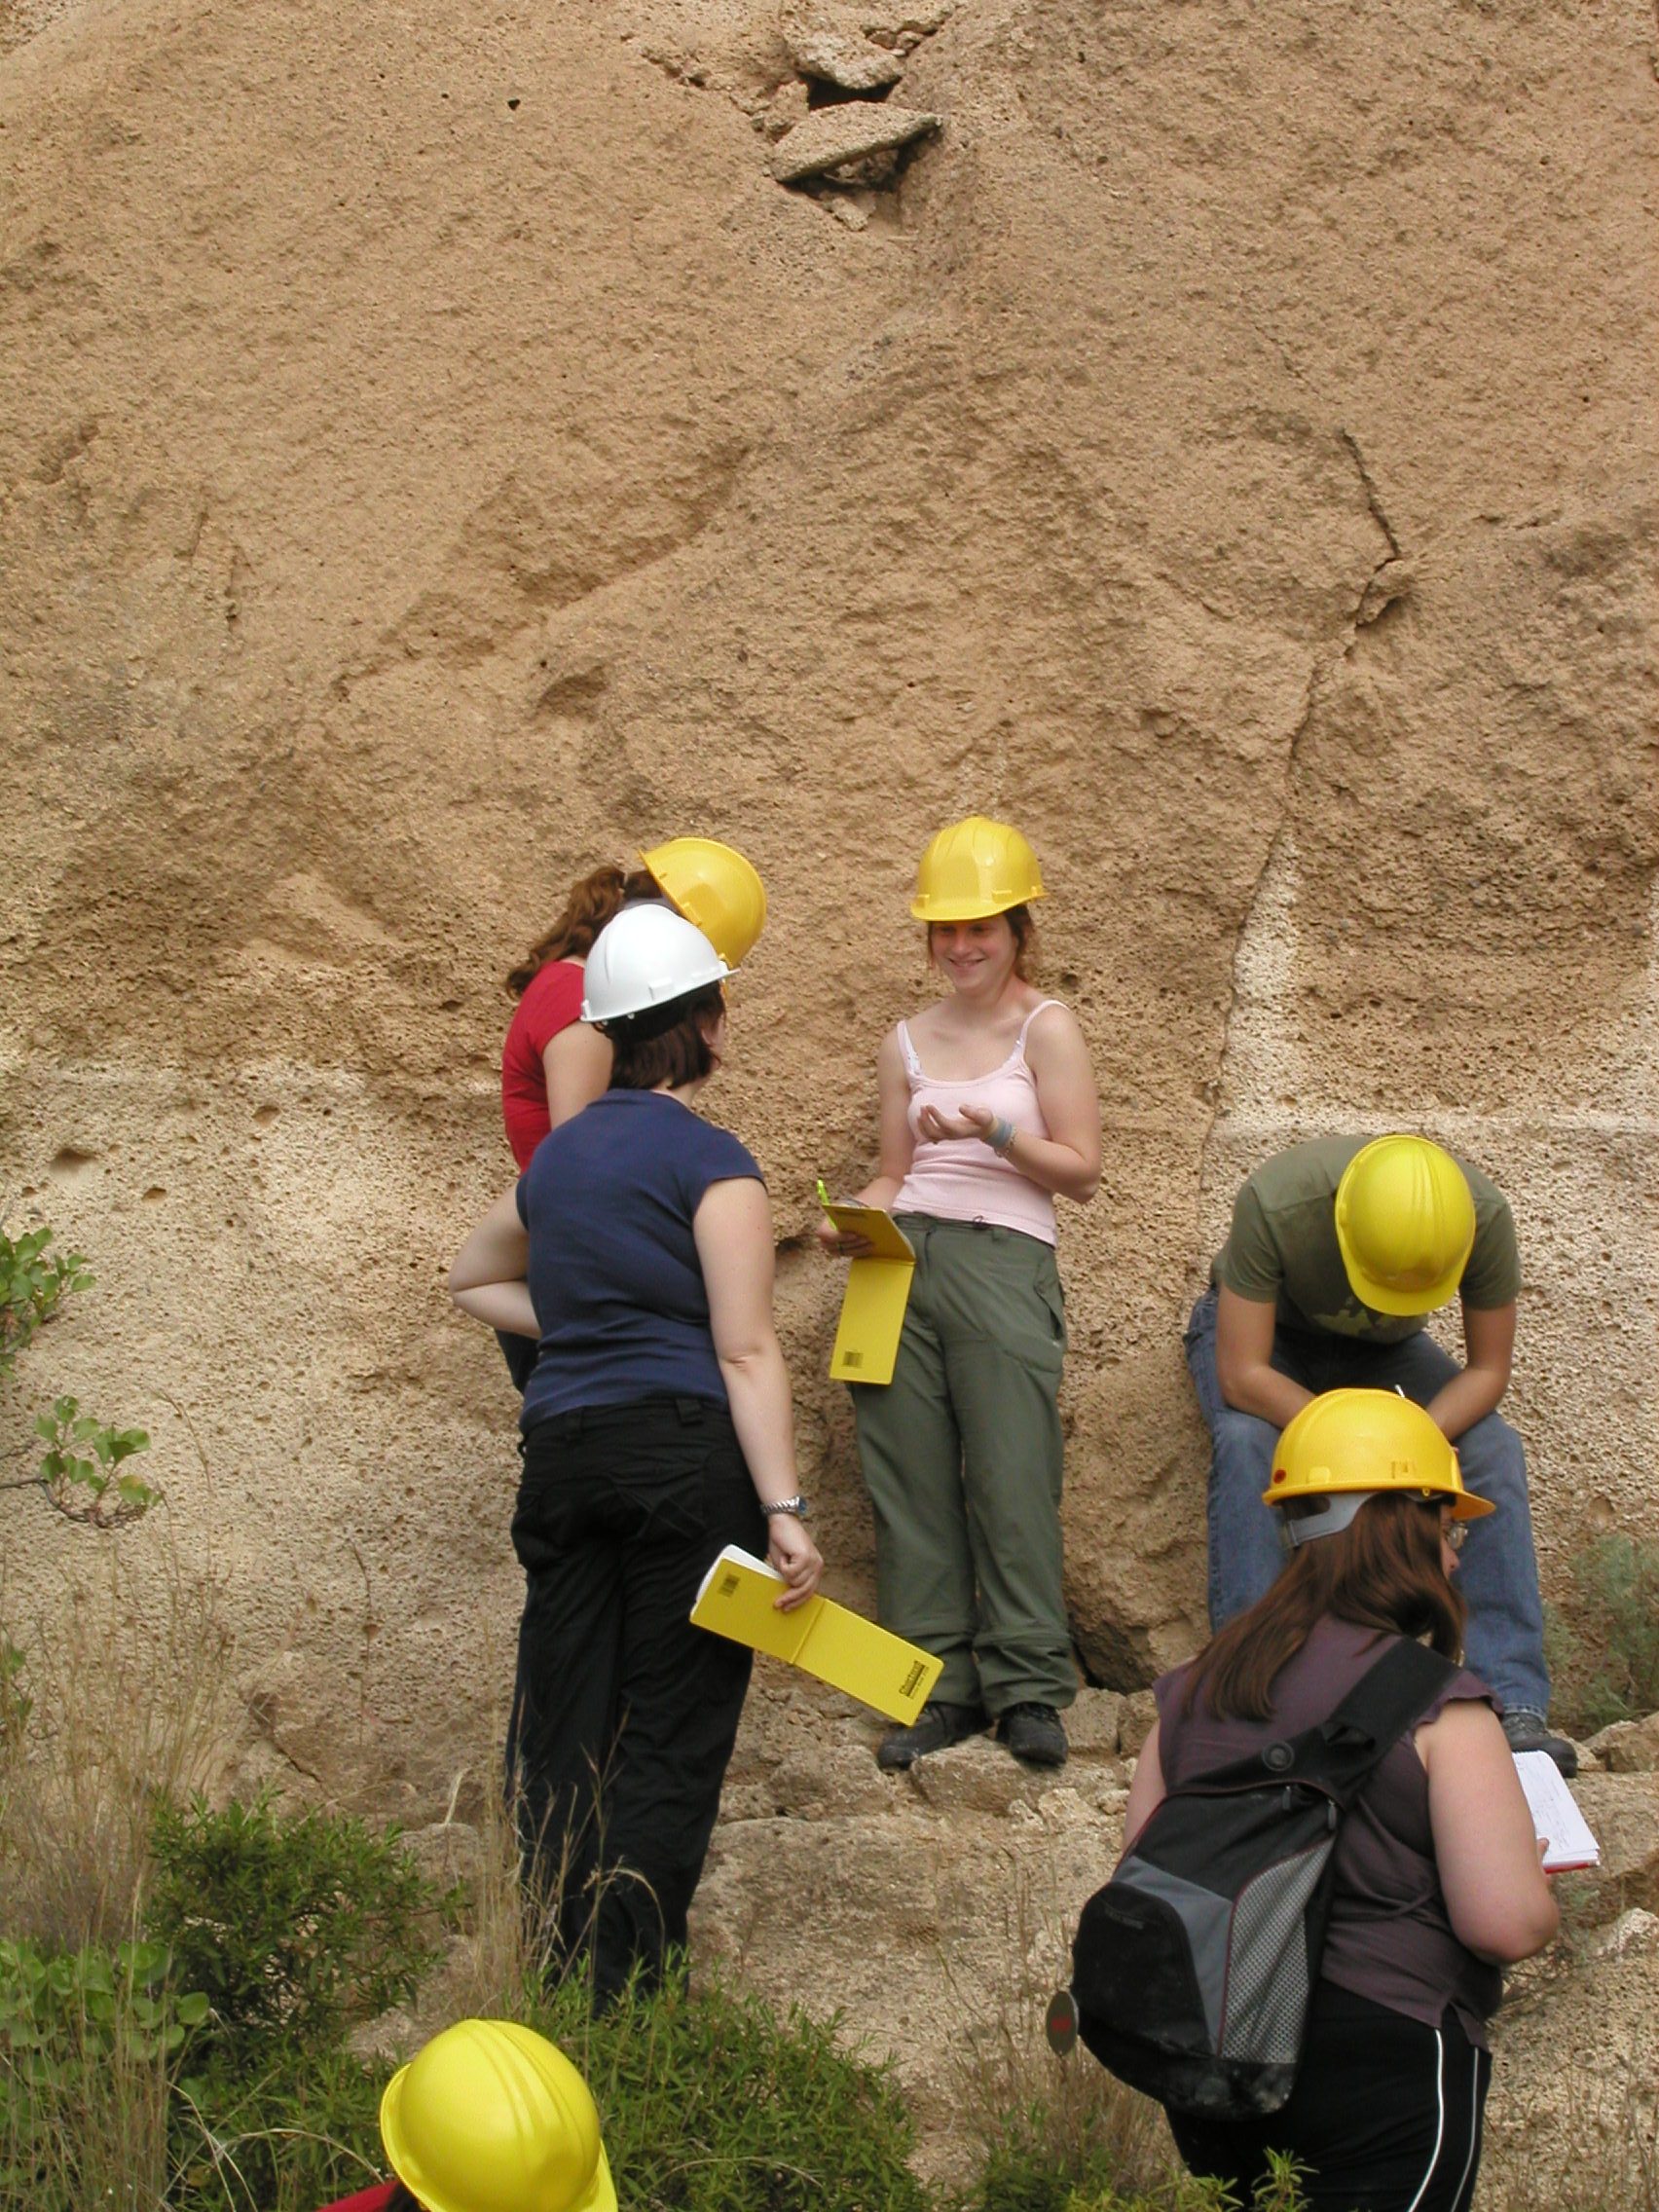 Figure 25. Detail of the lower part of the quarry face. The thin light band is also seen in Figure 23, at head level of the 3 people behind the bush. |
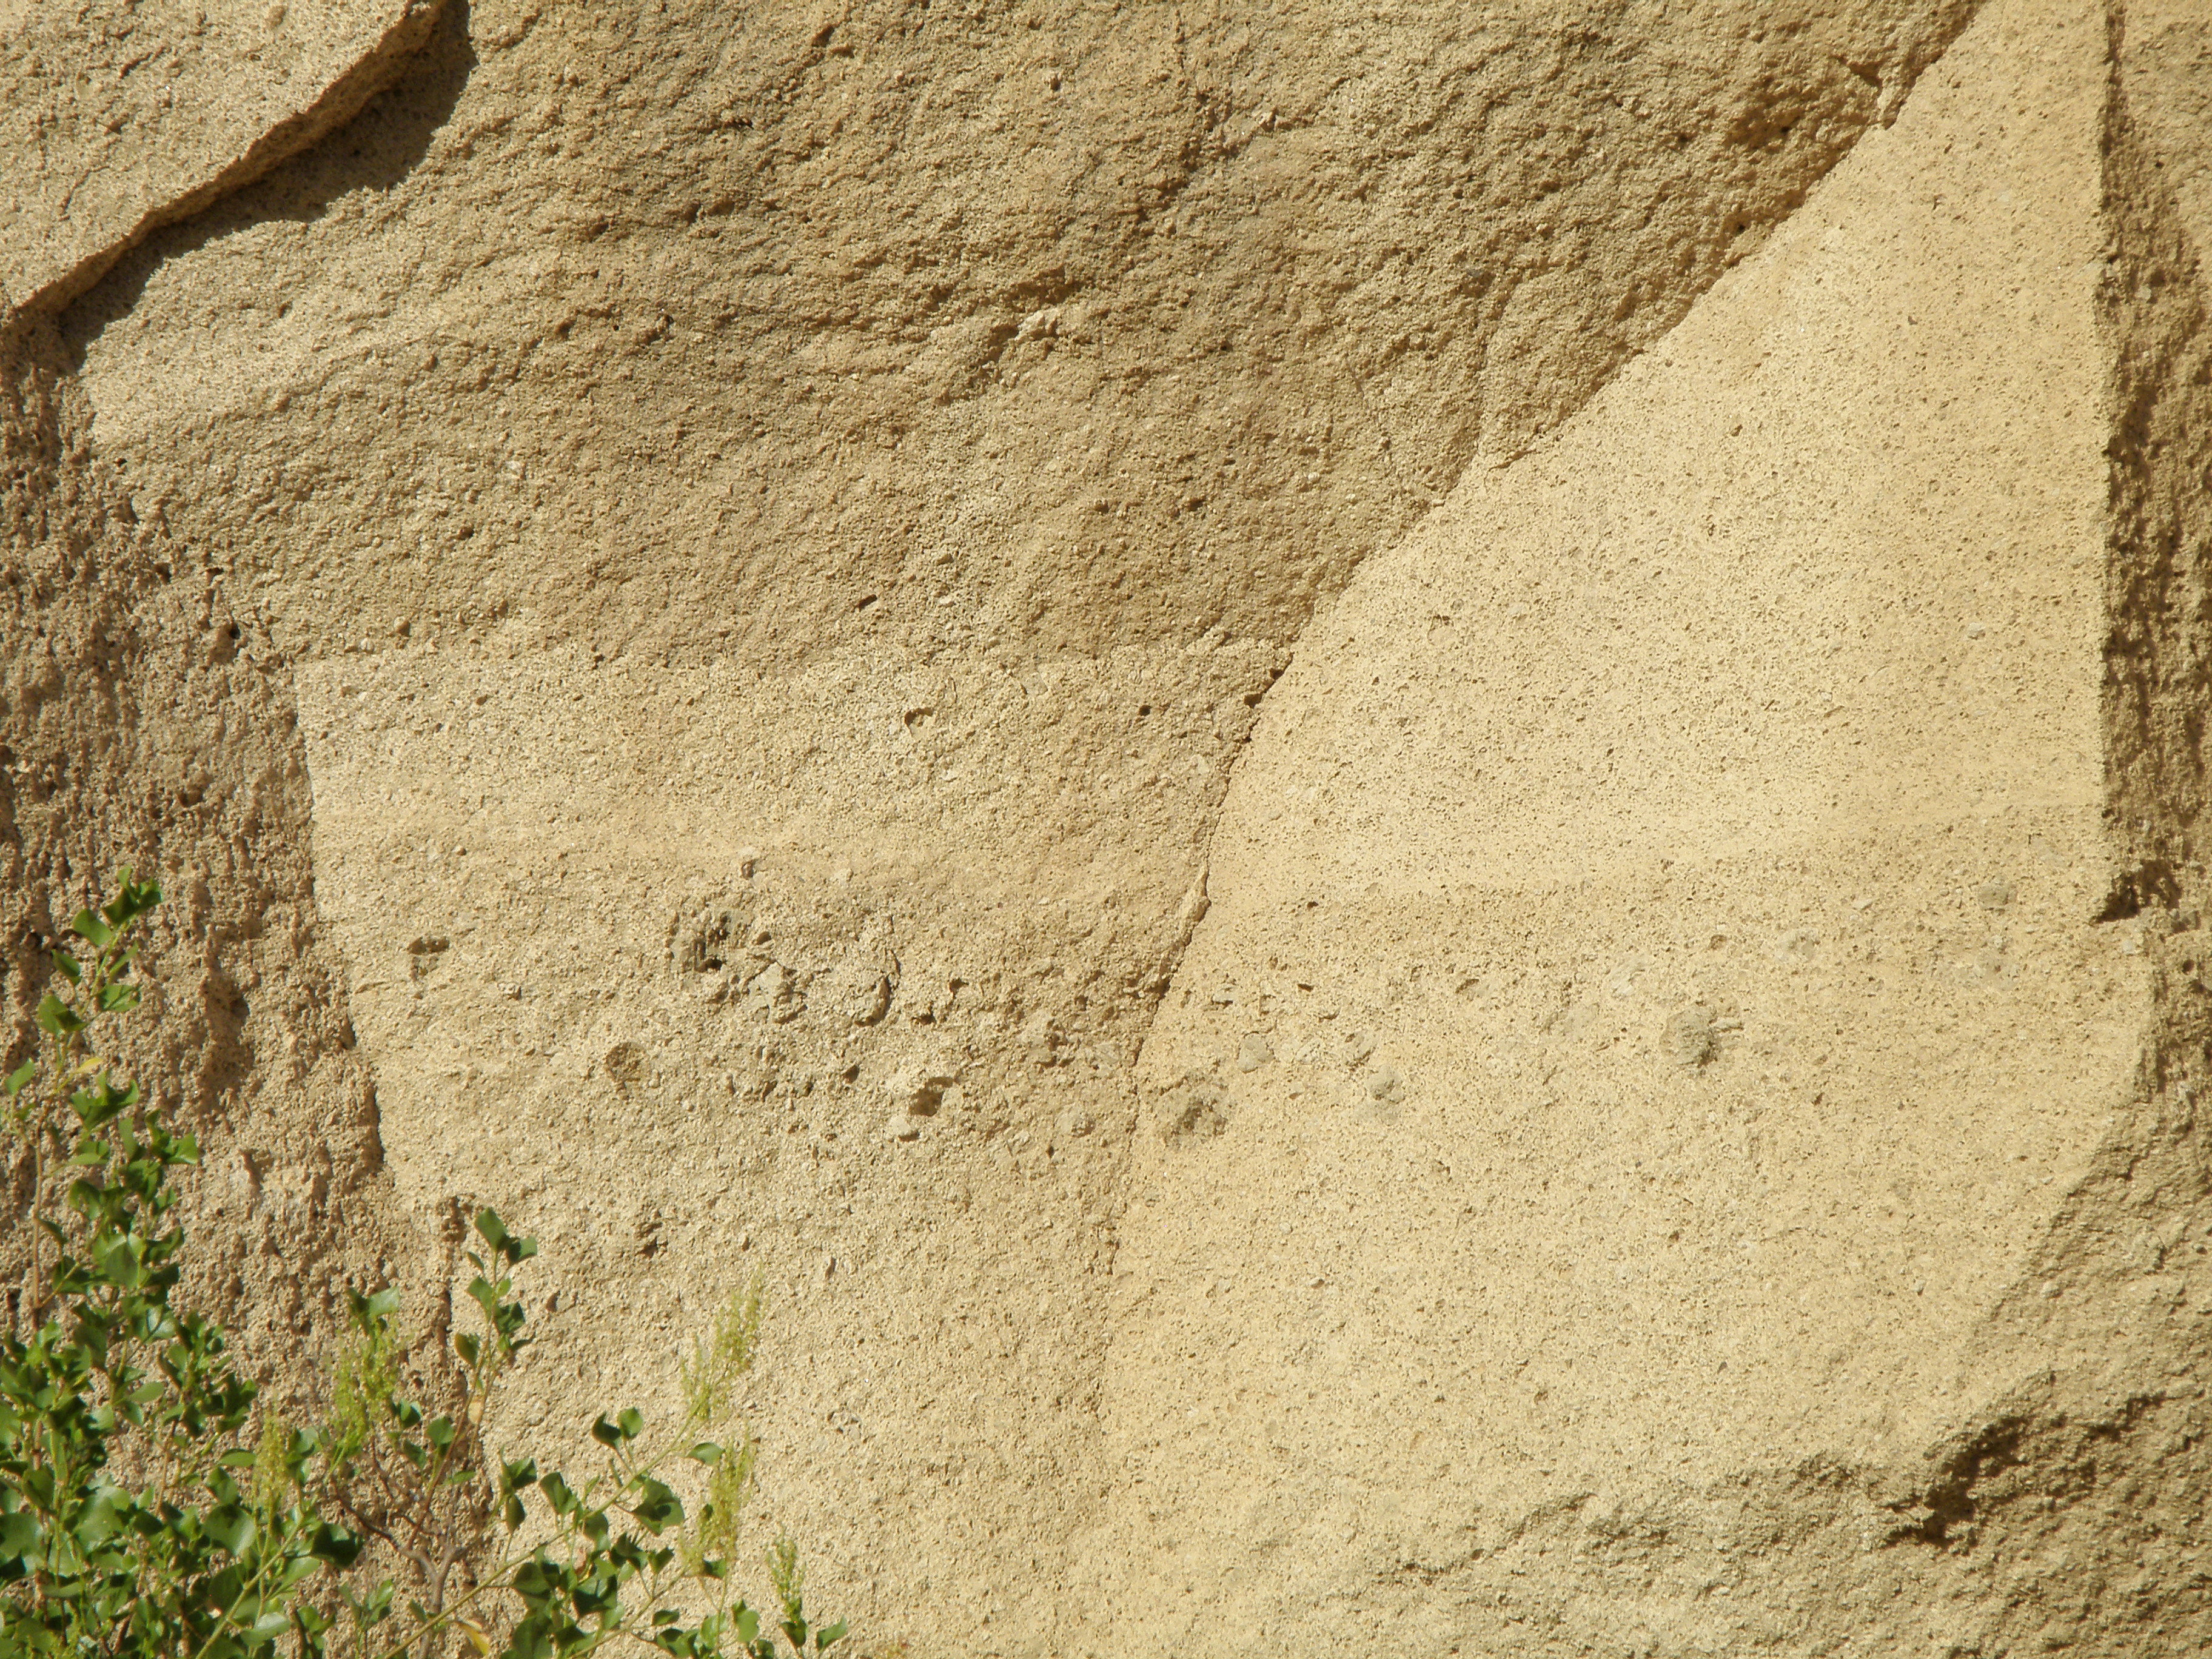 Figure 26. Further detail of the lower part of the face. |
Unit G3 in close-up
 Figure 27. A closer look at the beds shown in Figure 25 |
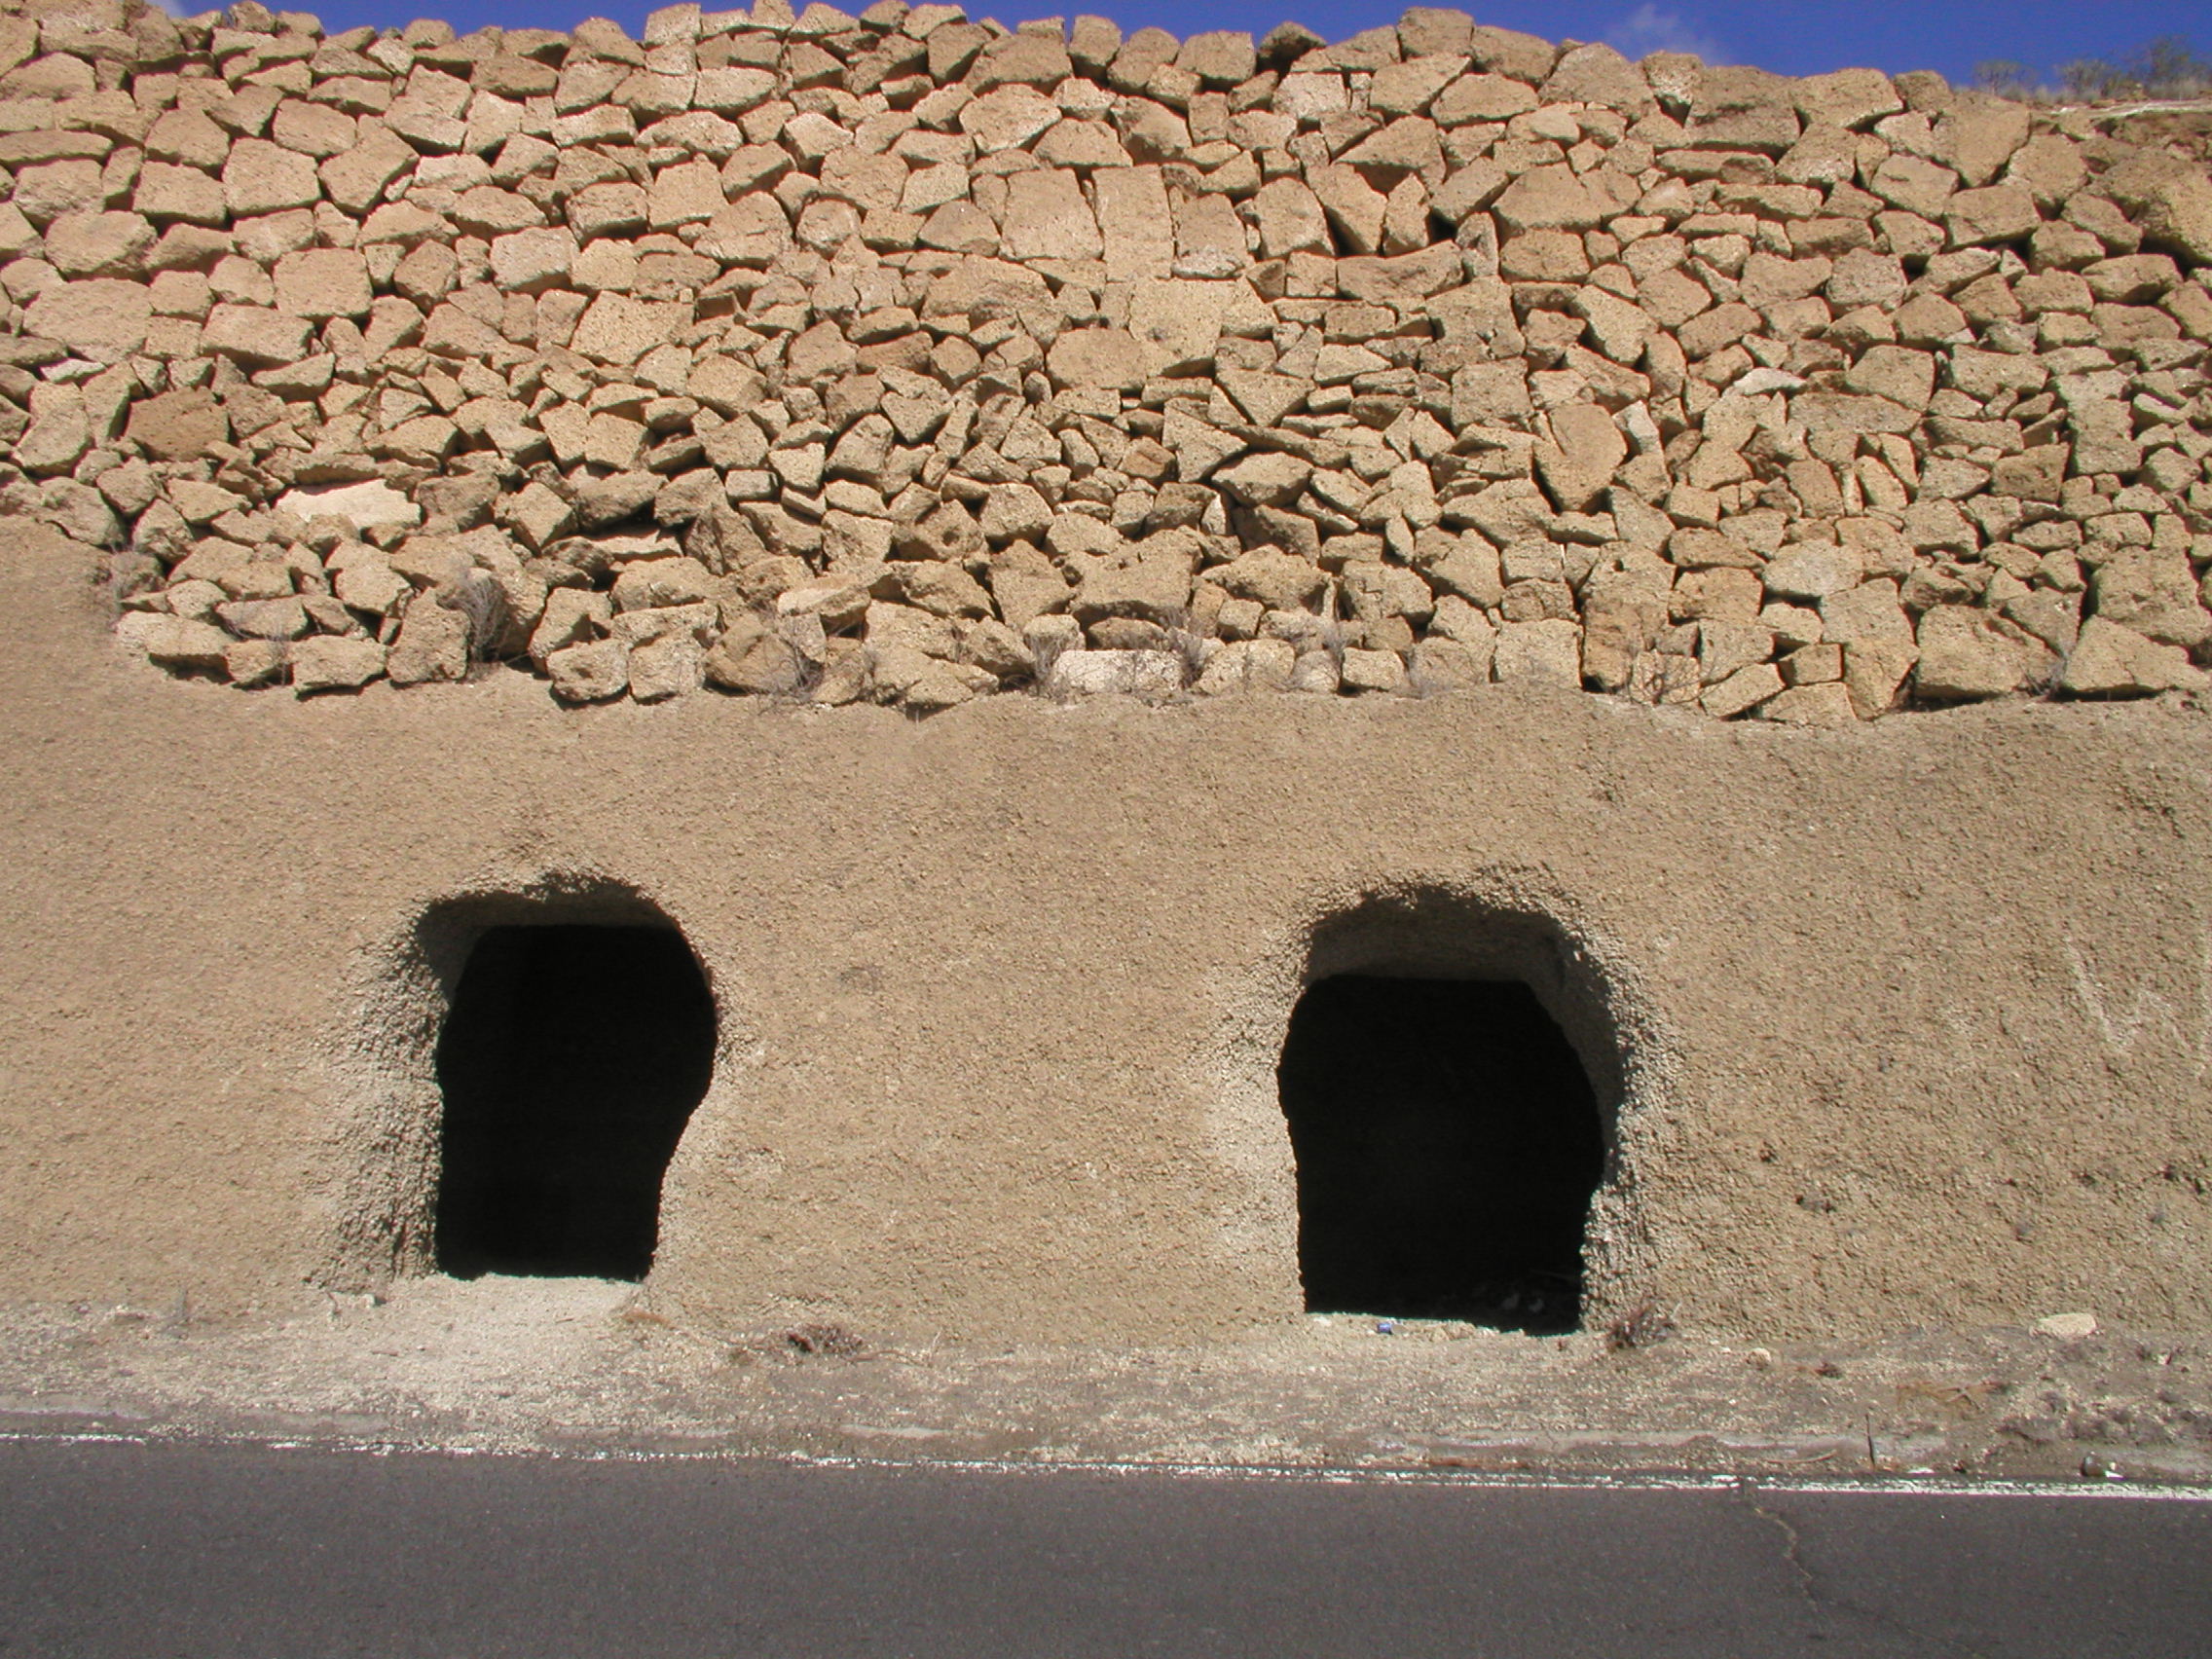
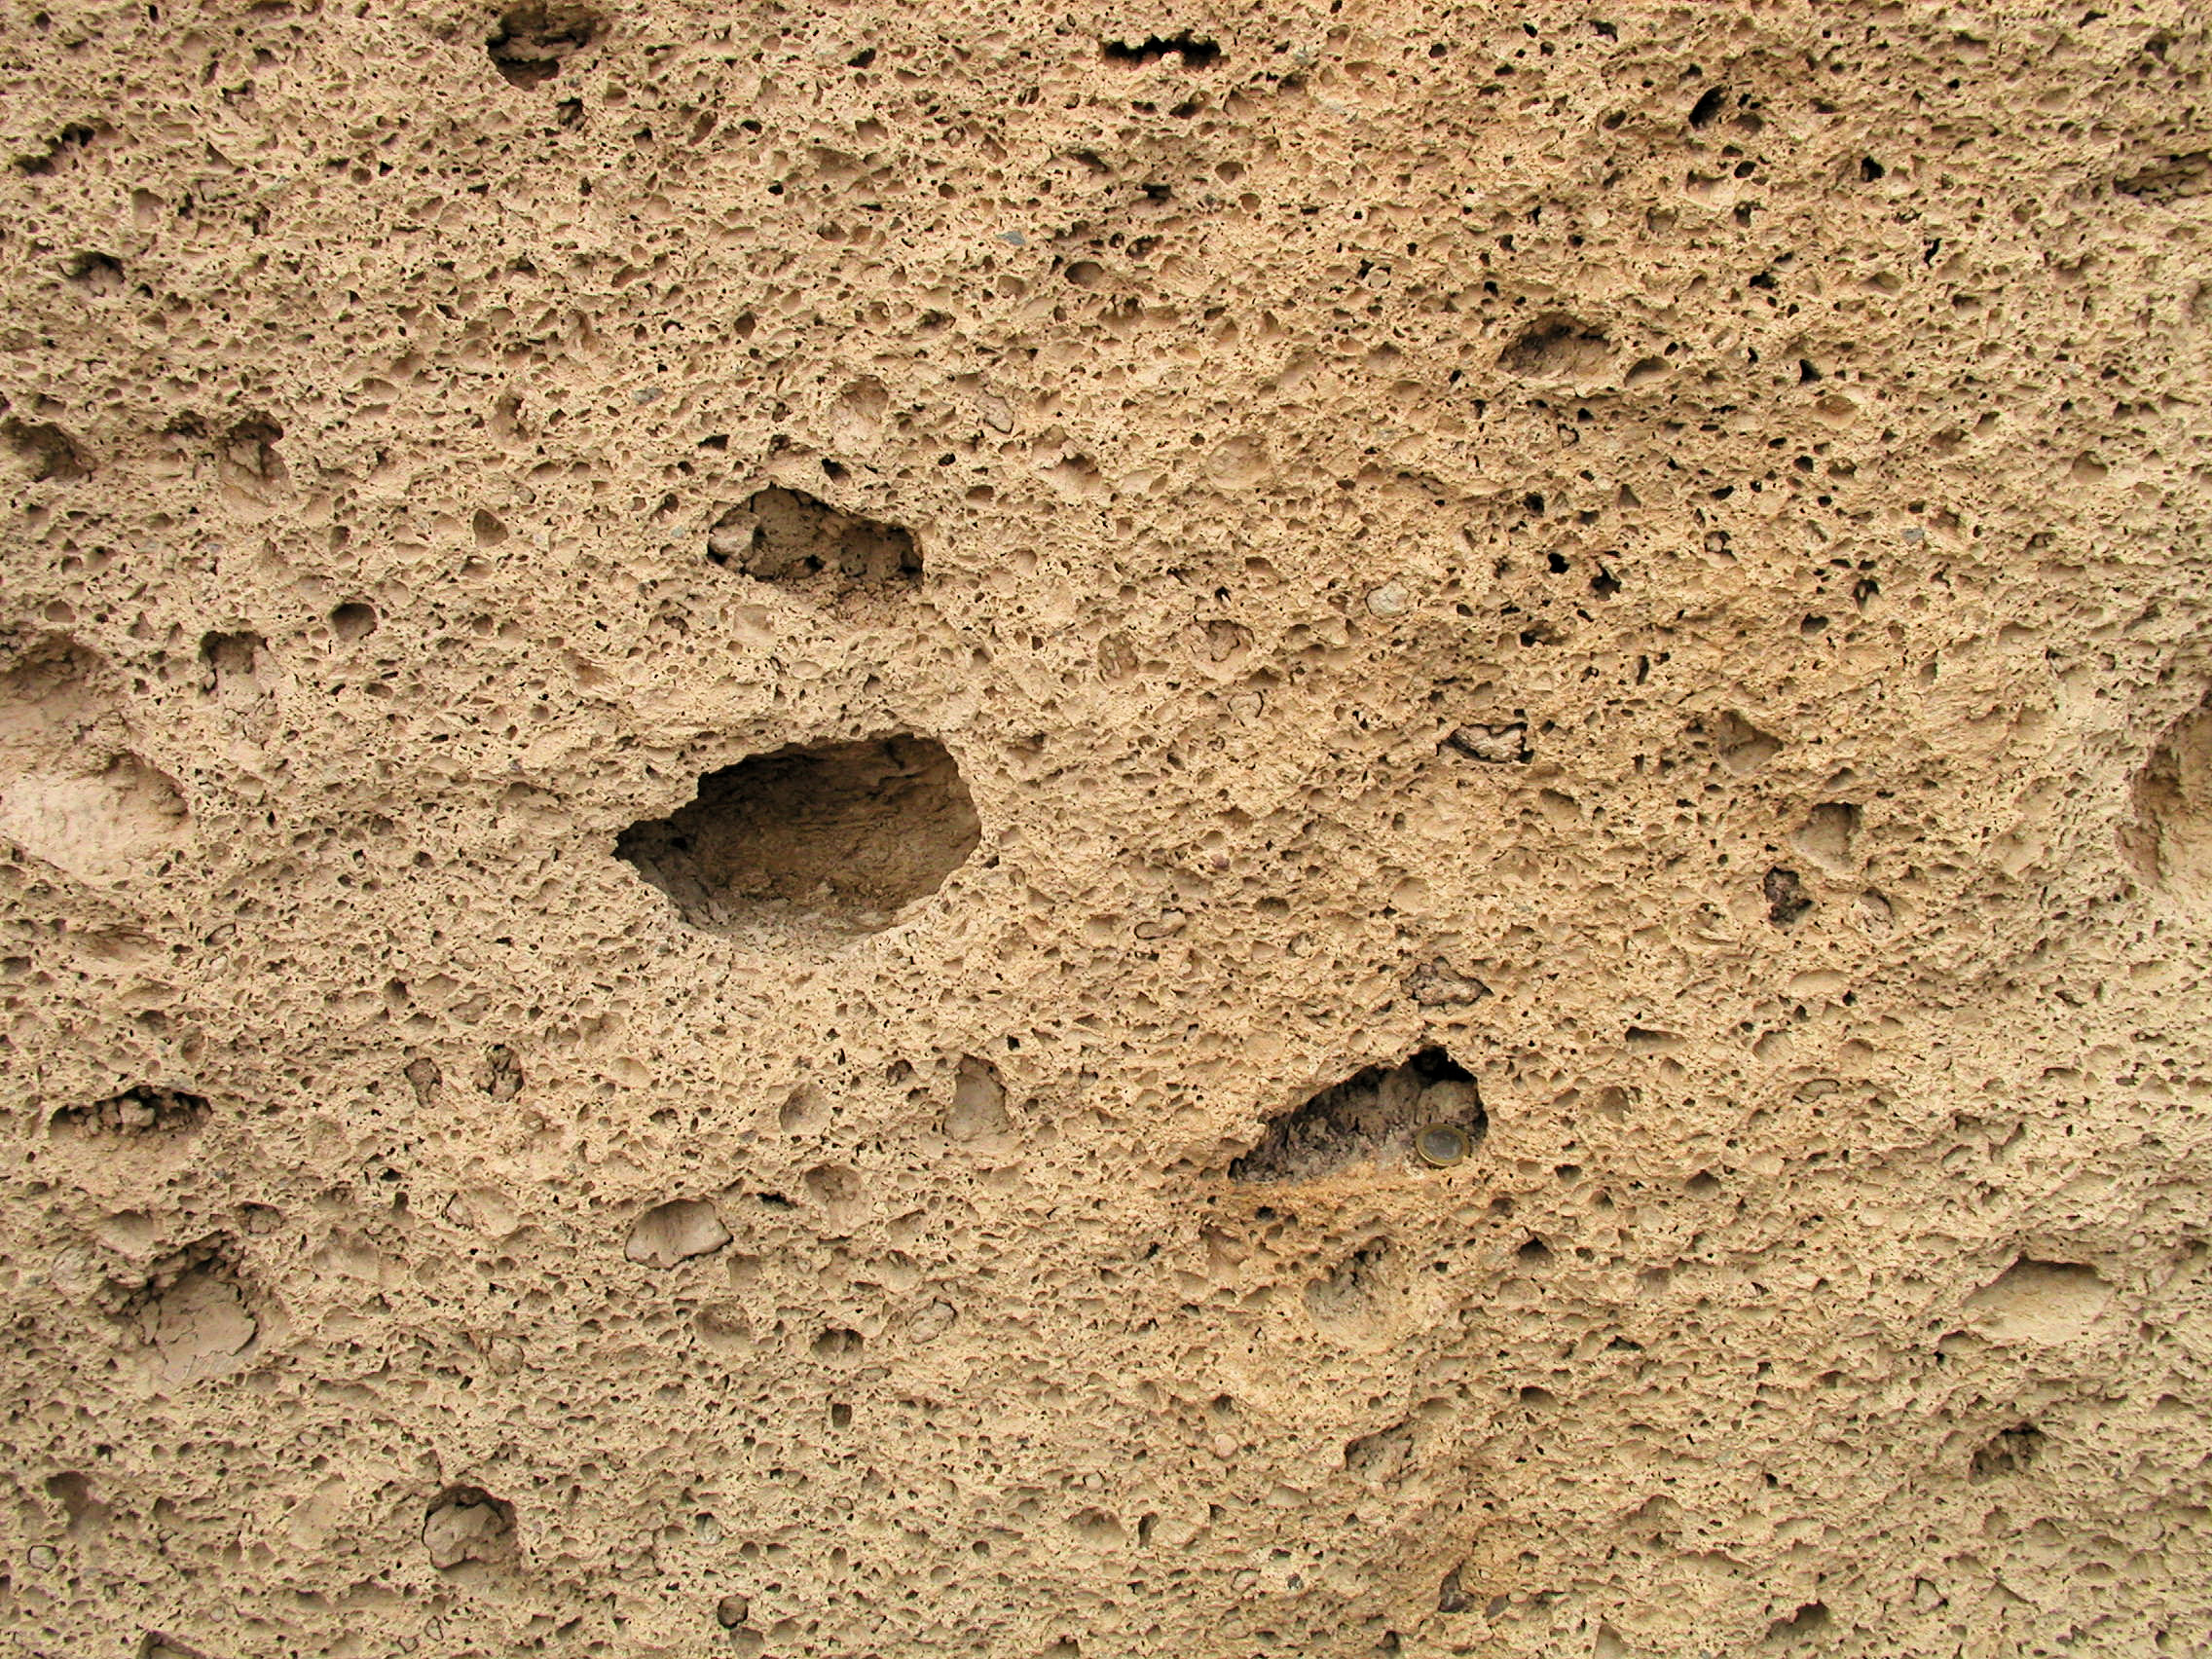
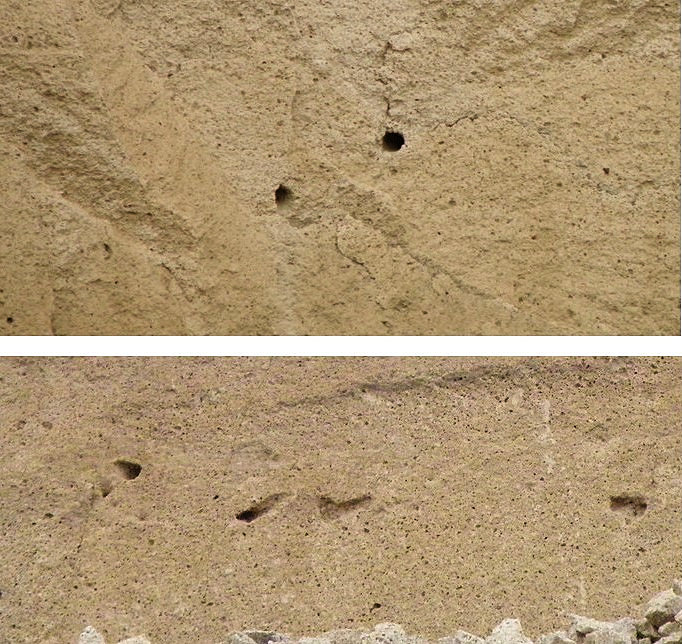 Figure 28. At several levels within Unit G3, features like these are seen. You may be able to pick them out in Figures 20 and 23. These two examples occur 6 to 8m above the base of G3. They are cylindrical holes up to 30 cm in diameter. They may be horizontal (upper photo) or inclined to bedding (lower photo). What could they represent - perhaps a solid object which has disappeared? |
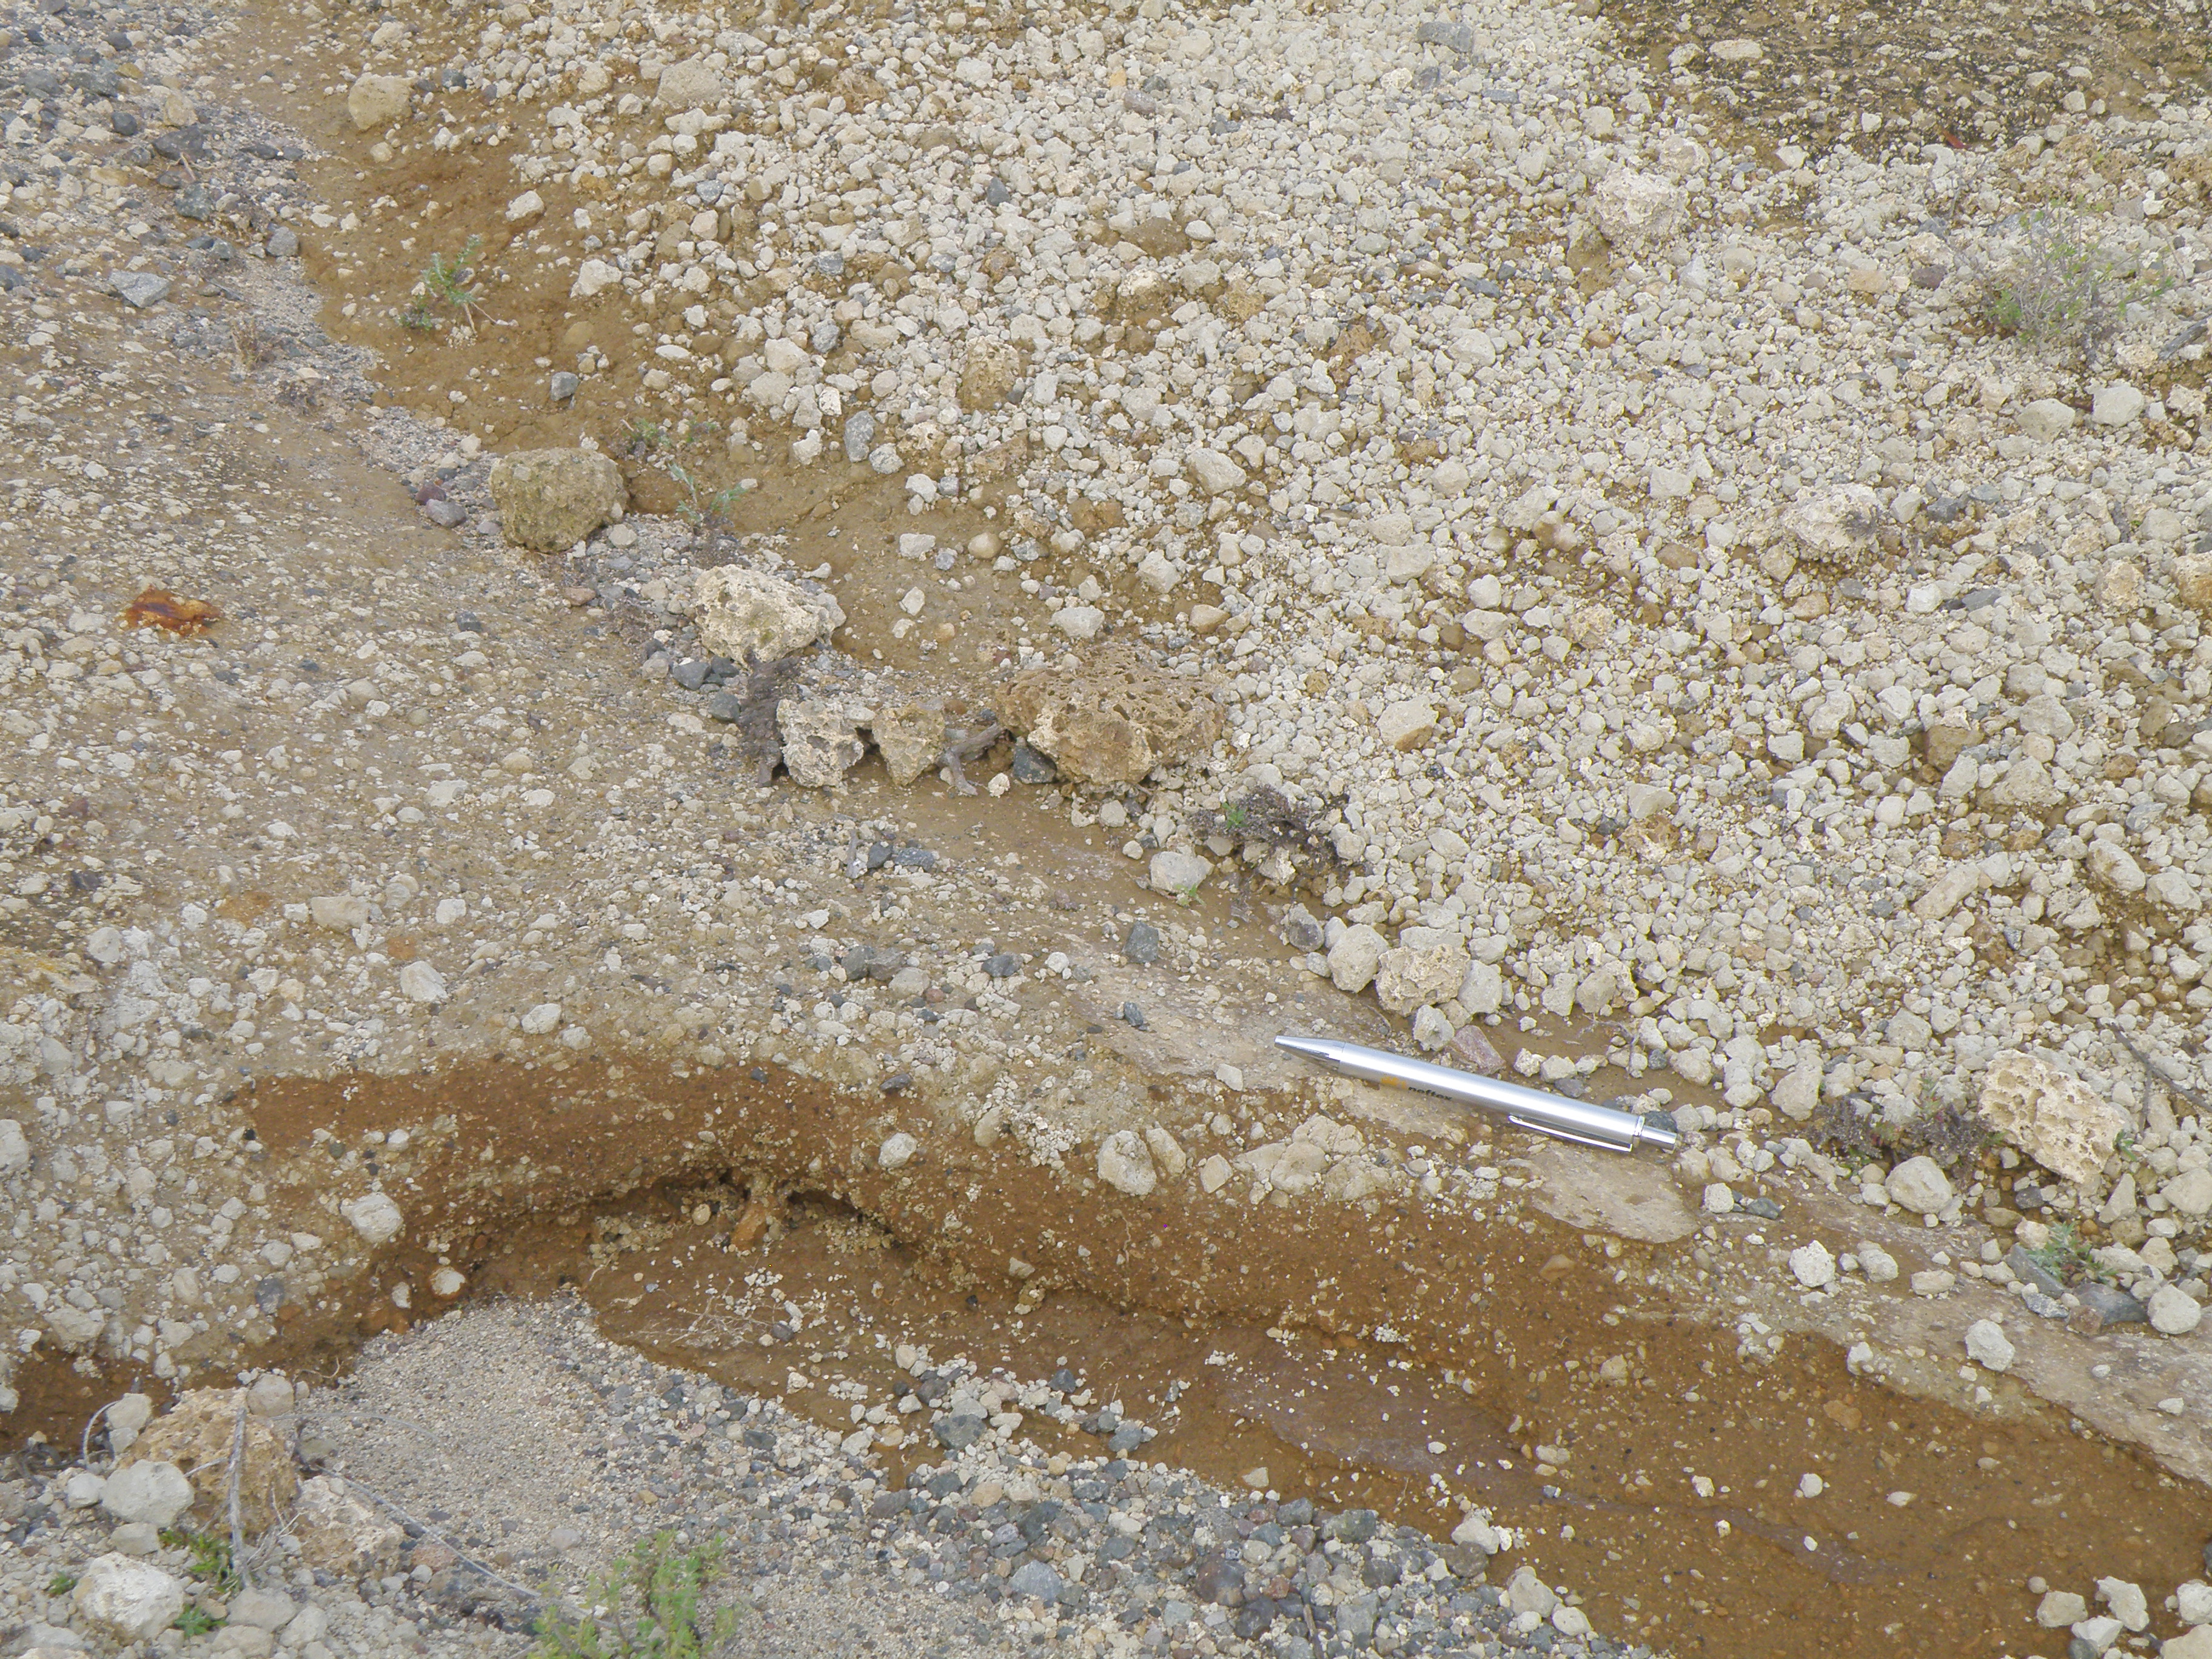
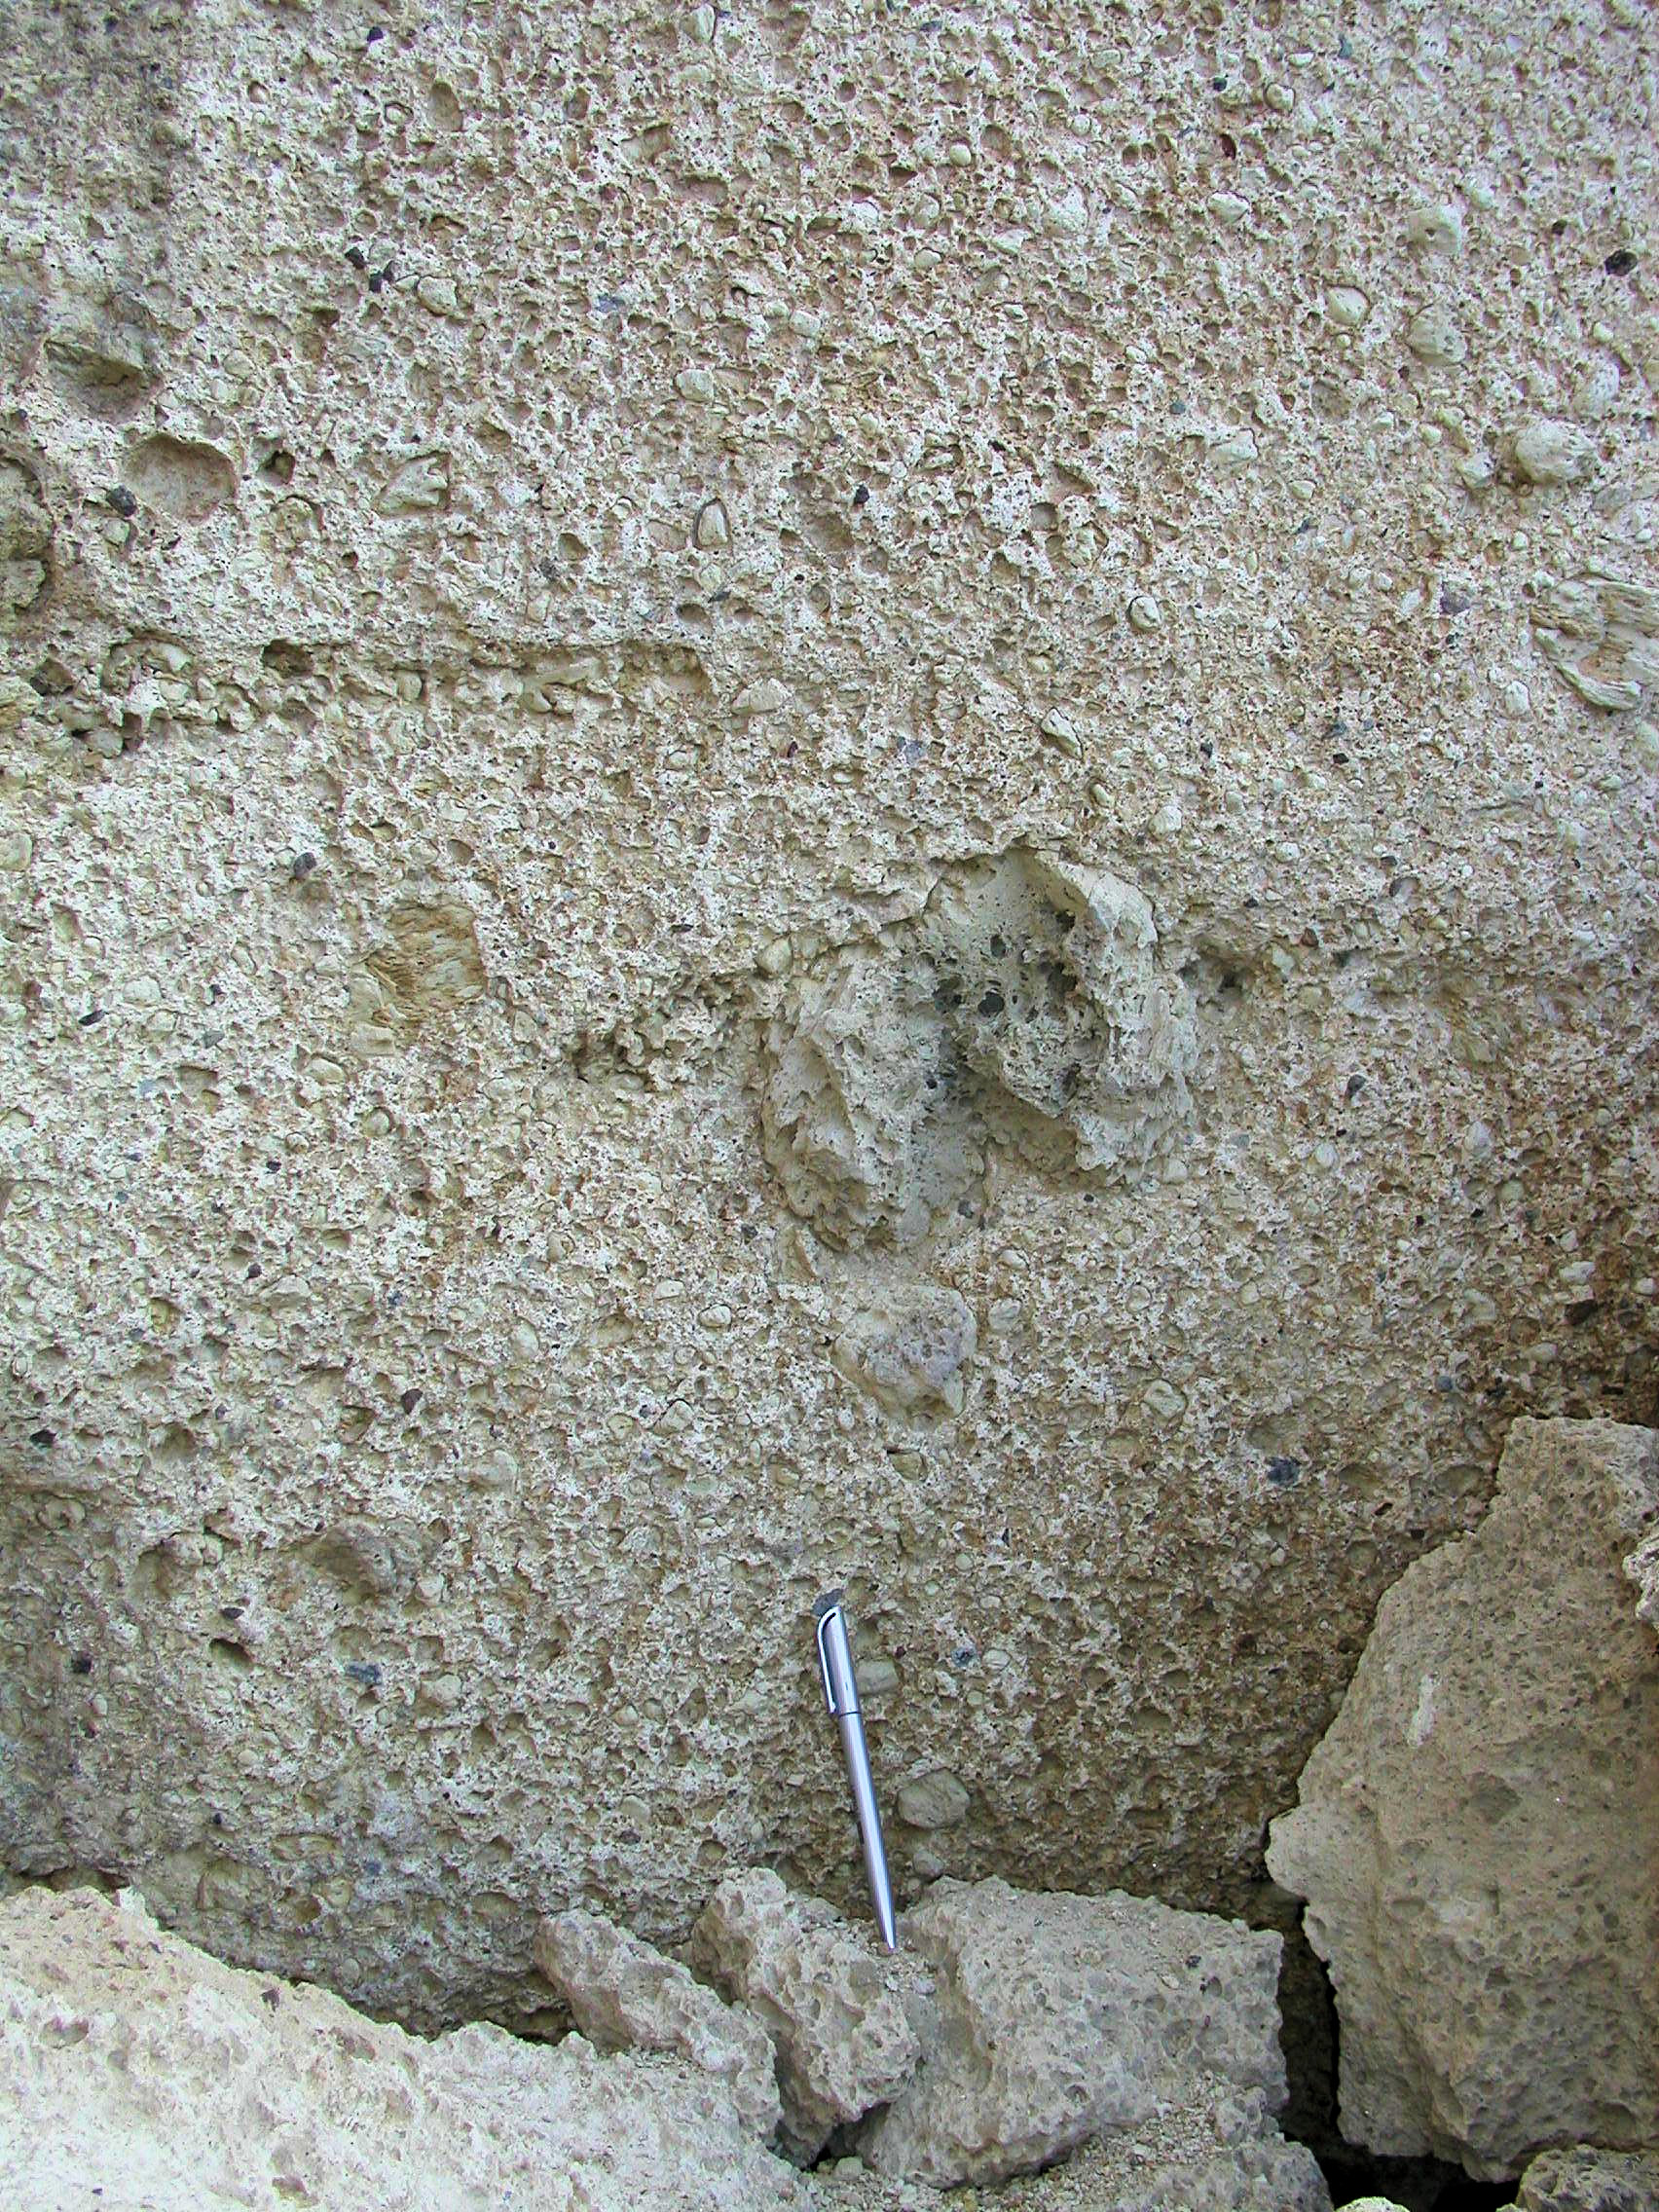 Figure 29. Detail of the lower part of the quarry face. Pen is 15 cm long. Describe the range of grain size and the sorting. |
|
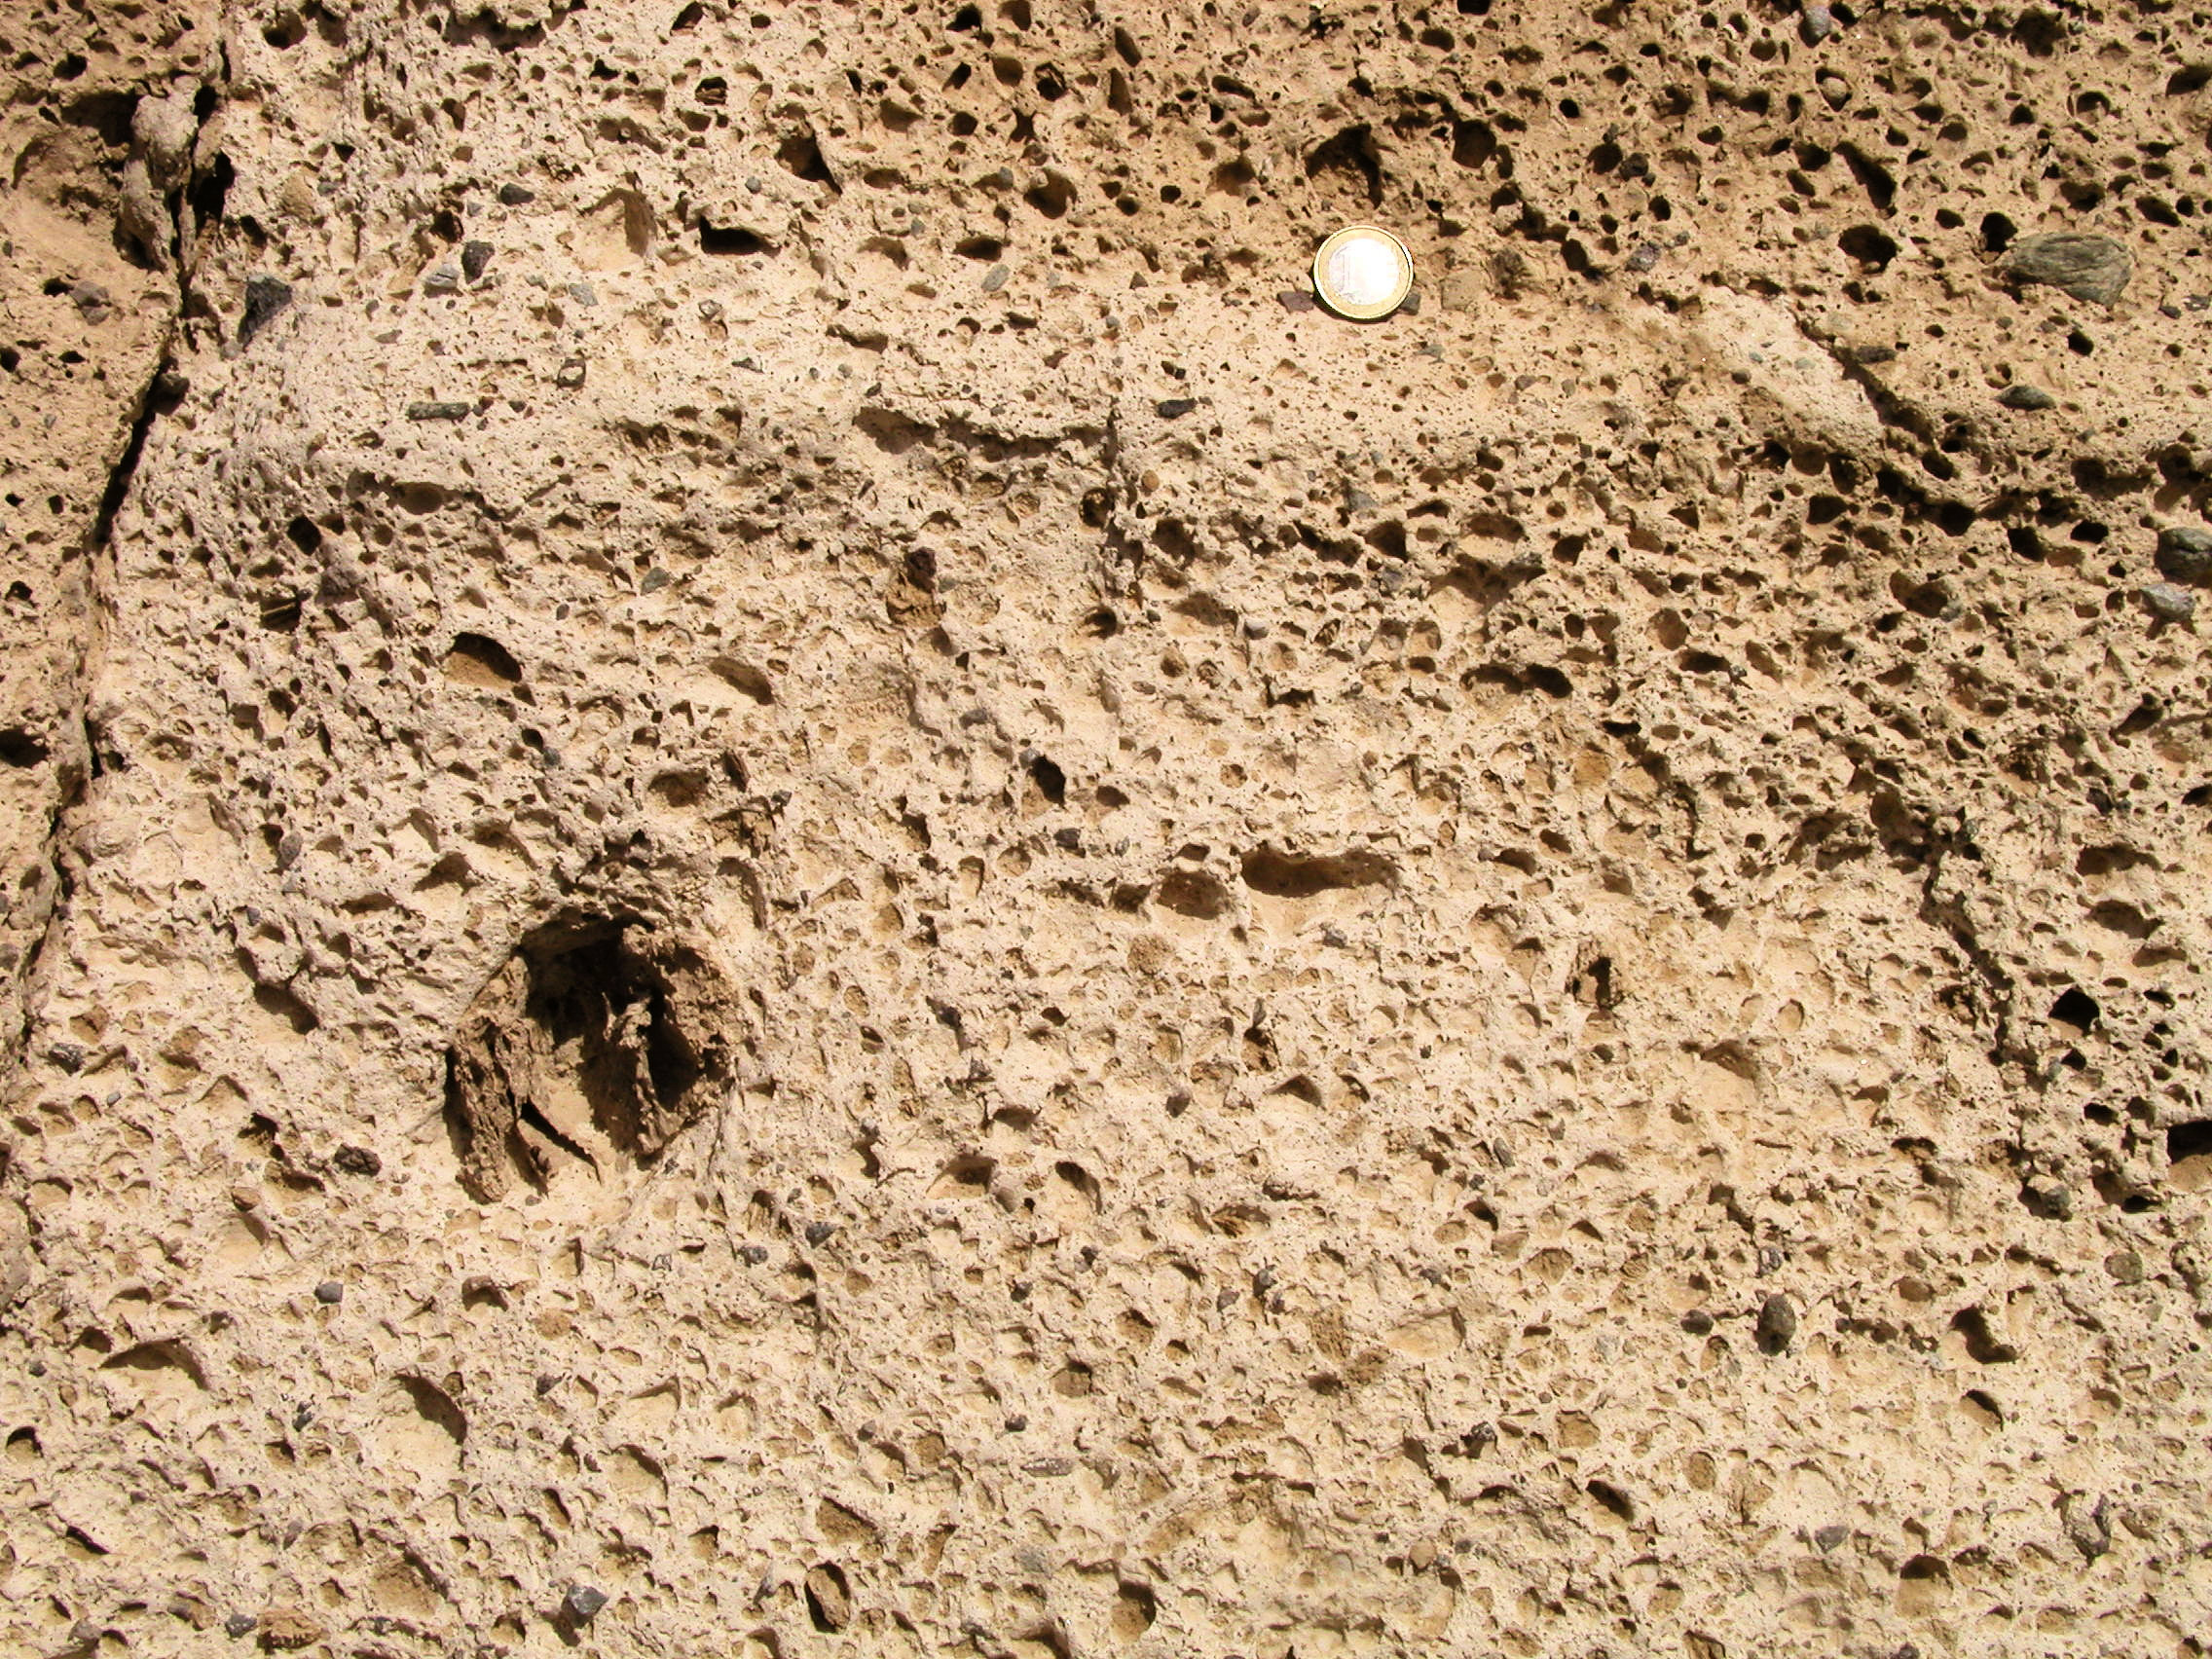 Figure 31. Figures 31 to 34 are close-ups of G3, to enable you to acquire further information on grain size and shape, and clast composition. |
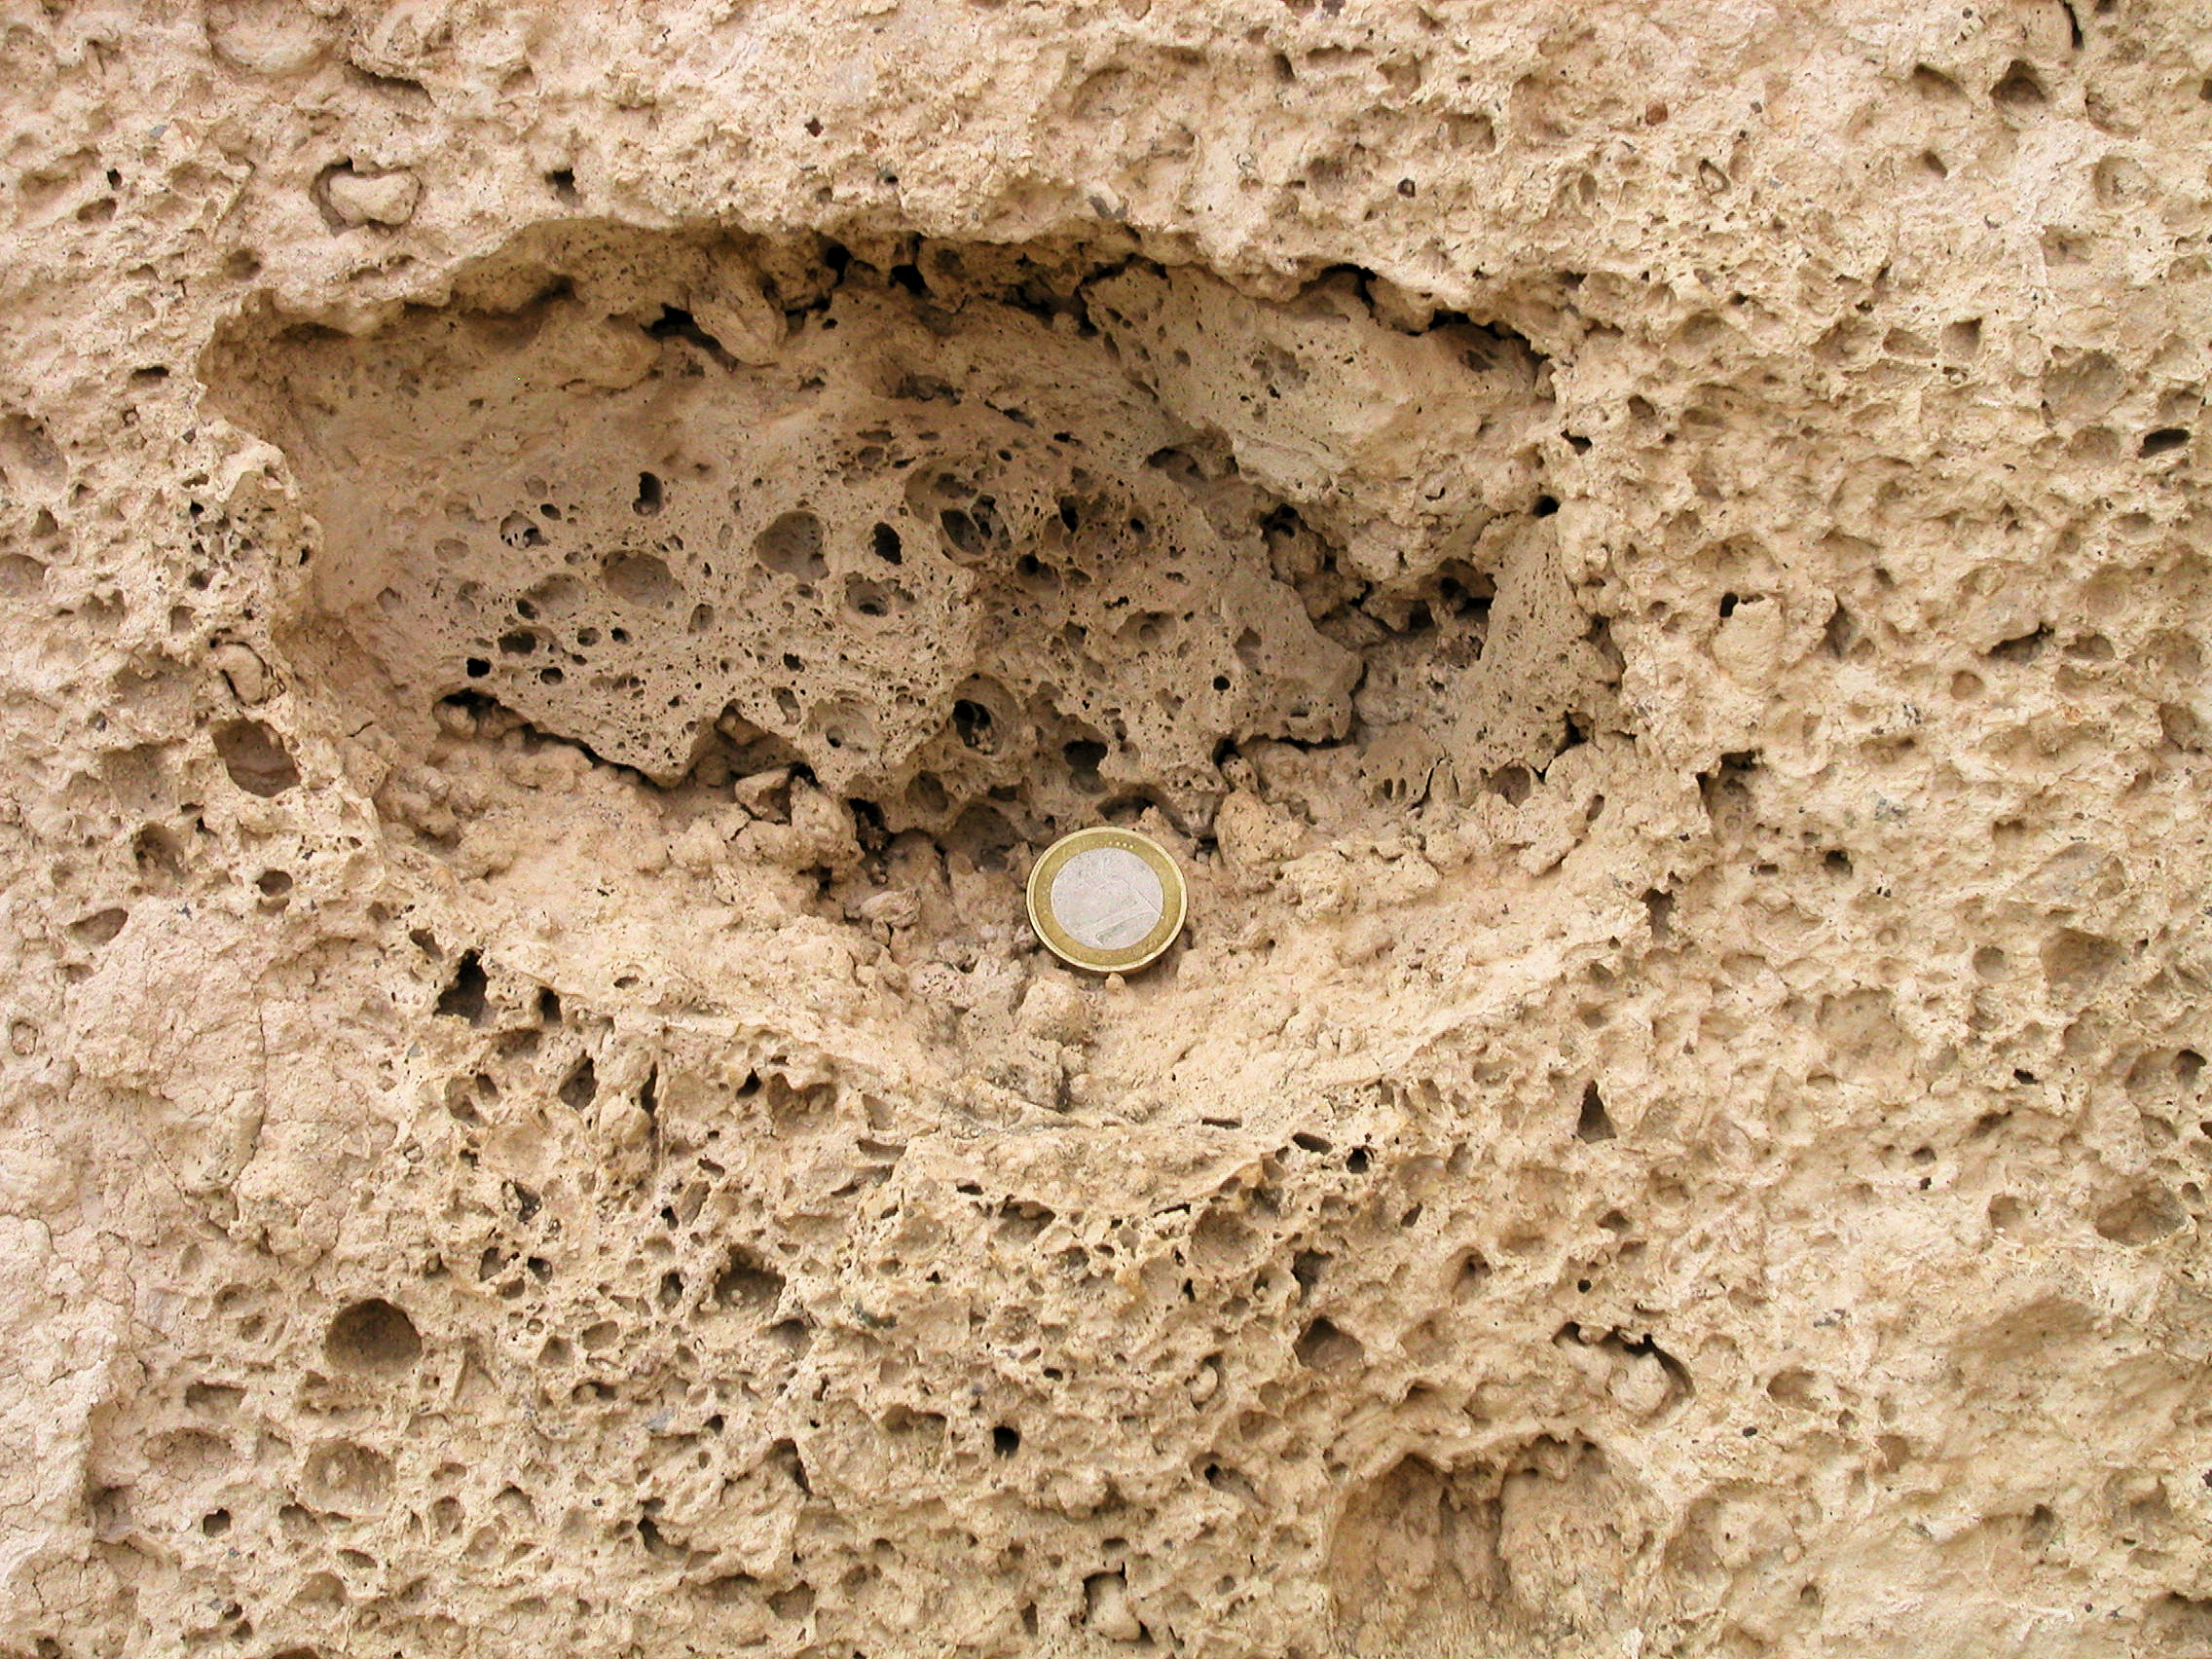 Figure 32. Coin is 23 mm diameter. Let's take a closer look. |
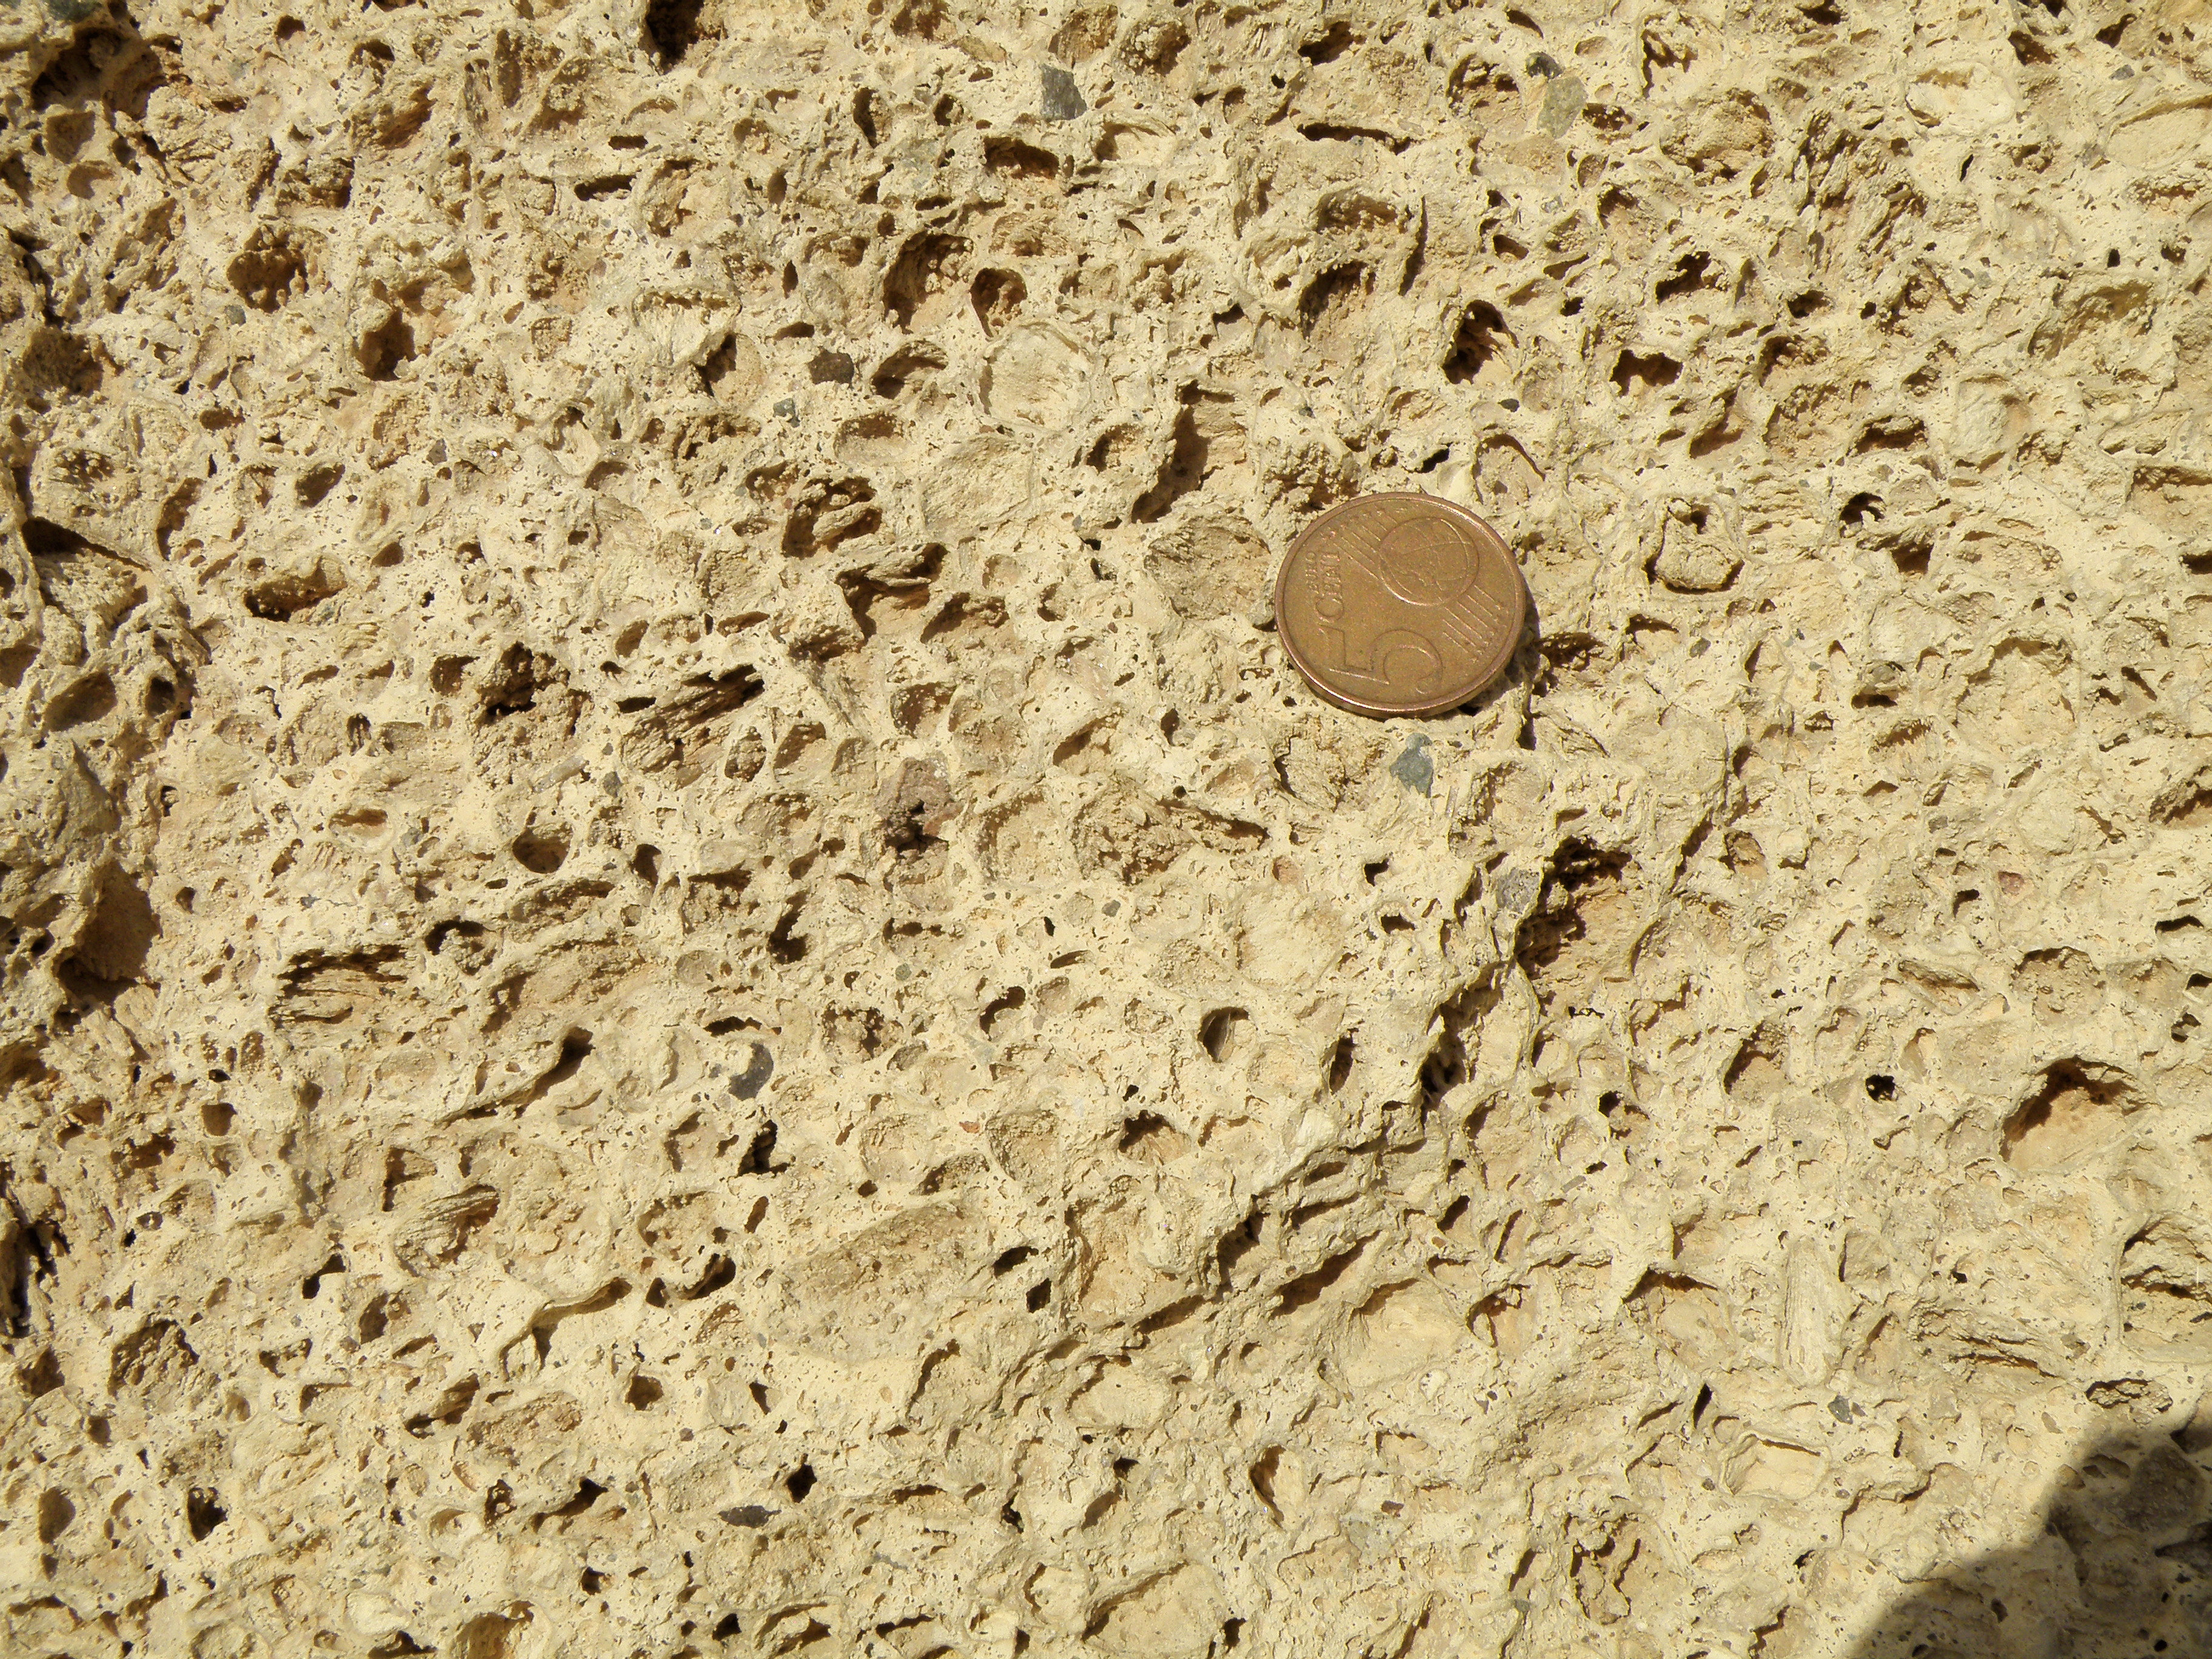 Figure 33. Coin is 21 mm diameter. |
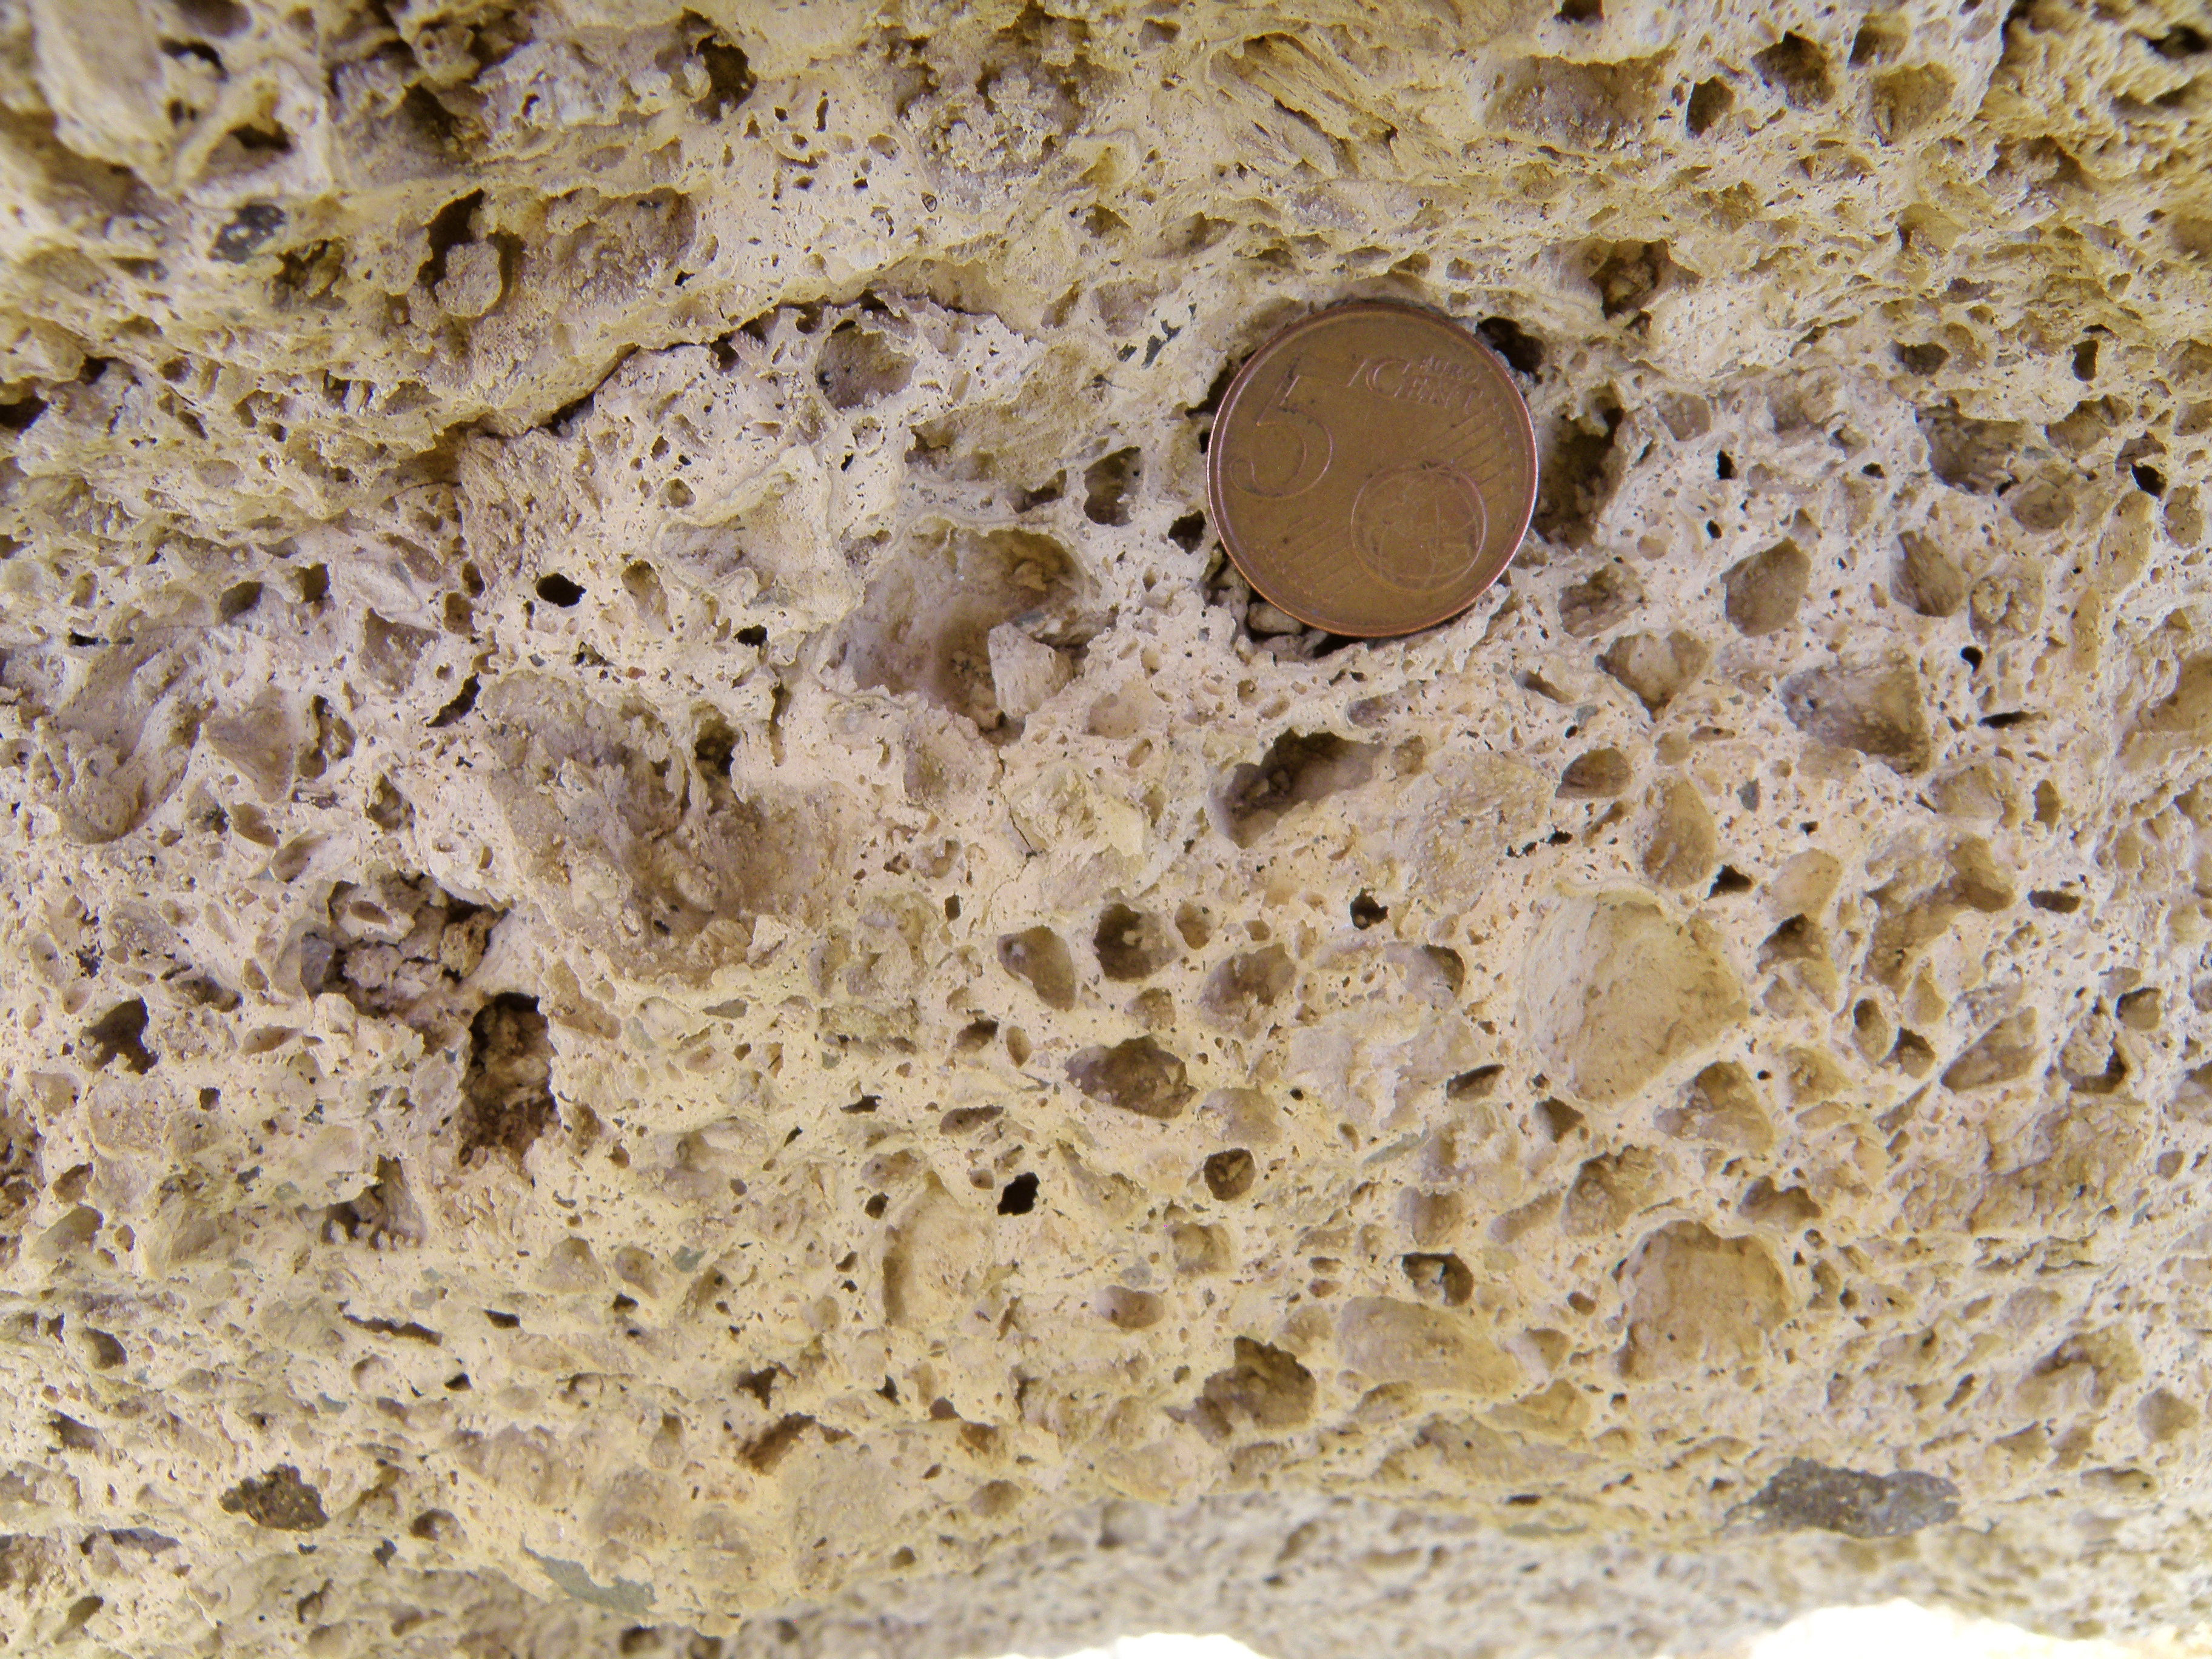 Figure 34. Coin is 21 mm diameter. Let's take a closer look. |
The top of the section
Above Unit G3 is a very different looking, bedded sequence: let's call it Unit H, although it can undoubtedly be subdivided.
 Figure 35. Image by Adrian Watson |
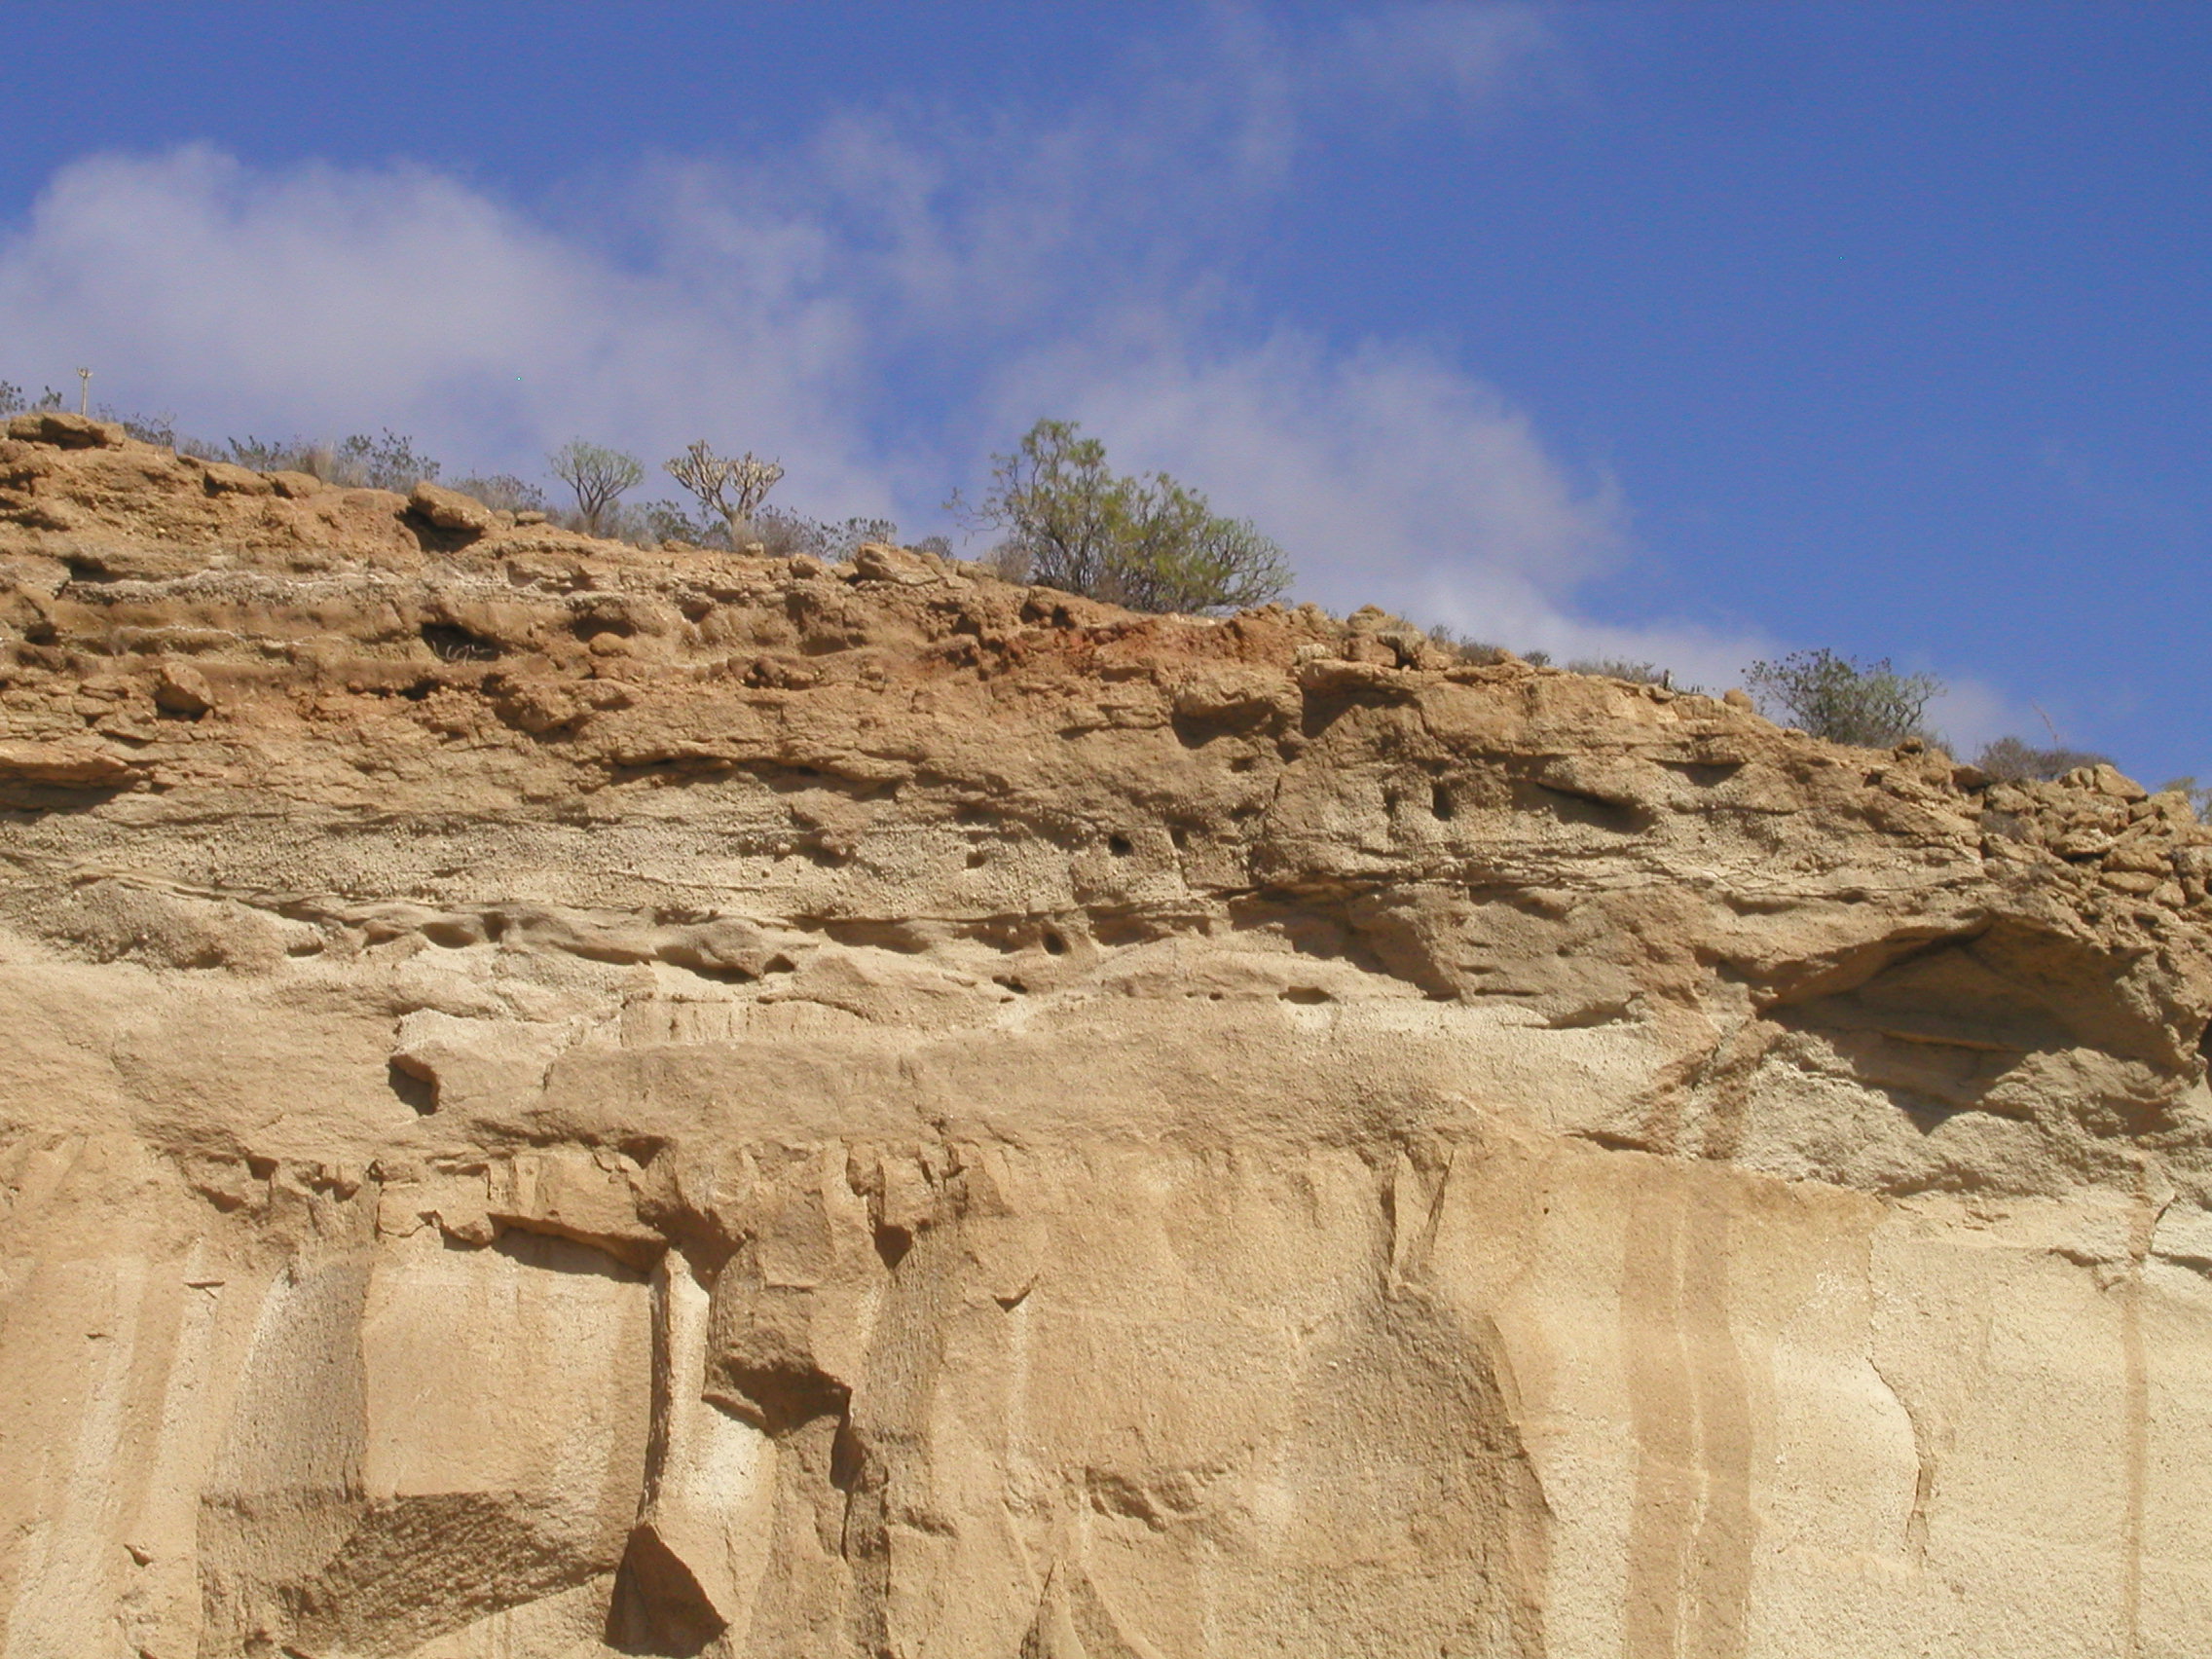 Figure 36. Close-up of part of Figure 35. Look carefully. Where exactly would you place the base of Unit H? Is it planar or irregular? Is there evidence of erosion at the base? Note the darker brown unit, seen also in Figure 37. What might it represent? |
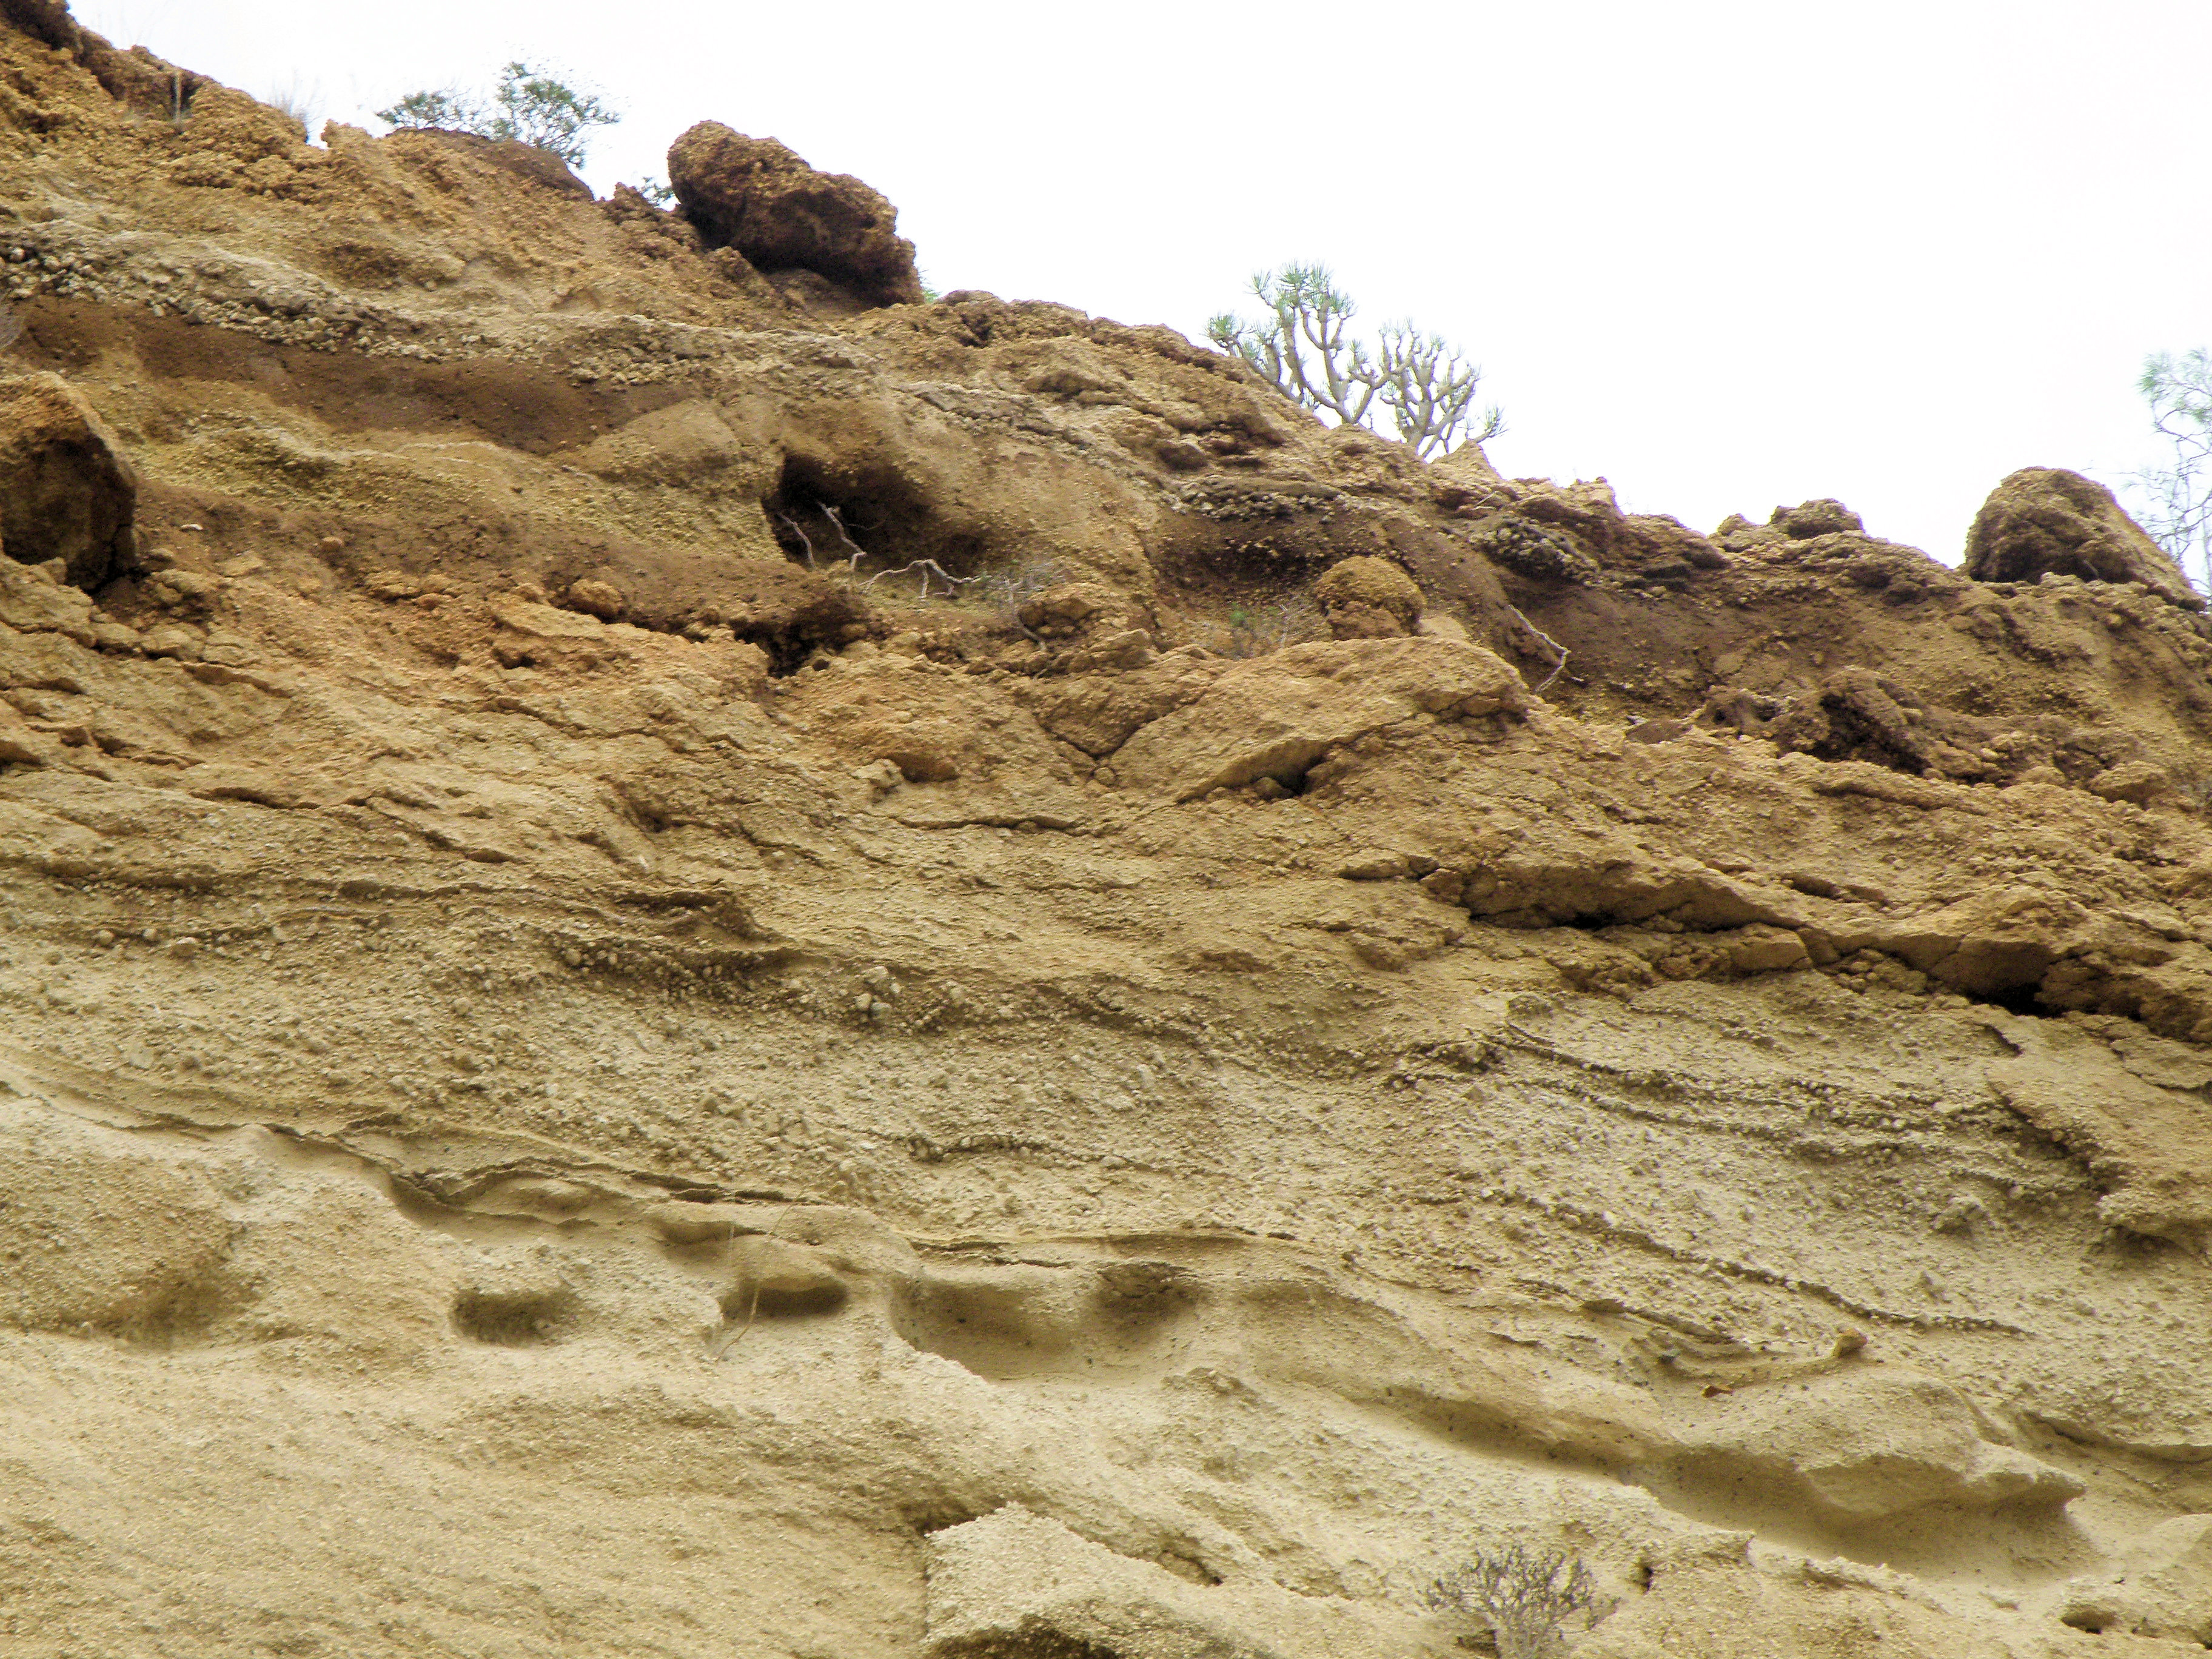 Figure 37. Detail of the top of G3, overlain by H. Describe the characteristics of the various beds in H. Try to interpret this unit in terms of processes. |
*** At this location, the contacts between the units are all sub-horizontal. Let's take a side trip to contrasting sections further west which will give us some vital additional information.
Interpreting the field evidence
You have now acquired a variety of different types of data to be represented graphically on your log. Logging instructions (pdf). This includes lithology, sedimentary structures and field relationships. Once your log is drawn, your task is to interpret the data.
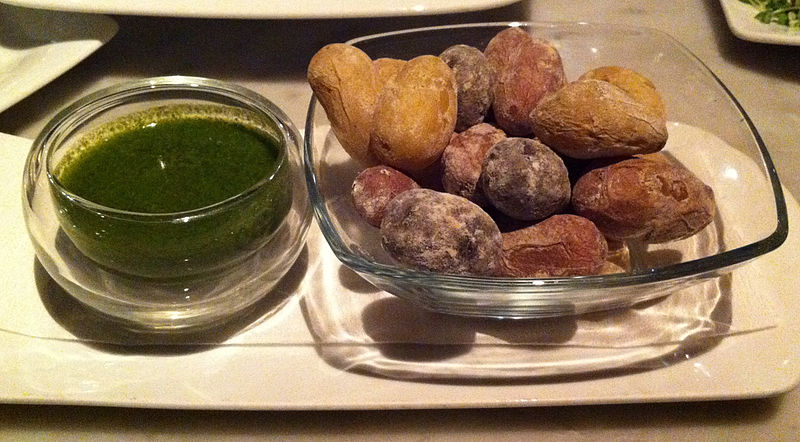 Image: Abhay Kumar via Wikimedia Commons |
Canarian potatoes are famous and delicious, and you'll find them on just about every restaurant menu in Tenerife. The potatoes are grown in small, terraced fields all over the island, and the fields are often mulched with pumice to conserve moisture. Traditionally, the small new potatoes are boiled whole in sea water until dry, leaving a thin salt crust. These papas arrugadas ('wrinkly potatoes') are then served with traditional sauces - a red chili sauce (mojo picón) and a green coriander sauce (mojo verde). |
![]()
Make sure you've completed all the work for this locality. Now we can get back on the virtual coach and head off to our next stop.
![]()
This page is maintained by Roger Suthren. Last updated 8 March, 2021 2:36 PM . All images © Roger Suthren unless otherwise stated. Images may be re-used for non-commercial purposes.